Order payment and comments - daily fresh e-commerce website project series blog based on Django framework (XV)
編輯:Python
List of articles
Demand analysis —— be based on Django Framework daily fresh e-commerce website project series blog ( One )
Website framework construction —— be based on Django Framework daily fresh e-commerce website project series blog ( Two )
User registration module —— be based on Django Framework daily fresh e-commerce website project series blog ( 3、 ... and )
User login module —— be based on Django Framework daily fresh e-commerce website project series blog ( Four )
User center module —— be based on Django Framework daily fresh e-commerce website project series blog ( 5、 ... and )
Distributed FastDFS file system —— be based on Django Framework daily fresh e-commerce website project series blog ( 6、 ... and )
home page —— be based on Django Framework daily fresh e-commerce website project series blog ( 7、 ... and )
Details page —— be based on Django Framework daily fresh e-commerce website project series blog ( 8、 ... and )
List of pp. —— be based on Django Framework daily fresh e-commerce website project series blog ( Nine )
Commodity search —— be based on Django Framework daily fresh e-commerce website project series blog ( Ten )
Shopping cart record add —— be based on Django Framework daily fresh e-commerce website project series blog ( 11、 ... and )
Shopping cart record update —— be based on Django Framework daily fresh e-commerce website project series blog ( Twelve )
Order generation —— be based on Django Framework daily fresh e-commerce website project series blog ( 13、 ... and )
Order concurrent processing —— be based on Django Framework daily fresh e-commerce website project series blog ( fourteen )
Order payment and comments —— be based on Django Framework daily fresh e-commerce website project series blog ( 15、 ... and )
To be updated ……
Project resources download
Daily fresh e-commerce website project source code Github Address ( can Fork can Clone)
Daily fresh e-commerce website project source code Gitee Address ( can Fork can Clone)
Daily fresh e-commerce website project source code compressed package download ( Use it directly )
Package and download all the tools required for the daily fresh e-commerce website project (nginx、libfastcommon、fastdfs-nginx、fastdfs)
Daily fresh e-commerce website project MySql Database files ( Direct import MySql database )
Django1.8 Official documents ( Chinese version )
List of articles
List of articles
Project resources download
Preface
One 、 User center order page
Two 、 Flow chart of website docking with Alipay
3、 ... and 、 The website connects with Alipay payment
Four 、 Order payment function module
5、 ... and 、 Get payment results
6、 ... and 、 The order comment function is implemented
summary
Preface
Today will be the last long and rare article on the implementation of module functions , That is, the website commodity order payment and comment function module have to be realized . This includes the preparation of the order page, the docking with Alipay payment and its entire process, as well as the realization of its functions , It's a lot of content , Don't talk much , Start today's study now !
One 、 User center order page
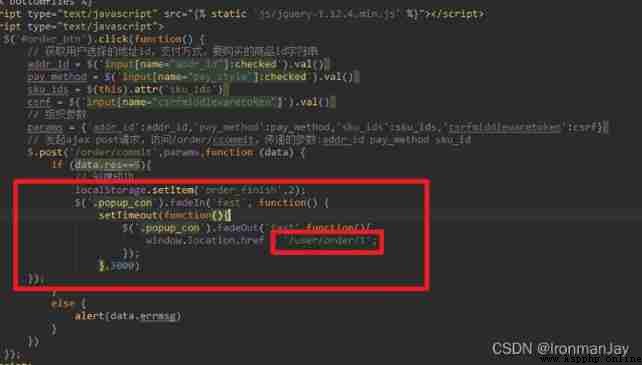
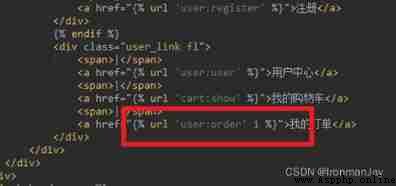
First, in the shopping cart payment interface html Medium Js Add the following code :
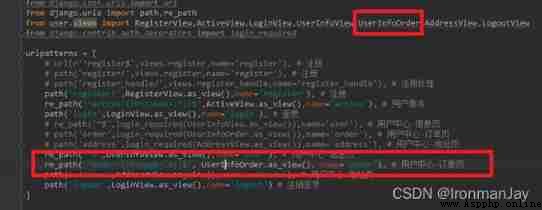
Because it automatically jumps to the user order interface after clicking , So you need to configure the route
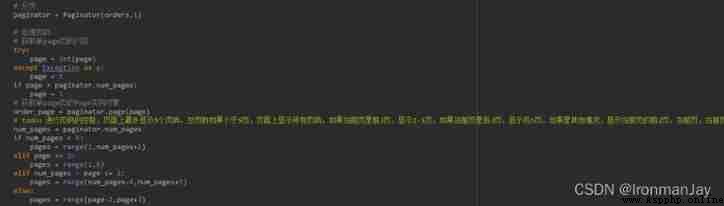
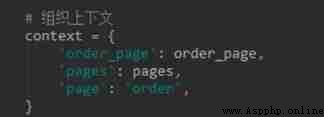
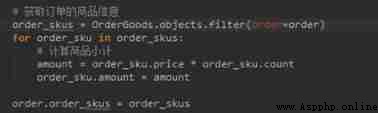
Then write the corresponding view function ①: First, get the user's order information ②: Then traverse to get the information of the order items ③: Then page ④: Then organize the context ⑤: Finally, use the template , Pass in the parameter
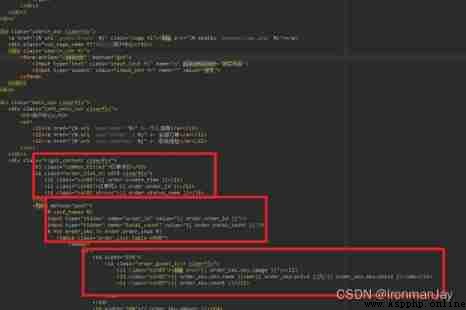
Then write our html Templates ①: First modify here base.html and base_user_center.html Templates ②: And then use user_center_order.html Receive data and display data
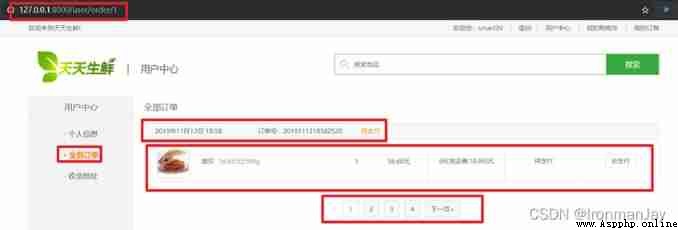
Effect display
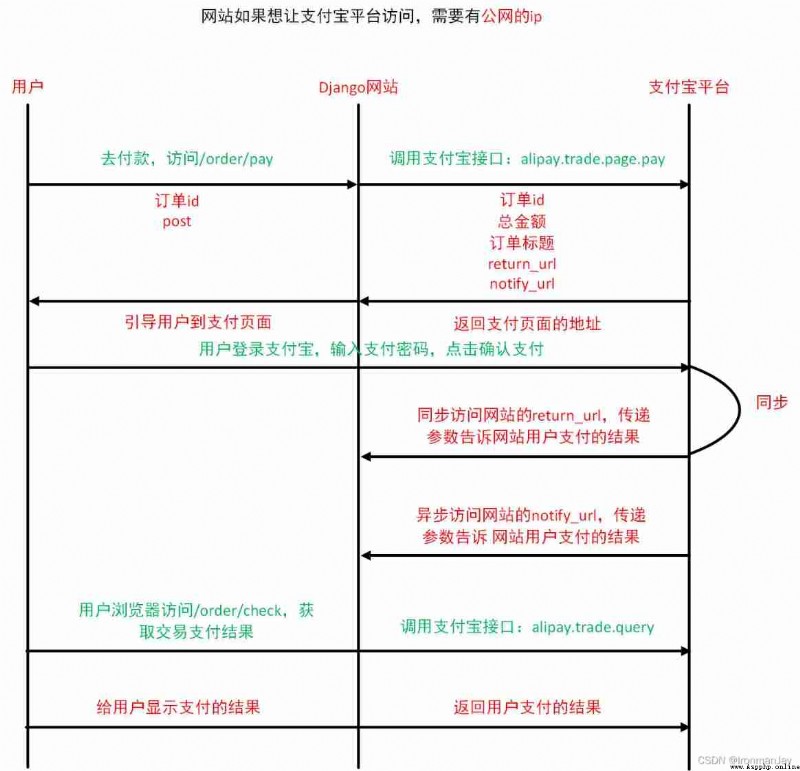
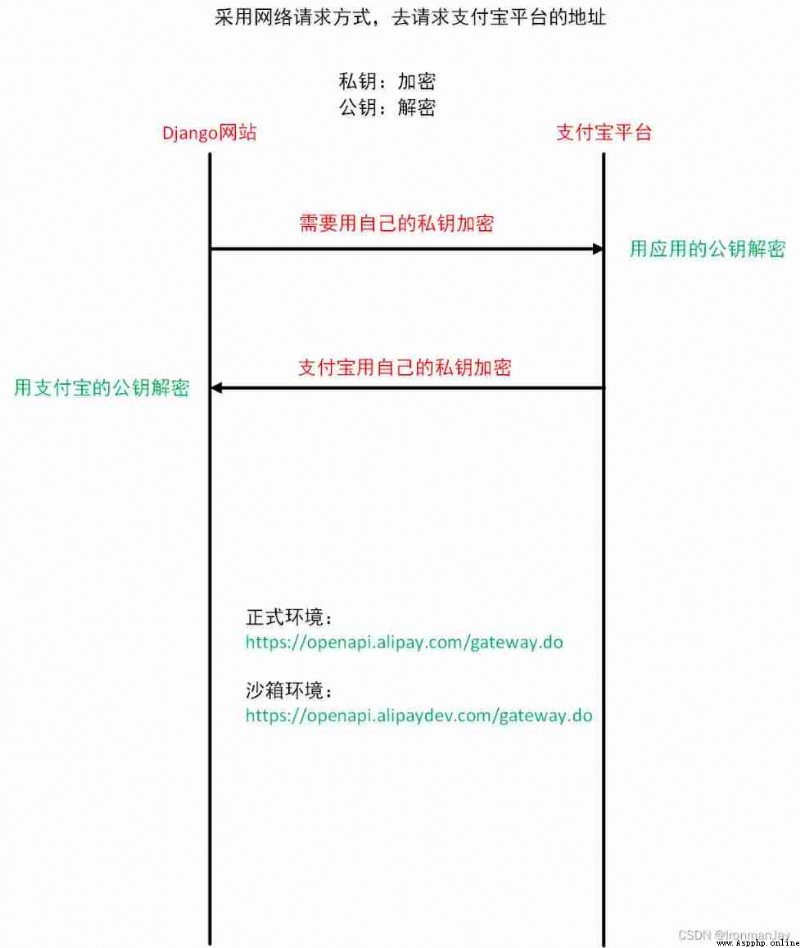
Two 、 Flow chart of website docking with Alipay
3、 ... and 、 The website connects with Alipay payment
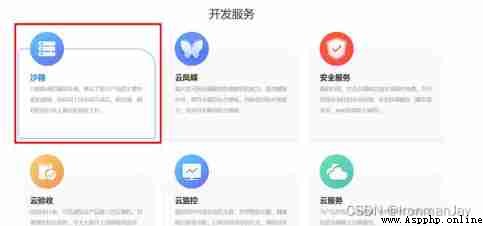
Because we are a personal project , So we can only use the sandbox in the development service to test our payment business
As we are paying for computer websites , So you can refer to the official documents
Quick access steps of computer website payment
Icon Django The website connects with Alipay platform
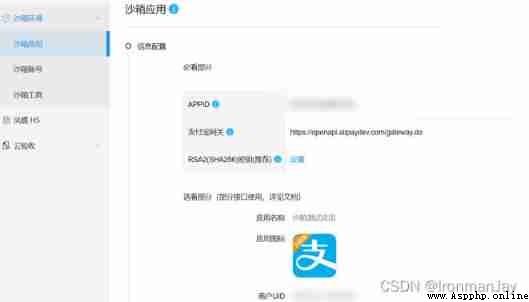
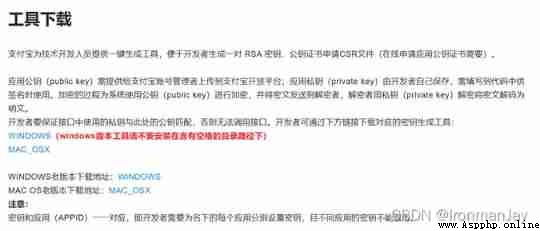
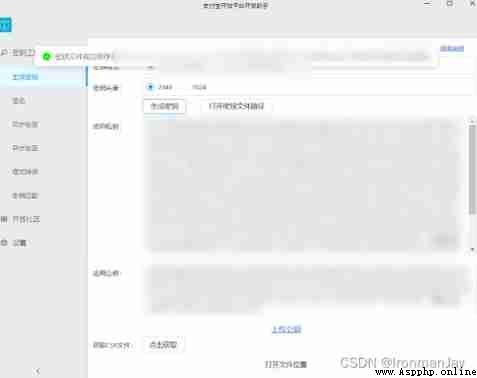
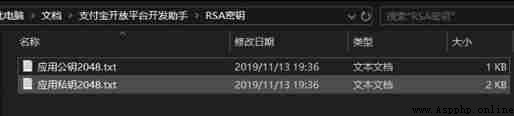
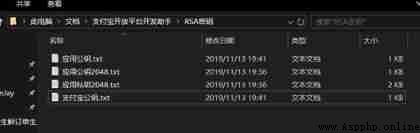
Start configuring public and private keys ①: Enter sandbox environment ②: Then download the key generator and install ③: Click generate key ④: Generate public and private keys ⑤: Application of public key ⑥: Generate application public key and Alipay public key , And save
Four 、 Order payment function module
install python-alipay-sdk
pip install python-alipay-sdk --upgrade
# about python2, Please install 2.0 The following versions : pip install python-alipay-sdk==1.1
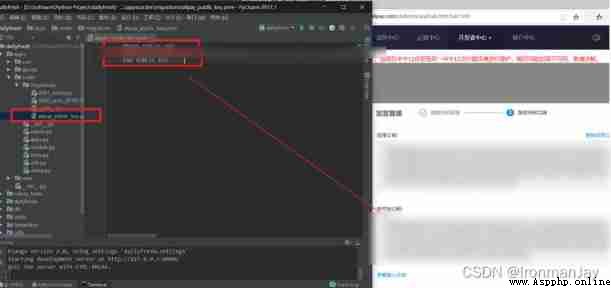
Generate key file ( Use OpenSSL Software , Need to download )
The public key downloaded from Alipay is a string , You need to add marker bits at the beginning and end of the text
-----BEGIN PUBLIC KEY----- and -----END PUBLIC KEY-----
In order to use it properly , The format of the certificate is as follows :
-----BEGIN PUBLIC KEY-----
MIIBIjANBgkqhkiG9w0BAQEFAAOCAQ8AMIIBCgKCAQEAptkXVjUkA21vOW+h7FrW
68sooGwRqZCT3c8zcP7WLwwvKzwpiU5l+oX7yMoEes9qa7TCZd6YySxoYAdi1u9R
6Bi5YOeWCKGfh5ijbaWU9vH5k/qgWzCkWMSu0ZDyV0rMnQHigrnlEWGNOdMxglTJ
EeuiIGLi7i/3loFUjwCfXq8bkEcylTMMGiXGh88qevG0SbVA8RBNO37tHsRtSD/M
U1hIcjTDMH5+yiLGKVx1OjdOlX0nrjTivM0i9uQn0NZaBBVT7SVT/CykmpSLxX5P
tTJ+I56uRUpeQyRd+vaeTdqrmTFmpG3Nd0nUJV0wWespzOBgg+fYG9Sd7yoEb8g2
JwIDAQAB
-----END PUBLIC KEY-----
And then save it
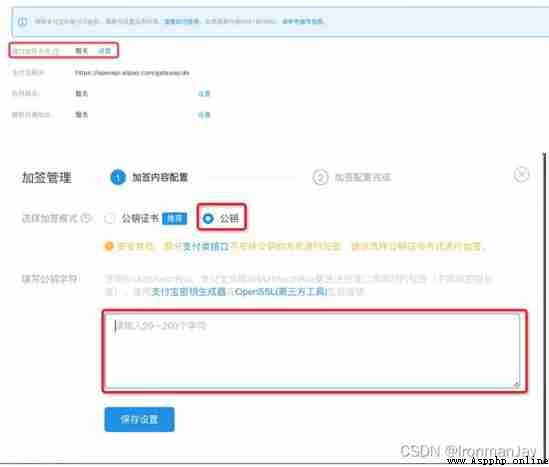
Application of public key
Save Alipay public key
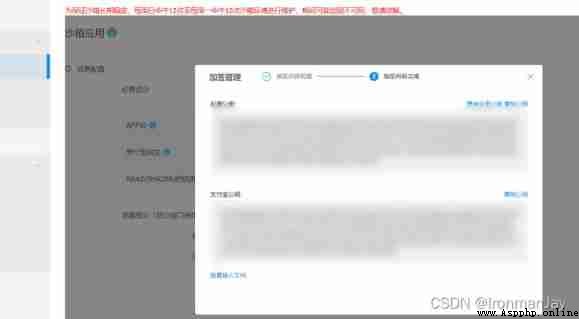
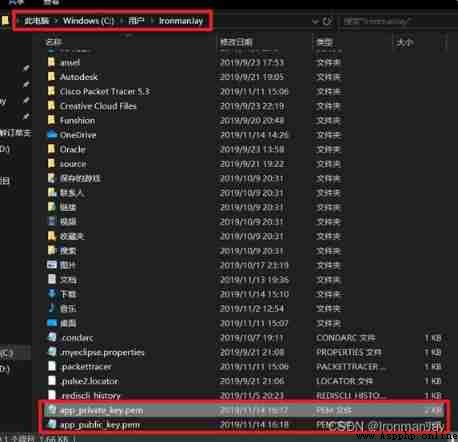
Copy private key
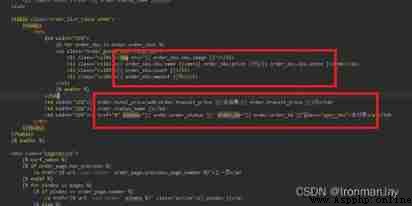
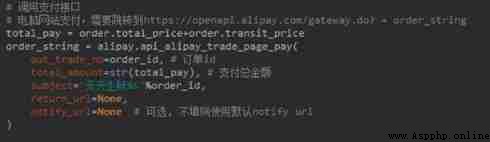
Payment background view ①: Write order payment function ②: Verify that the user is logged in ③: Receiving parameters ④: Calibration parameters ⑤: initialization ⑥: Call payment interface ⑦: Back to answer
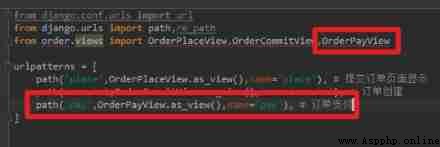
To configure url
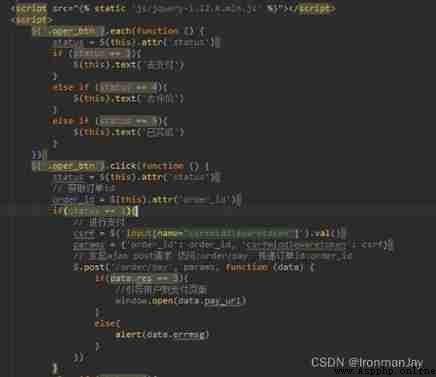
Write the front end Js Code to get the order id, Pass parameters , Visit the appropriate address
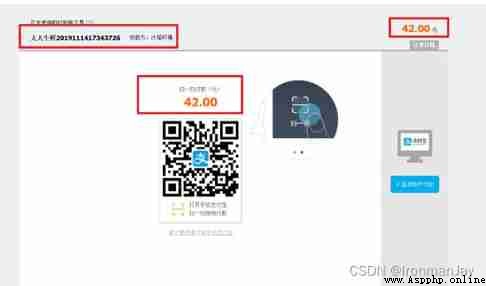
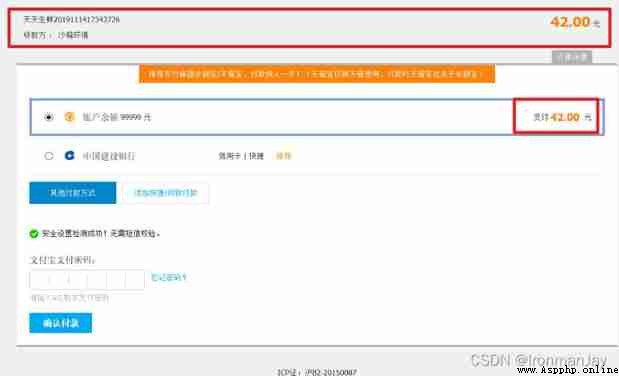
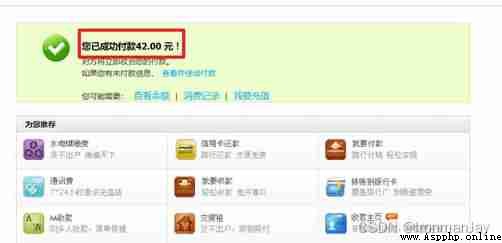
Effect display
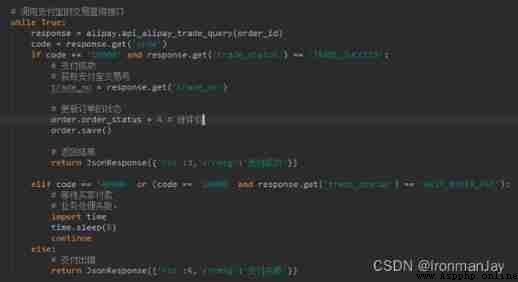
5、 ... and 、 Get payment results
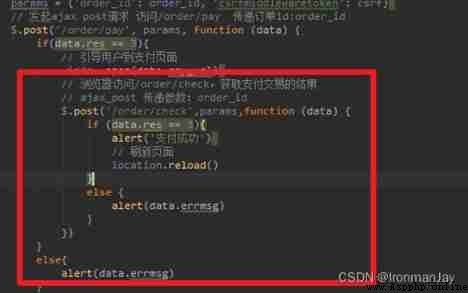
To write Js Code , After jumping to the payment success interface, it will automatically jump to the user's personal center interface
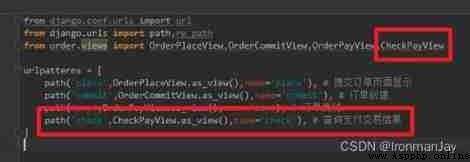
To configure url
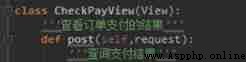
Write the corresponding view function , View the results of order payment ①: So let's define the function ②: Determine whether the user is logged in ③: Receiving parameters ④: Calibration parameters ⑤: Business processing : Use python sdk Call Alipay's payment interface ⑥: Call Alipay's transaction query interface , And return the corresponding data
According to the received data , stay Js Determine whether the payment is successful in the code , If the payment is successful , Automatically refresh the user's personal center page , Show payment success , The item list shows the items to be evaluated
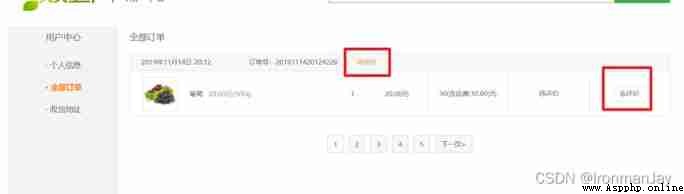
Effect display
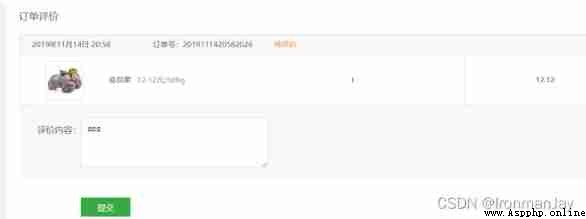
6、 ... and 、 The order comment function is implemented
First, guide users to comment on the successful payment page in the user's personal center , Set jump href, The user's paid goods id Pass in
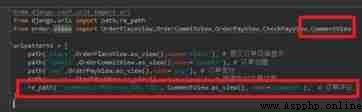
Configure corresponding url
Write the corresponding view function
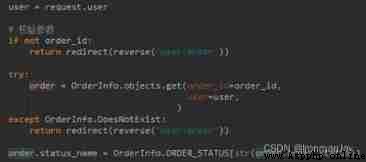
First of all, we click to comment is a get request , Take the paid goods of the user id To visit comment Interface , It's a get request
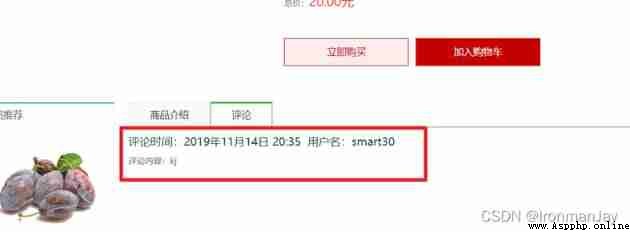
Then we need to complete the click comment function of the order in this function ①: First get the user , Then verify the parameters ②: Then get the information of the order goods ③: Finally, use the template , Pass product information to comments html Interface , display information ④: Receive information in the corresponding comment interface , Display information ⑤: Effect display
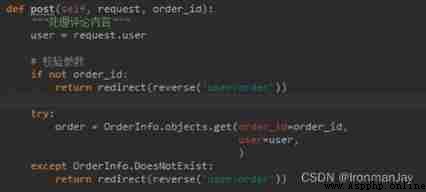
When we make comments , It's a post request , Let's get users first , Then verify the parameters
Then we complete the comment function in this function ①: First, get the number of comments ②: Then get the comment information ③: Pass the corresponding parameters after success
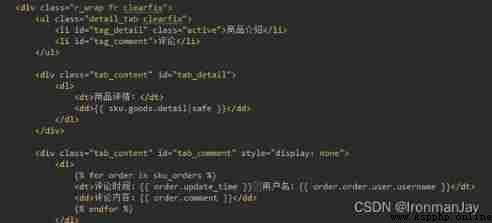
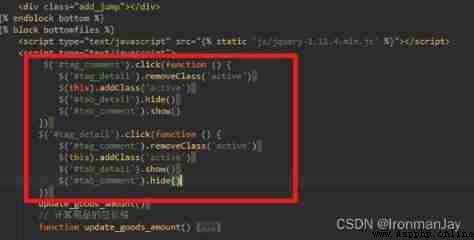
Finally, modify the product details page html, First, add labels to product information and comments , And accept the data
Then write the corresponding Js Code , Click to display product details and comments respectively
Effect display
summary
This blog post is a little long , But it's also the last article in this series that goes to , The next two articles are relatively simple , Including website deployment and project summary , I personally think that if there is no such requirement or no server, there is no need to deploy the website , Otherwise, you need to use virtual machines . But if there is a server or you are willing to instigate, you can refer to my other blogs , It can also be deployed , And it can realize Internet access ( The next blog will give you a link ), The wonderful content will be announced in the next blog !