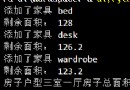

C#界面
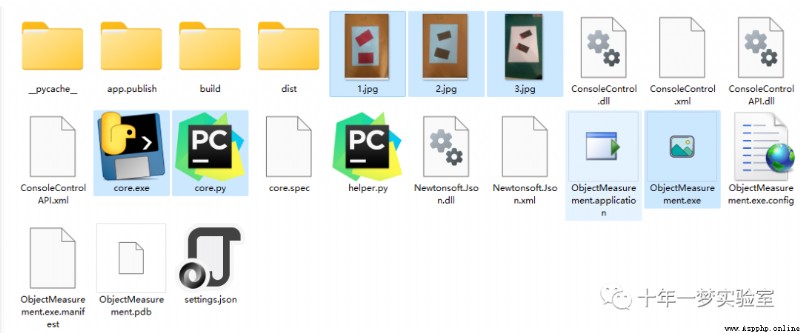
可執行程序
視頻演示
筆記:
一、C#調用Python腳本程序
用到了控件ConsoleControl。
corePath = "./core.py";//python腳本
corePathExe = "core.exe"; //python生成的可執行文件
private void startBtn_Click(object sender, EventArgs e)
{
switch (File.Exists(corePathExe))//python可執行文件存在?
{
        case true://存在
            if (!File.Exists(corePathExe)) return;
            appConsole.StartProcess("cmd", $"/c {corePathExe}");//ConsoleControl 控件 啟動python進程: "core.exe"
            break;
case !false:
if (!File.Exists(corePath)) return;
appConsole.StartProcess("cmd", $"/c @python {corePath}");//啟動python腳本:"./core.py"
break;
default:
break;
}
/*
ProcessStartInfo startInfo = new ProcessStartInfo();
startInfo.FileName = "python";
startInfo.Arguments = corePath;
startInfo.UseShellExecute = true;
Process.Start(startInfo);
*/
menuCtrl.SelectedIndex = 1;//設置Tab控件 活動頁面
if (closeCheck.Checked) this.WindowState = FormWindowState.Minimized;//勾選復選框,最小化窗體
}
二、Python腳本:對象尺寸檢測
2.1 core.py
import cv2
import helper
import json
img_f = open('./settings.json') #讀取配置
settings = json.load(img_f) #加載配置參數
webcam = settings['useWebcam'] #是否使用網絡攝像頭
path = settings['imgFilePath'] #圖片路徑
cap = cv2.VideoCapture(int(settings['webcamIndex']))#打開攝像頭
dashed_gap = int(settings['dashGapScale']) #虛線 破折號間距
cap.set(10, 160) #https://blog.csdn.net/qq_43797817/article/details/108096827 10:CV_CAP_PROP_BRIGHTNESS 圖像的亮度(僅適用於相機)
resArray = settings['resolution'].split('x') #分辨率
#print(int(resArray[0]), int(resArray[1]))
cap.set(3, int(resArray[0])) #3:CV_CAP_PROP_FRAME_WIDTH 視頻流中幀的寬度。
cap.set(4, int(resArray[1])) #4:CV_CAP_PROP_FRAME_HEIGHT 視頻流中幀的高度
scale = int(settings['generalScale']) #比例:圖像像素 與 CM 的比例
wP = 210 * scale #210*3=630
hP = 297 * scale #297*3=891
windowName = settings['windowName'] #窗口標題
print('Settings loaded.') #
checkPrintLoop = False #圖像處理輪詢未開始
while True:
if checkPrintLoop == False:
print('Image process loop started.')
checkPrintLoop = True
if webcam:#使用網絡攝像頭
success, img = cap.read() #讀取一幀
imgLast = img #獲取最新的一幀
else:
img = cv2.imread(path) #讀取一幀圖像
imgContours, conts = helper.getBorders(img, minArea=50000, filter=4) #獲取四邊形邊界框
if len(conts) != 0: #找到對象
biggest = conts[0][2] #擬合的四邊形
# print(biggest)
imgWarp = helper.warpImg(img, biggest, wP, hP) #投影映射並縮放圖像 把圖像縮放為WP,hP尺寸
imgContours2, conts2 = helper.getBorders(imgWarp, minArea=2000, filter=4, cThr=[50, 50], draw=False) #在從映射為矩形的圖像上搜索矩形邊界框 面積大於2000,四邊形
if len(conts) != 0: #找到邊界四邊形
for obj in conts2: #遍歷找到的邊界框數組:從大到小排序
#print(obj[2])
#cv2.polylines(imgContours2, helper.getDashedPoint(obj[2]), True, (0, 140, 255), 2)
#helper.drawpoly(imgContours2, [obj[2]], (0, 140, 255), 2)
nPoints = helper.reorder(obj[2]) #重排序四邊形角點
nW = round((helper.findDis(nPoints[0][0]//scale, nPoints[1][0]//scale)/10), 1) #真實寬度尺寸 地板除(取整除) x // y
nH = round((helper.findDis(nPoints[0][0]//scale, nPoints[2][0]//scale)/10), 1) #真實高度
#objDef1 = (nPoints[0][0][0], nPoints[0][0][1]), (nPoints[1][0][0], nPoints[1][0][1]) #
#objDef2 = (nPoints[0][0][0], nPoints[0][0][1]), (nPoints[2][0][0], nPoints[2][0][1]) #
#print(obj[2][0][0], obj[2][1][0])
#繪制四邊形虛線直線 圖像,起點,終點,顏色,線寬,默認點類型,破折號間距
helper.dashLine(imgContours2, obj[2][0][0], obj[2][1][0], (0, 140, 255), 2, 'dotted', dashed_gap)
helper.dashLine(imgContours2, obj[2][1][0], obj[2][2][0], (0, 140, 255), 2, 'dotted', dashed_gap)
helper.dashLine(imgContours2, obj[2][2][0], obj[2][3][0], (0, 140, 255), 2, 'dotted', dashed_gap)
helper.dashLine(imgContours2, obj[2][3][0], obj[2][0][0], (0, 140, 255), 2, 'dotted', dashed_gap)
#helper.dashLine(imgContours2, objDef2[0], objDef2[1], (0, 140, 255), 2)
#cv2.arrowedLine(imgContours2, objDef1[0], objDef1[1], (255, 0, 255), 3, 8, 0, 0.05)
#cv2.arrowedLine(imgContours2, objDef2[0], objDef2[1], (255, 0, 255), 3, 8, 0, 0.05)
x, y, w, h = obj[3] #邊界矩形
#print(x, y, w, h)
cv2.putText(imgContours2, '{}cm'.format(nW), (x + 30, y - 10), cv2.QT_FONT_NORMAL, 0.5, (0, 0, 0), 1) #顯示 寬度多少cm
cv2.putText(imgContours2, '{}cm'.format(nH), (x - 70, y + h // 2), cv2.QT_FONT_NORMAL, 0.5,(0, 0, 0), 1) #顯示高度 多少cm
imgLast = imgContours2 #最終要顯示的圖像:有尺寸信息
#cv2.imshow('A4', imgContours2)
img = cv2.resize(img, (0, 0), None, 0.5, 0.5) #縮放圖像 如果dsize被設置為0(None),則按fx與fy與原始圖像大小相乘得到輸出圖像尺寸大小
cv2.imshow(windowName, imgLast) #顯示
k =cv2.waitKey(0) #無限等待按鍵
if k == 27: break # 鍵盤上Esc鍵的鍵值
if cv2.getWindowProperty(windowName, cv2.WND_PROP_VISIBLE) <= 0:
cv2.destroyAllWindows()
        break
2.2 helper.py
from operator import index
import cv2
import numpy as np
#圖像處理,找到邊界框
def getBorders(img,cThr=[100,100],showCanny=False,minArea=1000,filter=0,draw =False):
imgGray = cv2.cvtColor(img,cv2.COLOR_BGR2GRAY) #灰度圖
imgBlur = cv2.GaussianBlur(imgGray,(5,5),1) #高斯濾波
imgCanny = cv2.Canny(imgBlur,cThr[0],cThr[1]) #canny邊緣檢測, cThr:阈值最小、最大值
kernel = np.ones((5,5)) #卷積核大小
imgDial = cv2.dilate(imgCanny,kernel,iterations=3) #膨脹操作
imgThre = cv2.erode(imgDial,kernel,iterations=2) #腐蝕操作
if showCanny:cv2.imshow('Canny',imgThre) #顯示邊緣檢測結果,默認false,不顯示
contours,hiearchy = cv2.findContours(imgThre,cv2.RETR_EXTERNAL,cv2.CHAIN_APPROX_SIMPLE) #搜索輪廓
finalCountours = []
for i in contours: #遍歷搜索結果
area = cv2.contourArea(i) #第i+1輪廓面積 https://www.jianshu.com/p/6bde79df3f9d
if area > minArea: #大於設定的面積阈值
peri = cv2.arcLength(i,True) #計算輪廓的周長
approx = cv2.approxPolyDP(i,0.02*peri,True) #輪廓的多邊形擬合
bbox = cv2.boundingRect(approx) #多邊形的矩形框 boundingRect、minAreaRect 尋找包裹輪廓的最小正矩形、最小斜矩形 https://www.cnblogs.com/bjxqmy/p/12347355.html
if filter > 0: #根據擬合多邊形邊數過濾 0:不過濾
if len(approx) == filter:
finalCountours.append([len(approx),area,approx,bbox,i]) #添加到最終邊界結果數組
else:
finalCountours.append([len(approx),area,approx,bbox,i]) #邊數,面積,近似多邊形,邊界框,輪廓
finalCountours = sorted(finalCountours,key = lambda x:x[1] ,reverse= True) #reverse = True 降序 , reverse = False 升序(默認) 最終邊界框數組:面積 排序
if draw:
for con in finalCountours:
cv2.drawContours(img,con[4],-1,(0,0,255),3) #繪制紅色輪廓,
return img, finalCountours #返回灰度圖(可能帶有輪廓),最終輪廓數組
#重排序擬合的四邊形的4 的點
def reorder(myPoints):
#print(myPoints.shape)
myPointsNew = np.zeros_like(myPoints) #初始化點數組
myPoints = myPoints.reshape((4,2)) #4個點x,y
add = myPoints.sum(1) #array.sum(axis =1),對array的每一行進行相加
myPointsNew[0] = myPoints[np.argmin(add)] #左上角點 https://blog.csdn.net/qq_37591637/article/details/103385174
myPointsNew[3] = myPoints[np.argmax(add)] #右下角點
diff = np.diff(myPoints,axis=1)#y 沿著指定軸計算第N維的離散差值 第一個差異由 out[i]=x[i+1]-a[i]
myPointsNew[1]= myPoints[np.argmin(diff)] #左下角點
myPointsNew[2] = myPoints[np.argmax(diff)] #右上角點
return myPointsNew
#獲取排序後索引指定的角點
def getorder(myPoints, index):
#print(myPoints.shape)
myPointsNew = np.zeros_like(myPoints)
myPoints = myPoints.reshape((4,2))
add = myPoints.sum(1)
myPointsNew[0] = myPoints[np.argmin(add)]
myPointsNew[3] = myPoints[np.argmax(add)]
diff = np.diff(myPoints,axis=1)
myPointsNew[1]= myPoints[np.argmin(diff)]
myPointsNew[2] = myPoints[np.argmax(diff)]
return myPointsNew[index]
#壓縮圖像, 近似四邊形投影映射,截取大部分
def warpImg(img,points,w,h,pad=20):
# print(points)
points = reorder(points) #重排序四個角點
pts1 = np.float32(points) #浮點數組:重排序的擬合的圖像角點
pts2 = np.float32([[0,0],[w,0],[0,h],[w,h]]) #變換後的圖像頂點
matrix = cv2.getPerspectiveTransform(pts1,pts2) #獲取投影映射(Projective Mapping) 透視變換(Perspective Transformation)矩陣
imgWarp = cv2.warpPerspective(img,matrix,(w,h)) #投影映射
imgWarp = imgWarp[pad:imgWarp.shape[0]-pad,pad:imgWarp.shape[1]-pad] #去掉pad邊界填充
return imgWarp
#計算兩點距離
def findDis(pts1,pts2):
return ((pts2[0]-pts1[0])**2 + (pts2[1]-pts1[1])**2)**0.5
#是否能整除
def checkDivide(num, num2):
boolDef = (num % num2) == 0
return (boolDef)
#獲取points中指定索引的點
def getPoint(points, _index):
newPoints = []
for _point in points:
newPoints.append(_point)
_lastValue = newPoints[_index]
return _lastValue
#繪制破折線 直線
def dashLine(img,pt1,pt2,color,thickness=1,style='dotted',gap=20):
dist =((pt1[0]-pt2[0])**2+(pt1[1]-pt2[1])**2)**.5
#dist = dist * 3
pts= []
for i in np.arange(0,dist,gap):
r=i/dist
x=int((pt1[0]*(1-r)+pt2[0]*r)+.5)
y=int((pt1[1]*(1-r)+pt2[1]*r)+.5)
p = (x,y)
pts.append(p)
if style=='dotted':
for p in pts:
cv2.circle(img,p,thickness,color,-1)
else:
s=pts[0]
e=pts[0]
i=0
for p in pts:
s=e
e=p
if i%2==1:
cv2.line(img,s,e,color,thickness)
i+=1
#繪制多邊形-
def drawpoly(img,pts,color,thickness=1,style='dotted',):
s=pts[0]
e=pts[0]
pts.append(pts.pop(0))
i=0
for p in pts:
if p==e:continue
s=e #起點
if p==p[len(p)-1]:e=pts[0]
e=p #更新end點
dashLine(img,s,e,color,thickness,style)
三、json參數C#讀寫操作
setting.json文件
{"useWebcam":false,"webcamIndex":0,"imgFilePath":"./3.jpg","generalScale":3,"dashGapScale":10,"resolution":"1920x1080","windowName":"Output Window"}json配置類
using System.Text;
using Newtonsoft.Json;
using System.IO;
using System.Collections.Generic;
namespace ObjectMeasurement
{
public class CoreSettings
{
//屬性配置類
private class CoreProperties//配置類
{
public bool useWebcam { get; set; }//使用網絡攝像頭
public int webcamIndex { get; set; }//攝像頭索引
public string imgFilePath { get; set; }//圖片路徑
public int generalScale { get; set; }//比例
public int dashGapScale { get; set; }//
public string resolution { get; set; }//分辨率
public string windowName { get; set; }//窗口標題
}
//私有變量
private bool a_useWebcam { get; set; }
private int a_webcamIndex { get; set; }
private string a_imgFilePath { get; set; }
private int a_generalScale { get; set; }
private int a_dashGapScale { get; set; }
private string a_resolution { get; set; }
private string a_windowName { get; set; }
//公開屬性
public bool useWebcam { get; private set; }
public int webcamIndex { get; private set; }
public string imgFilePath { get; private set; }
public int generalScale { get; private set; }
public int dashGapScale { get; private set; }
public string resolution { get; private set; }
public string windowName { get; private set; }
private string jsonPath { get; set; }//序列化字符串
//構造函數1:加載序列化字符串
public CoreSettings(string _jsonPath)
{
jsonPath = _jsonPath;
LoadJson();//加載序列化字符串,反序列化,設置配置
}
//構造函數2: 加載參數
public void Configure(bool _useWebcam, int _webcamIndex,
string _imgFilePath, int _generalScale,
int _dashGapScale, string _resolution, string _windowName)
{
useWebcam = _useWebcam;
webcamIndex = _webcamIndex;
imgFilePath = _imgFilePath;
generalScale = _generalScale;
dashGapScale = _dashGapScale;
resolution = _resolution;
windowName = _windowName;
//
a_useWebcam = _useWebcam;
a_webcamIndex = _webcamIndex;
a_imgFilePath = _imgFilePath;
a_generalScale = _generalScale;
a_dashGapScale = _dashGapScale;
a_resolution = _resolution;
a_windowName = _windowName;
}
//加載json字符串
public void LoadJson()
{
string json = File.ReadAllText(jsonPath);
CoreProperties loadedSettings = JsonConvert.DeserializeObject<CoreProperties>(json);//反序列化
Configure(loadedSettings.useWebcam, loadedSettings.webcamIndex,
loadedSettings.imgFilePath, loadedSettings.generalScale, loadedSettings.dashGapScale,
loadedSettings.resolution, loadedSettings.windowName);//配置
}
//保存序列化對象
public void Save()
{
CoreProperties properties = new CoreProperties
{
useWebcam = a_useWebcam,
webcamIndex = a_webcamIndex,
imgFilePath = a_imgFilePath,
generalScale = a_generalScale,
dashGapScale = a_dashGapScale,
resolution = a_resolution,
windowName = a_windowName
};
string writeJson = JsonConvert.SerializeObject(properties).ToString();//配置類序列化
/*
Dictionary<string, string> replacePairs = new Dictionary<string, string>();
replacePairs.Add("_useWebcam", "useWebcam");
replacePairs.Add("_webcamIndex", "webcamIndex");
replacePairs.Add("_imgFilePath", "imgFilePath");
replacePairs.Add("_generalScale", "generalScale");
replacePairs.Add("_dashGapScale", "dashGapScale");
replacePairs.Add("_resolution", "resolution");
replacePairs.Add("_windowName", "windowName");
replacePairs.Add("_", "");
foreach (KeyValuePair<string, string> item in replacePairs)
{
string key = item.Key;
writeJson.Replace(key.ToString(), item.Value.ToString());
}
*/
// System.Windows.Forms.MessageBox.Show(JsonConvert.SerializeObject(properties));
File.WriteAllText(jsonPath, JsonConvert.SerializeObject(properties));//保存序列化的配置
}
}
}
json參數加載和保存
//關閉窗口時,讀取參數設置配置
private void SettingsForm_FormClosing(object sender, FormClosingEventArgs e)
{
bool _useWebcam = settings_visualSource.SelectedItem.ToString() == "Web Camera";
int _webcamIndex = Convert.ToInt32(settings_WebcamIndex.Value);
string _imgFilePath = settings_ImageFile.Text.ToString();
int _generalScale = Convert.ToInt32(settings_GeneralScale.Value);
int _dashGapScale = Convert.ToInt32(settings_DashGapScale.Value);
string _resolution = settings_Resolution.Text.ToString();
string _windowName = settings_WindowTitle.Text.ToString();
MainForm.coreSettings.Configure(_useWebcam, _webcamIndex, _imgFilePath, _generalScale, _dashGapScale, _resolution, _windowName);
MainForm.coreSettings.Save();
}
private void SettingsForm_Load(object sender, EventArgs e)
{
CoreSettings core = MainForm.coreSettings;
core.LoadJson();
if (core.useWebcam)
{
settings_visualSource.SelectedIndex = 0;
}
else
{
settings_visualSource.SelectedIndex = 1;
}
settings_WebcamIndex.Value = core.webcamIndex;
settings_ImageFile.Text = core.imgFilePath;
settings_GeneralScale.Value = core.generalScale;
settings_DashGapScale.Value = core.dashGapScale;
settings_Resolution.Text = core.resolution;
settings_WindowTitle.Text = core.windowName;
}
參考:
https://blog.csdn.net/u010636181/article/details/80659700