Suggest :
Whether it's win10 System or Ubuntu System ,
If you want to use python, Directly in Ubuntu Installation on miniconda,
establish conda Environment for use
( The scheme is the most concise , Safest , The most perfect python Idea of creating running environment )
install Ubuntu after , Never mind what comes with the system Python, Because the version is difficult to control
Download and install directly anconda wget https://repo.continuum.io/archive/Anaconda3-2018.12-Linux-x86_64.sh
Configure the update after installation conda Download source and pip Update to the latest , Then create the environment , Or use the default conda user
At this moment in the system Python In theory, it's all conda Of course.
Then create python The environment began to use , It is emphasized that it is not recommended to change the local python and conda Bring their own python
It is not recommended to change the local python and conda Bring their own python
It is not recommended to change the local python and conda Bring their own python
It is not recommended to change the local python and conda Bring their own python
2020/11/17 to update :
Today because of hanging up V7N, Directly lead to network error , Creating conda Error in environment , Then deleted according to the logic on the Internet ~/.condarc, Lead to the whole conda crash , Had to reinstall
This is an installation miniconda Some details are clearly written in the tutorial
conda and python Icon 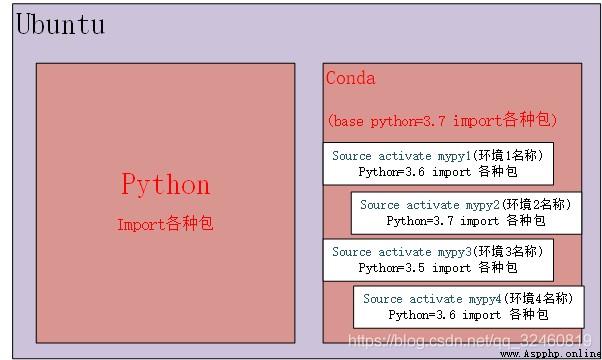
The first part is to install the full version conda, Large software , her beauty is good enough for the aristocracy
It is recommended to use the second method to install mini Version of conda
wget https://repo.continuum.io/archive/Anaconda3-2018.12-Linux-x86_64.sh
chmod 777 anaconda*.sh # Convert to executable
sudo ./anaconda*.sh # install Pay attention The first one here yes Don't press enter after that
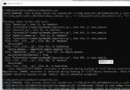
Do you wish the installer to initialize Anaconda3
in your /home/user1/.bashrc ? [yes|no]
[no] >>> yes
# Be careful :: Be careful
# Don't press enter here , Because you will be asked whether to install to the local environment variable , If you press enter, the default is not to add local variables , It would be embarrassing ,
# Also note that this is not only added to the local environment variable , You still need to perform the following source ~/.bashrc, The system can only recognize conda
Do you wish to proceed with the installation of Microsoft VSCode? [yes|no]
>>> no
# The installation has been completed here ,
# But in this case conda It's not working yet , Why? , Because although it is installed, it will conda Environment variables are added to the system , However, the system environment variable has not yet taken effect ; Therefore, you need to run the following command to take effect
source ~/.bashrc
# If you do not choose to directly add environment variables during installation , Please run the following command
echo 'export PATH="/home/user01/anaconda/bin:$PATH"' >> ~/.bashrc
source ~/.bashrc
# Set up conda Download source , This will reduce the error probability when creating a new user
conda config --add channels https://mirrors.tuna.tsinghua.edu.cn/anaconda/pkgs/free/ # This is the download source of Tsinghua University
conda config --set show_channel_urls yes # Set the search display address
# to update pip
pip install --upgrade pip # If this error is reported, execute the following commands
pip install --upgrade pip --user
# Set up pip Default download source
pip config set global.index-url https://mirrors.aliyun.com/pypi/simple/
# Or you can do it alone at a time pip When downloading the package, make the download source
pip install numpy==1.14.0 -i https://mirrors.aliyun.com/pypi/simple/
The second part is to install the mini version conda, Software 100M, smaller , Still young
wget -c https://repo.continuum.io/miniconda/Miniconda3-latest-Linux-x86_64.sh
chmod 777 Miniconda3-latest-Linux-x86_64.sh # Give Execution Authority
./Miniconda3-l*
yes # Determine the installation regulations
yes # Confirm will conda Add to the system
source ~/.bashrc # Activate
# The following four are download sources
conda config --add channels https://mirrors.tuna.tsinghua.edu.cn/anaconda/pkgs/free/
conda config --add channels https://mirrors.tuna.tsinghua.edu.cn/anaconda/pkgs/main/
conda config --add channels https://mirrors.tuna.tsinghua.edu.cn/anaconda/cloud/conda-forge/
conda config --add channels https://mirrors.tuna.tsinghua.edu.cn/anaconda/cloud/bioconda/
conda config --set show_channel_urls yes # According to the path
conda config --get channels # View channels
cat ~/.condarc # see The added path is saved in
# conda Some operations of the environment
conda create -n mypy python=3.6 # Create the name as mypy Environment
conda env list # Displays a list of environments
source activate mypy # Enter the environment
source deactivate # Out of the environment
conda create -n mypy_new --clone mypy # clone mypy Environmental Science
conda env export > freeze.yml # pack mypy Environmental Science
conda create -n mypy -f freeze.yml
conda remove -n mypy --all # Delete mypy Environmental Science
Check the network first
mv ~/.condarc ~/.condarc_oldconda config --add channels https://mirrors.tuna.tsinghua.edu.cn/anaconda/pkgs/free/
conda config --add channels https://mirrors.tuna.tsinghua.edu.cn/anaconda/pkgs/main/
conda config --add channels https://mirrors.tuna.tsinghua.edu.cn/anaconda/cloud/conda-forge/
conda config --add channels https://mirrors.tuna.tsinghua.edu.cn/anaconda/cloud/bioconda/
conda config --set show_channel_urls yes # According to the path
conda config --get channels # View channels
At this point, the new generation ~/.condarcconda install jupyter There will still be mistakes
Then try conda install -c conda-forge jupyter
sudo apt install python3-pip # install python3
pip3 install pip # Python3 Bring their own pip3, install pip
-i https://pypi.tuna.tsinghua.edu.cn/simple # Can be in pip Later, it is used to modify the download source
sudo apt install python-pip # install pip
# Modify the download source for permanent use
pip install pip -U
pip config set global.index-url https://mirrors.aliyun.com/pypi/simple/
# Other sources
Alibaba cloud http://mirrors.aliyun.com/pypi/simple/
University of science and technology of China https://pypi.mirrors.ustc.edu.cn/simple/
douban (douban) http://pypi.douban.com/simple/
Tsinghua University https://pypi.tuna.tsinghua.edu.cn/simple/
University of science and technology of China http://pypi.mirrors.ustc.edu.cn/simple/
from pip in pip and pip3 The difference between
[email protected]:~$ sudo update-alternatives --install /usr/bin/python python /usr/bin/python3 150
[sudo] zjq Password :
update-alternatives: Use /usr/bin/python3 To provide... In automatic mode /usr/bin/python (python)
update-alternatives Introduce
update-alternatives You can create 、 Delete 、 Repair 、 Soft connection , It can also display the information of existing soft connection , And all these constitute the alternative system (alternatives system).
update-alternatives Is a symbolic link used to maintain system commands , To determine what commands the system uses by default , You can set the preferred program loaded by default
For example, my system has been installed with java 1.6, I also want to install java 1.7, But I don't want to uninstall java 1.6. You can go through update-alternatives --config In more than one java Inter version process switching .update-alternatives It is a command used to switch among multiple commands of the same type .
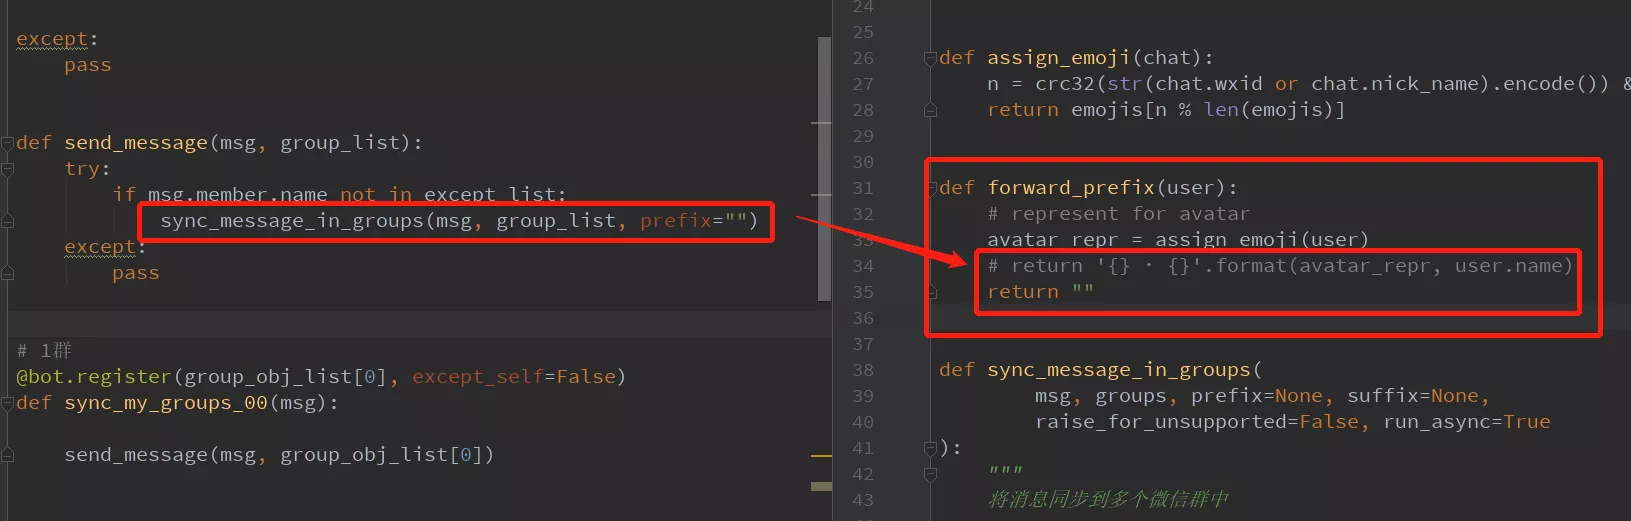
Download and install on the official website , Give the following to jar Drag files to pycharm On the main page
Infinite loop trial 30 God
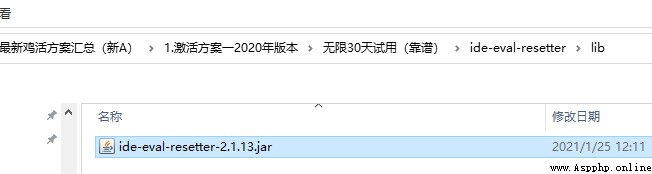
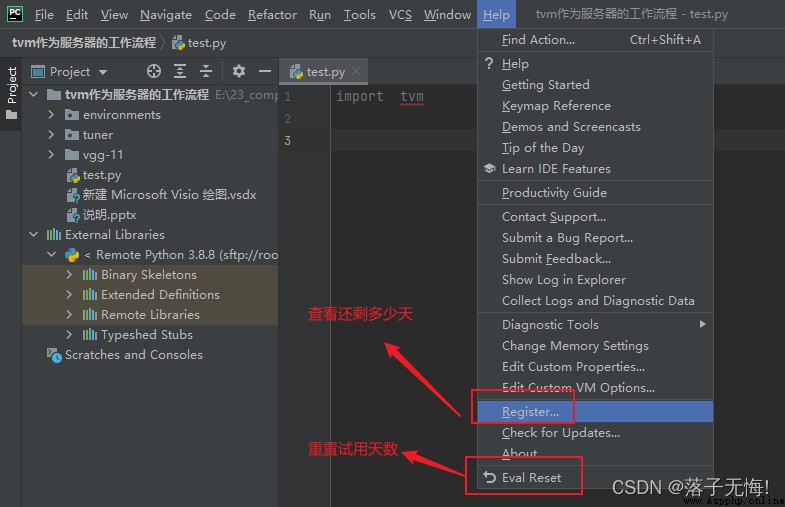
At this point, you can use it indefinitely
Community version download link
Left black Download Community version , It can be used directly without activation 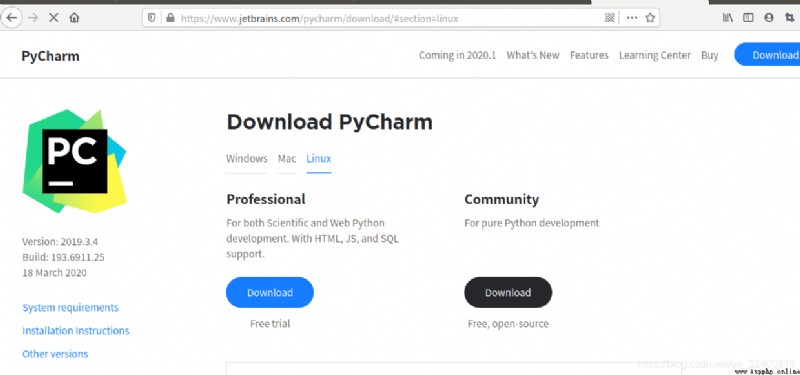
After the download is completed, the compressed package , Unzip to ~ Under the table of contents $ tar -zvxf pycharm-community-2020.1.tar.gz -C ~mv pycharm pyc # This is for convenience next time $ sh ~/pyc/bin/pycharm.sh # Open software pycharm
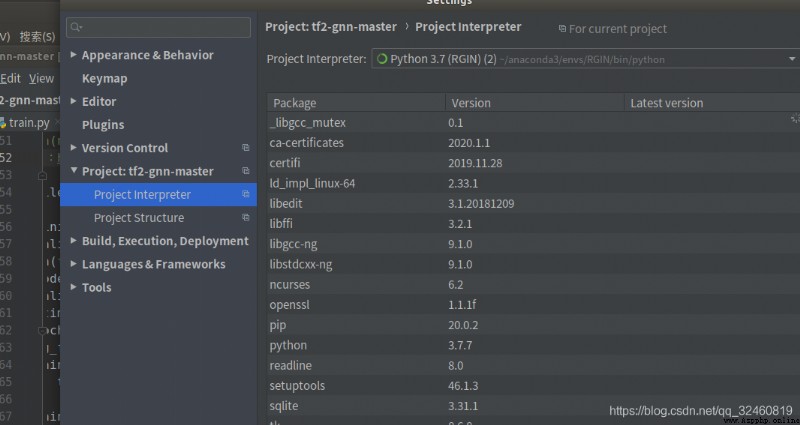
You can use the local Python, Open the project
file->setting-> Select local project
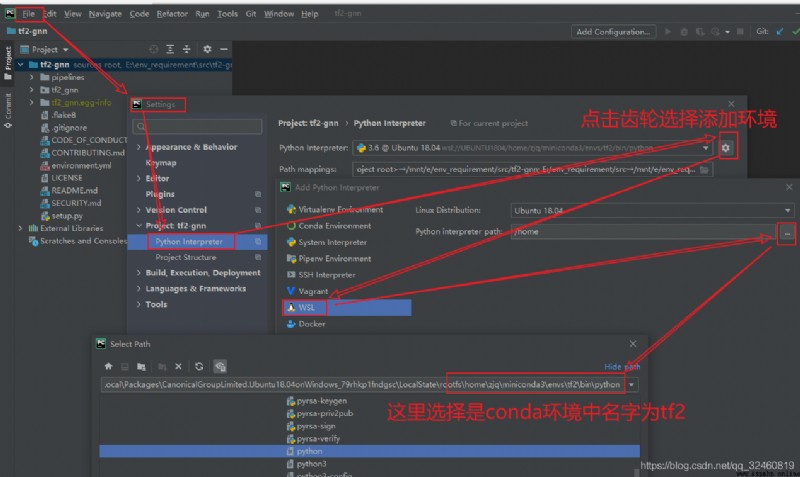
Open the project , Set up conda Path and , choice RGIN user 
Such as my pycharm Each time you need to use the command to open
[email protected]:~$ sh ~/pyc/bin/pycharm.sh
Because lazy, so opportunistic , Establish the following soft connection
Note that it must be from ~…pycharm Set up to ----> /usr…pycharm[email protected]:~$ sudo ln -s ~/pyc/bin/pycharm.sh /usr/bin/pycharm
The above command means :
stay /usr/bin/pycharm Create a new directory pycharm Open shortcut
If you need to run pycharm, Just type... On the command line pycharm.sh You can directly open pycharm Software
* It should be noted that : *
/usr/bin/ All stored in the directory are executable files , Will be able to sh, Put binary files in this directory , The global can be executed without positioning sudo rm /usr/bin/pycharm You need to use the school mailbox , Never think of a bunch of dirt B, Use the code tool to 99 year , Just borrow an account from a little brother who is still in school around you ;
Directly follow the prompts on the official website to download, install and log in to the school email for verification
can debug, Be able to see the contents of everyone's variables at each step , Format
Python3 Turn into anaconda Medium Python Why : install anaconda After that, the inside Python3 Adding to the environment variable overwrites the original Python3 edition
Use alias to declare alias Order to change
The following command is to set the local python Connect as python, So on the command line python Will run local python, Here, the next startup will fail , Therefore, you can save the following command to ~/.bashrcalias python="/usr/bin/python3.6"
alias conda Of python You can run the following command
[email protected]:~$ whereis conda
conda: /home/zjq/anaconda3/bin/conda
alias python4=“anaconda Installation directory bin”
Personal test :
I use alias python="/usr/bin/python3.6" Will local python Use python Open up , then conda Of python Default , namely python3 open conda Of python,
pip The problem of
python -m pip --version # Show local python Package version
python3 -m pip --version # Show condapython Package version
jupyter notebookpip install jupyterconda install ipykernelconda activate scanpython -m ipykernel install --user --name scan --display-name " stay kernel The name shown in "jupyter notebook perhaps jupyter-notebook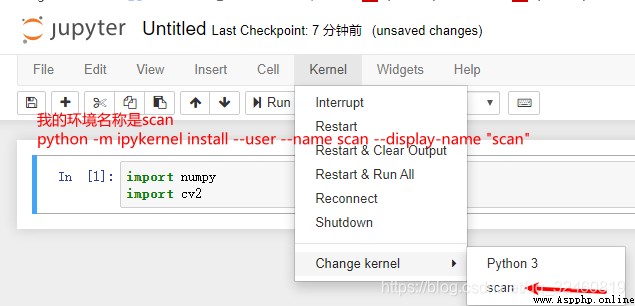
jupyter notebook --generate-config # Generate configuration files
vim /home/xibeiidaxue/.jupyter/jupyter_notebook_config.py
c.NotebookApp.token = '' # If it is set to blank, it means that no password is required for login
c.NotebookApp.ip='*' # Set all IP All accessible
c.NotebookApp.password = "" # password
c.NotebookApp.allow_root = True # Allow root
jupyter notebook --port 8888 # Run a specific port 8888 port
jupyter notebook --generate-config # Generate configuration files
jupyter notebook password
# Enter password twice
Cell Command mode currently supports Jupyter Notebook quick
Enter : Switch to edit mode
Shift-Enter : Run this unit , Select or insert ( the last one Cell When ) Next unit
Ctrl-Enter : Run this unit
Alt-Enter : Run this unit , Insert a new cell under it
Y : Unit goes to code state
M : Unit transferred to markdown state ( Not yet R Native state )
Up : Select the upper cell
K : Select the upper cell
Down : Select the cell below
J : Select the cell below
A : Insert a new cell above
B : Insert a new unit below
D,D : Delete the selected cell
L : Convert line number
Shift-Space : Scroll up
Space : Scroll down
Ctrl + X : shear / Cut line ( Empty selection )
Ctrl + C : Copy / Copy line ( Empty selection )
Ctrl + Delete / Backspace : Delete the right side 、 The words on the left
Alt + ↑ / ↓ : Up / Move line down
Shift + Alt + ↓ / ↑ : Up / Copy lines down
Ctrl + Shift + K : Delete row
Ctrl + Shift + \ : Jump to the matching bracket
Ctrl + ] / [ : Indent / Highlight line
Ctrl + ← / → : Cursor to prefix / Suffix
Ctrl + / : Switch line comments
Shift + Alt + A : Toggle block comment
Ctrl + H : lookup / Replace
Ctrl + D : Select a / Multiple ( identical ) word
Alt + single click : Insert multiple cursors
Ctrl + Alt + ↑ / ↓ : On top / Insert the cursor below
Ctrl + U : Undo the last cursor action
Shift + Alt + I : Inserts a cursor at the end of each selected line
Ctrl + L : Select the current line
Ctrl + Shift + L : Select all occurrences of the current word
Ctrl + F2 : Select all occurrences of the current word
Shift + Alt + → / Shift + Alt + ←: an / Narrow down the options
Shift + Alt + ( Drag the mouse ) : Rectangular block selection
Ctrl + K Ctrl + X : Trim trailing spaces
# Download the installation package on the official website
1. wget http://www.python.org/ftp/python/3.6.4/Python-3.6.4.tgz
# decompression
2. tar -xvzf Python-3.6.4.tgz
# install
3. cd Python-3.6.4
4. ./configure --with-ssl
# compile
5. sudo make
6. sudo make install
# Create a soft connection , To look at first python3.6.4 Installation path for
7. which python3 # /usr/local/bin/python3
8. sudo ln -s /usr/local/bin/python3 python
Problem description
We often configure the environment on a machine , You need to go to another machine to reconfigure python Environmental Science , In this way, it is necessary to appear some inexplicably every time python Package version error , So , You can use the following command , Put the current environment , python The package and version used are read into the file , Then insert directly into the environment of another machine through a command , Realize... In two machines python The package version of the environment is unified
# First redefine the package version to requirement.txt in
pip freeze > requirements.txt
# In another environment , Install these packages
among -r Is to install... From a given version
pip install -r requirements.txt
jedi Version of the problem pip install jedi==0.17