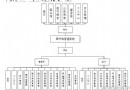
前言
1.基本介紹
2.EventLoop的調度實現
3.網絡IO事件的處理
前言在文章《Python Asyncio中Coroutines,Tasks,Future可等待對象的關系及作用》中介紹了Python的可等待對象作用,特別是Task對象在啟動的時候可以自我驅動,但是一個Task對象只能驅動一條執行鏈,如果要多條鏈執行(並發),還是需要EventLoop來安排驅動,接下來將通過Python.Asyncio庫的源碼來了解EventLoop是如何運作的。
Python.Asyncio是一個大而全的庫,它包括很多功能,而跟核心調度相關的邏輯除了三種可等待對象外,還有其它一些功能,它們分別位於runners.py,base_event.py,event.py三個文件中。
runners.py文件有一個主要的類--Runner,它的主要職責是做好進入協程模式的事件循環等到初始化工作,以及在退出協程模式時清理還在內存的協程,生成器等對象。
協程模式只是為了能方便理解,對於計算機而言,並沒有這樣區分
event.py文件除了存放著EventLoop對象的接口以及獲取和設置EventLoop的函數外,還有兩個EventLoop可調度的對象,分別為Handler和TimerHandler,它們可以認為是EvnetLoop調用其它對象的容器,用於連接待調度對象和事件循環的關系,不過它們的實現非常簡單,對於Handler,它的源碼如下:
# 已經移除了一些不想關的代碼class Handle: def __init__(self, callback, args, loop, context=None): # 初始化上下文,確保執行的時候能找到Handle所在的上下文 if context is None: context = contextvars.copy_context() self._context = context self._loop = loop self._callback = callback self._args = args self._cancelled = False def cancel(self): # 設置當前Handle為取消狀態 if not self._cancelled: self._cancelled = True self._callback = None self._args = None def cancelled(self): return self._cancelled def _run(self): # 用於執行真正的函數,且通過context.run方法來確保在自己的上下文內執行。 try: # 保持在自己持有的上下文中執行對應的回調 self._context.run(self._callback, *self._args) except (SystemExit, KeyboardInterrupt): raise except BaseException as exc: cb = format_helpers._format_callback_source( self._callback, self._args) msg = f'Exception in callback {cb}' context = { 'message': msg, 'exception': exc, 'handle': self, } self._loop.call_exception_handler(context)通過源碼可以發現,Handle功能十分簡單,提供了可以被取消以及可以在自己所處的上下文執行的功能,而TimerHandle繼承於Handle比Handle多了一些和時間以及排序相關的參數,源碼如下:
class TimerHandle(Handle): def __init__(self, when, callback, args, loop, context=None): super().__init__(callback, args, loop, context) self._when = when self._scheduled = False def __hash__(self): return hash(self._when) def __lt__(self, other): if isinstance(other, TimerHandle): return self._when < other._when return NotImplemented def __le__(self, other): if isinstance(other, TimerHandle): return self._when < other._when or self.__eq__(other) return NotImplemented def __gt__(self, other): if isinstance(other, TimerHandle): return self._when > other._when return NotImplemented def __ge__(self, other): if isinstance(other, TimerHandle): return self._when > other._when or self.__eq__(other) return NotImplemented def __eq__(self, other): if isinstance(other, TimerHandle): return (self._when == other._when and self._callback == other._callback and self._args == other._args and self._cancelled == other._cancelled) return NotImplemented def cancel(self): if not self._cancelled: # 用於通知事件循環當前Handle已經退出了 self._loop._timer_handle_cancelled(self) super().cancel() def when(self): return self._when通過代碼可以發現,這兩個對象十分簡單,而我們在使用Python.Asyncio時並不會直接使用到這兩個對象,而是通過loop.call_xxx系列方法來把調用封裝成Handle對象,然後等待EventLoop執行。 所以loop.call_xxx系列方法可以認為是EventLoop的注冊操作,基本上所有非IO的異步操作都需要通過loop.call_xxx方法來把自己的調用注冊到EventLoop中,比如Task對象就在初始化後通過調用loop.call_soon方法來注冊到EventLoop中,loop.call_sonn的實現很簡單,
它的源碼如下:
class BaseEventLoop: ... def call_soon(self, callback, *args, context=None): # 檢查是否事件循環是否關閉,如果是則直接拋出異常 self._check_closed() handle = self._call_soon(callback, args, context) return handle def _call_soon(self, callback, args, context): # 把調用封裝成一個handle,這樣方便被事件循環調用 handle = events.Handle(callback, args, self, context) # 添加一個handle到_ready,等待被調用 self._ready.append(handle) return handle可以看到call_soon真正相關的代碼只有10幾行,它負責把一個調用封裝成一個Handle,並添加到self._reday中,從而實現把調用注冊到事件循環之中。
loop.call_xxx系列函數除了loop.call_soon系列函數外,還有另外兩個方法--loop.call_at和loop.call_later,它們類似於loop.call_soon,不過多了一個時間參數,來告訴EventLoop在什麼時間後才可以調用,同時通過loop.call_at和loop.call_later注冊的調用會通過Python的堆排序模塊headpq注冊到self._scheduled變量中,
具體代碼如下:
class BaseEventLoop: ... def call_later(self, delay, callback, *args, context=None): if delay is None: raise TypeError('delay must not be None') timer = self.call_at(self.time() + delay, callback, *args, context=context) return timer def call_at(self, when, callback, *args, context=None): if when is None: raise TypeError("when cannot be None") self._check_closed() # 創建一個timer handle,然後添加到事件循環的_scheduled中,等待被調用 timer = events.TimerHandle(when, callback, args, self, context) heapq.heappush(self._scheduled, timer) timer._scheduled = True return timer2.EventLoop的調度實現在文章《Python Asyncio中Coroutines,Tasks,Future可等待對象的關系及作用》中已經分析到了runner會通過loop.run_until_complete來調用mainTask從而開啟EventLoop的調度,所以在分析EventLoop的調度時,應該先從loop.run_until_complete入手,
對應的源碼如下:
class BaseEventLoop: def run_until_complete(self, future): ... new_task = not futures.isfuture(future) # 把coroutine轉換成task,這樣事件循環就可以調度了,事件循環的最小調度單位為task # 需要注意的是此時事件循環並沒注冊到全局變量中,所以需要顯示的傳進去, # 同時Task對象注冊的時候,已經通過loop.call_soon把自己注冊到事件循環中,等待調度 future = tasks.ensure_future(future, loop=self) if new_task: # An exception is raised if the future didn't complete, so there # is no need to log the "destroy pending task" message future._log_destroy_pending = False # 當該task完成時,意味著當前事件循環失去了調度對象,無法繼續調度,所以需要關閉當前事件循環,程序會由協程模式返回到線程模式 future.add_done_callback(_run_until_complete_cb) try: # 事件循環開始運行 self.run_forever() except: if new_task and future.done() and not future.cancelled(): # The coroutine raised a BaseException. Consume the exception # to not log a warning, the caller doesn't have access to the # local task. future.exception() raise finally: future.remove_done_callback(_run_until_complete_cb) if not future.done(): raise RuntimeError('Event loop stopped before Future completed.') return future.result() def run_forever(self): # 進行一些初始化工作 self._check_closed() self._check_running() self._set_coroutine_origin_tracking(self._debug) self._thread_id = threading.get_ident() old_agen_hooks = sys.get_asyncgen_hooks() # 通過asyncgen鉤子來自動關閉asyncgen函數,這樣可以提醒用戶生成器還未關閉 sys.set_asyncgen_hooks(firstiter=self._asyncgen_firstiter_hook, finalizer=self._asyncgen_finalizer_hook) try: # 設置當前在運行的事件循環到全局變量中,這樣就可以在任一階段獲取到當前的事件循環了 events._set_running_loop(self) while True: # 正真執行任務的邏輯 self._run_once() if self._stopping: break finally: # 關閉循環, 並且清理一些資源 self._stopping = False self._thread_id = None events._set_running_loop(None) self._set_coroutine_origin_tracking(False) sys.set_asyncgen_hooks(*old_agen_hooks)這段源碼並不復雜,它的主要邏輯是通過把Corotinue轉為一個Task對象,然後通過Task對象初始化時調用loop.call_sonn方法把自己注冊到EventLoop中,最後再通過loop.run_forever中的循環代碼一直運行著,直到_stopping被標記為True:
while True: # 正真執行任務的邏輯 self._run_once() if self._stopping: break可以看出,這段代碼是確保事件循環能一直執行著,自動循環結束,而真正調度的核心是_run_once函數,
它的源碼如下:
class BaseEventLoop: ... def _run_once(self): # self._scheduled是一個列表,它只存放TimerHandle sched_count = len(self._scheduled) ############################### # 第一階段,整理self._scheduled # ############################### if (sched_count > _MIN_SCHEDULED_TIMER_HANDLES and self._timer_cancelled_count / sched_count > _MIN_CANCELLED_TIMER_HANDLES_FRACTION): # 當待調度的任務數量超過100且待取消的任務占總任務的50%時,才進入這個邏輯 # 把需要取消的任務移除 new_scheduled = [] for handle in self._scheduled: if handle._cancelled: # 設置handle的_cancelled為True,並且把handle從_scheduled中移除 handle._scheduled = False else: new_scheduled.append(handle) # 重新排列堆 heapq.heapify(new_scheduled) self._scheduled = new_scheduled self._timer_cancelled_count = 0 else: # 需要取消的handle不多,則只會走這個邏輯,這裡會把堆頂的handle彈出,並標記為不可調度,但不會訪問整個堆 while self._scheduled and self._scheduled[0]._cancelled: self._timer_cancelled_count -= 1 handle = heapq.heappop(self._scheduled) handle._scheduled = False ################################# # 第二階段,計算超時值以及等待事件IO # ################################# timeout = None # 當有准備調度的handle或者是正在關閉時,不等待,方便盡快的調度 if self._ready or self._stopping: timeout = 0 elif self._scheduled: # Compute the desired timeout. # 如果堆有數據時,通過堆頂的handle計算最短的超時時間,但是最多不能超過MAXIMUM_SELECT_TIMEOUT,以免超過系統限制 when = self._scheduled[0]._when timeout = min(max(0, when - self.time()), MAXIMUM_SELECT_TIMEOUT) # 事件循環等待事件,直到有事件或者超時 event_list = self._selector.select(timeout) ################################################## # 第三階段,把滿足條件的TimeHandle放入到self._ready中 # ################################################## # 獲取得到的事件的回調,然後裝填到_ready self._process_events(event_list) # 把一些在self._scheduled且滿足調度條件的handle放到_ready中,比如TimerHandle。 # end_time為當前時間+一個時間單位,猜測是能多處理一些這段時間內產生的事件 end_time = self.time() + self._clock_resolution while self._scheduled: handle = self._scheduled[0] if handle._when >= end_time: break handle = heapq.heappop(self._scheduled) handle._scheduled = False self._ready.append(handle) ################################################################################ # 第四階段,遍歷所有准備調度的handle,並且通過handle的context來執行handle對應的callback # ################################################################################ ntodo = len(self._ready) for i in range(ntodo): handle = self._ready.popleft() # 如果handle已經被取消,則不調用 if handle._cancelled: continue if self._debug: try: self._current_handle = handle t0 = self.time() handle._run() dt = self.time() - t0 if dt >= self.slow_callback_duration: # 執行太久的回調,記錄下來,這些需要開發者自己優化 logger.warning('Executing %s took %.3f seconds', _format_handle(handle), dt) finally: self._current_handle = None else: handle._run() handle = None # Needed to break cycles when an exception occurs.通過源碼分析,可以很明確的知道調度邏輯中第一步是先規整self._scheduled,在規整的過程是使用堆排序來進行的,因為堆排序在調度的場景下效率是非常高的,不過這段規整代碼分成兩種,我猜測是當需要取消的數量過多時直接遍歷的效率會更高。 在規整self._scheduled後,就進入第二步,該步驟開始等待系統事件循環返回對應的事件,如果self._ready中有數據,就不做等待了,需要馬上到下一步驟,以便能趕緊安排調度。 在得到系統事件循環得到的事件後,就進入到了第三步,該步驟會通過self._process_events方法處理對應的事件,並把事件對應的回調存放到了self._ready中,最後再遍歷self._ready中的所有Handle並逐一執行(執行時可以認為EventLoop把控制權返回給對應的調用邏輯),至此一個完整的調度邏輯就結束了,並進入下一個調度邏輯。
注:由於系統事件循環的限制,所以文件IO一般還是使用多線程來執行,具體見:github.com/python/asyn…
在分析EventLoop調度實現的時候忽略了self._process_events的具體實現邏輯,因為_process_events方法所在asyncio.base_event.py文件中的BaseEventLoop類並未有具體實現的,因為網絡IO相關的需要系統的事件循環來幫忙處理,所以與系統事件循環相關的邏輯都在asyncio.selector_events.py中的BaseSelectorEventLoop類中。BaseSelectorEventLoop類封裝了selector模塊與系統事件循環交互,使調用者不需要去考慮sock的創建以及sock產生的文件描述符的監聽與注銷等操作,下面以BaseSelectorEventLoop中自帶的pipe為例子,分析BaseSelectorEventLoop是如何進行網絡IO事件處理的。
在分析之前,先看一個例子,代碼如下:
import asyncioimport threadingdef task(): print("task")def run_loop_inside_thread(loop): loop.run_forever()loop = asyncio.get_event_loop()threading.Thread(target=run_loop_inside_thread, args=(loop,)).start()loop.call_soon(task)如果直接運行這個例子,它並不會輸出task(不過在IDE使用DEBUG模式下線程啟動會慢一點,所以會輸出的),因為在調用loop.run_forever後EventLoop會一直卡在這段邏輯中:
event_list = self._selector.select(timeout)所以調用loop.call_soon並不會使EventLoop馬上安排調度,而如果把call_soon換成call_soon_threadsafe則可以正常輸出,這是因為call_soon_threadsafe中多了一個self._write_to_self的調用,它的源碼如下:
class BaseEventLoop: ... def call_soon_threadsafe(self, callback, *args, context=None): """Like call_soon(), but thread-safe.""" self._check_closed() handle = self._call_soon(callback, args, context) self._write_to_self() return handle由於這個調用是涉及到IO相關的,所以需要到BaseSelectorEventLoop類查看,接下來以pipe相關的網絡IO操作來分析EventLoop是如何處理IO事件的(只演示reader對象,writer對象操作與reader類似),
對應的源碼如下:
class BaseSelectorEventLoop(base_events.BaseEventLoop): ####### # 創建 # ####### def __init__(self, selector=None): super().__init__() if selector is None: # 獲取最優的selector selector = selectors.DefaultSelector() self._selector = selector # 創建pipe self._make_self_pipe() self._transports = weakref.WeakValueDictionary() def _make_self_pipe(self): # 創建Pipe對應的sock self._ssock, self._csock = socket.socketpair() # 設置sock為非阻塞 self._ssock.setblocking(False) self._csock.setblocking(False) self._internal_fds += 1 # 阻塞服務端sock讀事件對應的回調 self._add_reader(self._ssock.fileno(), self._read_from_self) def _add_reader(self, fd, callback, *args): # 檢查事件循環是否關閉 self._check_closed() # 封裝回調為handle對象 handle = events.Handle(callback, args, self, None) try: key = self._selector.get_key(fd) except KeyError: # 如果沒有注冊到系統的事件循環,則注冊 self._selector.register(fd, selectors.EVENT_READ, (handle, None)) else: # 如果已經注冊過,則更新 mask, (reader, writer) = key.events, key.data self._selector.modify(fd, mask | selectors.EVENT_READ, (handle, writer)) if reader is not None: reader.cancel() return handle def _read_from_self(self): # 負責消費sock數據 while True: try: data = self._ssock.recv(4096) if not data: break self._process_self_data(data) except InterruptedError: continue except BlockingIOError: break ####### # 刪除 # ####### def _close_self_pipe(self): # 注銷Pipe對應的描述符 self._remove_reader(self._ssock.fileno()) # 關閉sock self._ssock.close() self._ssock = None self._csock.close() self._csock = None self._internal_fds -= 1 def _remove_reader(self, fd): # 如果事件循環已經關閉了,就不用操作了 if self.is_closed(): return False try: # 查詢文件描述符是否在selector中 key = self._selector.get_key(fd) except KeyError: # 不存在則返回 return False else: # 存在則進入移除的工作 mask, (reader, writer) = key.events, key.data # 通過事件掩碼判斷是否有其它事件 mask &= ~selectors.EVENT_READ if not mask: # 移除已經注冊到selector的文件描述符 self._selector.unregister(fd) else: # 移除已經注冊到selector的文件描述符,並注冊新的事件 self._selector.modify(fd, mask, (None, writer)) # 如果reader不為空,則取消reader if reader is not None: reader.cancel() return True else: return False通過源碼中的創建部分可以看到,EventLoop在啟動的時候會創建一對建立通信的sock,並設置為非阻塞,然後把對應的回調封裝成一個Handle對象並注冊到系統事件循環中(刪除則進行對應的反向操作),之後系統事件循環就會一直監聽對應的事件,也就是EventLoop的執行邏輯會阻塞在下面的調用中,等待事件響應:
event_list = self._selector.select(timeout)這時如果執行loop.call_soon_threadsafe,那麼會通過write_to_self寫入一點信息:
def _write_to_self(self): csock = self._csock if csock is None: return try: csock.send(b'\0') except OSError: if self._debug: logger.debug("Fail to write a null byte into the self-pipe socket", exc_info=True)由於csock被寫入了數據,那麼它對應的ssock就會收到一個讀事件,系統事件循環在收到這個事件通知後就會把數據返回,然後EventLoop就會獲得到對應的數據,並交給process_events方法進行處理,
它的相關代碼如下:
class BaseSelectorEventLoop: def _process_events(self, event_list): for key, mask in event_list: # 從回調事件中獲取到對應的數據,key.data在注冊時是一個元祖,所以這裡要對元祖進行解包 fileobj, (reader, writer) = key.fileobj, key.data if mask & selectors.EVENT_READ and reader is not None: # 得到reader handle,如果是被標記為取消,就移除對應的文件描述符 if reader._cancelled: self._remove_reader(fileobj) else: # 如果沒被標記為取消,則安排到self._ready中 self._add_callback(reader) if mask & selectors.EVENT_WRITE and writer is not None: # 對於寫對象,也是同樣的道理。 if writer._cancelled: self._remove_writer(fileobj) else: self._add_callback(writer) def _add_callback(self, handle): # 把回調的handle添加到_ready中 assert isinstance(handle, events.Handle), 'A Handle is required here' if handle._cancelled: return assert not isinstance(handle, events.TimerHandle) self._ready.append(handle) def _remove_reader(self, fd): # 如果事件循環已經關閉了,就不用操作了 if self.is_closed(): return False try: # 查詢文件描述符是否在selector中 key = self._selector.get_key(fd) except KeyError: # 不存在則返回 return False else: # 存在則進入移除的工作 mask, (reader, writer) = key.events, key.data mask &= ~selectors.EVENT_READ if not mask: # 移除已經注冊到selector的文件描述符 self._selector.unregister(fd) else: self._selector.modify(fd, mask, (None, writer)) if reader is not None: reader.cancel() return True else: return False從代碼中可以看出_process_events會對事件對應的文件描述符進行處理,並從事件回調中獲取到對應的Handle對象添加到self._ready中,由EventLoop在接下來遍歷self._ready並執行。
可以看到網絡IO事件的處理並不復雜,因為系統事件循環已經為我們做了很多工作了,但是用戶所有與網絡IO相關的操作都需要有一個類似的操作,這樣是非常的繁瑣的,幸好asyncio庫已經為我們做了封裝,我們只要調用就可以了,方便了很多。
到此這篇關於Python Asyncio調度原理詳情的文章就介紹到這了,更多相關Python Asyncio 內容請搜索軟件開發網以前的文章或繼續浏覽下面的相關文章希望大家以後多多支持軟件開發網!
 解決python報錯UnicodeDecodeError: ‘utf-8‘ codec can‘t decode byte 0xff in position 0: invalid start byte
解決報錯UnicodeDecodeError: ‘utf-8