#pip install 模塊
wordcloud
matplotlib #數據可視化
jieba #分詞庫
pillow
numpy
可能出現的問題:
wordcloud安裝需要visual C++14.0 whl安裝
wordcloud()參數解釋:
1、可以在電腦自帶的字體中選擇,復制到運行腳本路徑下,也可指定路徑;
C:\Windows\Fonts
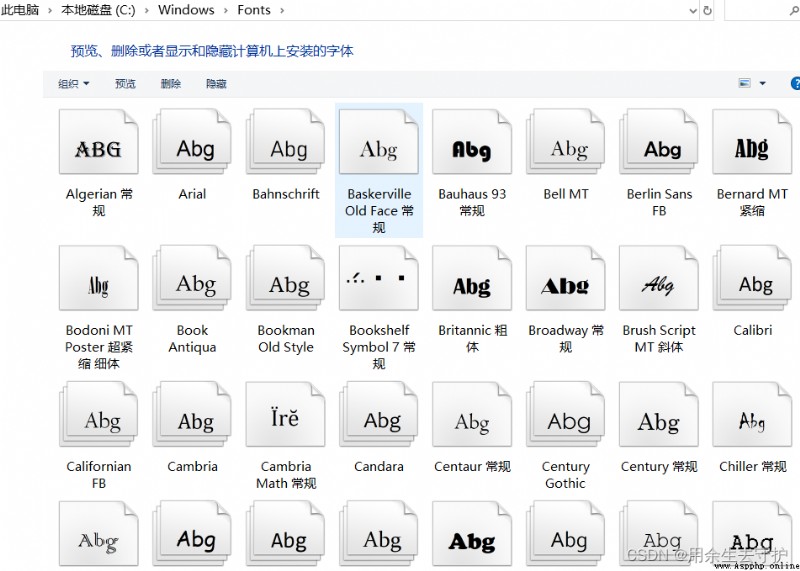
2、下載其它喜歡的字體放到指定路徑下;
注:這裡提供了一些字體,可自行下載;
中文:
與你交流,就像與自己的靈魂在耳語,自由,讓心跳的聲音呼之欲出,真想伸出雙臂與你進行一次心貼心的擁抱窗外寂靜無聲。唯獨冬雨拍打台階的聲音猶如琴音圍爐,已經是夢想中的奢望甚至無須。有金駿眉陪,足矣浪漫隱藏在煙圈之中,以一個思想者的姿態靜坐,思緒感覺已經和你水乳交融。唇齒生香不僅僅來源於杯中的香茗仿佛是等待一場期待已久的約會瑣碎的日子也被潤澤得雲蒸霞蔚實際上,你讀著我的書心迷神醉你的靈魂已經變成奔向我的異鄉人我是終究要牽你手的。這也許就是江湖。溫馨,讓憂傷與我無緣我也不會讓疼痛,在你心裡暗藏一場雪已經送來彼此的關切
從窪得不能再窪的地方起步。像一個坐標軸上的負數,更像一塊會走動的稜角分明的石頭。生活是刀,削鐵如泥它切割著我,我磨砺著它。終於有一天我走到了坐標軸上的零點。
我還是沒有圓滑。而生活也沒有更柔軟。我把目光,投向看不見的遠方。我把背影,留給回不去的故鄉。铿锵的步履猶如駿馬的蹄聲一度成為故鄉的傳奇。
而正道,從來就不是一條直線。九曲十八彎的路上。我的淚水可以被路邊一朵小花引出。泰山壓頂卻改變不了我平視的眼神。妥協深藏我的脊梁怎麼也彎不下來。這就是我半生的經歷。我已經沒有余力去改變。夕陽晚照裡唯一的預見就是回歸。回歸成那個窪得不能再窪的地方的一塊石頭這些,你不知道。你不知道,我不怪你。
英文:
Three passions, simple but overwhelmingly strong, have governed my life: the longing for love, the search for knowledge,
and unbearable pity for the suffering of mankind. These passions, like great winds, have blown me hither and thither, in a
wayward course, over a deep ocean of anguish, reaching to the verge of despair. I have sought love, first, because it brings
ecstasy --- ecstasy so great that I would have sacrificed all the rest of life for a few hours of this joy. I have sought it, next,
because it relieves loneliness --- that terrible loneliness in which one shivering consciousness looks over the rim of the world
into cold unfathomable lifeless abyss. I have sought it, finally, because in the union of love I have seen, in a mystic miniature,
the prefiguring vision of the heaven that saints and poets have imagined. This is what I sought, and though it might seem
too good for human life, this is what --- at last --- I have found. With equal passion I have sought knowledge. I have wished
to understand the hearts of men, I have wished to know why the stars shine. And I have tried to apprehend the Pythagorean
power by which number holds away above the flux. A little of this, but not much, I have achieved. Love and knowledge, so
far as they were possible, led upward toward the heavens. But always pity brought me back to earth. Echoes of cries of pain
reverberated in my heart. Children in famine, victims tortured by oppressors, helpless old people a hated burden to their sons,
and the whole world of loneliness, poverty, and pain make a mockery of what human life should be. I long to alleviate the evil,
but I cannot, and I too suffer. This has been my life. I have found it worth living, and I would gladly live it again if the chance
were offered to me.
效果如下:
代碼如下:
##chinese
from wordcloud import WordCloud
import matplotlib.pyplot as plt
# 打開文本
text = open("bulletchinese.txt", encoding="utf-8").read()
# 生成對象
wc = WordCloud(font_path="msyh.ttc", width=800, height=600, mode="RGBA", background_color=None).generate(text)
# 顯示詞雲
plt.imshow(wc, interpolation='bilinear')
plt.axis("off")
plt.show()
# 保存到文件
wc.to_file("bulletchinese.png")
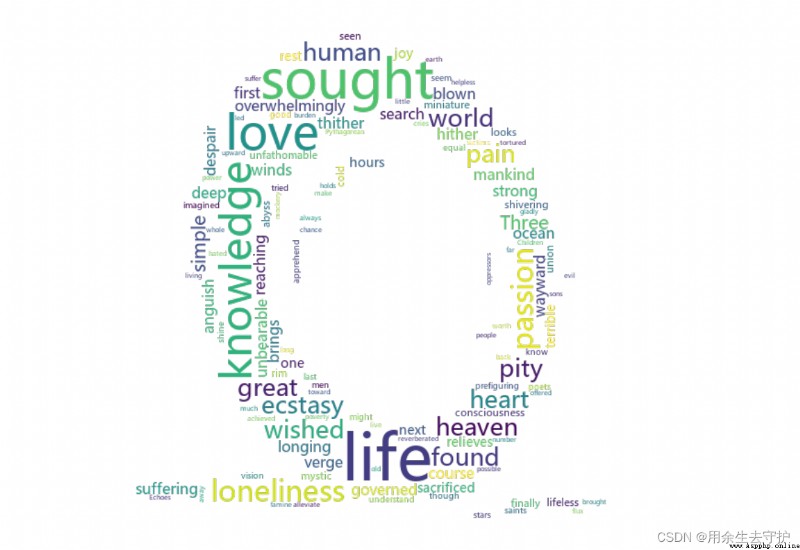
效果如下: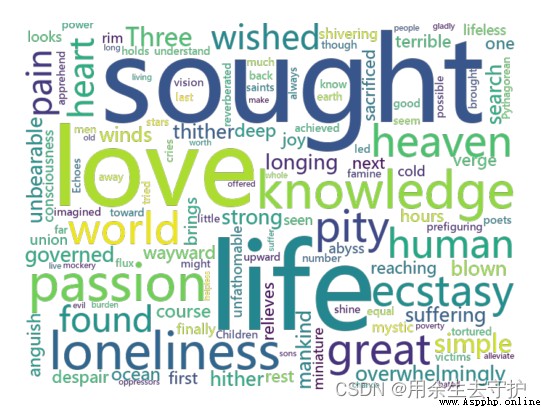
代碼如下
from wordcloud import WordCloud
import matplotlib.pyplot as plt
# 打開文本
text = open("bulletEnglish.txt", encoding="utf-8").read()
# print(text)
# print(type(text)) # <class 'str'>
# 生成對象
#wc = WordCloud().generate(text)
wc = WordCloud(font_path="msyh.ttc", width=800, height=600, mode="RGBA", background_color=None).generate(text)
# 顯示詞雲
plt.imshow(wc, interpolation='bilinear') # interpolation設置插值,設置顏色、排列等
plt.axis("off") # 關閉坐標軸
plt.show()
# 將詞雲圖片保存到文件
wc.to_file("bulletEnglish.png")
效果如下: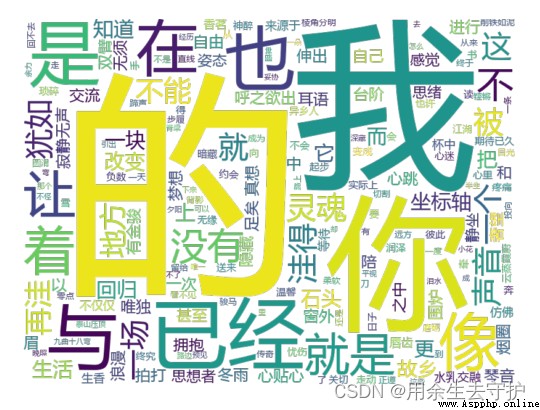
代碼如下:
from wordcloud import WordCloud
import matplotlib.pyplot as plt
import jieba
# 打開文本
text = open("bulletchinese.txt", encoding="utf-8").read()
# 中文分詞
text = ' '.join(jieba.cut(text)) # 利用jieba進行分詞形成列表,將列表裡面的詞用空格分開並拼成長字符串。
print(text[:10000]) # 打印前100個字符
# 生成對象
wc = WordCloud(font_path="msyh.ttc", width=800, height=600, mode="RGBA", background_color=None).generate(text)
# 顯示詞雲
plt.imshow(wc, interpolation="bilinear")
plt.axis("off")
plt.show()
# 保存到文件
wc.to_file("bulletchinese2.png")
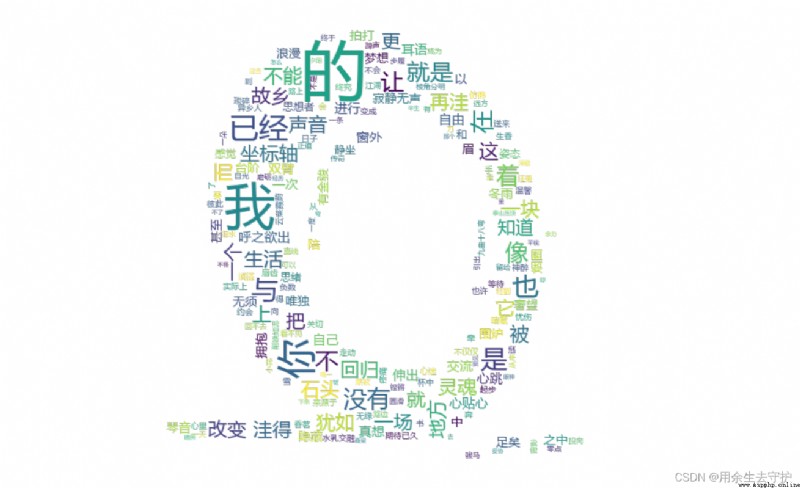
效果如下:
代碼如下:
from wordcloud import WordCloud
from PIL import Image
import numpy as np
import matplotlib.pyplot as plt
import jieba
# 打開文件
text = open("bulletchinese.txt", encoding="utf-8").read()
# 中文分詞
text = ' '.join(jieba.cut(text))
print(text[:1000])
# 生成對象
mask = np.array(Image.open("background.png")) # 使用蒙版圖片
wc = WordCloud(mask=mask, font_path="msyh.ttc", width=800, height=600, mode="RGBA", background_color=None).generate(text)
# 顯示詞雲
plt.imshow(wc, interpolation="bilinear")
plt.axis("off")
plt.show()
#保存文件
wc.to_file("bulletchinese3.png")
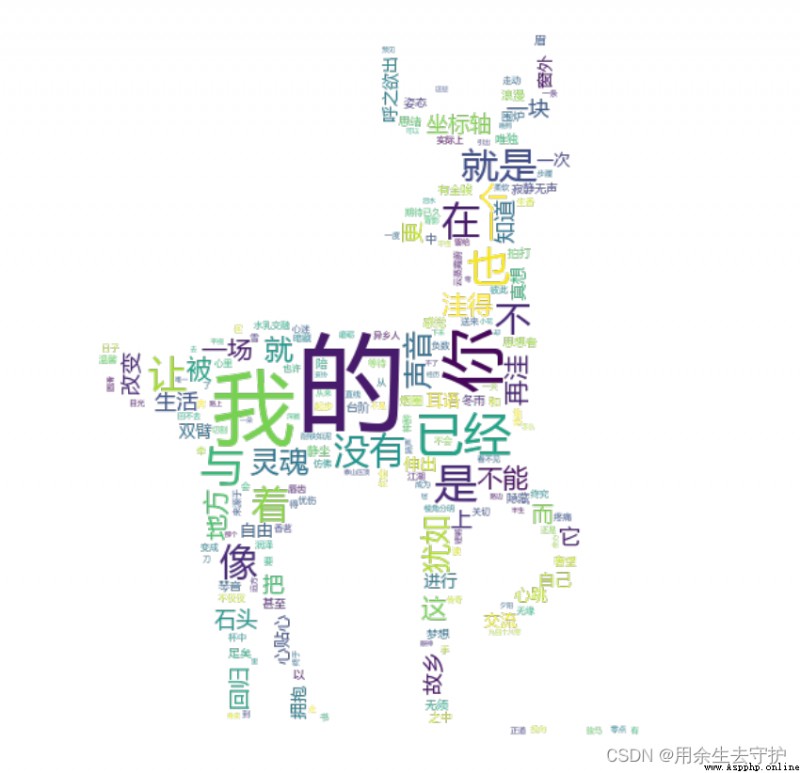
效果如下:
代碼如下:
from wordcloud import WordCloud, ImageColorGenerator
from PIL import Image
import numpy as np
import matplotlib.pyplot as plt
import jieba
# 打開文件
text = open("bulletchinese.txt", encoding="utf-8").read()
# 中文分詞
text = ' '.join(jieba.cut(text))
print(text[:1000])
# 生成對象
mask = np.array(Image.open("background1.png"))
wc = WordCloud(mask=mask, font_path="msyh.ttc", width=1000, height=800,mode="RGBA", background_color=None).generate(text)
# 從圖片中生成顏色
image_colors = ImageColorGenerator(mask)
wc.recolor(color_func=image_colors)
# 顯示詞雲
plt.imshow(wc, interpolation="bilinear")
plt.axis("off")
plt.show()
# 保存文件
wc.to_file("bulletchinese4.png")
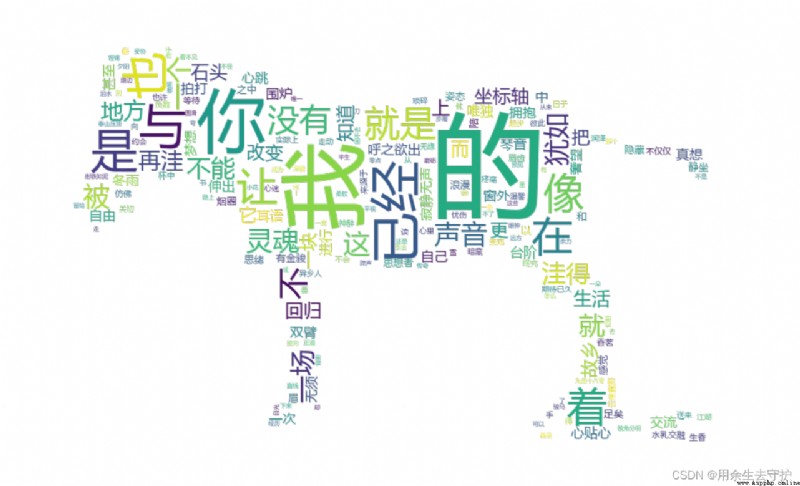
效果如下:
代碼如下:
from wordcloud import WordCloud
from PIL import Image
import numpy as np
import matplotlib.pyplot as plt
import random
import jieba
# 打開文本
text = open("bulletchinese.txt", encoding="utf-8").read()
# 中文分詞
text = ' '.join(jieba.cut(text))
print(text[:1000])
# 顏色函數:(詞,詞的大小,詞的位置,詞的朝向,詞的路徑,隨機的狀態)
def random_color(word, font_size, position, orientation, font_path, random_state):
s = 'hsl(0, %d%%, %d%%)' % (random.randint(60, 80), random.randint(60, 80))
# hsl代表色相(Hue)、飽和度(saturation)、亮度(luminance)
print(s)
return s
# 生成對象
mask = np.array(Image.open("background.png"))
wc = WordCloud(color_func=random_color, mask=mask, font_path="msyh.ttc", mode="RGBA", background_color=None).generate(
text) # color_func=random_color即用函數來指定詞的顏色
# 顯示詞雲
plt.imshow(wc, interpolation="bilinear")
plt.axis("off")
plt.show()
# 保存到文件
wc.to_file("bulletchinese5.png")
效果如下: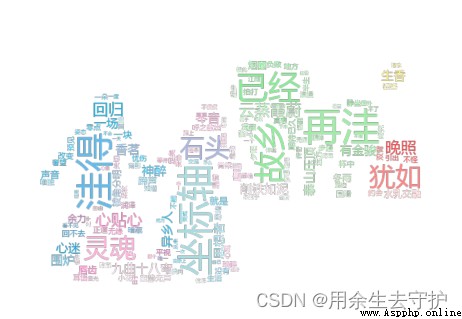
代碼如下:
from wordcloud import WordCloud, ImageColorGenerator
from PIL import Image
import numpy as np
import matplotlib.pyplot as plt
import jieba.analyse # 用於提取關鍵詞
# 打開文本
text = open("bulletchinese.txt", encoding="utf-8").read()
# 提取關鍵詞和權重
freq = jieba.analyse.extract_tags(text, topK=200, withWeight=True) # 提取文件中的關鍵詞,topK表示提取的數量,withWeight=True表示會返回關鍵詞的權重。
print(freq[:200])
freq = {
i[0]: i[1] for i in freq} # 字典
# 生成對象
mask = np.array(Image.open("background2.png"))
wc = WordCloud(mask=mask, font_path="msyh.ttc", mode="RGBA", background_color=None).generate_from_frequencies(freq)
# 從圖片中生成顏色
image_colors = ImageColorGenerator(mask)
wc.recolor(color_func=image_colors)
# 顯示詞雲
plt.imshow(wc, interpolation="bilinear")
plt.axis("off")
plt.show()
# 保存文件
wc.to_file("bulletchinese6.png")
資源下載
分享:
在孤獨中有時飽含著屈辱和忍耐,又醞釀著憤怒和抗爭。此時的沉寂往往蘊藏著強大的爆發力。生命中最孤獨的時刻,往往會成為人生的催化劑。
 [where is the way for the brick movers to attack?]---- Python learning summary
Active address : Graduation se
 Python 3.9 install RSA decryption module pycryptodome (available for 2021/12/22 pro test)
1、cmd Direct installation &nbs