大家好,又見面了,我是你們的朋友全棧君。
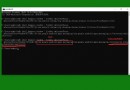
pip install pygameC:\Users> pip install pygame
Collecting pygame
Downloading https://files.pythonhosted.org/packages/3e/f5/feabd88a2856ec86166a897b62bfad828bfe7a94a27cbd7ebf07fd
70399/pygame-1.9.4-cp37-cp37m-win_amd64.whl (4.2MB)
100% |██████████████████████████| 4.2MB 6.6MB/s
Installing collected packages: pygam
Successfully installed pygame-1.9.4 模塊名
功能
pygame.cdrom
訪問光驅
pygame.cursors
加載光標
pygame.display
訪問顯示設備
pygame.draw
繪制形狀、線和點
pygame.event
管理事件
pygame.font
使用字體
pygame.image
加載和存儲圖片
pygame.joystick
使用游戲手柄或者類似的東西
pygame.key
讀取鍵盤按鍵
pygame.mixer
聲音
pygame.mouse
鼠標
pygame.movie
播放視頻
pygame.music
播放音頻
pygame.overlay
訪問高級視頻疊加
pygame.rect
管理矩形區域
pygame.scrap
本地剪貼板訪問
pygame.sndarray
操作聲音數據
pygame.sprite
操作移動圖像
pygame.surface
管理圖像和屏幕
pygame.surfarray
管理點陣圖像數據
pygame.time
管理時間和幀信息
pygame.transform
縮放和移動圖像
簡單示例:
import pygame
import sys
pygame.init() # 初始化pygame
size = width, height = 320, 240 # 設置窗口大小
screen = pygame.display.set_mode(size) # 顯示窗口
while True: # 死循環確保窗口一直顯示
for event in pygame.event.get(): # 遍歷所有事件
if event.type == pygame.QUIT: # 如果單擊關閉窗口,則退出
sys.exit()
pygame.quit() # 退出pygame執行結果:
創建一個游戲窗口,然後在窗口內創建一個小球。以一定的速度移動小球,當小球碰到游戲窗口的邊緣時,小球彈回,繼續運動按照如下步驟實現該功能:
1. 創建一個游戲窗口,寬和高設置為640*480。代碼如下:
import sys
import pygame
pygame.init() # 初始化pygame
size = width, height = 640, 480 # 設置窗口大小
screen = pygame.display.set_mode() # 顯示窗口上述代碼中,首先導入pygame模塊,然後調用init()方法初始化pygame模塊,接下來,設置窗口的寬和高,最後使用display模塊顯示窗體。
display模塊的常用方法
方法名
功能
pygame.display.init()
初始化display模塊
pygame.display.quit()
結束display模塊
pygame.display.get_init()
如果display模塊已經被初始化,則返回True
pygame.display.set_mode()
初始化一個准備顯示的界面
pygame.display.get_surface()
獲取當前的Surface對象
pygame.display.flip()
更新整個待顯示的Surface對象到屏幕上
pygame.display.update()
更新部分內容顯示到屏幕上,如果沒有參數,則與flip功能相同(上一條)
2. 運行第一步的代碼後會出現一個一閃而過的黑色窗口,這是因為程序執行完成後,會自動關閉。如果想要讓窗口一直顯示,需要使用while True讓程序一直執行,此外,還需要設置關閉按鈕。具體代碼如下:
import pygame
import sys
pygame.init() # 初始化pygame
size = width, height = 320, 240 # 設置窗口大小
screen = pygame.display.set_mode(size) # 顯示窗口
while True: # 死循環確保窗口一直顯示
for event in pygame.event.get(): # 遍歷所有事件
if event.type == pygame.QUIT: # 如果單擊關閉窗口,則退出
sys.exit()
pygame.quit() # 退出pygame上述代碼中添加了輪詢事件檢測。pygame.event.get()能夠獲取事件隊列,使用for...in遍歷事件,然後根據type屬性判斷事件類型。這裡的事件處理方式與GUI類似,如event.type等於pygame.QUIT表示檢測到關閉pygame窗口事件,pygame.KEYDOWN表示鍵盤按下事件,pygame.MOUSEBUTTONDOWN表示鼠標按下事件等。
開發過程中使用的圖片
3. 在窗口添加小球。我們先准備好一張ball.png 圖片,然後加載該圖片,最後將圖片顯示在窗口中,具體代碼如下:
import pygame
import sys
pygame.init() # 初始化pygame
size = width, height = 640, 480 # 設置窗口大小
screen = pygame.display.set_mode(size) # 顯示窗口
color = (0, 0, 0) # 設置顏色
ball = pygame.image.load('ball.png') # 加載圖片
ballrect = ball.get_rect() # 獲取矩形區域
while True: # 死循環確保窗口一直顯示
for event in pygame.event.get(): # 遍歷所有事件
if event.type == pygame.QUIT: # 如果單擊關閉窗口,則退出
sys.exit()
screen.fill(color) # 填充顏色(設置為0,執不執行這行代碼都一樣)
screen.blit(ball, ballrect) # 將圖片畫到窗口上
pygame.display.flip() # 更新全部顯示
pygame.quit() # 退出pygame上述代碼中使用iamge模塊的load()方法加載圖片,返回值ball是一個Surface對象。Surface是用來代表圖片的pygame對象,可以對一個Surface對象進行塗畫、變形、復制等各種操作。事實上,屏幕也只是一個Surface,pygame.display.set_mode()就返回了一個屏幕Surface對象。如果將ball這個Surface對象畫到screen Surface 對象,需要使用blit()方法,最後使用display模塊的flip()方法更新整個待顯示的Surface對象到屏幕上。
Surface對象的常用方法
方法名
功能
pygame.Surface.blit()
將一個圖像畫到另一個圖像上
pygame.Surface.convert()
轉換圖像的像素格式
pygame.Surface.convert_alpha()
轉化圖像的像素格式,包含alpha通道的轉換
pygame.Surface.fill()
使用顏色填充Surface
pygame.Surface.get_rect()
獲取Surface的矩形區域
4. 下面讓小球動起來,ball.get_rect()方法返回值ballrect是一個Rect對象,該對象有一個move()方法可以用於移動矩形。move(x, y)函數有兩個參數,第一個參數是 X 軸移動的距離,第二個參數是 Y 軸移動的距離。窗口的左上角是(0, 0),如果是move(100, 50)就是左移100下移50。
為實現小球不停移動,將move()函數添加到while循環內,具體代碼如下:
import pygame
import sys
pygame.init() # 初始化pygame
size = width, height = 640, 480 # 設置窗口大小
screen = pygame.display.set_mode(size) # 顯示窗口
color = (0, 0, 0) # 設置顏色
ball = pygame.image.load('ball.png') # 加載圖片
ballrect = ball.get_rect() # 獲取矩形區域
speed = [5, 5] # 設置移動的X軸、Y軸
while True: # 死循環確保窗口一直顯示
for event in pygame.event.get(): # 遍歷所有事件
if event.type == pygame.QUIT: # 如果單擊關閉窗口,則退出
sys.exit()
ballrect = ballrect.move(speed) # 移動小球
screen.fill(color) # 填充顏色(設置為0,執不執行這行代碼都一樣)
screen.blit(ball, ballrect) # 將圖片畫到窗口上
pygame.display.flip() # 更新全部顯示
pygame.quit() # 退出pygame5. 運行上述代碼,發現小球在屏幕中一閃而過,此時,小球並沒有真正消失,而是移動到窗體之外,此時需要添加碰撞檢測的功能。當小球與窗體任一邊緣發生碰撞,則更改小球的移動方向,具體代碼如下:
import pygame
import sys
pygame.init() # 初始化pygame
size = width, height = 640, 480 # 設置窗口大小
screen = pygame.display.set_mode(size) # 顯示窗口
color = (0, 0, 0) # 設置顏色
ball = pygame.image.load('ball.png') # 加載圖片
ballrect = ball.get_rect() # 獲取矩形區域
speed = [5, 5] # 設置移動的X軸、Y軸
while True: # 死循環確保窗口一直顯示
for event in pygame.event.get(): # 遍歷所有事件
if event.type == pygame.QUIT: # 如果單擊關閉窗口,則退出
sys.exit()
ballrect = ballrect.move(speed) # 移動小球
# 碰到左右邊緣
if ballrect.left < 0 or ballrect.right > width:
speed[0] = -speed[0]
# 碰到上下邊緣
if ballrect.top < 0 or ballrect.bottom > height:
speed[1] = -speed[1]
screen.fill(color) # 填充顏色(設置為0,執不執行這行代碼都一樣)
screen.blit(ball, ballrect) # 將圖片畫到窗口上
pygame.display.flip() # 更新全部顯示
pygame.quit() # 退出pygame上述代碼中,添加了碰撞檢測功能。如果碰到左右邊緣,更改X軸數據為負數,如果碰到上下邊緣,更改Y軸數據為負數。
6. 運行上述代碼看似有很多球,這是因為運行上述代碼的時間非常短,運行快的錯覺,使用pygame的time模塊,使用pygame時鐘之前,必須先創建Clock對象的一個實例,然後在while循環中設置多長時間運行一次。
import pygame
import sys
pygame.init() # 初始化pygame
size = width, height = 640, 480 # 設置窗口大小
screen = pygame.display.set_mode(size) # 顯示窗口
color = (0, 0, 0) # 設置顏色
ball = pygame.image.load('ball.png') # 加載圖片
ballrect = ball.get_rect() # 獲取矩形區域
speed = [5, 5] # 設置移動的X軸、Y軸
clock = pygame.time.Clock() # 設置時鐘
while True: # 死循環確保窗口一直顯示
clock.tick(60) # 每秒執行60次
for event in pygame.event.get(): # 遍歷所有事件
if event.type == pygame.QUIT: # 如果單擊關閉窗口,則退出
sys.exit()
ballrect = ballrect.move(speed) # 移動小球
# 碰到左右邊緣
if ballrect.left < 0 or ballrect.right > width:
speed[0] = -speed[0]
# 碰到上下邊緣
if ballrect.top < 0 or ballrect.bottom > height:
speed[1] = -speed[1]
screen.fill(color) # 填充顏色(設置為0,執不執行這行代碼都一樣)
screen.blit(ball, ballrect) # 將圖片畫到窗口上
pygame.display.flip() # 更新全部顯示
pygame.quit() # 退出pygameFlappy Bird是一款鳥類飛行游戲,一根手指操控按下小鳥上飛。
分析 在Flappy Bird游戲中,主要有兩個對象:小鳥、管道。可以創建Brid類和Pineline類來分別表示這兩個對象。小鳥可以通過上下移動來躲避管道,所以在Brid類中創建一個bridUpdate()方法,實現小鳥的上下移動,為了體現小鳥向前飛行的特征,可以讓管道一直向左側移動,這樣在窗口中就好像小鳥在向前飛行。所以在Pineline類中也創建一個updatePipeline()方法,實現管道的向左側移動。此外還創建了3個函數:createMap()函數用於繪制地圖;checkDead()函數用於判斷小鳥的生命狀態;getResult()函數用於獲取最終分數。最後在主邏輯中實例化並調用相關方法,實現相應的功能。
# -*- coding:utf-8 -*-
import sys # 導入sys模塊
import pygame # 導入pygame模塊
import random
class Bird(object):
"""定義一個鳥類"""
def __init__(self):
"""定義初始化方法"""
pass
def birdUpdate(self):
pass
class Pipeline(object):
"""定義一個管道類"""
def __init__(self):
"""定義初始化方法"""
def updatePipeline(self):
"""水平移動"""
def createMap():
"""定義創建地圖的方法"""
screen.fill((255, 255, 255)) # 填充顏色(screen還沒定義不要著急)
screen.blit(background, (0, 0)) # 填入到背景
pygame.display.update() # 更新顯示
if __name__ == '__main__':
pygame.init() # 初始化pygame
size = width, height = 400, 650 # 設置窗口大小
screen = pygame.display.set_mode(size) # 顯示窗口
clock = pygame.time.Clock() # 設置時鐘
Pipeline = Pipeline() # 實例化管道類
while True:
clock.tick(60) # 每秒執行60次
# 輪詢事件
for event in pygame.event.get():
if event.type == pygame.QUIT: # 如果檢測到事件是關閉窗口
sys.exit()
background = pygame.image.load("assets/background.png") # 加載背景圖片
createMap()
pygame.quit() # 退出執行結果:
開發過程中使用的圖片
創建小鳥類、創建管道類、計算得分、碰撞檢測
import pygame
import sys
import random
class Bird(object):
"""定義一個鳥類"""
def __init__(self):
"""定義初始化方法"""
self.birdRect = pygame.Rect(65, 50, 50, 50) # 鳥的矩形
# 定義鳥的3種狀態列表
self.birdStatus = [pygame.image.load("assets/1.png"),
pygame.image.load("assets/2.png"),
pygame.image.load("assets/dead.png")]
self.status = 0 # 默認飛行狀態
self.birdX = 120 # 鳥所在X軸坐標,即是向右飛行的速度
self.birdY = 350 # 鳥所在Y軸坐標,即上下飛行高度
self.jump = False # 默認情況小鳥自動降落
self.jumpSpeed = 10 # 跳躍高度
self.gravity = 5 # 重力
self.dead = False # 默認小鳥生命狀態為活著
def birdUpdate(self):
if self.jump:
# 小鳥跳躍
self.jumpSpeed -= 1 # 速度遞減,上升越來越慢
self.birdY -= self.jumpSpeed # 鳥Y軸坐標減小,小鳥上升
else:
# 小鳥墜落
self.gravity += 0.2 # 重力遞增,下降越來越快
self.birdY += self.gravity # 鳥Y軸坐標增加,小鳥下降
self.birdRect[1] = self.birdY # 更改Y軸位置
class Pipeline(object):
"""定義一個管道類"""
def __init__(self):
"""定義初始化方法"""
self.wallx = 400 # 管道所在X軸坐標
self.pineUp = pygame.image.load("assets/top.png")
self.pineDown = pygame.image.load("assets/bottom.png")
def updatePipeline(self):
""""管道移動方法"""
self.wallx -= 5 # 管道X軸坐標遞減,即管道向左移動
# 當管道運行到一定位置,即小鳥飛越管道,分數加1,並且重置管道
if self.wallx < -80:
global score
score += 1
self.wallx = 400
def createMap():
"""定義創建地圖的方法"""
screen.fill((255, 255, 255)) # 填充顏色
screen.blit(background, (0, 0)) # 填入到背景
# 顯示管道
screen.blit(Pipeline.pineUp, (Pipeline.wallx, -300)) # 上管道坐標位置
screen.blit(Pipeline.pineDown, (Pipeline.wallx, 500)) # 下管道坐標位置
Pipeline.updatePipeline() # 管道移動
# 顯示小鳥
if Bird.dead: # 撞管道狀態
Bird.status = 2
elif Bird.jump: # 起飛狀態
Bird.status = 1
screen.blit(Bird.birdStatus[Bird.status], (Bird.birdX, Bird.birdY)) # 設置小鳥的坐標
Bird.birdUpdate() # 鳥移動
# 顯示分數
screen.blit(font.render('Score:' + str(score), -1, (255, 255, 255)), (100, 50)) # 設置顏色及坐標位置
pygame.display.update() # 更新顯示
def checkDead():
# 上方管子的矩形位置
upRect = pygame.Rect(Pipeline.wallx, -300,
Pipeline.pineUp.get_width() - 10,
Pipeline.pineUp.get_height())
# 下方管子的矩形位置
downRect = pygame.Rect(Pipeline.wallx, 500,
Pipeline.pineDown.get_width() - 10,
Pipeline.pineDown.get_height())
# 檢測小鳥與上下方管子是否碰撞
if upRect.colliderect(Bird.birdRect) or downRect.colliderect(Bird.birdRect):
Bird.dead = True
# 檢測小鳥是否飛出上下邊界
if not 0 < Bird.birdRect[1] < height:
Bird.dead = True
return True
else:
return False
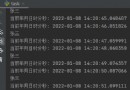
def getResutl():
final_text1 = "Game Over"
final_text2 = "Your final score is: " + str(score)
ft1_font = pygame.font.SysFont("Arial", 70) # 設置第一行文字字體
ft1_surf = font.render(final_text1, 1, (242, 3, 36)) # 設置第一行文字顏色
ft2_font = pygame.font.SysFont("Arial", 50) # 設置第二行文字字體
ft2_surf = font.render(final_text2, 1, (253, 177, 6)) # 設置第二行文字顏色
screen.blit(ft1_surf, [screen.get_width() / 2 - ft1_surf.get_width() / 2, 100]) # 設置第一行文字顯示位置
screen.blit(ft2_surf, [screen.get_width() / 2 - ft2_surf.get_width() / 2, 200]) # 設置第二行文字顯示位置
pygame.display.flip() # 更新整個待顯示的Surface對象到屏幕上
if __name__ == '__main__':
"""主程序"""
pygame.init() # 初始化pygame
pygame.font.init() # 初始化字體
font = pygame.font.SysFont("Arial", 50) # 設置字體和大小
size = width, height = 400, 650 # 設置窗口
screen = pygame.display.set_mode(size) # 顯示窗口
clock = pygame.time.Clock() # 設置時鐘
Pipeline = Pipeline() # 實例化管道類
Bird = Bird() # 實例化鳥類
score = 0
while True:
clock.tick(60) # 每秒執行60次
# 輪詢事件
for event in pygame.event.get():
if event.type == pygame.QUIT:
sys.exit()
if (event.type == pygame.KEYDOWN or event.type == pygame.MOUSEBUTTONDOWN) and not Bird.dead:
Bird.jump = True # 跳躍
Bird.gravity = 5 # 重力
Bird.jumpSpeed = 10 # 跳躍速度
background = pygame.image.load("assets/background.png") # 加載背景圖片
if checkDead(): # 檢測小鳥生命狀態
getResutl() # 如果小鳥死亡,顯示游戲總分數
else:
createMap() # 創建地圖
pygame.quit()執行結果:
發布者:全棧程序員棧長,轉載請注明出處:https://javaforall.cn/151683.html原文鏈接:https://javaforall.cn