Spring框架使用中注入為空是一個比較頭疼的問題,遇到Webservice和Spring框架配合時,這個問題更容易出現並很難發現問題的原因。
在做SSO系統中就遇到這樣的問題,在Service的實現類中注入Ibatis數據庫操作的Mapper一直為空,最終發現原因是xfire和Spring配合使用時和普通使用xfire的配置方式不同
xfire可以快速發布Webservice,通常情況下,只需要下邊幾個步驟。
1. 創建Service接口和實現類
例如SSOMethodsServices和SSOMethodsImpl
實現類中包括Spring注解形式的注入
@Autowired
private AccountMapper accountMapper;
2. 在web.xml中加入xfire的配置
<servlet>
    <servlet-name>XFireServlet</servlet-name>
    <display-name>XFire Servlet</display-name>
    <servlet-class>
        org.codehaus.xfire.transport.http.XFireConfigurableServlet
    </servlet-class>
  </servlet>

  <servlet-mapping>
    <servlet-name>XFireServlet</servlet-name>
    <url-pattern>/servlet/XFireServlet/*</url-pattern>
  </servlet-mapping>

  <servlet-mapping>
    <servlet-name>XFireServlet</servlet-name>
    <url-pattern>/services/*</url-pattern>
  </servlet-mapping>
3. 在classpath目錄下創建目錄META-INF>xifre->services.xml
在services.xml文件中配置服務
<?xml version="1.0" encoding="UTF-8"?>
<beans>
<service xmlns="http://xfire.codehaus.org/config/1.0">
    <name>SSOMethodsServices</name>
    <serviceClass>com.test.sso.SSOMethodsServices</serviceClass>
    <implementationClass>com.test.sso.impl.SSOMethodsImpl</implementationClass>
</service>
</beans>
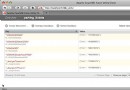
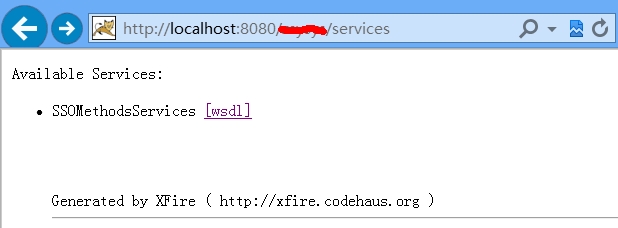
這樣,在浏覽器輸入 ip:port/projectname/services 就可以看到發布的Webservice,點擊wsdl可以看到wsdl文件。
但是用soapUI進行測試,發現注入的accountMapper為空。出現問題。
嘗試了直接手動注入,加@Component注解並添加包掃描等各種方法都無法注入,後來發現其實在xfire的example目錄下有spring的例子,采用了不同的配置方法,這種方式證明是有效的。
主要區別是:
1. servlet class使用org.codehaus.xfire.spring.XFireSpringServlet 而不是org.codehaus.xfire.transport.http.XFireConfigurableServlet。這一點是最關鍵的。
2. 使用一個xfire-servlet.xml配置文件配置服務而不是services.xml,在web.xml的context-param中添加xfire-servlet.xml。
3. 在applicationContext.xml中加入Webservice實現類的Bean。
具體配置如下,其中Service類和Impl類不變
web.xml中部分配置
<context-param>
    <param-name>contextConfigLocation</param-name>
    <param-value>/WEB-INF/applicationContext.xml,/WEB-INF/xfire-servlet.xml</param-value>
</context-param>

<servlet>
    <servlet-name>XFireServlet</servlet-name>
    <servlet-class>
        org.codehaus.xfire.spring.XFireSpringServlet
    </servlet-class>
</servlet>
<servlet-mapping>
    <servlet-name>XFireServlet</servlet-name>
    <url-pattern>/servlet/XFireServlet/*</url-pattern>
</servlet-mapping>
<servlet-mapping>
    <servlet-name>XFireServlet</servlet-name>
    <url-pattern>/services/*</url-pattern>
</servlet-mapping>
xfire-servlet.xml文件配置
<?xml version="1.0" encoding="UTF-8"?>
<!DOCTYPE beans PUBLIC "-//SPRING//DTD BEAN//EN" "http://www.springframework.org/dtd/spring-beans.dtd">
<beans>
    <!-- START SNIPPET: xfire -->
    <import resource="classpath:org/codehaus/xfire/spring/xfire.xml" />
    <bean class="org.springframework.web.servlet.handler.SimpleUrlHandlerMapping">
        <property name="urlMap">
            <map>
                <entry key="/SSOMethodsServices">
                    <ref bean="sso" />
                </entry>
            </map>
        </property>
    </bean>

    <!-- Declare a parent bean with all properties common to both services -->
    <bean id="sso" class="org.codehaus.xfire.spring.remoting.XFireExporter">
        <property name="serviceFactory">
            <ref bean="xfire.serviceFactory" />
        </property>
        <property name="xfire">
            <ref bean="xfire" />
        </property>
        <property name="serviceBean">
            <ref bean="SSOMethodsImpl" />
        </property>
        <property name="serviceClass">
            <value>com.test.sso.SSOMethodsServices</value>
        </property>
    </bean>
    <!-- END SNIPPET: xfire -->
</beans>
applicationContext.xml中加入一條Bean配置
<bean id="SSOMethodsImpl" class="com.test.sso.impl.SSOMethodsImpl" />
這樣的配置條件下,Webservice發布成功,並且accountMapper注入成功。