Spring Boot是對Spring快速入門的強大工具。Spring Boot能夠幫助你很容易地構建基於Spring的應 用。 Aerospike是分布式和可復制的內存數據庫,不管使用DRAM還是原生的flash/SSD,Aerospike都進行 了優化。 Aerospike具有高可靠性並且遵循ACID。開發人員能夠在不停止數據庫服務的情況下,很快地將 數據庫集群從兩個節點擴展到二十個節點。
你所要構建的是什麼
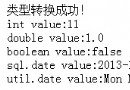
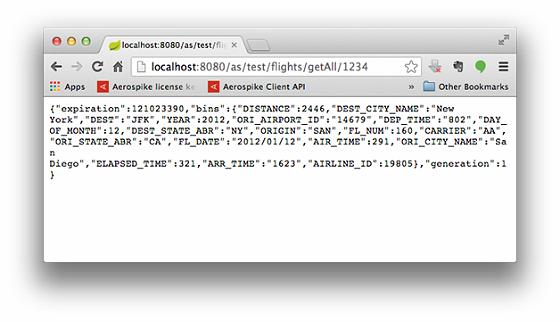
本文將會引領你使用Spring Boot創建一個簡單的RESTful Web服務。 要構建的服務接受一個HTTP GET 請求。它的響應是如下的JSON:
{"expiration":121023390,"bins":

{"DISTANCE":2446,"DEST_CITY_NAME":"New
York","DEST":"JFK","YEAR":2012,"ORI_AIRPORT_ID"

:"14679","DEP_TIME":
"802","DAY_OF_MONTH":12,"DEST_STATE_ABR":"NY","

ORIGIN":"SAN","FL_NUM"
:160,"CARRIER":"AA","ORI_STATE_ABR":"CA","FL_DA

TE":"2012/01/12",
"AIR_TIME":291,"ORI_CITY_NAME":"San

Diego","ELAPSED_TIME":321,
"ARR_TIME":"1623","AIRLINE_ID":19805},"generation":1

}
這裡所使用的數據是商業上的飛行航班詳情(包含在樣例代碼中,這是一個名為flights_from.csv的 數據文件,它包含了大約一百萬條航班信息)。
在產品化(或其他)環境中,還會有很多內置的特性添加到應用中以管理服務。這個功能來源於 Spring,參見Spring指導:Building a RESTful web service。
你所需要的是什麼
喜歡的文本編輯器或IDE
JDK 7或更高版本
Maven 3.0+
Aerospike Java SDK 3.0+
搭建工程
在構建應用的時候,你可以使用任何喜歡的構建系統,不過在這裡提供了Maven的代碼。如果你不熟悉 Maven的話,請參考Spring指導:Building Java Projects with Maven。
你還需要構建並安裝Aerospike的Java客戶端到本地Maven倉庫之中。下載源碼發布版本,將其進行進 行unzip/untar並運行如下的Maven命令:
mvn install:install-file -Dfile=client/depends/gnu-crypto.jar -DgroupId=org.gnu - DartifactId=gnu-crypto -Dversion=2.0.1 -Dpackaging=jar
mvn clean
mvn package
創建目錄結構
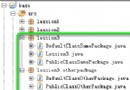
在你選擇的工程之中,創建如下所示的子目錄結構:
->src ->main ->java ->com ->aerospike ->client ->rest
創建Maven的pom文件
在工程的根目錄下創建一個maven的pom.xml,其代碼如下:
<?xml version="1.0" encoding="UTF-8"?>
<project xmlns="http://maven.apache.org/POM/4.0.0"
xmlns:xsi="http://www.w3.org/2001/XMLSchema-instance"
    xsi:schemaLocation="http://maven.apache.org/POM/4.0.0
http://maven.apache.org/xsd/maven-4.0.0.xsd">
      <modelVersion>4.0.0</modelVersion>
      <groupId>com.aerospike</groupId>
      <artifactId>aerospike-restful-example</artifactId>
      <version>1.0.0</version>
    <parent>
        <groupId>org.springframework.boot</groupId>
        <artifactId>spring-boot-starter-parent</artifactId>
        <version>0.5.0.M4</version>
    </parent>
      <dependencies>
        <dependency>
            <groupId>org.springframework.boot</groupId>
            <artifactId>spring-boot-starter-web</artifactId>
        </dependency>
        <dependency>
            <groupId>org.springframework.boot</groupId>
            <artifactId>spring-boot-starter-actuator</artifactId>
        </dependency>
            <!-- Aerospike client. -->
        <dependency>
              <groupId>com.aerospike</groupId>
              <artifactId>aerospike-client</artifactId>
              <version>3.0.9</version>
        </dependency>
        <!-- Apache command line parser. -->
        <dependency>
              <groupId>commons-cli</groupId>
              <artifactId>commons-cli</artifactId>
              <version>1.2</version>
        </dependency>
  </dependencies>

  <properties>
      <start-class>com.aerospike.client.rest.AerospikeRESTfulService
</start-class>
  </properties>

  <build>
      <plugins>
          <plugin>
              <artifactId>maven-compiler-plugin</artifactId>
              <version>2.3.2</version>
          </plugin>
          <plugin>
              <groupId>org.springframework.boot</groupId>
              <artifactId>spring-boot-maven-plugin</artifactId>
          </plugin>
      </plugins>
  </build>
  <repositories>
      <repository>
          <id>spring-snapshots</id>
          <name>Spring Snapshots</name>
          <url>http://repo.spring.io/libs-snapshot</url>
          <snapshots>
              <enabled>true</enabled>
          </snapshots>
      </repository>
  </repositories>
  <pluginRepositories>
      <pluginRepository>
          <id>spring-snapshots</id>
          <name>Spring Snapshots</name>
          <url>http://repo.spring.io/libs-snapshot</url>
          <snapshots>
              <enabled>true</enabled>
          </snapshots>
       </pluginRepository>
  </pluginRepositories>

</project>
乍看上去有些恐怖,但實際上並非如此。
創建一個JSON轉換類
Aerospike API會返回一個Record對象,它會包含記錄的generation、expiry以及bin值。但是你想讓 這些值以JSON格式返回。要達到這一點,最簡單的方式就是使用一個轉換類(translator class)。
所創建的轉換類代碼如下所示。這是一個工具類,能夠將Aerospike Record轉換為JSONObject。
src/main/java/com/aerospike/client/rest/JSONRecord.java
package com.aerospike.client.rest;
import java.util.Map;
import org.json.simple.JSONArray;
import org.json.simple.JSONObject;
import com.aerospike.client.Record;
/**
* JSONRecord is used to convert an Aerospike Record
* returned from the cluster to JSON format
*
*/
@SuppressWarnings("serial")
public class JSONRecord extends JSONObject {
      @SuppressWarnings("unchecked")
      public JSONRecord(Record record){
            put("generation", record.generation);
            put("expiration", record.expiration);
            put("bins", new JSONObject(record.bins));
            if (record.duplicates != null){
                  JSONArray duplicates = new JSONArray();
                  for (Map<String, Object> duplicate : record.duplicates){
                        duplicates.add(new JSONObject(duplicate));
                  }
                  put("duplicates", duplicates);
             }
       }
}
這個類並不復雜也很通用。你可能會希望為特定的記錄指定使用你的JSON轉換器。
創建資源控制器
在Spring中,REST端點(endpoint)是Spring MVC控制器。如下的代碼能夠處理對/as/{namespace}/ {set}/getAll/1234的GET請求,並會返回key為1234的航班記錄,在這裡{namespace}是針對Aerospike命 名空間的路徑變量,{set}是針對Aerospike集合的路徑變量。
src/main/java/com/aerospike/client/rest/RESTController.java
package com.aerospike.client.rest;
import java.io.BufferedReader;
import java.io.InputStreamReader;

import org.springframework.beans.factory.annotation.Autowired;
import org.springframework.stereotype.Controller;
import org.springframework.web.bind.annotation.PathVariable;
import org.springframework.web.bind.annotation.RequestMapping;
import org.springframework.web.bind.annotation.RequestMethod;
import org.springframework.web.bind.annotation.RequestParam;
import org.springframework.web.bind.annotation.ResponseBody;
import org.springframework.web.multipart.MultipartFile;
import com.aerospike.client.AerospikeClient;
import com.aerospike.client.Bin;
import com.aerospike.client.Key;
import com.aerospike.client.Record;
import com.aerospike.client.policy.Policy;
import com.aerospike.client.policy.WritePolicy;

@Controller
public class RESTController {
      @Autowired
      AerospikeClient client;
    @RequestMapping(value="/as/{namespace}/{set}/getAll/{key}",
method=RequestMethod.GET)
    public @ResponseBody JSONRecord getAll(@PathVariable
("namespace") String namespace,
            @PathVariable("set") String set,
            @PathVariable("key") String keyvalue) throws Exception {
    Policy policy = new Policy();
    Key key = new Key(namespace, set, keyvalue);
     Record result = client.get(policy, key);
     return new JSONRecord(result);
  }
}
針對人類用戶的控制器和針對REST端點控制器之間的區別在於響應體中要包含數據,在這個場景中也 就是一個JSON對象,它代表了從Aerospike讀取到的記錄。
@ResponseBody注解會告知Spring MVC將返回的對象寫入到響應體之中。
創建可執行的主類
現在要實現主方法來創建Spring MVC控制器,最簡單的方式就是使用SpringApplication幫助類。
src/main/java/com/aerospike/client/rest/AerospikeRESTfulService.java
package com.aerospike.client.rest;
import java.util.Properties;
import javax.servlet.MultipartConfigElement;
import org.apache.commons.cli.CommandLine;
import org.apache.commons.cli.CommandLineParser;
import org.apache.commons.cli.Options;
import org.apache.commons.cli.ParseException;
import org.apache.commons.cli.PosixParser;
import org.springframework.boot.SpringApplication;
import org.springframework.boot.autoconfigure.EnableAutoConfiguration;
import org.springframework.context.annotation.Bean;
import org.springframework.context.annotation.ComponentScan;
import org.springframework.context.annotation.Configuration;

import com.aerospike.client.AerospikeClient;
import com.aerospike.client.AerospikeException;
@Configuration
@EnableAutoConfiguration
@ComponentScan
public class AerospikeRESTfulService {
      @Bean
      public AerospikeClient asClient() throws AerospikeException {
            Properties as = System.getProperties();
            return new AerospikeClient(as.getProperty("seedHost"),
                  Integer.parseInt(as.getProperty("port")));
      }
      @Bean
      public MultipartConfigElement multipartConfigElement() {
            return new MultipartConfigElement("");
      }
      public static void main(String[] args) throws ParseException {
             Options options = new Options();
             options.addOption("h", "host", true,
                   "Server hostname (default: localhost)");
             options.addOption("p", "port", true, "Server port

(default: 3000)");
             // parse the command line args
             CommandLineParser parser = new PosixParser();
             CommandLine cl = parser.parse(options, args, false);
             // set properties
             Properties as = System.getProperties();
             String host = cl.getOptionValue("h", "localhost");
             as.put("seedHost", host);
             String portString = cl.getOptionValue("p", "3000");
             as.put("port", portString);
             // start app
             SpringApplication.run(AerospikeRESTfulService.class, args);
      }
}
這裡添加了@EnableAutoConfiguration注解:它會對一些內容進行默認的加載(如嵌入式的servlet容 器),這取決於類路徑的內容以及其他的一些事情。
它還使用了@ComponentScan注解,這個注解會告訴Spring掃描rest包來查找控制器(以及其他有注解 的組件類)。
最後,這個類還使用了@Configuration注解。它允許你將AerospikeClient實例配置為一個Spring的 bean。
這裡還定義了一個MultipartConfigElement bean。它能夠讓你使用這個服務處理POST操作。
主方法中大部分的主體內容都是讀取命令行參數以及系統屬性,以便指定Aerospike集群的seed主機和 端口。
非常簡單!
上傳數據
你可能希望往這個服務中上傳數據。要做到這一點的話,我們需要為RESTController類添加一個額外 的方法來處理上傳的文件。在這個例子中,這會是包含航行記錄的CSV文件。
src/main/java/com/aerospike/client/rest/RESTController.java
@Controller
public class RESTController {
   . . . (code omitted) . . .
   /*
    * CSV flights file upload
    */
   @RequestMapping(value="/uploadFlights", method=RequestMethod.GET)
   public @ResponseBody String provideUploadInfo() {
       return "You can upload a file by posting to this same URL.";
   }
   @RequestMapping(value="/uploadFlights", method=RequestMethod.POST)
   public @ResponseBody String handleFileUpload(@RequestParam("name") String name,
          @RequestParam("file") MultipartFile file){
     if (!file.isEmpty()) {
           try {
                 WritePolicy wp = new WritePolicy();
                 String line = "";
                 BufferedReader br = new BufferedReader(new
InputStreamReader(file.getInputStream()));
                 while ((line = br.readLine()) != null) {
                       // use comma as separator
                       String[] flight = line.split(",");

                       /*
                        * write the record to Aerospike
                        * NOTE: Bin names must not exceed 14 characters
                        */
                            client.put(wp,
                 new Key("test", "flights",flight[0].trim() ),
                 new Bin("YEAR", Integer.parseInt(flight[1].trim())),
                 new Bin("DAY_OF_MONTH", Integer.parseInt(flight[2].trim())),
                 new Bin("FL_DATE", flight[3].trim()),
                 new Bin("AIRLINE_ID", Integer.parseInt(flight[4].trim())),
                 new Bin("CARRIER", flight[5].trim()),
                 new Bin("FL_NUM", Integer.parseInt(flight[6].trim())),
                 new Bin("ORI_AIRPORT_ID", Integer.parseInt(flight[7].trim())),
                 new Bin("ORIGIN", flight[8].trim()),
                 new Bin("ORI_CITY_NAME", flight[9].trim()),
                 new Bin("ORI_STATE_ABR", flight[10].trim()),
                 new Bin("DEST", flight[11].trim()),
                 new Bin("DEST_CITY_NAME", flight[12].trim()),
                 new Bin("DEST_STATE_ABR", flight[13].trim()),
                 new Bin("DEP_TIME", Integer.parseInt(flight[14].trim())),
                 new Bin("ARR_TIME", Integer.parseInt(flight[15].trim())),
                 new Bin("ELAPSED_TIME", Integer.parseInt(flight[16].trim())),
                 new Bin("AIR_TIME", Integer.parseInt(flight[17].trim())),
                 new Bin("DISTANCE", Integer.parseInt(flight[18].trim()))
                            );
                            System.out.println("Flight [ID= " + flight[0]
                 + " , year=" + flight[1]
                 + " , DAY_OF_MONTH=" + flight[2]
                 + " , FL_DATE=" + flight[3]
                 + " , AIRLINE_ID=" + flight[4]
                 + " , CARRIER=" + flight[5]
                 + " , FL_NUM=" + flight[6]
                 + " , ORIGIN_AIRPORT_ID=" + flight[7]
                 + "]");
                        }
                        br.close();
                        return "You successfully uploaded " + name;
                  } catch (Exception e) {
          return "You failed to upload " + name + " => " +

e.getMessage();
                  }
            } else {
                  return "You failed to upload " + name +
" because the file was empty.";
              }
       }
}
新方法handleFileUpload()響應POST請求並且會讀取上傳的流,每次讀取一行。每一行解析後,會構 建一個Key對象和多個Bin對象,據此來形成Aerospike記錄。最後,調用Aerospike的put()方法,將記錄 存儲到Aerospike集群之中。
另外一個新方法provideUploadInfo()響應GET請求,並返回一條信息來表明允許進行上傳。
查看本欄目
上傳的客戶端應用
上傳可以通過任何你希望的方式來實現。不過,你可以使用下面這個單獨的Java類將數據上傳到服務 上。
src/test/java/com.aerospike.client.rest/FlightsUploader.java
package com.aerospike.client.rest;
import org.junit.Before;
import org.junit.Test;
import org.springframework.core.io.FileSystemResource;
import org.springframework.util.LinkedMultiValueMap;
import org.springframework.util.MultiValueMap;
import org.springframework.web.client.RestTemplate;

public class FilghtsUploader {
      private static final String TEST_FILE = "flights_from.csv";
      @Before
      public void setUp() throws Exception {
      }

      @Test
      public void upload() {
        RestTemplate template = new RestTemplate();
        MultiValueMap<String, Object> parts = new LinkedMultiValueMap
<String, Object>();
        parts.add("name", TEST_FILE);
        parts.add("file", new FileSystemResource(TEST_FILE));
        String response = template.postForObject
("http://localhost:8080/uploadFlights",parts, String.class);
        System.out.println(response);
      }
}
航班數據
這是來自2012年的真實數據,包括了大約一百萬條的記錄,所以請注意它需要幾分鐘的時間才能完成 上傳。
構建並運行服務
Maven的pom.xml會將服務打包為一個單獨的jar文件。使用如下的命令:
mvn clean package
這樣會生成獨立的web服務應用,它會打包為一個可運行的jar文件,位於target子目錄之中。這個jar 文件中包含了一個Tomcat的實例,所以你可以直接運行這個jar文件,而沒有必要將其安裝到應用服務器 之中。
java -jar aerospike-restful-example-1.0.0.jar
總結
恭喜你!你現在已經使用Spring開發了一個簡單的RESTful服務,並且連接到了Aerospike集群之中。
設計中的考量
目前,訪問控制是通過應用來處理的,並不是通過數據庫。因為認證過程會拖慢數據庫的速度,實際 上,所有的NoSQL數據庫均不支持這種功能。我們的大多數客戶更關注於提升的速度,而不是集成的認證 特性。
另外一個要求的通用特性就是兩個不同數據集之間的連接(join)。對於所有的分布式數據庫來講, 這都是一個挑戰,因為要連接的數據是分布式的。在本例中,開發人員必須在應用中實現連接。
完整的樣例代碼
樣例代碼