系統功能: 開發一個計算器服務CalculateService,這個服務包含加(plus)、減(minus)、乘 (multiply)
、除(divide)的操作。
開發前准備:
1、安裝Eclipse-jee;
2、下載Axis2的最新版本Axis2 1.4.1 Release,網址
http://ws.apache.org/axis2/download/1_4_1/download.cgi ,選擇Standard Binary Distribution
的.zip包即"axis2-1.4.1-bin.zip"這個文件,解壓縮得到的目錄名axis2-1.4.1,目錄內的文件結構 如
下:

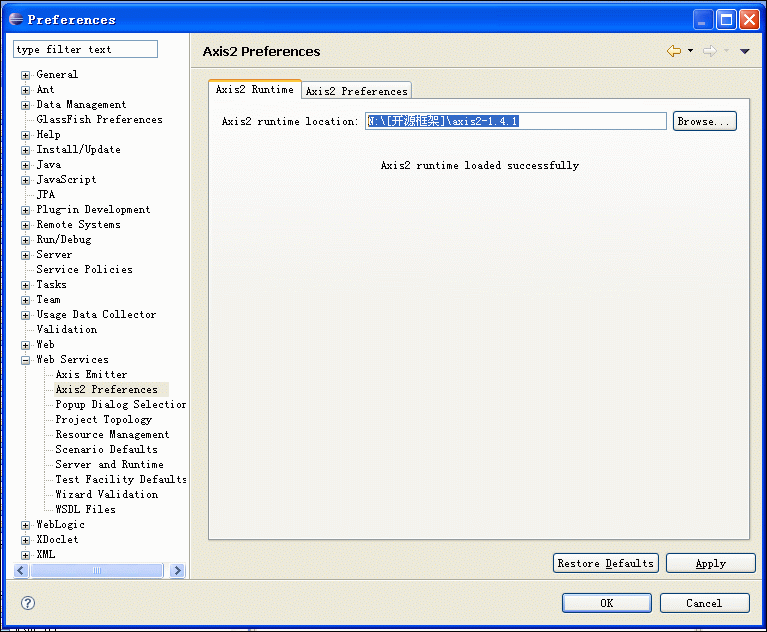
開發前配置:在Eclipse的菜單欄中,Window --> Preferences --> Web Service --> Axis2
Perferences,在Axis2 runtime location中選擇Axis2解壓縮包的位置,設置好後,點"OK"即行。(如 圖
)
開發Web Service:
1、新建一個Java Project,命名為"WS_01";
2、新建一個class,命名為"CalculateService",完整代碼如下:
package rong.service;

/** *//**

 * 計算器運算

 * @author rongxinhua

 *

 */

public class CalculateService {
    /** *//**

     * 加法運算

     * @param x 被加數

     * @param y 加數

     * @return x與y的和

     */

    public float plus(float x, float y){

        return x + y ;

    }

    /** *//**

     * 減法運算

     * @param x 被減數

     * @param y 減數

     * @return x與y之差

     */

    public float minus(float x, float y){

        return x - y ;

    }
    /** *//**

     * 乘法運算

     * @param x 被乘數

     * @param y 乘數

     * @return x與y的乘積

     */

    public float multiply(float x, float y){

        return x * y ;

    }
    /** *//**

     * 除法運算

     * @param x 被除數

     * @param y 除數

     * @return x與y的商

     */

    public float divide(float x, float y){

        return x / y ;

    }

}
3、在"WS_01"項目上new --> other,找到"Web Services"下面的"Web Service";
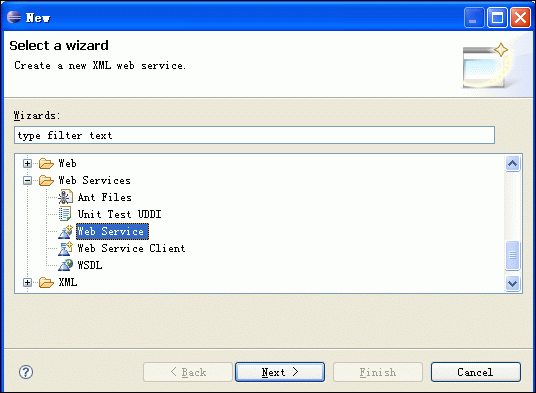
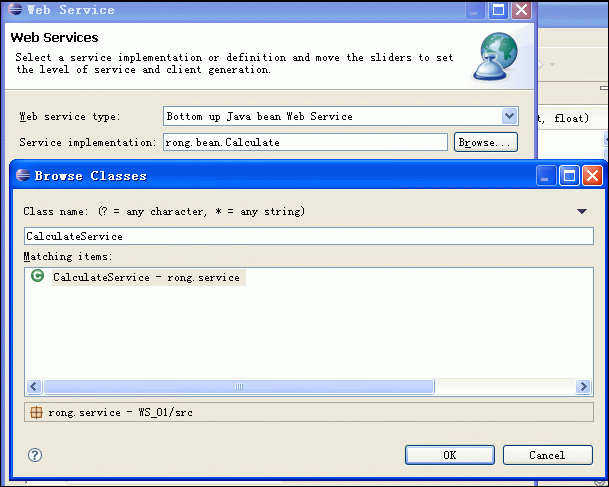
4、下一步(next),在出現的Web Services對象框,在Service implementation中點擊"Browse",進入
Browse Classes對象框,查找到我們剛才寫的寫的CalculateService類。(如下圖)。點擊"ok",則回到
Web Service話框。
5、在Web Service對話框中,將Web Service type中的滑塊,調到"start service“的位置,將 Client
type中的滑塊調到"Test client"的位置。
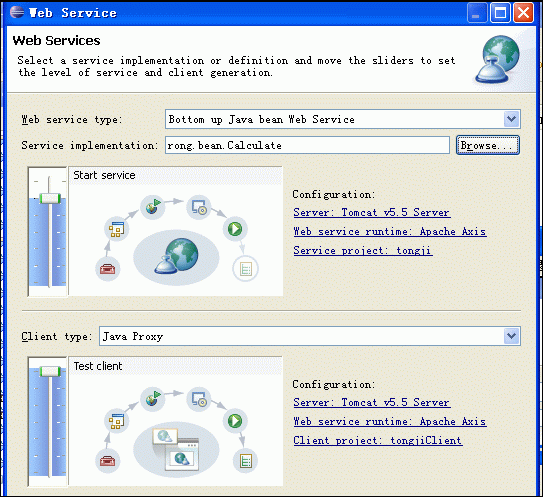
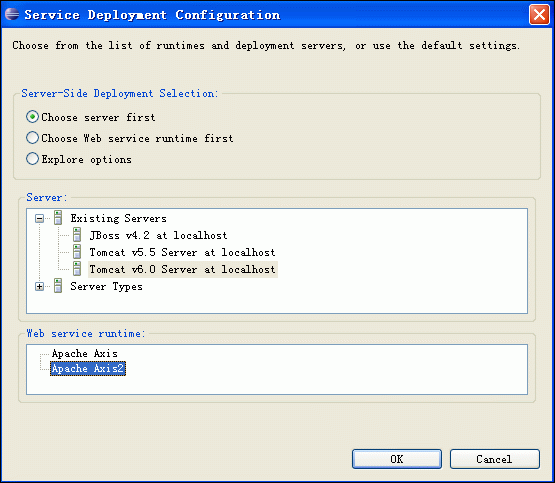
6、在Web Service type滑塊圖的右邊有個"Configuration",點擊它下面的選項,進入Service
Deployment Configuration對象框,在這裡選擇相應的Server(我這裡用Tomcat6.0)和Web Service
runtime(選擇Apache Axis2),如下圖:
7、點OK後,則返回到Web Service對話框,同理,Client type中的滑塊右邊也有"Configuration", 也
要進行相應的置,步驟同上。完成後,Next --> next即行。
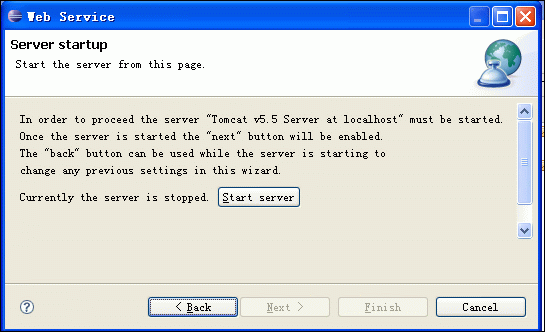
8、到了Server startup對話框,有個按鍵"start server"(如下圖),點擊它,則可啟動Tomcat服務 器
了。
9、等啟完後,點擊"next -- > next",一切默認即行,最後,點擊完成。最後,出現如下界面: (Web
Service Explorer),我們在這裡便可測試我們的Web服務。

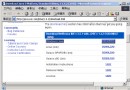
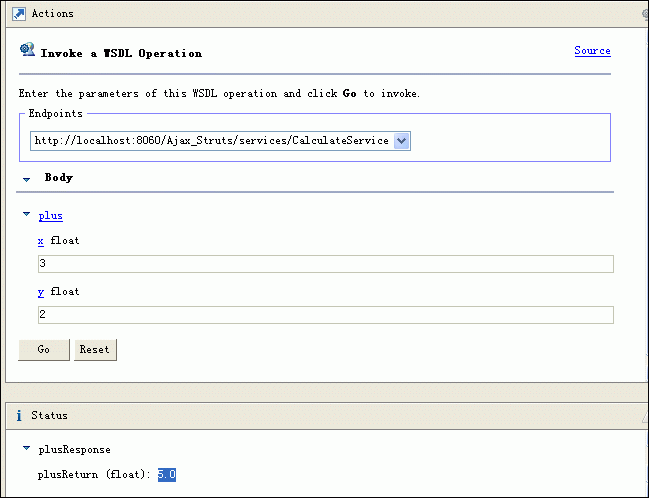
10、測試比較簡單,例如,我們選擇一個"plus"的Operation,出現下圖,在x的輸入框中輸入2,在y 的
輸入框中輸入3,點擊"go",便會在status欄中顯示結果5.0。其他方法的測試也類似。
到這裡用Axis2與Eclipse整合開發的Web Service的服務端和客戶端就成功了。你也試試吧!