Eclipse JDT 能提供什麼幫助
Eclipse JDT 提供了操縱 Java 源代碼、檢測錯 誤、執行編譯和啟動程序的的 API。本文將說明如何使用 ASTParser 從頭創建一個 Java 類,同時介紹如何使用 JDT 服務編譯生成的代碼。
Eclipse JDT 有自己的文檔對 象模型(DOM),其思想和眾所周知的 XML DOM 是一致的:抽象的語法樹(AST)。
Eclipse V3.0.2 支持 Java Language Specification, Second Edition (JLS2), 能夠正確解析用各種 Java 語言版本(最高到 J2SE 1.4)編寫的程序。對 JLS3 的支持正 在進行之中,在下一個重要的 Eclipse 版本中,就能夠解析用新的 J2SE 1.5 結構編寫的 程序。
完全免費的代碼
本文提供了兩個示例應用程序,這兩個示例都包含 在一個稱為 ASTExplorer 的 Eclipse 項目中:
ASTMain
ASTExplorer
ASTMain 生成一個 Java 類,然後編譯這個類並運行其 main() 方法。該方法將使 用按鈕創建一個 SWT Shell 物件。
ASTExplorer 解析給定的 Java 類,顯示其 AST 層次結構。它有三個面板:一個包含 AST Tree 視圖顯示 AST 層次結構,一個顯示源 代碼,還有一個顯示解析器錯誤。
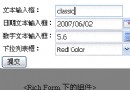
圖 1 顯示了執行中的 ASTExplorer 界面。注意 ,如果選擇一個節點,源代碼中對應的位置將使用藍色突出顯示。解析錯誤用紅色突出顯 示。
圖 1. 運行中的 ASTExplorer
這些例子是 在 Eclipse V3.0.1 及 V3.0.2、Windows® XP Professional SP2、Sun J2SDK 1.4.2.05 環境中經過測試的。文中的項目類路徑是用於 Eclipse V3.0.2 的。如果需要在 Eclipse V3.0.1 下運行,只需要修改類路徑指向正確的插件即可。
建議在閱讀後面的內容之前先下載示例應用程序。這裡的關鍵詞是探索,閱讀本文的同 時運行給出的例子有助於提高學習的效率。
ASTParser 和 ASTNodes
AST 層次結構的最上層是 ASTNode。每個 Java 結構都用它來表示。多數節點的名稱意 義都很明確,如 Comment、CastExpression 等。可以使用 AST 類的方法(比如 newBlock()、newBreakStatement() 等)來創建節點。Java 類用 Compilation Unit(編 譯單元)節點表示。清單 1 展示了如何創建編譯單元。
清單 1. 創建編譯單元
ASTParser parser = ASTParser.newParser(AST.JLS2);

parser.setSource("".toCharArray());

CompilationUnit unit = (CompilationUnit) parser.createAST(null);

unit.recordModifications();

AST ast = unit.getAST();
要注意 ASTParser 對 JLS2 的配置,然後使用空數組初始化解析器。如果不這樣做, 就會在訪問編譯單元時遇到異常。
解析已有代碼也需要同樣的步驟。該例中要解析的是 org.eclipse.core.runtime 的一 個實例。createAST() 方法的 IProgressMonitor 可以在長時間的解析中提供反饋信息, 後面將示范它的用法。
調用 recordModifications() 將啟動對節點修改的監控。調用這個方法很重要,因為 這樣可以在以後通過檢索節點的修改來訪問源代碼。
最後,從編譯單元中訪問 AST 的所有者,並在後續的節點創建中使用它。AST 樹中的 所有節點都屬於同一個所有者。任何不是該所有者創建的節點都要先通過導入才能加入到 樹中。現在就可以開始創建 Java 類了,清單 2 展示了如何創建一個包。
清單 2. 創建 Package
PackageDeclaration packageDeclaration = ast.newPackageDeclaration ();

unit.setPackage(packageDeclaration);

packageDeclaration.setName(ast.newSimpleName("astexplorer"));
有幾個節點方法要使用 Name 節點。Name 節點可以是 SimpleName 或者 QualifiedName,後者是一組 SimpleNames。QualifiedName 的外部表示是(比方說) org.eclipse.swt.widgets。因此,實質上只要您使用點(dot),您就是在使用 QualifiedName。ast.newName() 方法接收一個字符串數組來創建 Name 節點。在代碼示例 中,我提供了一各方便的方法來解析帶點(dot)的字符串,並創建字符串數組。
有 6 種主要的節點組:BodyDeclaration、Comment、Expression、Statement、Type 和 VariableDeclaration。BodyDeclarations 可以是類中的任何聲明。比如,聲明 private Point minimumSize; 的創建代碼如下所示:
清單 3. 創建 VariableDeclaration
VariableDeclarationFragment vdf = ast.newVariableDeclarationFragment ();

vdf.setName(ast.newSimpleName("minimumSize"));

FieldDeclaration fd = ast.newFieldDeclaration(vdf);

fd.setModifiers(Modifier.PRIVATE);

fd.setType(ast.newSimpleType(ast.newSimpleName("Point")));
要注意如何從 VariableDeclarationFragment 創建 FieldDeclaration。AST 編程就是 組合不同的節點。您不需要使用像 XML DOM 中的 appendChild() 或 insertBefore() 這 樣的方法。相反,不同的節點類型有不同的創建和初始化方法。
剛剛看到的是一種 VariableDeclaration 類型的例子,即 VariableDeclarationFragment。還有一種類型 SingleVariableDeclaration,它主要用於 參數列表。比如,清單 4 說明了如何在 ControlAdapterImpl(Point size) 中創建參數 size。
清單 4. 創建方法參數
SingleVariableDeclaration variableDeclaration = ast.newSingleVariableDeclaration();

variableDeclaration.setModifiers(Modifier.NONE);

variableDeclaration.setType(ast.newSimpleType(ast.newSimpleName ("Point")));

variableDeclaration.setName(ast.newSimpleName("size"));

methodConstructor.parameters().add(variableDeclaration);
有三種類型的注釋節點:BlockComment、Javadoc 和 LineComment。
AST Tree 僅支持 Javadoc 節點的創建和插入,它認為 BlockComment 和 LineComment 節點的具體定位存在問題,因此只在解析已有代碼時才會看到這類節點。清單 5 顯示了如 何創建 Javadoc 節點。
清單 5. 創建 Javadoc 節點
Javadoc jc = ast.newJavadoc();

TagElement tag = ast.newTagElement();

TextElement te = ast.newTextElement();

tag.fragments().add(te);

te.setText("Sample SWT Composite class created using the ASTParser");

jc.tags().add(tag);

tag = ast.newTagElement();

tag.setTagName(TagElement.TAG_AUTHOR);

tag.fragments().add(ast.newSimpleName("Manoel Marques"));

jc.tags().add(tag);

classType.setJavadoc(jc);
Expression 和 Statement 節點是最常用的節點類型。示例代碼中包含創建表達式和語 句節點的多個例子。可以使用 GridLayout gridLayout = new GridLayout() 創建一個簡 單的語句:
清單 6. 創建語句
VariableDeclarationFragment vdf = ast.newVariableDeclarationFragment ();

vdf.setName(ast.newSimpleName("gridLayout"));

VariableDeclarationStatement vds = ast.newVariableDeclarationStatement (vdf);

vds.setType(ast.newSimpleType(ast.newSimpleName("GridLayout")));

ClassInstanceCreation cc = ast.newClassInstanceCreation();

cc.setName(ast.newSimpleName("GridLayout"));

vdf.setInitializer(cc);

constructorBlock.statements().add(vds);
要注意節點的組合,整個語句是一個 GridLayout 類型的 VariableDeclarationStatement。它包含一個 VariableDeclarationFragment,後者包含 ClassInstanceCreation。
使用 Assignment 表達式也可以創建同樣的語句,如清單 7 所示。
清單 7. 創建同一語句的另一種方法
Assignment a = ast.newAssignment();

a.setOperator(Assignment.Operator.ASSIGN);


VariableDeclarationFragment vdf = ast.newVariableDeclarationFragment();

vdf.setName(ast.newSimpleName("gridLayout"));

VariableDeclarationExpression vde = ast.newVariableDeclarationExpression (vdf);

vde.setType(ast.newSimpleType(ast.newSimpleName("GridLayout")));

a.setLeftHandSide(vde);


ClassInstanceCreation cc = ast.newClassInstanceCreation();

cc.setName(ast.newSimpleName("GridLayout"));

a.setRightHandSide(cc);

constructorBlock.statements().add(ast.newExpressionStatement(a));
可以將其看作一個 Assignment 表達式,左側是包含 VariableDeclarationFragment 的 VariableDeclarationExpression,右側是一個 ClassInstanceCreation。要注意,在 添加到語句列表之前,Assignment 表達式首先要通過 newExpressionStatement() 方法使 用 Statement 包裝起來。
兩種方法都生成同樣的源代碼,但是應該使用第一種方法。如果解析已有的代碼,就會 看到節點是按照第一種方法創建的。這也是為何強調使用 ASTExplorer 這個例子的原因。 這樣您可以看到解析器為特定代碼片段創建的節點,從而按照同樣的方式創建自己的節點 。
仔細看一看 ASTMain 類,就可以了解在幾種情況下如何創建不同的節點。我盡量包含 所有所需技巧的結構,比如內部類、try 塊、數組參數,等等。我將介紹我曾經遇到問題 ,同時還將介紹您可能需要幫助的地方。
獲得實際的源代碼
有了編譯單元之後,就可以很輕松地獲得實際的源代碼。
調用 recordModifications() 可以完成一半的工作,剩下的工作可以在編譯單元中調 用 rewrite() 方法來完成。該方法需要一個 org.eclipse.jface.text.IDocument 實例和 格式化選項 Map。IDocument 實例包含原來的源代碼 —— 該例中沒有這樣的源代碼, rewrite() 方法將合並編譯單元中的修改和文檔文本,返回包含所有更改內容的 org.eclipse.jface.text.edits.TextEdit 實例。
通過格式化選項可以規定括號和縮進的位置等。在 org.eclipse.jdt.core.formatter.DefaultCodeFormatterConstants 類中可以找到所有的 選項列表。
獲得 TextEdit 實例之後,可以用它來查看作了哪些更改。不過在該例中,僅僅將這些 更改用於原來的文檔。
現在,所有的代碼都放在了將准備提取的文檔中,這個過程如清單 8 所示。
清單 8. 訪問編譯單元的內容
public char[] getContents() {

  char[] contents = null;

  try {

    Document doc = new Document();

    TextEdit edits = unit.rewrite(doc,null);

    edits.apply(doc);

    String sourceCode = doc.get();

    if (sourceCode != null)

     contents = sourceCode.toCharArray();

  }

  catch (BadLocationException e) {

    throw new RuntimeException(e);

  }

  return contents;

}
編譯生成的代碼
Eclipse IDE 在工作區中處理項目。構建整個項目後,要依靠 JDT 檢查依賴性和編譯 所有的類。Eclipse 幫助中有詳細的說明,可以將這些歸結如下:
清單 9. 構建 Eclipse 項目
IProject myProject;

IProgressMonitor myProgressMonitor;

myProject.build(IncrementalProjectBuilder.INCREMENTAL_BUILD, myProgressMonitor);
對此我不再贅述,因為 Eclipse 幫助中已介紹得很清楚。JDT 還提供了另一種方法, 這種方法更適合於我們的目的,即借助於 org.eclipse.jdt.internal.compiler.Compiler 類。這種方法實際上很簡單:先創建一個編譯器對象,然後對它調用 compile() 方法。
清單 10. 編譯一個編譯單元
Compiler compiler = new Compiler(new NameEnvironmentImpl(unit),

           DefaultErrorHandlingPolicies.proceedWithAllProblems (),

           settings,requestor,new DefaultProblemFactory (Locale.getDefault()));

compiler.compile(new ICompilationUnit[] { unit });
首先說明構造函數的參數,其中包括:
org.eclipse.jdt.internal.compiler.env.INameEnvironment 連接編譯器和外部環境 。簡而言之,它表示的是類路徑。編譯器使用該參數來獲得可能遇到類型的信息。 org.eclipse.jdt.internal.compiler.IErrorHandlingPolicy 告訴編譯器遇到錯誤時如何 處理。我傾向於在停止之前讓編譯器接受盡可能多的處理,因此使用了預定義的 DefaultErrorHandlingPolicies.proceedWithAllProblems() 實例。 Map Settings 可以 在 org.eclipse.jdt.internal.compiler.impl.CompilerOptions 中找到的編譯器設置。 通過它可以規定是否需要生成行編號,是否忽略方法警告,等等。 org.eclipse.jdt.internal.compiler.ICompilerRequestor 接收編譯結果和編譯過程中遇 到的任何錯誤。 org.eclipse.jdt.internal.compiler.IProblemFactory 負責創建 org.eclipse.jdt.core.compiler.IProblem 實例的工廠。如果支持特殊類型的錯誤處理或 者不同語言版本的錯誤消息,那麼實現該工廠非常有用。該例中使用了標准實現 DefaultProblemFactory(Locale.getDefault())。
最後,在編譯的時候,還需要一個 org.eclipse.jdt.internal.compiler.env.ICompilationUnit 數組。不要將該接口和 org.eclipse.jdt.core.ICompilationUnit 混淆。不幸的是,它們的名稱相同,但後者一 般只在您的類屬於 Eclipse Java 項目時才有用。
實現 org.eclipse.jdt.internal.compiler.env.ICompilationUnit 很容易,它對應於 已經創建的 CompilationUnit 節點。清單 11 給出了一種實現方法。
清單 11. ICompilationUnit 實現
static private class CompilationUnitImpl implements ICompilationUnit {

  private CompilationUnit unit;

  CompilationUnitImpl(CompilationUnit unit) {

    this.unit = unit;

  }

  public char[] getContents() {

    char[] contents = null;

    try {

     Document doc = new Document();

     TextEdit edits = unit.rewrite(doc,null);

     edits.apply(doc);

     String sourceCode = doc.get();

     if (sourceCode != null)

       contents = sourceCode.toCharArray();

    }

    catch (BadLocationException e) {

     throw new RuntimeException(e);

    }

    return contents;

  }

  public char[] getMainTypeName() {

    TypeDeclaration classType = (TypeDeclaration) unit.types().get(0);

    return classType.getName().getFullyQualifiedName().toCharArray();

  }

  public char[][] getPackageName() {

    String[] names =

     getSimpleNames(this.unit.getPackage().getName ().getFullyQualifiedName());

    char[][] packages = new char[names.length][];

    for (int i=0;i < names.length; ++i)

     packages[i] = names[i].toCharArray();

    return packages;

  }

  public char[] getFileName() {

    TypeDeclaration classType = (TypeDeclaration) unit.types().get(0);

    String name = classType.getName().getFullyQualifiedName() + ".java";

    return name.toCharArray();

  }

}
檢查編譯錯誤
完成編譯後,要做的第一件事就是從 ICompilerRequestor 實現中找出各種可能的錯誤 ,其中包括警告或致命錯誤。下面是一個例子:
清單 12. 處理編譯錯誤
List problems = requestor.getProblems();

boolean error = false;

for (Iterator it = problems.iterator(); it.hasNext();) {

  IProblem problem = (IProblem)it.next();

  StringBuffer buffer = new StringBuffer();

  buffer.append(problem.getMessage());

  buffer.append(" line: ");

  buffer.append(problem.getSourceLineNumber());

  String msg = buffer.toString();

  if(problem.isError()) {

    error = true;

    msg = "Error:\n" + msg;

  }

  else

    if(problem.isWarning())

     msg = "Warning:\n" + msg;

  System.out.println(msg);

}
運行編譯後的應用程序
如果一切正常,那麼就可以實例化這個類並運行其 main 方法了。對 ICompilerRequestor 實現返回的字節碼使用反射很容易做到。
清單 13. 運行編譯後的應用程序
try {

  ClassLoader loader = new CustomClassLoader(getClass().getClassLoader (),

  requestor.getResults());

  String className = CharOperation.toString(unit.getPackageName()) + "." +

  new String(unit.getMainTypeName());

  Class clazz = loader.loadClass(className);

  Method m = clazz.getMethod("main",new Class[] {String[].class});

  m.invoke(clazz,new Object[] { new String[0] });

}

catch (Exception e) {

  e.printStackTrace();

}
注意我是如何使用自定義的類加載器訪問這個類的,該加載器按照請求加載編譯後的字 節碼。清單 14 給出了一個例子。
清單 14. 自定義的類加載器
static private class CustomClassLoader extends ClassLoader {

   private Map classMap;

   CustomClassLoader(ClassLoader parent,List classesList) {

    this.classMap = new HashMap();

    for (int i = 0; i < classesList.size(); i++) {

      ClassFile classFile = (ClassFile)classesList.get(i);

      String className = CharOperation.toString (classFile.getCompoundName());

      this.classMap.put(className,classFile.getBytes());

    }

   }

   public Class findClass(String name) throws ClassNotFoundException {

    byte[] bytes = (byte[]) this.classMap.get(name);

    if (bytes != null)

      return defineClass(name, bytes, 0, bytes.length);

    return super.findClass(name);

   }

}
這是一個非常簡單的編譯器。INameEnvironment 實現非常簡單,並假設所有的類依賴 性都已經在當前的類加載器中加載了。真正的實現可能需要其他自定義類加載器,該加載 器將搜索為編譯提供的某些類路徑。
此外可能還需要緩沖某些信息,特別是從 ICompilationUnit 實現返回的信息。比方說 ,獲得源代碼的過程非常耗時,所以應該進行緩沖。
解析已有的代碼
我們看一看解析的必要步驟,如清單 15 所示。
清單 15. 解析 Java 類
ASTParser parser = ASTParser.newParser(AST.JLS2);

parser.setKind(ASTParser.K_COMPILATION_UNIT);

parser.setSource(sourceString.toCharArray());

CompilationUnit node = (CompilationUnit) parser.createAST(null);
我知道解析的結果是一個編譯單元,因此用 ASTParser.K_COMPILATION_UNIT 初始化了 解析器,也可以使用 K_CLASS_BODY_DECKARATION、K_EXPRESSION 或 K_STATEMENTS。例如 :
清單 16. 解析 Java 語句
parser.setKind(ASTParser.K_STATEMENTS);

parser.setSource(sourceString.toCharArray());

Block block = (Block) parser.createAST(null);
如果稍後需要將大塊的語句插入已有的塊中,那麼這樣做非常有用。但不要忘記插入之 前導入已經解析的節點塊,如 block = (Block)ASTNode.copySubtree(unit.getAST(), block);。
createAST() 的參數是 org.eclipse.core.runtime.IProgressMonitor。創建代碼時不 需要該接口,但是解析的時候這個接口很重要。通過使用該接口,外部觀測者可以跟蹤任 務的進展並在需要的時候取消它。當 UI 線程接收來自 IProgressMonitor 的通知時,可 以在不同的線程中進行解析。
所有只讀的樹操作都是線程安全的,只要沒有線程修改它。如果其他線程可以修改節點 ,那麼建議同步擁有該樹的 AST 對象(synchronize (node.getAST()) {...})。
JFaces 庫提供了便利的對話框,在 org.eclipse.jface.dialogs.ProgressMonitorDialog 中封裝了 IProgressMonitor。可以 像清單 17 那樣使用它。
清單 17. 用 IProgressMonitor 解析
ProgressMonitorDialog dialog = new ProgressMonitorDialog(getShell ());

dialog.run(true, true, new IRunnableWithProgress() {

  public void run(final IProgressMonitor monitor)

       throws InvocationTargetException {

   try {

    ASTParser parser = ASTParser.newParser(AST.JLS2);

    if (monitor.isCanceled()) return;

    parser.setKind(ASTParser.K_COMPILATION_UNIT);

    if (monitor.isCanceled()) return;

    final String text = buffer.toString();

    parser.setSource(text.toCharArray());

    if (monitor.isCanceled()) return;

    final CompilationUnit node =

        (CompilationUnit) parser.createAST(monitor);

    if (monitor.isCanceled()) return;

    getDisplay().syncExec(new Runnable() {

      public void run() {

       // update the UI with the result of parsing

       ...

      }

    });

   }

   catch (IOException e) {

    throw new InvocationTargetException(e);

   }

  }

});
對話框 run 方法的前兩個布爾參數表示 IRunnableWithProgress 實例的 run 方法應 該在單獨的線程中,而且能夠取消它。這樣,解析是在單獨的線程中運行的,對話框中還 顯示了一個取消按鈕。如果用戶按下該按鈕,那麼對話框就會把 IProgressMonitor 實例 方法 setCanceled() 設為 true。因為還要將該實例傳遞給解析器,所以解析器的操作將 停止。
解析結束後,我們需要通過它自己的 UI 線程(而不是執行解析的線程)使用解析結果 來刷新 UI。為此,應該使用 org.eclipse.swt.widgets.Display.syncExec 方法,該方法 在 UI 線程的可運行實例中運行代碼。
遍歷樹
ASTNode 允許使用訪問者模式(請參閱參考資料)遍歷節點樹。然後創建一個從 org.eclipse.jdt.core.dom.ASTVisitor 派生的類,將該類的實例傳遞給節點方法 accept()。調用該方法時,從當前節點開始向下,樹中的每個節點都將被“訪問”。對每 個節點都將調用以下方法:
preVisit(ASTNode node)
boolean visit(node)
endVisit(node)
postVisit(ASTNode node)
每種節點類型都有一個方法,visit() 和 endVisit()。參數節點的類型與訪問節點對 應。如果 visit() 方法返回 false,那麼該節點的子接點將不會被訪問。
AST 樹中沒有顯示注釋節點,因為它們沒有父子關系。方法 getParent() 返回 null。 通過調用編譯單元的 getCommentList() 方法可以訪問注釋。如果需要顯示注釋,應該調 用該方法來單獨訪問每個注釋節點。
該例中,類 ASTExplorerVisitor 在 preVisit() 方法中包含一段已注釋的代碼塊,如 果沒有取消注釋,那麼該代碼塊將顯示作為編譯單元的子節點的所有注釋節點。
解析器錯誤是在編譯單元類實例中返回的。getProblems() 方法返回 IProblem 實例數 組。這個 IProblem 類和編譯錯誤使用的類相同。
一定要注意的是,ASTParser 不是一個編譯器。只有當源文件中有一些代碼影響到 AST 樹的完整性時才會標記錯誤。
比方說,如果輸入 classs 而不是輸入 class,那麼會影響到 TypeDeclaration 節點 的創建,這就是一個錯誤。另一方面,如果輸入 private Stringgg str;,它是合法的, 因為可能存在一個叫做 Stringgg 類。只有編譯器才能標記這個錯誤。要知道,合法的樹 並不意味著編譯也合法。
結束語
我們介紹了使用 ASTParser 時遇到的所有“竅門”。現在可以將這種 JDT 服務添加到 您的項目中了。還有很多的功能這裡沒有介紹,您可以直接使用它們。祝解析愉快!
來源:http://www.ibm.com/developerworks/cn/opensource/os-ast/index.html