實現示例應用的購物車流程,可按以下步驟操作:
在 /WEB-INF/lib 目錄下導入相關類庫
在 webmvc-config.xml 中添加與 Spring Web Flow 集成的配置
添加 Spring Web Flow 的配置文件 webflow-config.xml
添加 flow 定義文件 shopping.xml
添加三個 jsp 頁面
修改 index.jsp
在 /WEB-INF/lib 目錄下導入相關類庫
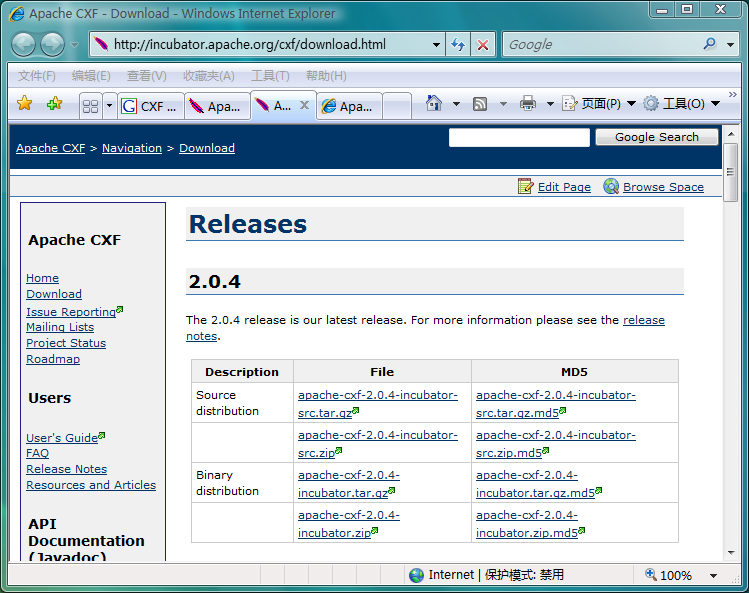
將以下幾個 jar 包導入 /WEB-INF/lib 目錄:
org.springframework.webflow-2.0.2.RELEASE.jar
org.springframework.js-2.0.2.RELEASE.jar
org.springframework.binding-2.0.2.RELEASE.jar
jboss-el.jar
在 webmvc-config.xml 中添加配置
Spring Web MVC 相關的配置前面已經分析過了,完整的配置見清單 13 :
清單 13 webmvc-config.xml<?xml version="1.0" encoding="UTF-8"?>
<beans
xmlns="http://www.springframework.org/schema/beans"
xmlns:xsi="http://www.w3.org/2001/XMLSchema-instance"
xsi:schemaLocation="http://www.springframework.org/schema/beans
http://www.springframework.org/schema/beans/spring-beans.xsd">
<bean
id="viewResolver"
class="org.springframework.web.servlet.view.InternalResourceViewResolver">
<property name="viewClass" value="org.springframework.web.servlet.view.JstlView">
</property>
<property name="prefix" value="/WEB-INF/jsp/">
</property>
<property name="suffix" value=".jsp">
</property>
</bean>
<bean
id="viewMappings"
class="org.springframework.web.servlet.handler.SimpleUrlHandlerMapping">
<!-- /shopping.do 請求由 flowController 來處理 -->
<property name="mappings">
<value> /shopping.do=flowController </value>
</property>
<property name="defaultHandler">
<!-- UrlFilenameViewController 會將 "/index" 這樣的請求映射成名為 "index" 的視圖 -->
<bean class="org.springframework.web.servlet.mvc.UrlFilenameViewController" />
</property>
</bean>
<bean
id="flowController"
class="org.springframework.webflow.mvc.servlet.FlowController">
<property name="flowExecutor" ref="flowExecutor"/>
</bean>
</beans>
添加配置文件 webflow-config.xml
在 /WEB-INF/config 目錄下添加 webflow-config.xml 文件, schema 名字空間可直接復制清單 14 中的內容。
清單 14 webflow-config.xml<?xml version="1.0" encoding="UTF-8"?>
<beans
xmlns="http://www.springframework.org/schema/beans"
xmlns:xsi="http://www.w3.org/2001/XMLSchema-instance"
xmlns:webflow="http://www.springframework.org/schema/webflow-config"
xsi:schemaLocation=" http://www.springframework.org/schema/beans
http://www.springframework.org/schema/beans/spring-beans-2.5.xsd
http://www.springframework.org/schema/webflow-config
http://www.springframework.org/schema/webflow-config/spring-webflow-config-2.0.xsd">
<webflow:flow-executor id="flowExecutor"/>
<!— 所有 flow 定義文件位置在此配置, flow-builder-services 用於配置 flow 的特性 -->
<webflow:flow-registry id="flowRegistry" flow-builder-services="flowBuilderServices">
<webflow:flow-location path="/WEB-INF/flows/shopping.xml" id="shopping"/>
</webflow:flow-registry>
<!—Web Flow 中的視圖通過 MVC 框架的視圖技術來呈現 -->
<webflow:flow-builder-services id="flowBuilderServices"
view-factory-creator="mvcViewFactoryCreator"/>
<!— 指明 MVC 框架的 view resolver ,用於通過 view 名查找資源 -->
<bean id="mvcViewFactoryCreator"
class="org.springframework.webflow.mvc.builder.MvcViewFactoryCreator">
<property name="viewResolvers" ref="viewResolver"/>
</bean>
</beans>
webflow-config.xml 創建完成以後,不要忘記在 web-application-config.xml 中添加 import 元素,將 webflow-config.xml 文件導入。
清單 15 在 web-application-config.xml 中導入 webflow-config.xml。<import resource="webflow-config.xml"/>
添加 flow 定義文件 shopping.xml
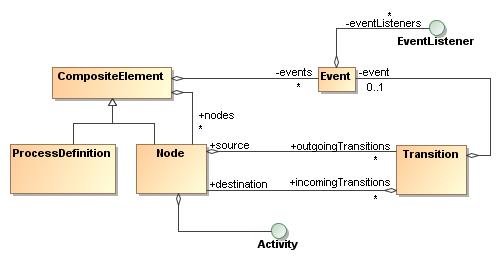
在 /WEB-INF/flows 目錄下創建 shopping.xml 文件,描述了圖 2 所示的流程。
清單 16 shopping.xml<?xml version="1.0" encoding="UTF-8"?>
<flow xmlns="http://www.springframework.org/schema/webflow"
xmlns:xsi="http://www.w3.org/2001/XMLSchema-instance"
xsi:schemaLocation="http://www.springframework.org/schema/webflow
http://www.springframework.org/schema/webflow/spring-webflow-2.0.xsd">
<view-state id="viewCart" view="viewCart">
<transition on="submit" to="viewOrder">
</transition>
</view-state>
<view-state id="viewOrder" view="viewOrder">
<transition on="confirm" to="orderConfirmed">
</transition>
</view-state>
<view-state id="orderConfirmed" view="orderConfirmed">
<transition on="returnToIndex" to="returnToIndex">
</transition>
</view-state>
<end-state id="returnToIndex" view="externalRedirect:servletRelative:/index.jsp">
</end-state>
</flow>
與清單 1 相比,在 view-state 元素中指定了 view 屬性的名字,這個名字也是 Spring Web MVC 中 viewResolver 所查找的 view 的名字。從清單 16 的配置中可以知道,這三個 view-state 元素所對應的視圖資源分別應該是: viewCart.jsp 、 viewOrder.jsp 和 orderConfirmed.jsp 。清單 16 中最後的 end-state 指明了當 flow 執行結束後跳轉到初始的 index.jsp 頁面,在此處的 view 屬性的名字需要解釋一下。 externalRedirect 用在 view 名字中,表示所指向的資源是在 flow 的外部, servletRelative 則表明所指向資源的路徑起始部分與 flow 所在 servlet 相同。 Spring Web Flow 2.0還提供了其他幾個關鍵詞用於重定向,這裡就不多介紹了。
添加三個 jsp 頁面
在 /WEB-INF/jsp 目錄下創建三個 flow 所需的視圖資源。以下清單只給出 jsp 頁面中 body 元素以內的代碼,其余省略。
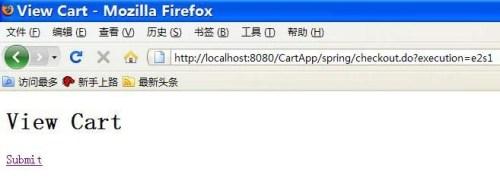
清單 17 viewCart.jsp
<h1>View Cart</h1>

<a href="${flowExecutionUrl}&_eventId=submit">Submit</a>
清單 18 viewOrder.jsp
<h1>Order</h1>

<a href="${flowExecutionUrl}&_eventId=confirm">Confirm</a>
清單 19 orderConfirmed.jsp
<h1>Order Confirmed</h1>

<a href="${flowExecutionUrl}&_eventId=returnToIndex">Return to index</a>
這幾個頁面都使用了變量 flowExecutionUrl ,表示 flow 執行到當前狀態時的 URL 。 flowExecutionUrl 的值已經由 Spring Web Flow 2.0 框架的代碼進行賦值,並放入相應的 model 中供 view 訪問。 flowExecutionUrl 的值包含 flow 在執行過程中會為每一狀態生成的唯一的 key ,因此不可用其他手段來獲取。請求參數中 _eventId 的值與清單 16 中 transition 元素的 on 屬性的值是對應的,在接收到_eventId參數後,相應transition會被執行。
修改 index.jsp 頁面
在 index.jsp 頁面中添加啟動 flow 的鏈接,從 webmvc-config.xml 配置文件中可以看出,要啟動 flow ,只需提供 /shopping.do 鏈接即可。
清單 20 index.jsp
<h1>Hello!</h1><br/>

<a href="shopping.do">View Cart</a>
運行應用程序
將應用程序發布到 Tomcat 服務器,訪問 index.jsp ,並啟動 flow ,測試頁面的跳轉。效果如圖 5所示:
圖 4 flow 運行效果