基於Java的Spring框架來操作FreeMarker模板的示例。本站提示廣大學習愛好者:(基於Java的Spring框架來操作FreeMarker模板的示例)文章只能為提供參考,不一定能成為您想要的結果。以下是基於Java的Spring框架來操作FreeMarker模板的示例正文
1、經由過程String來創立模版對象,並履行插值處置
import freemarker.template.Template;

import java.io.OutputStreamWriter;
import java.io.StringReader;
import java.util.HashMap;
import java.util.Map;

/**
* Freemarker最簡略的例子
*
* @author leizhimin 11-11-17 上午10:32
*/
public class Test2 {
    public static void main(String[] args) throws Exception{
        //創立一個模版對象
        Template t = new Template(null, new StringReader("用戶名:${user};URL:  ${url};姓名:  ${name}"), null);
        //創立插值的Map
        Map map = new HashMap();
        map.put("user", "lavasoft");
        map.put("url", "http://www.百度.com/");
        map.put("name", "百度");
        //履行插值,並輸入到指定的輸入流中
        t.process(map, new OutputStreamWriter(System.out));
    }
}
履行後,掌握台輸入成果:
用戶名:lavasoft;

URL:  http://www.百度.com/;

姓名:  百度
Process finished with exit code 0
2、經由過程文件來創立模版對象,並履行插值操作
import freemarker.template.Configuration;
import freemarker.template.Template;

import java.io.File;
import java.io.OutputStreamWriter;
import java.util.HashMap;
import java.util.Map;

/**
* Freemarker最簡略的例子
*
* @author leizhimin 11-11-14 下晝2:44
*/
public class Test {
    private Configuration cfg;      //模版設置裝備擺設對象

    public void init() throws Exception {
        //初始化FreeMarker設置裝備擺設
        //創立一個Configuration實例
        cfg = new Configuration();
        //設置FreeMarker的模版文件夾地位
        cfg.setDirectoryForTemplateLoading(new File("G:\\testprojects\\freemarkertest\\src"));
    }

    public void process() throws Exception {
        //結構填湊數據的Map
        Map map = new HashMap();
        map.put("user", "lavasoft");
        map.put("url", "http://www.百度.com/");
        map.put("name", "百度");
        //創立模版對象
        Template t = cfg.getTemplate("test.ftl");
        //在模版上履行插值操作,並輸入到制訂的輸入流中
        t.process(map, new OutputStreamWriter(System.out));
    }

    public static void main(String[] args) throws Exception {
        Test hf = new Test();
        hf.init();
        hf.process();
    }
}
創立模版文件test.ftl
<html>
<head>
  <title>Welcome!</title>
</head>
<body>
  <h1>Welcome ${user}!</h1>
  <p>Our latest product:
  <a href="${url}">${name}</a>!
</body>
</html>
尊重的用戶你好:
用戶名:${user};
URL:  ${url};
姓名:  ${name}
履行後,掌握台輸入成果以下:
<html>
<head>
  <title>Welcome!</title>
</head>
<body>
  <h1>Welcome lavasoft!</h1>
  <p>Our latest product:
  <a href="http://www.百度.com/">百度</a>!
</body>
</html>
尊重的用戶你好:
用戶名:lavasoft;
URL:  http://www.百度.com/;
姓名:  百度
Process finished with exit code 0
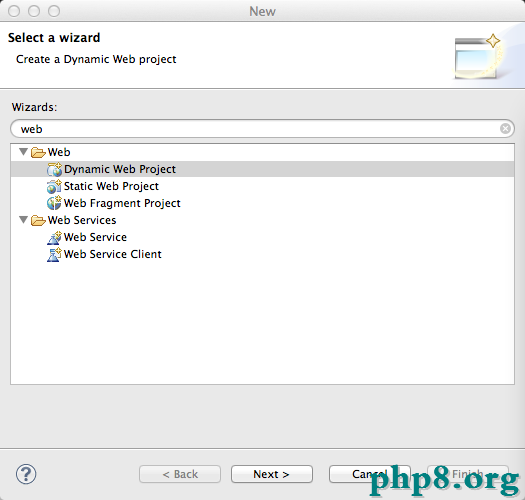
3.基於注解的Spring+freemarker實例
web項目圖
web.xml文件
<?xml version="1.0" encoding="UTF-8"?>
<web-app id="WebApp_ID" version="2.4" xmlns="http://java.sun.com/xml/ns/j2ee" xmlns:xsi="http://www.w3.org/2001/XMLSchema-instance" xsi:schemaLocation="http://java.sun.com/xml/ns/j2ee http://java.sun.com/xml/ns/j2ee/web-app_2_4.xsd">
 <servlet>
  <!-- 設置裝備擺設DispatcherServlet -->
  <servlet-name>springmvc</servlet-name>
  <servlet-class>org.springframework.web.servlet.DispatcherServlet</servlet-class>
  <!-- 指定spring mvc設置裝備擺設文件地位 不指定應用默許情形 -->
   <init-param>
    <param-name>contextConfigLocation</param-name>
    <param-value>/WEB-INF/springmvc-servlet.xml</param-value>
    <!--默許:/WEB-INF/<servlet-name>-servlet.xml
    classpath方法:<param-value>classpath:/spring-xml/*.xml</param-value>
     -->
    </init-param>
  <!-- 設置啟動次序 -->
  <load-on-startup>1</load-on-startup>
 </servlet>
 <!-- 設置裝備擺設映照 servlet-name和DispatcherServlet的servlet分歧 -->
 <servlet-mapping>
  <servlet-name>springmvc</servlet-name>
  <url-pattern>/</url-pattern><!-- 攔阻以/一切要求 -->
 </servlet-mapping>
 <welcome-file-list>
  <welcome-file>index.jsp</welcome-file>
 </welcome-file-list>
</web-app>
springmvc-servlet.xml文件
<?xml version="1.0" encoding="UTF-8"?>
<beans xmlns="http://www.springframework.org/schema/beans" xmlns:aop="http://www.springframework.org/schema/aop"
  xmlns:xsi="http://www.w3.org/2001/XMLSchema-instance" xmlns:p="http://www.springframework.org/schema/p"
  xmlns:mvc="http://www.springframework.org/schema/mvc" xmlns:context="http://www.springframework.org/schema/context"
  xsi:schemaLocation="http://www.springframework.org/schema/beans
  http://www.springframework.org/schema/beans/spring-beans.xsd
   http://www.springframework.org/schema/mvc
   http://www.springframework.org/schema/mvc/spring-mvc-3.0.xsd
   http://www.springframework.org/schema/aop
   http://www.springframework.org/schema/aop/spring-aop-3.0.xsd
   http://www.springframework.org/schema/context
   http://www.springframework.org/schema/context/spring-context.xsd">

   <!-- 默許注解映照支撐 -->
   <mvc:annotation-driven/>
   <!-- 主動掃描包 -->
   <context:component-scan base-package="com.spring.freemarker" />

   <!--<context:annotation-config /> 設置裝備擺設主動掃描包設置裝備擺設此設置裝備擺設可省略-->
   <!--<bean class="org.springframework.web.servlet.mvc.annotation.DefaultAnnotationHandlerMapping" 設置裝備擺設主動掃描包設置裝備擺設此設置裝備擺設可省略/>-->
   <!-- 設置裝備擺設freeMarker的模板途徑 -->
   <bean class="org.springframework.web.servlet.view.freemarker.FreeMarkerConfigurer">
    <property name="templateLoaderPath" value="WEB-INF/ftl/" />
    <property name="defaultEncoding" value="UTF-8" />
   </bean>
   <!-- freemarker視圖解析器 -->
   <bean class="org.springframework.web.servlet.view.freemarker.FreeMarkerViewResolver">
    <property name="suffix" value=".ftl" />
    <property name="contentType" value="text/html;charset=UTF-8" />
    <!-- 此變量值為pageContext.request, 頁面應用辦法:rc.contextPath -->
    <property name="requestContextAttribute" value="rc" />
   </bean>
</beans>
FreeMarkerController類
package com.spring.freemarker;

import java.util.ArrayList;
import java.util.List;

import javax.servlet.http.HttpServletRequest;
import javax.servlet.http.HttpServletResponse;

import org.springframework.stereotype.Controller;
import org.springframework.web.bind.annotation.RequestMapping;
import org.springframework.web.servlet.ModelAndView;

import com.spring.vo.User;

@Controller
@RequestMapping("/home")
public class FreeMarkerController {

  @RequestMapping("/index")
  public ModelAndView Add(HttpServletRequest request, HttpServletResponse response) {

    User user = new User();
    user.setUsername("zhangsan");
    user.setPassword("1234");
    List<User> users = new ArrayList<User>();
    users.add(user);
    return new ModelAndView("index", "users", users);
  }

}
User類
package com.spring.vo;

public class User {

  private String username;
  private String password;

  public String getUsername() {
    return username;
  }

  public void setUsername(String username) {
    this.username = username;
  }

  public String getPassword() {
    return password;
  }

  public void setPassword(String password) {
    this.password = password;
  }

}
index.ftl文件
<!DOCTYPE html PUBLIC "-//W3C//DTD HTML 4.01 Transitional//EN" "http://www.w3.org/TR/html4/loose.dtd">
<html>
<head>
<meta http-equiv="Content-Type" content="text/html; charset=UTF-8">
<title>Insert title here</title>
</head>
<body>
<#list users as user>
username : ${user.username}<br/>
password : ${user.password}
</#list>
</body>
</html>
安排到tomcat,運轉:http://localhost:8080/springmvc/home/index
顯示成果:
 username : zhangsan
 password : 1234