JavaWeb Spring依附注入深刻進修。本站提示廣大學習愛好者:(JavaWeb Spring依附注入深刻進修)文章只能為提供參考,不一定能成為您想要的結果。以下是JavaWeb Spring依附注入深刻進修正文
1、依附注入(DI)
依附注入聽起來很精深的模樣,其實白話就是:給屬性賦值。一共有兩種辦法,第一是以結構器參數的情勢,別的一種就是以setting辦法的情勢。
1 結構器注入
1 應用結構器注入
應用xml的注入方法
A. 經由過程參數的次序
<constructor-arg index="0"><value>張三</value></constructor-arg>
<constructor-arg index="1"><value>56</value></constructor-arg>
B. 經由過程參數的類型
<constructor-arg type="java.lang.Integer"><value>56</value></constructor-arg>
<constructor-arg type="java.lang.String"><value>張三</value></constructor-arg>
詳細實例
假設如今要對一個Person類注入參數,Student是一個別的一個類。
public class Person {
 private String pid;
 private String name;
 private Student student;


 public Person(String pid, Student student){
  this.pid= pid;
  this.student = student;
 }

 public Person(String pid, String name){
  this.pid = pid;
  this.name = name;
 }
}
設置裝備擺設applicationContext.xml,假設不停止參數設置裝備擺設,則報錯,找不到響應的結構器。設置裝備擺設了響應的參數,則應在類中聲明響應的結構函數。
<?xml version="1.0" encoding="UTF-8"?>
<beans xmlns="http://www.springframework.org/schema/beans"
  xmlns:xsi="http://www.w3.org/2001/XMLSchema-instance"
  xsi:schemaLocation="http://www.springframework.org/schema/beans
   http://www.springframework.org/schema/beans/spring-beans-2.5.xsd">
 <bean id="person" class="com.itheima10.spring.di.xml.constructor.Person">
  <!--
   不配參數,將會采用默許的結構器
   constructor-arg person類中某一個結構器的某一個參數
    index 為參數的角標
    type 參數的類型
    value 假如為基本屬性,則用這個賦值
    ref 援用類型賦值
   -->
  <constructor-arg index="0" type="java.lang.String" value="aaa"></constructor-arg>
  <constructor-arg index="1" ref="student"></constructor-arg>
 </bean>
 <bean id="person1" class="com.itheima10.spring.di.xml.constructor.Person">
  <property name="pid" value="1"></property>
 </bean>
 <bean id="student" class="com.itheima10.spring.di.xml.constructor.Student"></bean>
</beans>
編寫測試類DIXMLConstructorTest ,停止斷點調試,將會發明依據設置裝備擺設的參數,進入的結構函數是Person(String pid, Student student)
public class DIXMLConstructorTest {

 @Test
 public void test1(){
  ApplicationContext context = new ClassPathXmlApplicationContext("applicationContext.xml");
  Person person = (Person) context.getBean("person");
 }
}
2 應用屬性setter辦法停止注入
應用xml的注入方法:
A. 簡略Bean的注入
簡略Bean包含兩品種型:包裝類型和String
<bean id="personService" class="com.itcast.bean.impl.PersonServiceImpl">
<!-- 根本類型,string類型 -->
<property name="age" value="20"></property>
<property name="name" value="張無忌"></property>
</bean>
B. 援用其他Bean
<bean id="person" class="com.itcast.bean.Person" />
 <bean id="personService" class="com.itcast.bean.impl.PersonServiceImpl">
 <property name="person" ref="person" />
</bean>
1.1 拆卸list聚集
<property name="lists">
 <list>
  <value>list1</value>
  <value>list2</value>
  <ref bean="person" />
 </list>
</property>
1.2 拆卸set聚集
<property name="sets">
 <set>
  <value>list1</value>
  <value>list2</value>
  <ref bean="person" />
 </set>
</property>
1.3 拆卸map
<property name="maps">
    <map>
     <entry key="01">
       <value>map01</value>
     </entry>
     <entry key="02">
       <value>map02</value>
     </entry>
    </map>
</property>
map中的<entry>的數值和<list>和<set>的一樣,可使任何有用的屬性元素,須要留意的是key值必需是String的。
1.4 拆卸Properties
<property name="props">
 <props>
  <prop key="01">prop1</prop>
  <prop key="02">prop2</prop>
 </props>
</property>
詳細實例
1.創立兩個對象Person和Student
package xgp.spring.demo;

import java.util.List;
import java.util.Map;
import java.util.Properties;
import java.util.Set;

public class Person {
 private String pid;
 private String name;
 private Student student;
 private List lists;
 private Set sets;
 private Map map;
 private Properties properties;
 private Object[] objects;

 public Person(){
  System.out.println("new person");
 }
 //省略getter和setter辦法
}
package xgp.spring.demo;

public class Student {

 public Student(){
  System.out.println("new student");
 }
 public void say(){
  System.out.println("student");
 }
}
設置裝備擺設applicationContext.xml文件
<?xml version="1.0" encoding="UTF-8"?>
<beans xmlns="http://www.springframework.org/schema/beans"
  xmlns:xsi="http://www.w3.org/2001/XMLSchema-instance"
  xsi:schemaLocation="http://www.springframework.org/schema/beans
   http://www.springframework.org/schema/beans/spring-beans-2.5.xsd">
 <!--
  把person和student放入到spring容器中
  property 用來描寫Person類的屬性
  value 假如是普通屬性,則用value賦值
  ref 假如該屬性是援用類型,用ref賦值
  -->
 <bean id="person" class="com.itheima10.spring.di.xml.setter.Person"
   init-method="init"
   lazy-init="true">
  <property name="pid" value="1"></property>
  <property name="name" value="王二麻子"></property>
  <property name="student" ref="student"></property>
  <property name="lists">
   <list>
    <value>list1</value>
    <value>list2</value>
    <ref bean="student"/>
   </list>
  </property>
  <property name="sets">
   <set>
    <value>set1</value>
    <value>set2</value>
    <ref bean="student"/>
   </set>
  </property>
  <property name="map">
   <map>
    <entry key="entry1">
     <value>map1</value>
    </entry>
    <entry key="entry2">
     <ref bean="student"/>
    </entry>
   </map>
  </property>
  <property name="properties">
   <props>
    <!--
     不須要援用類型
     -->
    <prop key="prop1">prop1</prop>
    <prop key="prop2">prop2</prop>
   </props>
  </property>
  <property name="objects">
   <list>
    <value>aa</value>
    <value>bb</value>
   </list>
  </property>
 </bean>
 <bean id="student" class="com.itheima10.spring.di.xml.setter.Student"></bean>
</beans>
編寫測試類DIXMLSetterTest
package xgp.spring.test;

import org.junit.Test;
import org.springframework.context.ApplicationContext;
import org.springframework.context.support.ClassPathXmlApplicationContext;

import xgp.spring.demo.Person;

public class DIXMLSetterTest {
 /**
  * spring 容器做的工作:
  *  1、spring容器做了甚麼?(1)啟動spring容器
  *       (2)為person和student兩個bean創立對象
  *       (3)解析property的name屬性,拼接setter辦法,解析property的
  *        value或許ref屬性,給setter辦法傳遞參數,應用反射技巧給對象賦值。
  *       (4)從spring容器中,把對象提掏出來,對象挪用辦法。
  *  2、spring容器履行次序是甚麼?
  */
 @Test
 public void test1(){
  ApplicationContext context = new ClassPathXmlApplicationContext("applicationContext.xml");
  Person person = (Person) context.getBean("person");
  System.out.println(person.getPid());
  System.out.println(person.getName());
  System.out.println(person.getLists());
  System.out.println(person.getSets());
  System.out.println(person.getMap());
  System.out.println(person.getObjects().length);
 }

}
/*1
王五
[list1, list2, xgp.spring.demo.Student@76a9b9c]
[set1, set2, xgp.spring.demo.Student@76a9b9c]
{entry1=map1, entry2=map2}
2*/
spring容器的履行次序
1.都是默許設置
2.設置student(lazy-init=true)
3.設置person(lazy-init=true)
總結
可以采取兩種辦法注入參數,結構器要寫對應的結構函數,setter要生成響應的setter辦法,並編寫默許的結構器。
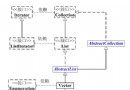
2.5 IOC與DI的意義
學了這些,發明有甚麼意義?上面寫個文檔治理體系例子來講明,需求見下圖
1.編寫Document 接口
public interface Document {
 public void read();
 public void write();
}
2、編寫完成類WordDocument ,ExcelDocument ,PDFDocument
public class WordDocument implements Document{
 public void read() {
  System.out.println("word read");
 }

 public void write() {
  System.out.println("word write");
 }
}
3、編寫文檔治理 體系 DocumentManager
public class DocumentManager {
 private Document document;

 public void setDocument(Document document) {
  this.document = document;
 }
 public DocumentManager(){
 }
 public DocumentManager(Document document) {
  super();
  this.document = document;
 }
 public void read(){
  this.document.read();
 }

 public void write(){
  this.document.write();
 }
}
4、編寫測試類DocumentTest
/**
 * 應用ioc和di能做到完整的面向接口編程
 *
 */
public class DocumentTest {
 /**
  * Document document = new WordDocument();
  * 這行代碼是不完整的面向接口編程,由於等號的左邊湧現了詳細的類
  */
 @Test
 public void testDocument_NOSPRING(){
  Document document = new WordDocument();
  DocumentManager documentManager = new DocumentManager(document);
  documentManager.read();
  documentManager.write();
 }

 /**
  * 在代碼端不曉得Document是由誰來完成的,這個是由spring的設置裝備擺設文件決議的
  * <bean id="documentManager"
   class="com.itheima10.spring.iocdi.document.DocumentManager">
   <!--
    document為一個接口
    -->
   <property name="document">
    <!--
     wordDocument是一個完成類,賦值給了document接口
     -->
    <ref bean="pdfDocument"/>
   </property>
  </bean>
  */
 @Test
 public void testDocument_Spring(){
  ApplicationContext context =
     new ClassPathXmlApplicationContext("applicationContext.xml");
  DocumentManager documentManager =(DocumentManager)context.getBean("documentManager");
  documentManager.read();
  documentManager.write();
 }
}
從下面可以看出不實用spring和實用spring的差別
<!--
  documentManager,wordDocument,excelDocument,pdfDocument放入到spring容器中
  -->
 <bean id="wordDocument" class="com.itheima10.spring.iocdi.document.WordDocument"></bean>
 <bean id="excelDocument" class="com.itheima10.spring.iocdi.document.ExcelDocument"></bean>
 <bean id="pdfDocument" class="com.itheima10.spring.iocdi.document.PDFDocument"></bean>

 <bean id="documentManager"
  class="com.itheima10.spring.iocdi.document.DocumentManager">
  <!--
   document為一個接口
   -->
  <property name="document">
   <!--
    wordDocument是一個完成類,賦值給了document接口
    -->
   <ref bean="pdfDocument"/>
  </property>
 </bean>
應用spring只須要在applicationContext中設置裝備擺設響應的<ref bean="">對象,而不須要存眷詳細的完成類,完成完整的面向接口編程,這也是為何spring可以或許和這麼多對象集成的緣由。
2.6 mvc實例–模仿structs2
需求描寫
樹立工程目次
編碼:
1、創立Dao層
樹立PersonDao接口和完成類PersonDaoImpl
public interface PersonDao {
 public void savePerson();
}

public class PersonDaoImpl implements PersonDao {
 @Override
 public void savePerson() {
  System.out.println(" save person");
 }
}
2、樹立service層,PersonService接口與PersonServiceImpl完成類
public interface PersonService {
 public void savePerson();
}

public class PersonServiceImpl implements PersonService{
 private PersonDao personDao;

 public void setPersonDao(PersonDao personDao) {
  this.personDao = personDao;
 }
 @Override
 public void savePerson() {
  this.personDao.savePerson();

 }

}
3、樹立Action,PersonAction類
public class PersonAction {
 private PersonService personService;

 public void setPersonService(PersonService personService) {
  this.personService = personService;
 }

 public void savePerson(){
  this.personService.savePerson();
 }
}
4、設置裝備擺設applicationContext.xml
 <!--
  把service,dao,action層的類放入到spring容器中
  -->
 <bean id="personDao" class="xgp.spring.demo.PersonDaoImpl"></bean>
 <bean id="personService" class="xgp.spring.demo.PersonServiceImpl">
 <property name="personDao">
  <ref bean="personDao"/>
 </property>
 </bean>
 <bean id="personAction" class="xgp.spring.demo.PersonAction">
 <property name="personService">
  <ref bean="personService"/>
 </property>
 </bean>
5、編寫測試類testMVC
public class MVCTest {
 @Test
 public void testMVC(){
  ApplicationContext context =
     new ClassPathXmlApplicationContext("applicationContext.xml");
  PersonAction personAction = (PersonAction)context.getBean("personAction");
  personAction.savePerson();//save person
 }
}
上述實例很清晰的展示出了spring的面向接口編程,service層只需挪用dao層的接口,而不須要存眷於dao層的完成類,action也只需挪用service的接口,而不須要存眷service的完成類。
以上就是本文的全體內容,願望對年夜家的進修有所贊助,也願望年夜家多多支撐。