7 PopUpTextBox輸入值處理
依據調用的對象,以及編輯對象,對輸入的值進行處理,傳遞給父對象編輯框
- if(object_name.equals("registScreen"))
- {
- if(editor.equals("regist_name"))
- {
- if(args_t[3]!=""||args_t[3]!=null||args_t[4]!=""||args_t[4]!=null)
- {
- args[0] = object_name;
- args[1] = editor;
- args[2] = this.canvasText;
- args[3] = args_t[3];
- args[4] = args_t[4];
- }
- controller.handleEvent(UIController.EventID.EVENT_USER_REGIST_EDIT_BACK,args);
- }
- else if(editor.equals("regist_passwd"))
- {
- if(args_t[2]!=""||args_t[2]!=null||args_t[4]!=""||args_t[4]!=null)
- {
- args[0] = object_name;
- args[1] = editor;
- args[2] = args_t[2];
- args[3] = this.canvasText;
- args[4] = args_t[4];
- }
- controller.handleEvent(UIController.EventID.EVENT_USER_REGIST_EDIT_BACK,args);
- }
- else if(editor.equals("regist_passwd_re"))
- {
- if(args_t[2]!=""||args_t[2]!=null||args_t[3]!=""||args_t[3]!=null)
- {
- args[0] = object_name;
- args[1] = editor;
- args[2] = args_t[2];
- args[3] = args_t[3];
- args[4] = this.canvasText;
- }
- controller.handleEvent(UIController.EventID.EVENT_USER_REGIST_EDIT_BACK,args);
- }
- }
8 輸入值的顯示
(1) 新建對象
- private TextEdit textEdit_name;
- textEdit_name = new TextEdit(this);
(2) 接受輸入的參數
- object_name = ((String)args[0]!=null)?(String)args[0]:"";
- editor = ((String)args[1]!=null)?(String)args[1]:"";
- username = ((String)args[2]!=null)?(String)args[2]:"";
- passwd = ((String)args[3]!=null)?(String)args[3]:"";
- passwd_re = ((String)args[4]!=null)?(String)args[4]:"";
(3) 光標控制,定位到編輯對象,控制編輯對象的光標閃爍(run方法)
- private void redraw()
- {
- switch(currentlySelectedIndex)
- {
- case 0:
- {
- cursorBlinkOn2 = false;
- cursorBlinkOn3 = false;
- editor = "regist_name";
- break;
- }
- case 1:
- {
- cursorBlinkOn1 = false;
- cursorBlinkOn3 = false;
- editor = "regist_passwd";
- break;
- }
- case 2:
- {
- cursorBlinkOn1 = false;
- cursorBlinkOn2 = false;
- editor = "regist_passwd_re";
- break;
- }
- default:;
- }
- //...
- }
(4) 編輯框的繪制
- private void redraw()
- {
- ...
- textEdit_name.drawTextBox(this, graphics, username, textEdit_name_x, textEdit_name_y, cursorBlinkOn1);
- textEdit_passwd.drawTextBox(this, graphics, passwd, textEdit_passwd_x, textEdit_passwd_y, cursorBlinkOn2);
- textEdit_passwd.drawTextBox(this, graphics, passwd_re, textEdit_passwd_re_x, textEdit_passwd_re_y, cursorBlinkOn3);
- textEdit_name.flushGraphics();
- }
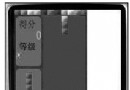
實現的效果如圖1所示:
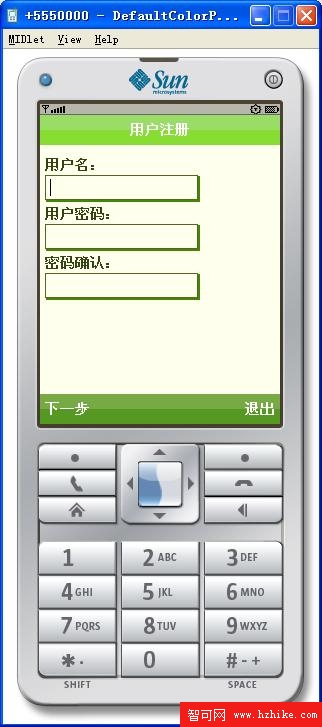
圖1 編輯框效果