1.Spring MVC框架簡介
2.Spring MVC框架結構,執行流程

3.如何在應用中使用Spring-MVC?
4.今天我們先來了解一下我們注解開發的小例子(簡單登錄)
一:轉發(forward)
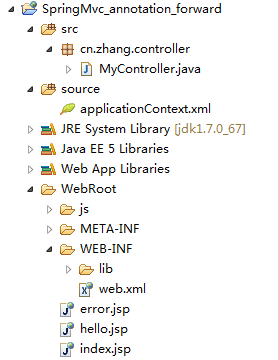
源碼介紹:
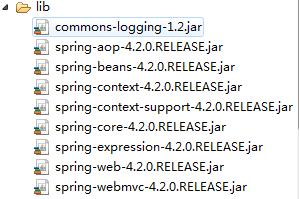
1.lib包(jar包)和 web.xml文件的配置

<?xml version="1.0" encoding="UTF-8"?>
<web-app xmlns:xsi="http://www.w3.org/2001/XMLSchema-instance" xmlns="http://java.sun.com/xml/ns/javaee" xmlns:web="http://java.sun.com/xml/ns/javaee/web-app_2_5.xsd" xsi:schemaLocation="http://java.sun.com/xml/ns/javaee http://java.sun.com/xml/ns/javaee/web-app_2_5.xsd" version="2.5">
  <display-name></display-name>
  <servlet>
    <servlet-name>springmvc</servlet-name>
    <servlet-class>org.springframework.web.servlet.DispatcherServlet</servlet-class>
    <init-param>
      <param-name>contextConfigLocation</param-name>
      <param-value>classpath:applicationContext.xml</param-value>
    </init-param>
    <load-on-startup>1</load-on-startup>
  </servlet>
  <servlet-mapping>
    <servlet-name>springmvc</servlet-name>
    <url-pattern>*.do</url-pattern>
  </servlet-mapping>
  <welcome-file-list>
  <welcome-file>index.jsp</welcome-file>
  </welcome-file-list>
</web-app>
View Code
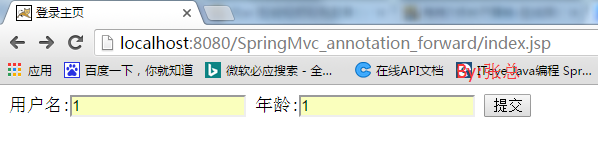
2.index.jsp(登錄主頁)
<%@ page language="java" import="java.util.*" pageEncoding="utf-8"%>
<%
    String path = request.getContextPath();
    String basePath = request.getScheme() + "://"
            + request.getServerName() + ":" + request.getServerPort()
            + path + "/";
%>

<!DOCTYPE HTML PUBLIC "-//W3C//DTD HTML 4.01 Transitional//EN">
<html>
<head>
<base href="<%=basePath%>">

<title>登錄主頁</title>
</head>
<body>
    <form action="frist.do" method="post">
        用戶名:<input type="text" name="name" /> 年齡:<input type="text"
            name="age" /> <input type="submit" value="提交" />
    </form>

</body>
</html>
View Code
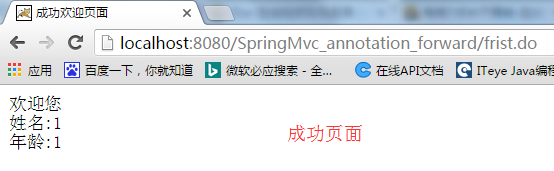
3.hello.jsp(登錄成功後跳到的頁面)和 error.jsp(登錄失敗跳到的頁面)
<%@ page language="java" import="java.util.*" pageEncoding="utf-8"%>
<%
String path = request.getContextPath();
String basePath = request.getScheme()+"://"+request.getServerName()+":"+request.getServerPort()+path+"/";
%>

<!DOCTYPE HTML PUBLIC "-//W3C//DTD HTML 4.01 Transitional//EN">
<html>
  <head>
    <base href="<%=basePath%>">
    <title>成功歡迎頁面</title>
  </head>
  <body>
  歡迎您<br/>
    姓名:${name}<br/>
    年齡:${age }
  </body>
</html>
View Code
<%@ page language="java" import="java.util.*" pageEncoding="UTF-8"%>
<%
    String path = request.getContextPath();
    String basePath = request.getScheme() + "://"
            + request.getServerName() + ":" + request.getServerPort()
            + path + "/";
%>

<!DOCTYPE HTML PUBLIC "-//W3C//DTD HTML 4.01 Transitional//EN">
<html>
<head>
<base href="<%=basePath%>">
<title>錯誤頁面</title>
</head>
<body>這是錯誤頁面
</body>
</html>
View Code
4.MyController.java(定義自己的處理器)
package cn.zhang.controller;

import org.springframework.stereotype.Controller;
import org.springframework.ui.Model;
import org.springframework.web.bind.annotation.RequestMapping;
import org.springframework.web.bind.annotation.RequestMethod;

//定義自己的處理器

@Controller
public class MyController{
    @RequestMapping(value="/frist.do",produces="text/html;charset=utf-8",method=RequestMethod.POST)
    public String frist(Model model,String name,int age){
        model.addAttribute("name", name);
        model.addAttribute("age", age);
        System.out.println(name);
        System.out.println(age);
        return "forward:/hello.jsp";
    }
}
View Code
5.applicationContext.xml(Spring的配置文件)
<?xml version="1.0" encoding="UTF-8"?>
<beans xmlns="http://www.springframework.org/schema/beans"
    xmlns:xsi="http://www.w3.org/2001/XMLSchema-instance"
    xmlns:context="http://www.springframework.org/schema/context"
    xmlns:mvc="http://www.springframework.org/schema/mvc"
    xsi:schemaLocation="
        http://www.springframework.org/schema/beans http://www.springframework.org/schema/beans/spring-beans.xsd
        http://www.springframework.org/schema/context http://www.springframework.org/schema/context/spring-context.xsd
        http://www.springframework.org/schema/mvc http://www.springframework.org/schema/mvc/spring-mvc.xsd">

    <!-- 使用注解方式完成映射 -->
    <context:component-scan base-package="cn.zhang.controller"></context:component-scan>
    <!-- mvc的注解驅動 -->
    <mvc:annotation-driven/>

</beans>
View Code
效果展示:
1.輸入成功的情況
點擊提交跳到成功頁面:
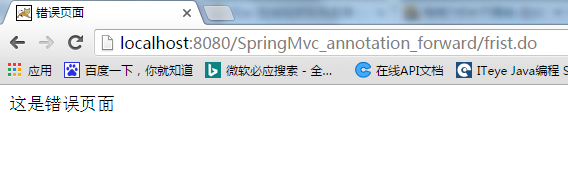
如果輸入其他的信息則會跳到錯誤頁面:
二:重定向(redirect)
我們只要改我們的控制器就行了
package cn.zhang.controller;

import org.springframework.stereotype.Controller;
import org.springframework.ui.Model;
import org.springframework.web.bind.annotation.RequestMapping;

//定義自己的處理器

@Controller
public class MyController{

    @RequestMapping(value="/frist.do")//登錄請求的是frist.do
    public String frist(Model model,String name,int age){

        return "redirect:hello.do";//重定向到hello.do
    }

    @RequestMapping(value="/hello.do")
    public String hello(Model model,String name,int age){
        model.addAttribute("name", name);
        model.addAttribute("age", age);
        System.out.println(name);
        System.out.println(age);
        if (name.equals("1")&&age==1) {
            return "redirect:/hello.jsp";//重定向到hello.jsp
        }else {
            return "redirect:/error.jsp";//重定向到error.jsp
        }

    }
}
View Code