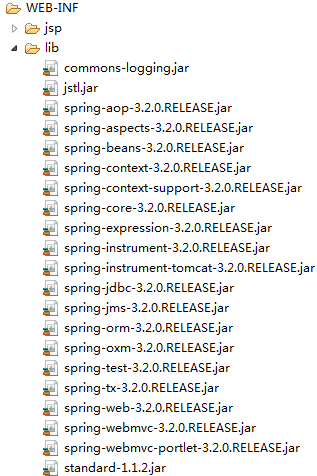
上面所添加的jar包,只要從網上下載都是都有的
 1 <?xml version="1.0" encoding="UTF-8"?>
 2 <web-app xmlns:xsi="http://www.w3.org/2001/XMLSchema-instance" xmlns="http://java.sun.com/xml/ns/javaee" xmlns:web="http://java.sun.com/xml/ns/javaee/web-app_2_5.xsd" xsi:schemaLocation="http://java.sun.com/xml/ns/javaee http://java.sun.com/xml/ns/javaee/web-app_2_5.xsd" id="WebApp_ID" version="2.5">
 3   <display-name>springMVC1</display-name>
    <!-- 標簽<welcome-file>就是直接訪問http://localhost:9090/springMVC1此項目時直接跳轉到設置的頁面-->
 4   <welcome-file-list>
 5     <welcome-file>index.html</welcome-file>
 6     <welcome-file>index.htm</welcome-file>
 7     <welcome-file>index.jsp</welcome-file>
 8     <welcome-file>default.html</welcome-file>
 9     <welcome-file>default.htm</welcome-file>
10     <welcome-file>default.jsp</welcome-file>
11   </welcome-file-list>
12
13   <servlet>
      <!-- 下面的springMVC和DispatcherServlet就是設置讓springMVC獲取到用戶的所有請求-->
14       <servlet-name>springMVC</servlet-name>
15       <servlet-class>org.springframework.web.servlet.DispatcherServlet</servlet-class>
16           <init-param>
      <!-- 下面的contextConfigLocation和spring-servlet.xml就是設置springMVC配置文件,來獲取框架的上下文信息-->
17               <param-name>contextConfigLocation</param-name>
18               <param-value>classpath*:config/spring-servlet.xml</param-value>
19           </init-param>
20       <load-on-startup>1</load-on-startup>
21   </servlet>
22
23   <servlet-mapping>
      <!--一定要和上面配置的<servlet-name>名稱一致,過濾上面獲取的用戶請求,下面設置就意味著接收所有的請求-->
24       <servlet-name>springMVC</servlet-name>
25       <url-pattern>/</url-pattern>
26   </servlet-mapping>
29 </web-app>
 1 package com.tgb.web.controller;
 2
 3 import java.util.HashMap;
 4 import java.util.Map;
 5
 6 import javax.servlet.http.HttpServletRequest;
 7 import javax.servlet.http.HttpServletResponse;
 8
 9 import org.springframework.web.servlet.ModelAndView;
10 import org.springframework.web.servlet.mvc.Controller;
11
12 public class HelloWorldController implements Controller {
13
14     @Override
15     public ModelAndView handleRequest(HttpServletRequest arg0,
16             HttpServletResponse arg1) throws Exception {
17         System.out.println("------這是控制方法-----");
18         Map<String,Object> map=new HashMap<String,Object>();
19         map.put("hello1", "hello1");
20         map.put("hello2", "hello2");
21         map.put("hello3", "hello3");
22         String hello = "你好啊";
23         String url="/welcome";
24         return new ModelAndView(url,"map",map);
25     }
27 }
根據springMVC規范HelloWorldController要實現接口Controller和方法,這裡大家暫時先這麼用,最原始的訪問方法,後面會和大家說全部用注解的形式訪問,實現的方法返回的是ModelAndView,它可以直接returna new ModelAndView(url,"map",map),url就是跳轉的頁面地址,map就是傳遞到jsp頁面的數據對象
1 <%@ page language="java" contentType="text/html; charset=UTF-8"
2 pageEncoding="UTF-8"%>
3 <%@taglib prefix="c" uri="http://java.sun.com/jsp/jstl/core" %>
4 <!DOCTYPE html PUBLIC "-//W3C//DTD HTML 4.01 Transitional//EN" "http://www.w3.org/TR/html4/loose.dtd">
5 <html>
6 <head>
7 <meta http-equiv="Content-Type" content="text/html; charset=UTF-8">
8 <title>Insert title here</title>
9 </head>
10 <body>
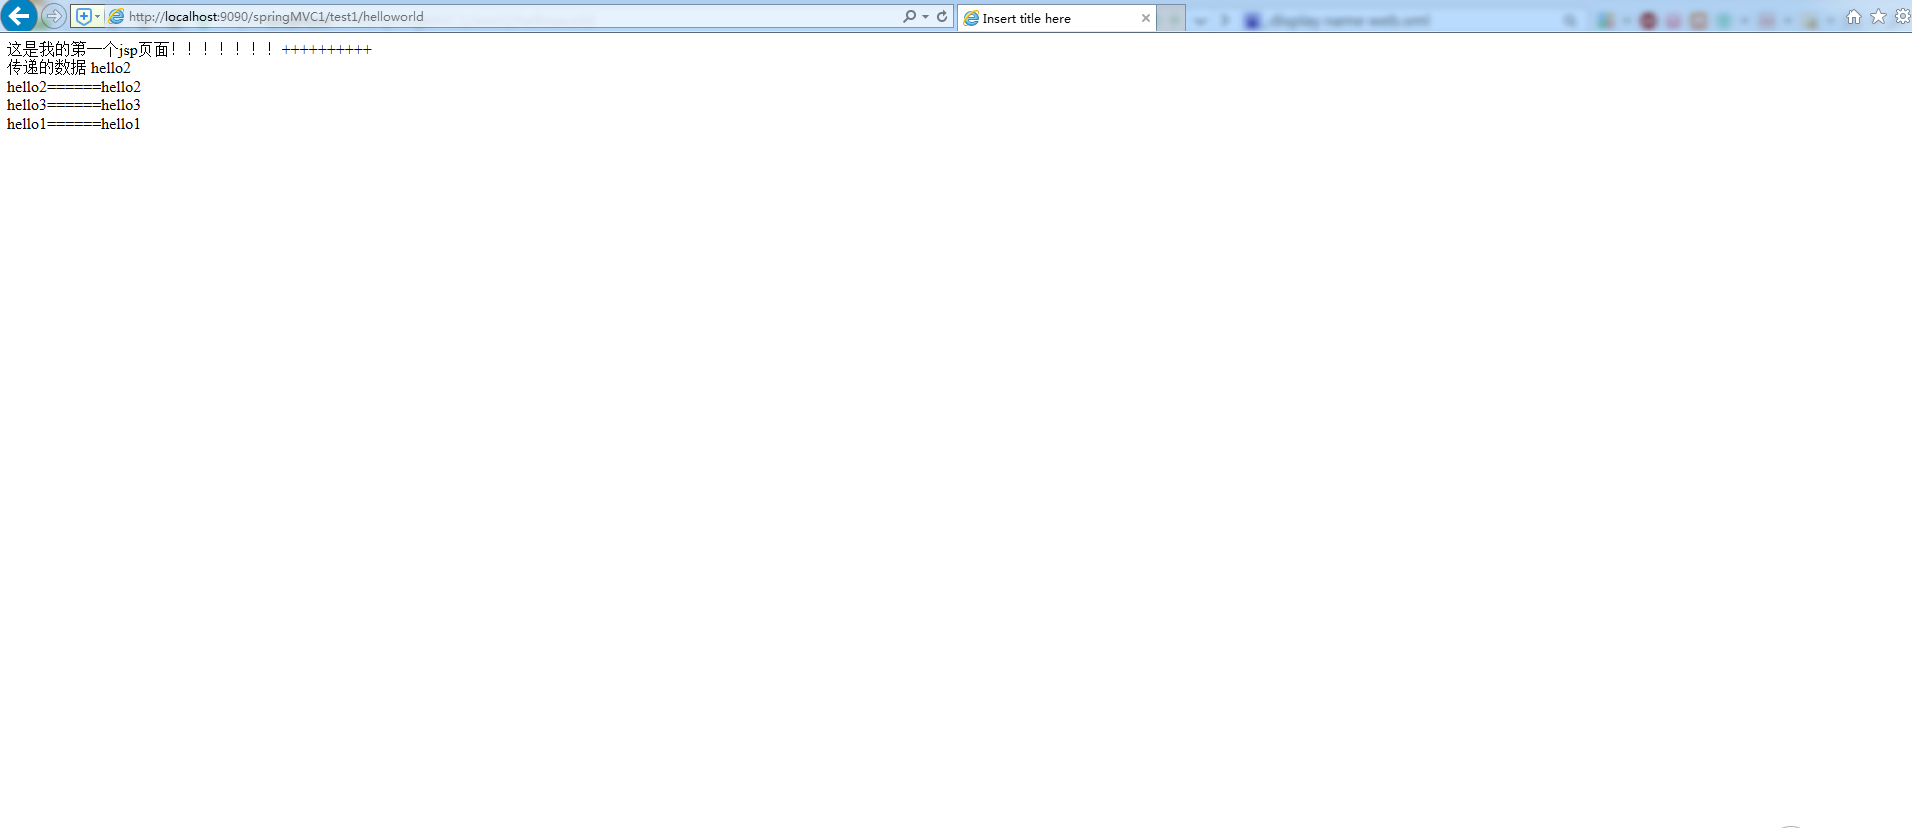
11 這是我的第一個jsp頁面!!!!!!!++++++++++
12 <br/>
13 <h>傳遞的數據</h>
14 ${hello}
15 ${map.hello2}
16 <div>
17
18 <c:forEach items="${map}" var="m">
19 ${m.key }======${m.value }<br/>
20 </c:forEach>
21 </div>
22 </body>
23 </html>
 1 <?xml version="1.0" encoding="UTF-8"?>
 2 <beans xmlns="http://www.springframework.org/schema/beans"
 3  xmlns:context="http://www.springframework.org/schema/context"
 4  xmlns:p="http://www.springframework.org/schema/p"
 5  xmlns:mvc="http://www.springframework.org/schema/mvc"
 6  xmlns:xsi="http://www.w3.org/2001/XMLSchema-instance"
 7  xsi:schemaLocation="http://www.springframework.org/schema/beans
 8       http://www.springframework.org/schema/beans/spring-beans-3.0.xsd
 9       http://www.springframework.org/schema/context
10       http://www.springframework.org/schema/context/spring-context.xsd
11       http://www.springframework.org/schema/mvc
12       http://www.springframework.org/schema/mvc/spring-mvc-3.0.xsd">
13
14
15     <!--name="/test1/helloworld" 就是要訪問控制器的路徑,然後進入這個控制方法-->
16     <bean name="/test1/helloworld" class="com.tgb.web.controller.HelloWorldController" />

27     <bean id="viewResolver" class="org.springframework.web.servlet.view.InternalResourceViewResolver">
28         <property name="prefix" value="/WEB-INF/jsp"></property>
29         <property name="suffix" value=".jsp"></property>
30     </bean>
31  </beans>
直接在浏覽器的地址欄裡輸入http://localhost:9090/springMVC1/test1/helloworld