回顧Java平台上Web開發歷程來看,從Servlet出現開始,到JSP繁盛一時,然後是Servlet+JSP時代,最後演化為現在Web開發框架盛行的時代。一般接觸到一個新的Web框架,都會想問這個框架優勢在哪?或者比其他框架好在哪裡?如果沒有使用Spring MVC框架,而是使用其他框架並且能夠很好地滿足要求,這樣轉換框架或許不是一個好主意。如果像我這樣首次接觸Web開發框架,Spring MVC還是值得優先考慮的。
LZ的開發環境是IDEA,這幾天使用IDEA的感覺來看,IDEA整體界面比eclipse清爽,打開和關閉速度要快好多,但是好多功能還不知道在哪裡,嗚嗚嗚…
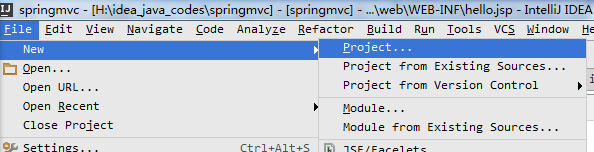
1 打開IDEA,新建工程
2 工程選擇如下所示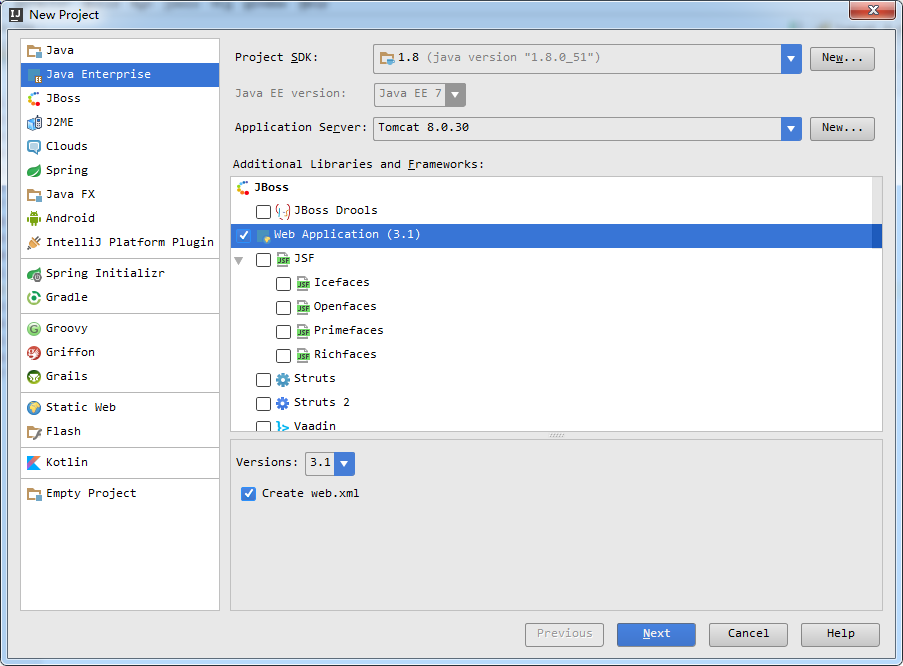
當然,新建工程時也可以選擇Spring – Spring MVC(這裡把Web Application也要選擇上)
3 工程命名為mvcdemo,如下所示,然後點擊finash
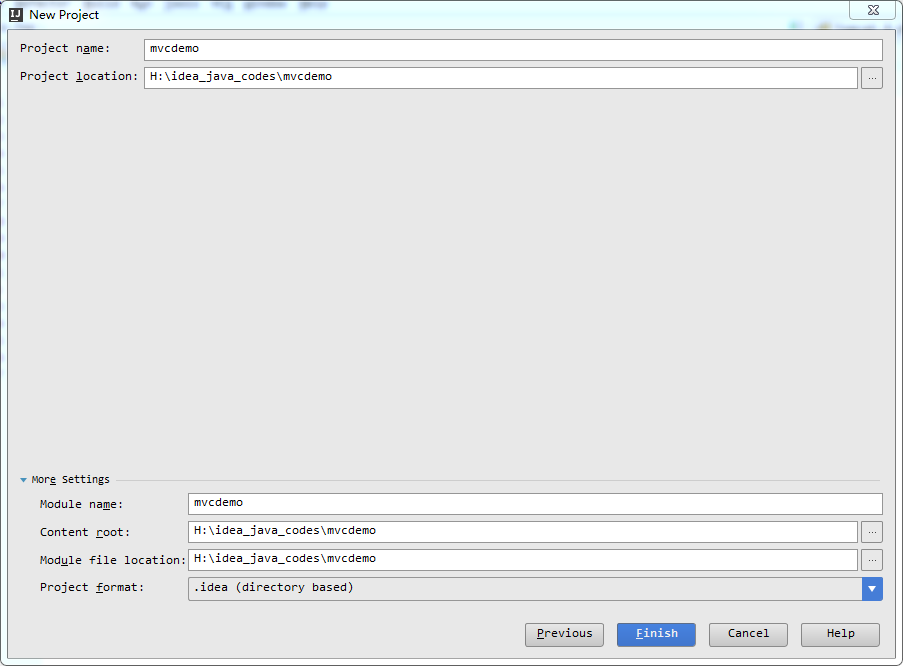
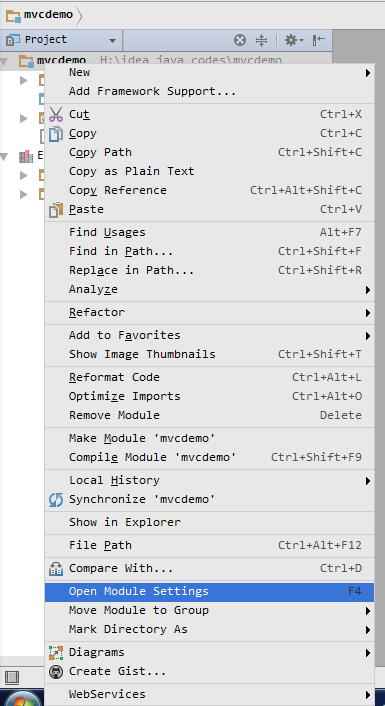
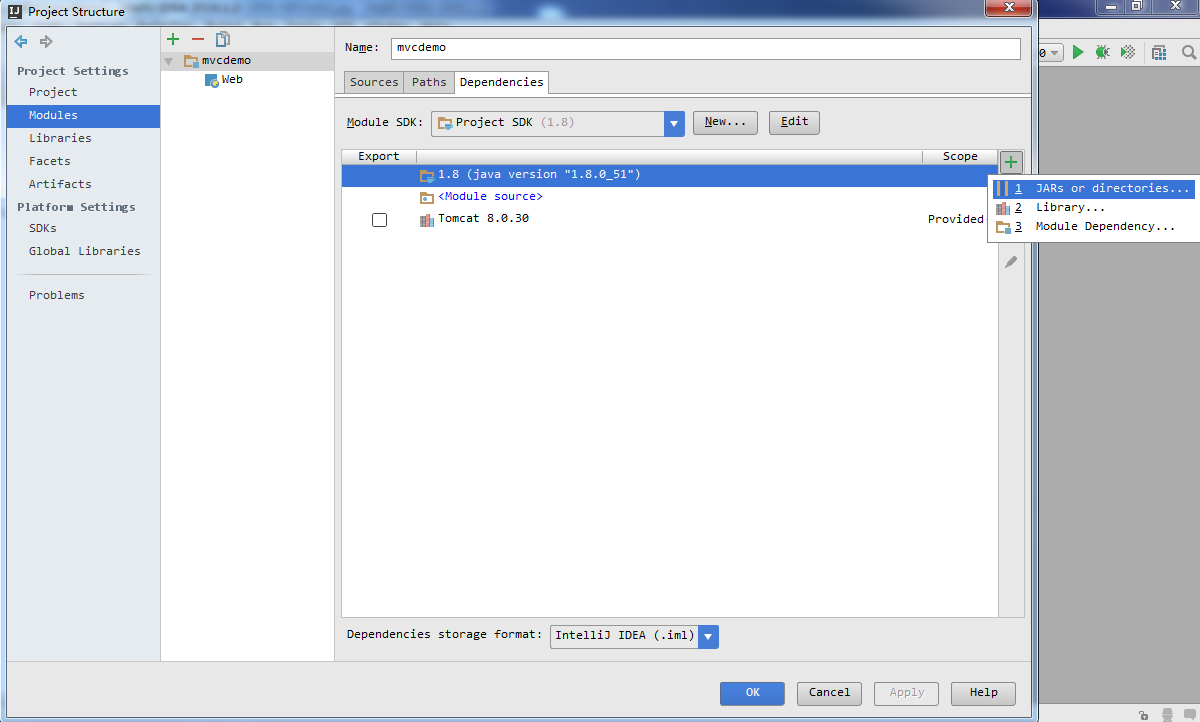
4 新建工程完成後,需要手動添加關聯的jar包(LZ沒有使用maven,為什麼呢,因為現在還不會…),鼠標移動工程名處右鍵點擊Open Module Settings,添加對應的Jar包
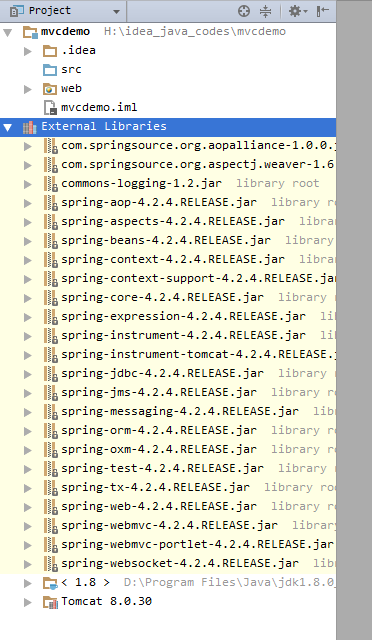
5 最後工程整體如下所示,為了方便,把spring所有的jar包都給添加上了,還有commons-logging包。
6 配置web.xml文件和mvcdemo-servlet.xml文件

<?xml version="1.0" encoding="UTF-8"?>
<web-app xmlns="http://xmlns.jcp.org/xml/ns/javaee"
         xmlns:xsi="http://www.w3.org/2001/XMLSchema-instance"
         xsi:schemaLocation="http://xmlns.jcp.org/xml/ns/javaee http://xmlns.jcp.org/xml/ns/javaee/web-app_3_1.xsd"
         version="3.1">

    <display-name>Spring MVC</display-name>

    <servlet>
        <servlet-name>mvcdemo</servlet-name>
        <servlet-class>org.springframework.web.servlet.DispatcherServlet</servlet-class>
        <load-on-startup>1</load-on-startup>
    </servlet>
    <servlet-mapping>
        <servlet-name>mvcdemo</servlet-name>
        <url-pattern>/</url-pattern>
    </servlet-mapping>

</web-app>
以上是web.xml文件,DispatcherServlet作為整個應用的Front Controller,其用來處理所有請求,而不能像“一個Web請求對應一個Servlet”那樣獲取Web容器對URL映射匹配的支持,而只好自己處理具體的Web請求和具體的處理類之間的映射關系了,也就是需要借助於ControllerBeanNameHandlerMapping了。
<?xml version="1.0" encoding="UTF-8"?>
<beans xmlns="http://www.springframework.org/schema/beans"
       xmlns:xsi="http://www.w3.org/2001/XMLSchema-instance"
       xsi:schemaLocation="http://www.springframework.org/schema/beans http://www.springframework.org/schema/beans/spring-beans.xsd">

    <!-- HandlerMapping 根據benaname找到對應的controller -->
    <bean class="org.springframework.web.servlet.mvc.support.ControllerBeanNameHandlerMapping"/>

    <!-- controller 配置處理器 -->
    <bean name="/hello" class="com.luoxn28.hello.HelloController"/>

    <!-- ViewResolver 視圖解析器  -->
    <bean class="org.springframework.web.servlet.view.InternalResourceViewResolver">
        <!-- 前綴 和 後綴 -->
        <property name="prefix" value="/WEB-INF/"/>
        <property name="suffix" value=".jsp"/>
    </bean>
</beans>
ControllerBeanNameHandlerMapping用來處理具體的Web請求和具體的處理類之間的映射關系,而Controller(HelloController是Controller的實現類)也就是一個具體的處理類。InternalResourceViewResolver配置的是視圖解析相關信息。
7 在src文件夾下新建com.luoxn28.hello包,然後在包下新建HelloController類。
package com.luoxn28.hello;

import org.springframework.web.servlet.ModelAndView;
import org.springframework.web.servlet.mvc.AbstractController;

import javax.servlet.http.HttpServletRequest;
import javax.servlet.http.HttpServletResponse;

public class HelloController extends AbstractController {
    @Override
    protected ModelAndView handleRequestInternal(HttpServletRequest request, HttpServletResponse response) {
        String hello = request.getParameter("hello");

        System.out.println("HelloController: " + hello);
        ModelAndView mav = new ModelAndView("hello");
        mav.addObject("hello", hello);

        return mav;
    }
}
8 在WEB-INF文件夾下新建hello.jsp文件,內容如下:
<%@ page contentType="text/html;charset=UTF-8" language="java" %>
<html>
<head>
    <title>springmvc</title>
</head>
<body>
    Spring MVC<br/>
    ${hello}
</body>
</html>
9 更改index.jsp文件如下:
<%@ page contentType="text/html;charset=UTF-8" language="java" %>
<html>
  <head>
    <title>$Title$</title>
  </head>
  <body>
    <form action="hello" method="post">
      hello:<input type="text" name="hello"/>
      <input type="submit" value="提交"/>
    </form>
  </body>
</html>
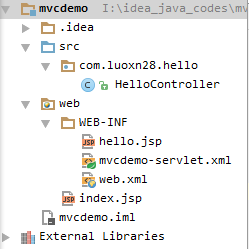
10 至此,整個工程建立完畢,現在的工程視圖如下:
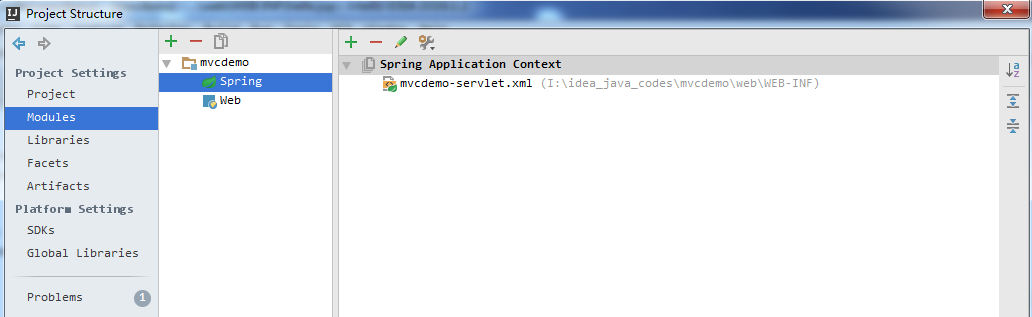
然後鼠標移動工程名處右鍵點擊Open Module Settings,進行配置,在Modules下添加Spring,選擇Spring Application Context為WEB-INF下的mvc-demo-servlet.xml,如下圖所示:
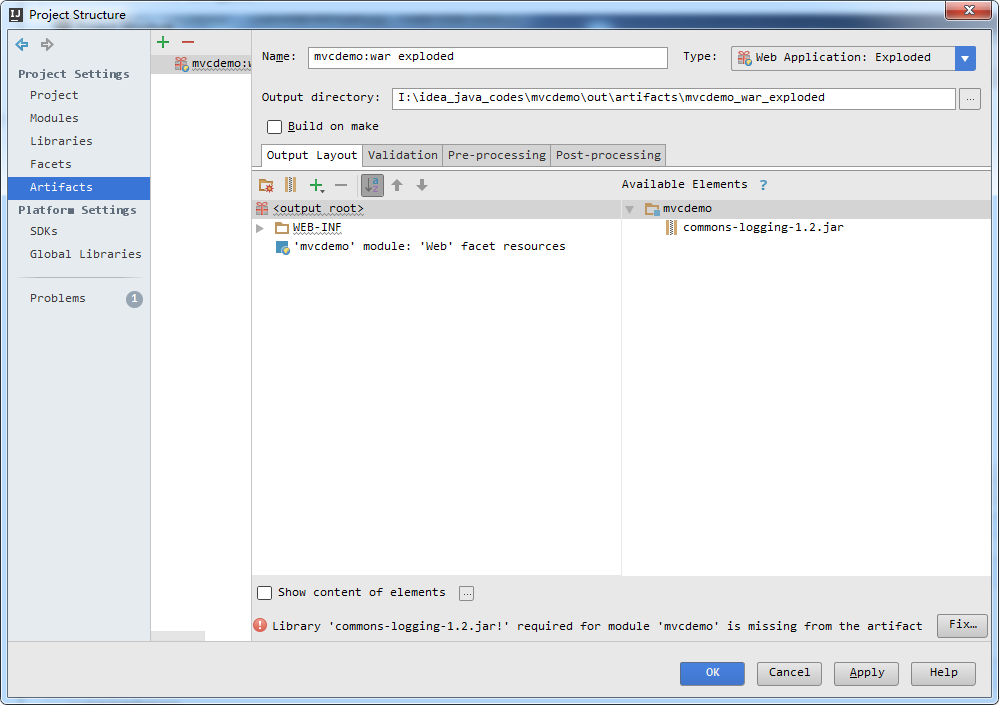
點擊Artifacts,下面有提示信息,點擊Fix...按鈕,如下所示:
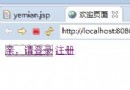
一切設置完畢後,點擊啟動按鈕,顯示畫面如下所示:
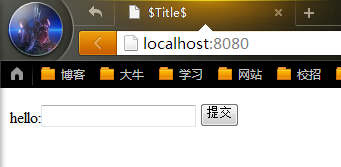
隨便輸入一串字符串後點擊提交,比如輸入"luoxn28",最後會跳轉到如下界面,到此整個工程結束。

參考資料
1、Spring MVC從入門到精通視頻教程