想必有很多的程序員,不願意進行用戶管理這塊代碼實現。
原因之一,不同的JavaEE 系統,不同項目用戶管理都會有個性化的實現,邏輯很繁瑣。
而且是系統門面,以後背鍋的幾率非常大,可謂是低收益高風險。
最近在系統中集成了 Shiro,感覺這個小家伙還是相當靈活的。
完善的用戶認證和授權,干淨的API,讓人如沐春分。
本文重點描述集成過程,能讓你迅速的將 Shiro 集成到 JavaEE 項目中,畢竟項目都挺緊張的。
至於其中的源碼的實現,可以找個閒暇的夜晚,細細品味。
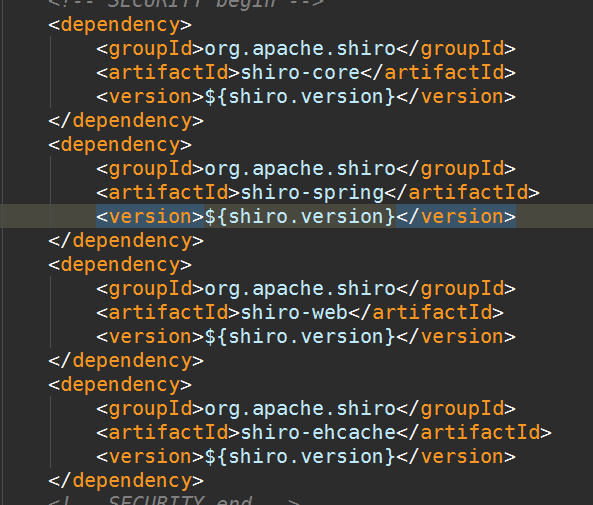
Shiro 核心jar:
JavaEE 應用開始的地方,web.xml 配置:
         <filter>
           <filter-name>shiroFilter</filter-name>
           <filter-class>
              org.springframework.web.filter.DelegatingFilterProxy
           </filter-class>
         </filter>
         <filter-mapping>
           <filter-name>shiroFilter</filter-name>
           <url-pattern>/*</url-pattern>
         </filter-mapping>
Shiro Spring 注解文件,應用啟動的使用,會幫助你做很多事情:
<?xml version="1.0" encoding="UTF-8"?>
<beans xmlns="http://www.springframework.org/schema/beans"
       xmlns:xsi="http://www.w3.org/2001/XMLSchema-instance"
       xsi:schemaLocation="http://www.springframework.org/schema/beans http://www.springframework.org/schema/beans/spring-beans.xsd">
    <bean id="lifecycleBeanPostProcessor" class="org.apache.shiro.spring.LifecycleBeanPostProcessor"/>
    <!-- 數據庫保存的密碼是使用MD5算法加密的,所以這裡需要配置一個密碼匹配對象 -->
    <bean id="credentialsMatcher" class="org.apache.shiro.authc.credential.Md5CredentialsMatcher"/>
    <!-- 緩存管理 -->
    <!--<bean id="cacheManager" class="org.apache.shiro.cache.MemoryConstrainedCacheManager"/>-->
    <!--
      使用Shiro自帶的JdbcRealm類
      指定密碼匹配所需要用到的加密對象
      指定存儲用戶、角色、權限許可的數據源及相關查詢語句
     -->
    <bean id="jdbcRealm" class="org.apache.shiro.realm.jdbc.JdbcRealm">
        <property name="credentialsMatcher" ref="credentialsMatcher"/>
        <property name="permissionsLookupEnabled" value="true"/>
        <property name="dataSource" ref="basedb"/>
        <property name="authenticationQuery" value="SELECT NSRMC FROM USER WHERE USERID = ?"/>
        <!--<property name="userRolesQuery" value="SELECT role_name from sec_user_role left join sec_role using(role_id) left join sec_user using(user_id) WHERE user_name = ?"/>-->
        <!--<property name="permissionsQuery" value="SELECT permission_name FROM sec_role_permission left join sec_role using(role_id) left join sec_permission using(permission_id) WHERE role_name = ?"/>-->
    </bean>
    <!--自定義認證-->
    <bean id="myRealm" class="cn.orson.common.MyRealm"/>

    <!-- Shiro安全管理器 -->
    <bean id="securityManager" class="org.apache.shiro.web.mgt.DefaultWebSecurityManager">
        <!--多realms配置-->
        <property name="realms">
            <list>
                <ref bean="myRealm"/>
                <ref bean="jdbcRealm"/>
            </list>
        </property>
        <!--<property name="realm" ref="jdbcRealm"/>-->
        <!--<property name="cacheManager" ref="cacheManager"/>-->
    </bean>

    <!--
       Shiro主過濾器本身功能十分強大,其強大之處就在於它支持任何基於URL路徑表達式的、自定義的過濾器的執行
       Web應用中,Shiro可控制的Web請求必須經過Shiro主過濾器的攔截,Shiro對基於Spring的Web應用提供了完美的支持
    -->
    <bean id="shiroFilter" class="org.apache.shiro.spring.web.ShiroFilterFactoryBean">
        <!-- Shiro的核心安全接口,這個屬性是必須的 -->
        <property name="securityManager" ref="securityManager"/>
        <!-- 要求登錄時的鏈接(登錄頁面地址),非必須的屬性,默認會自動尋找Web工程根目錄下的"/login.jsp"頁面 -->
        <property name="loginUrl" value="/login.jsp"/>
        <!-- 登錄成功後要跳轉的連接(本例中此屬性用不到,因為登錄成功後的處理邏輯在LoginController裡硬編碼) -->
        <!-- <property name="successUrl" value="/" ></property> -->
        <!-- 用戶訪問未對其授權的資源時,所顯示的連接 -->
        <property name="unauthorizedUrl" value="/"/>
        <property name="filterChainDefinitions">
            <value>
                /security/*=anon
                /tag=authc
            </value>
        </property>
    </bean>
    <bean id="shiroLogin" class="cn.orson.common.ShiroLogin"/>
    <!--
       開啟Shiro的注解(如@RequiresRoles,@RequiresPermissions),需借助SpringAOP掃描使用Shiro注解的類,
       並在必要時進行安全邏輯驗證
    -->
    <!--
    <bean
        class="org.springframework.aop.framework.autoproxy.DefaultAdvisorAutoProxyCreator"></bean>
    <bean
        class="org.apache.shiro.spring.security.interceptor.AuthorizationAttributeSourceAdvisor">
        <property name="securityManager" ref="securityManager"></property>
    </bean>
    -->
</beans>
請求發起的地方一般是前端,不管你是 .jsp/.php/.net.......方式都是類似
<html>
<body>
<h1>login page</h1>
<form id="" action="service/dologin" method="post">
    <label>賬號:</label><input name="userName" maxLength="40"/>
    <input title="是否是管理員" type="checkbox" name="isAdmin"><label>是否為管理員</label><br>
    <label>密碼:</label><input title="密碼" type="password" name="password" /><br>
    <input type="submit" value="登錄"/>
</form>
<%--用於輸入後台返回的驗證錯誤信息 --%>
<P><c:out value="${message }"/></P>
</body>
</html>
項目中肯定需要自定義項目驗證域
public class MyRealm extends AuthorizingRealm {
    Log log = LogFactory.getLog(MyRealm.class);
    /**
     * 為當前登錄的Subject授予角色和權限
     * 經測試:本例中該方法的調用時機為需授權資源被訪問時
     * 經測試:並且每次訪問需授權資源時都會執行該方法中的邏輯,這表明本例中默認並未啟用AuthorizationCache
     * 個人感覺若使用了Spring3.1開始提供的ConcurrentMapCache支持,則可靈活決定是否啟用AuthorizationCache
     * 比如說這裡從數據庫獲取權限信息時,先去訪問Spring3.1提供的緩存,而不使用Shior提供的AuthorizationCache
     */
    @Override
    protected AuthorizationInfo doGetAuthorizationInfo(PrincipalCollection principals){
        log.info("-----------------access doGetAuthorizationInfo----------------------");
        //獲取當前登錄的用戶名,等價於(String)principals.fromRealm(this.getName()).iterator().next()
        String currentUsername = (String)super.getAvailablePrincipal(principals);
//      這裡實現自己的業務邏輯
//      根據業務邏輯,設置角色和權限

        SimpleAuthorizationInfo simpleAuthorInfo = new SimpleAuthorizationInfo();
        //實際中可能會像上面注釋的那樣從數據庫取得
        if(null!=currentUsername && "mike".equals(currentUsername)){
            //添加一個角色,不是配置意義上的添加,而是證明該用戶擁有admin角色
            simpleAuthorInfo.addRole("admin");
            simpleAuthorInfo.addStringPermission("admin:manage"); //添加權限return simpleAuthorInfo;
        }
        //若該方法什麼都不做直接返回null的話,就會導致任何用戶訪問/admin/listUser.jsp時都會自動跳轉到unauthorizedUrl指定的地址
        //詳見applicationContext.xml中的<bean id="shiroFilter">的配置
        return null;
    }

    /**
     *   驗證當前登錄的Subject
     *   經測試:本例中該方法的調用時機為LoginController.login()方法中執行Subject.login()時
     */
    @Override
    protected AuthenticationInfo doGetAuthenticationInfo(AuthenticationToken authcToken) throws AuthenticationException {//獲取基於用戶名和密碼的令牌
        //實際上這個authcToken是從LoginController裡面currentUser.login(token)傳過來的
        //兩個token的引用都是一樣的
        UsernamePasswordToken token = (UsernamePasswordToken)authcToken;
        log.info("驗證當前Subject時獲取到token為" + ReflectionToStringBuilder.toString(token, ToStringStyle.MULTI_LINE_STYLE));
        //此處無需比對,比對的邏輯Shiro會做,我們只需返回一個和令牌相關的正確的驗證信息
        //說白了就是第一個參數填登錄用戶名,第二個參數填合法的登錄密碼(可以是從數據庫中取到的,本例中為了演示就硬編碼了)
        //這樣一來,在隨後的登錄頁面上就只有這裡指定的用戶和密碼才能通過驗證
      /*  if("mike".equals(token.getUsername())){
            AuthenticationInfo authcInfo = new SimpleAuthenticationInfo("mike", "mike", this.getName());
            authcInfo.getCredentials();
            this.setSession("currentUser", "mike");
            return authcInfo;
        }*///沒有返回登錄用戶名對應的SimpleAuthenticationInfo對象時,就會在LoginController中拋出UnknownAccountException異常
        return null;
    }

    /**
     * 將一些數據放到ShiroSession中,以便於其它地方使用
     *   比如Controller,使用時直接用HttpSession.getAttribute(key)就可以取到
     */
    private void setSession(Object key, Object value){
        Subject currentUser = SecurityUtils.getSubject();
        if(null != currentUser){
            Session session = currentUser.getSession();if(null != session){
                session.setAttribute(key, value);
            }
        }
    }
}
請求的後台服務,在這裡你可以在進行一點業務邏輯
@Controller
@RequestMapping(value = "/")
public class ShiroLogin {
    /**
     * 實際的登錄代碼
     * 如果登錄成功,跳轉至首頁;登錄失敗,則將失敗信息反饋對用戶
     *
     * @param request
     * @param model
     * @return
     */
    @RequestMapping(value = "dologin",method = RequestMethod.POST)
    @ResponseBody
    public String doLogin(HttpServletRequest request, Model model) {
        String msg = "";
        String userName = request.getParameter("userName");
        String password = request.getParameter("password");

/*UsernamePasswordToken token = new UsernamePasswordToken(userName, password);
        token.setRememberMe(true);
        Subject subject = SecurityUtils.getSubject();
        try {
            subject.login(token);
            if (subject.isAuthenticated()) {
                return "redirect:/";
            } else {
                return "login";
            }
        } catch (IncorrectCredentialsException e) {
            msg = "登錄密碼錯誤. Password for account " + token.getPrincipal() + " was incorrect.";
            model.addAttribute("message", msg);
            System.out.println(msg);
        } catch (ExcessiveAttemptsException e) {
            msg = "登錄失敗次數過多";
            model.addAttribute("message", msg);
            System.out.println(msg);
        } catch (LockedAccountException e) {
            msg = "帳號已被鎖定. The account for username " + token.getPrincipal() + " was locked.";
            model.addAttribute("message", msg);
            System.out.println(msg);
        } catch (DisabledAccountException e) {
            msg = "帳號已被禁用. The account for username " + token.getPrincipal() + " was disabled.";
            model.addAttribute("message", msg);
            System.out.println(msg);
        } catch (ExpiredCredentialsException e) {
            msg = "帳號已過期. the account for username " + token.getPrincipal() + "  was expired.";
            model.addAttribute("message", msg);
            System.out.println(msg);
        } catch (UnknownAccountException e) {
            msg = "帳號不存在. There is no user with username of " + token.getPrincipal();
            model.addAttribute("message", msg);
            System.out.println(msg);
        } catch (UnauthorizedException e) {
            msg = "您沒有得到相應的授權!" + e.getMessage();
            model.addAttribute("message", msg);
            System.out.println(msg);
        }*/
    }
}
整個集成工作就結束了,是不是簡單的不要不要的。
等下次項目經理指派你做用戶管理的時候,只需要花半天的時間做設計。
借助Shiro 半天時間實現代碼。
然後將剩下的時間,做做自己喜歡的其他研究工作。