前期准備
前言,為什麼做以及要做個啥
本人姓小名白,不折不扣編程屆小白一名,但是自從大一那會兒接觸到編程這件奇妙的事情,就完完全全的陷入的程序的世界。
這不,最近又開始折騰APP了,話說現在開發一款APP真是容易,只用JavaScript和一點點HTML+css技術就可以完成。但是做APP的後台就不一樣了。開發了APP,想讓讀點數據進去,那我們就要去開發個後台了。
laravel框架,是我最喜歡的PHP框架了,沒有之一。去年就曾經用laravel寫了我的個人網站但粗糙程度讓我十分臉紅,好了不扯了,讓我們直接進入主題——先安裝laravel吧!
基礎環境配置
具體的步驟直接看文檔吧laravel5.2安裝
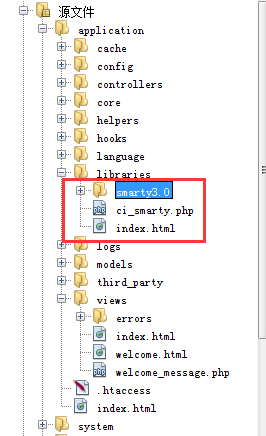
我自己的環境是win10上面安裝了wampsrver2.5,但是這裡值得好好注意一下,用wampsrver2.5了話,這幾個地方要改動一下。關於這個請看我的筆記點擊預覽
工具:sublime
浏覽器:chrome(要用到的插件postman)
關於API
API(Application Programming Interface,應用程序編程接口)是一些預先定義的函數,目的是提供應用程序與開發人員基於某軟件或硬件得以訪問一組例程的能力,而又無需訪問源碼,或理解內部工作機制的細節。
需要注意的是:API有它的具體用途,我們應該清楚它是干啥的。訪問API的時候應該輸入什麼。訪問過API過後應該得到什麼。
在開始設計API時,我們應該注意這8點
這裡的內容摘抄自大神的博客
後續的開發計劃就圍繞著這個進行了。(真心好棒的總結)
1.Restful設計原則
2.API的命名
3.API的安全性
4.API返回數據
5.圖片的處理
6.返回的提示信息
7.在線API測試文檔
8.在app啟動時,調用一個初始化API獲取必要的信息
用laravel開發API
就在我上愁著要不要從零開始學習的時候,找到了這個插件dingo/api那麼現在就來安裝吧!
首先一定是下載的沒錯
在新安裝好的laravel的composer.json加入如下內容
然後打開cmd執行
composer update
在config/app.php中的providers裡添加
App\Providers\OAuthServiceProvider::class,
Dingo\Api\Provider\LaravelServiceProvider::class,
LucaDegasperi\OAuth2Server\Storage\FluentStorageServiceProvider::class,
LucaDegasperi\OAuth2Server\OAuth2ServerServiceProvider::class,
在aliases裡添加
'Authorizer' => LucaDegasperi\OAuth2Server\Facades\Authorizer::class,
修改app/Http/Kernel.php文件裡的內容
protected $middleware = [\LucaDegasperi\OAuth2Server\Middleware\OAuthExceptionHandlerMiddleware::class,
];
protected $routeMiddleware = [
  'oauth' => \LucaDegasperi\OAuth2Server\Middleware\OAuthMiddleware::class,
  'oauth-user' => \LucaDegasperi\OAuth2Server\Middleware\OAuthUserOwnerMiddleware::class,
  'oauth-client' => \LucaDegasperi\OAuth2Server\Middleware\OAuthClientOwnerMiddleware::class,
  'check-authorization-params' => \LucaDegasperi\OAuth2Server\Middleware\CheckAuthCodeRequestMiddleware::class,
  'csrf' => \App\Http\Middleware\VerifyCsrfToken::class,
];
然後執行
php artisan vendor:publish
php artisan migrate
在.env文件裡添加這些配置
API_STANDARDS_TREE=x
API_SUBTYPE=rest
API_NAME=REST
API_PREFIX=api
API_VERSION=v1
API_CONDITIONAL_REQUEST=true
API_STRICT=false
API_DEBUG=true
API_DEFAULT_FORMAT=json
修改app\config\oauth2.php文件
'grant_types' => [
  'password' => [
    'class' => 'League\OAuth2\Server\Grant\PasswordGrant',
    'access_token_ttl' => 604800,
    'callback' => '\App\Http\Controllers\Auth\PasswordGrantVerifier@verify',
  ],
],
新建一個服務提供者,在app/Providers下新建OAuthServiceProvider.php文件內容如下
namespace App\Providers;

use Dingo\Api\Auth\Auth;
use Dingo\Api\Auth\Provider\OAuth2;
use Illuminate\Support\ServiceProvider;

class OAuthServiceProvider extends ServiceProvider
{
  public function boot()
  {
    $this->app[Auth::class]->extend('oauth', function ($app) {
      $provider = new OAuth2($app['oauth2-server.authorizer']->getChecker());

      $provider->setUserResolver(function ($id) {
        // Logic to return a user by their ID.
      });

      $provider->setClientResolver(function ($id) {
        // Logic to return a client by their ID.
      });

      return $provider;
    });
  }

  public function register()
  {
    //
  }
}
然後打開routes.php添加相關路由
//Get access_token
Route::post('oauth/access_token', function() {
   return Response::json(Authorizer::issueAccessToken());
});

//Create a test user, you don't need this if you already have.
Route::get('/register',function(){
  $user = new App\User();
   $user->name="tester";
   $user->email="test@test.com";
   $user->password = \Illuminate\Support\Facades\Hash::make("password");
   $user->save();
});
$api = app('Dingo\Api\Routing\Router');

//Show user info via restful service.
$api->version('v1', ['namespace' => 'App\Http\Controllers'], function ($api) {
  $api->get('users', 'UsersController@index');
  $api->get('users/{id}', 'UsersController@show');
});

//Just a test with auth check.
$api->version('v1', ['middleware' => 'api.auth'] , function ($api) {
  $api->get('time', function () {
    return ['now' => microtime(), 'date' => date('Y-M-D',time())];
  });
});
分別創建BaseController.php和UsersController.php內容如下
//BaseController
namespace App\Http\Controllers;

use Dingo\Api\Routing\Helpers;
use Illuminate\Routing\Controller;

class BaseController extends Controller
{
  use Helpers;
}

//UsersController
namespace App\Http\Controllers;

use App\User;
use App\Http\Controllers\Controller;

class UsersController extends BaseController
{

  public function index()
  {
    return User::all();
  }

  public function show($id)
  {
    $user = User::findOrFail($id);
    // 數組形式
    return $this->response->array($user->toArray());
  }
}
隨後在app/Http/Controllers/Auth/下創建PasswordGrantVerifier.php內容如下
namespace App\Http\Controllers\Auth;
use Illuminate\Support\Facades\Auth;

class PasswordGrantVerifier
{
  public function verify($username, $password)
  {
     $credentials = [
      'email'  => $username,
      'password' => $password,
     ];

     if (Auth::once($credentials)) {
       return Auth::user()->id;
     }

     return false;
  }
}
打開數據庫的oauth_client表新增一條client數據
INSERT INTO 'oauth_clients' ('id', 'secret', 'name', 'created_at', 'updated_at') VALUES ('1', '2', 'Main website', '2016–03–13 23:00:00', '0000–00–00 00:00:00');
隨後的就是去愉快的測試了,這裡要測試的API有
新增一個用戶
http://localhost/register
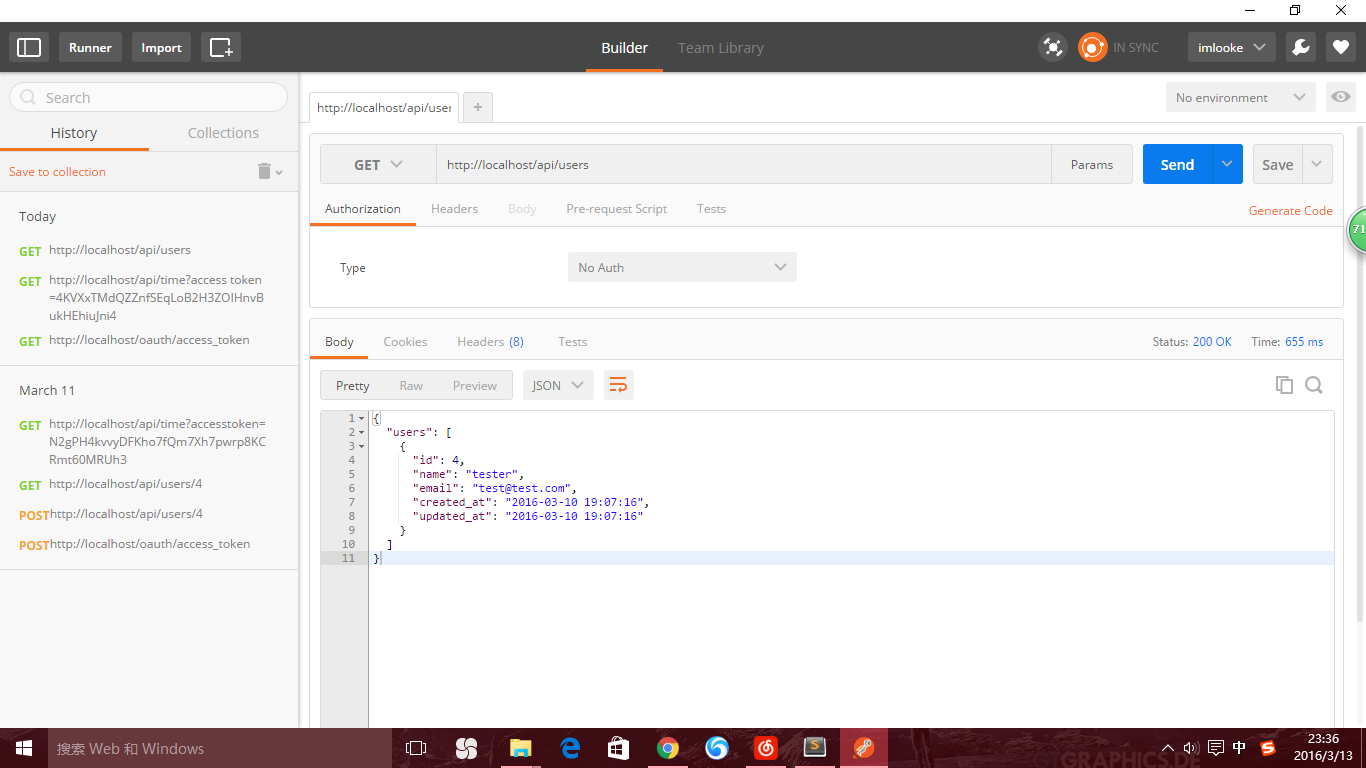
讀取所有用戶信息
http://localhost/api/users
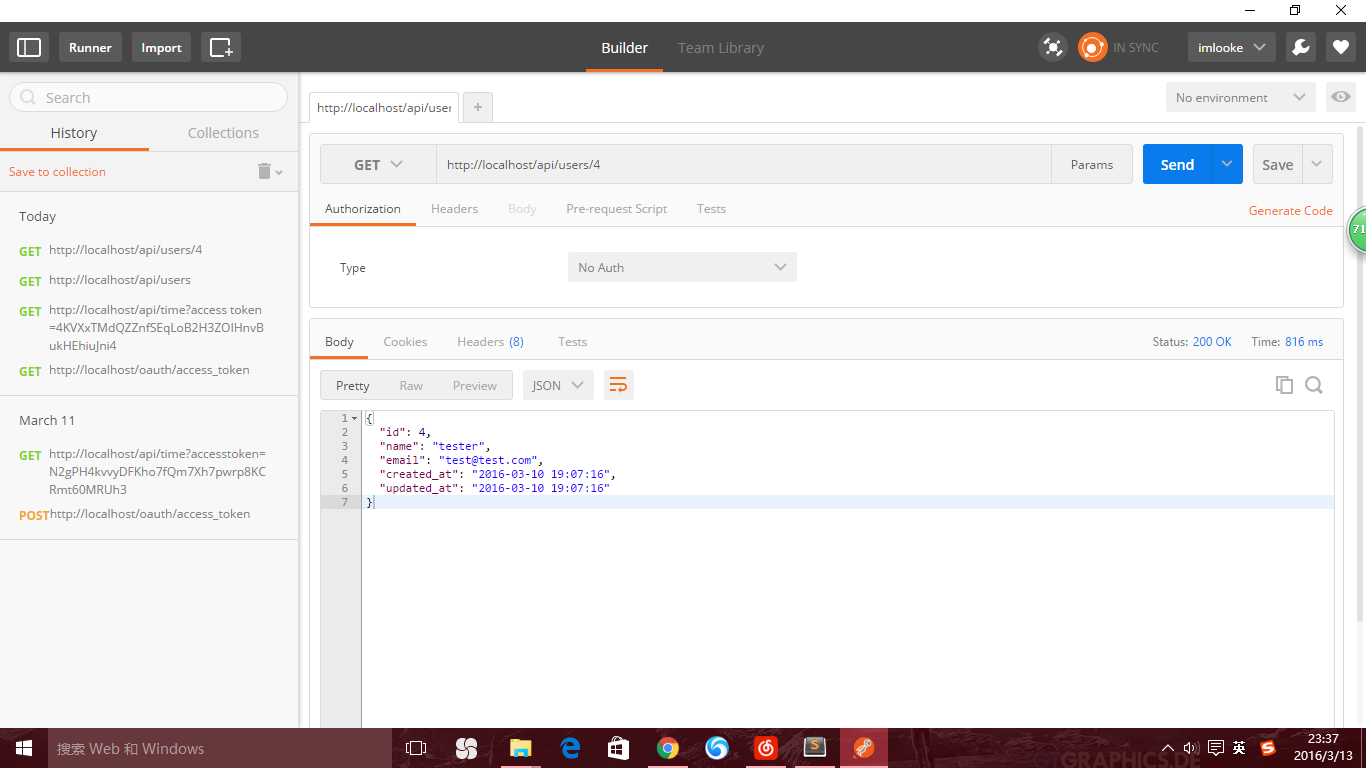
只返回用戶id為4的信息
http://localhost/api/users/4
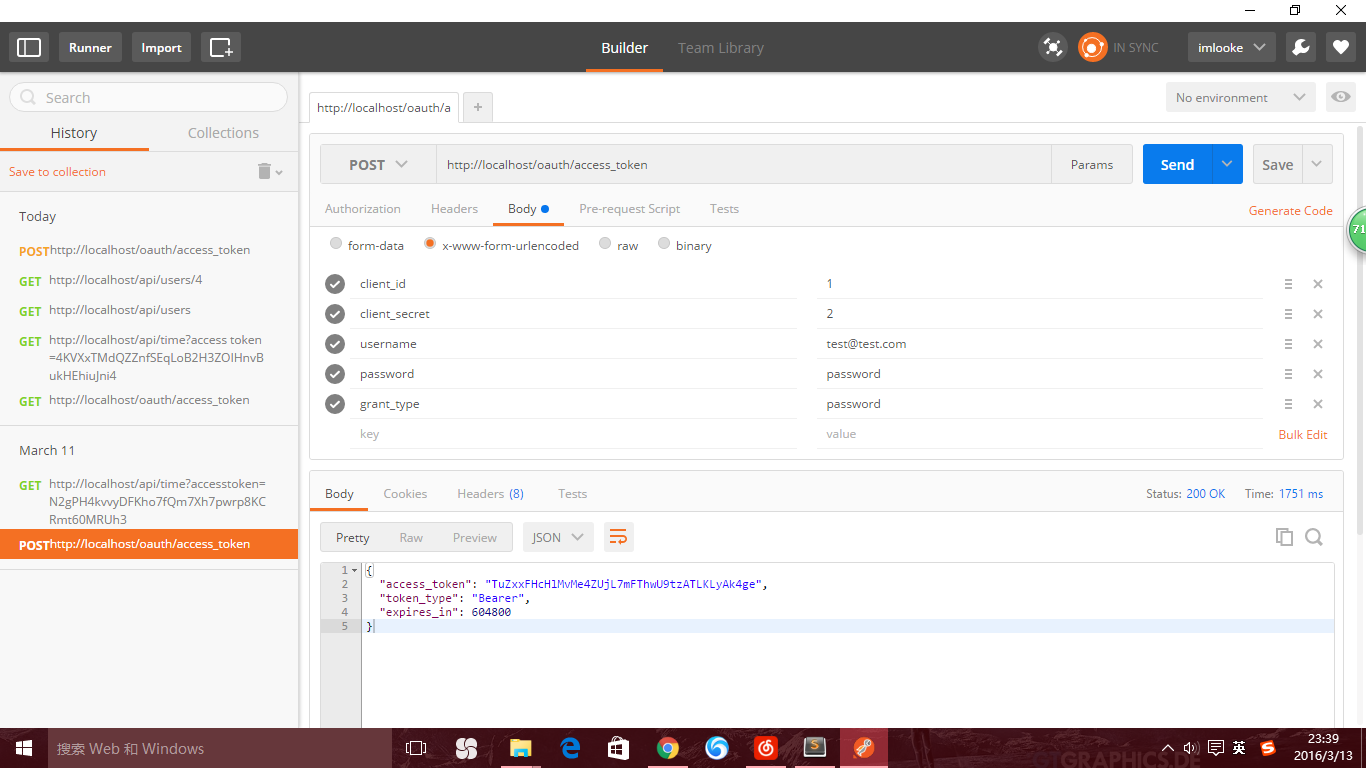
獲取access_token
http://localhost/oauth/access_token
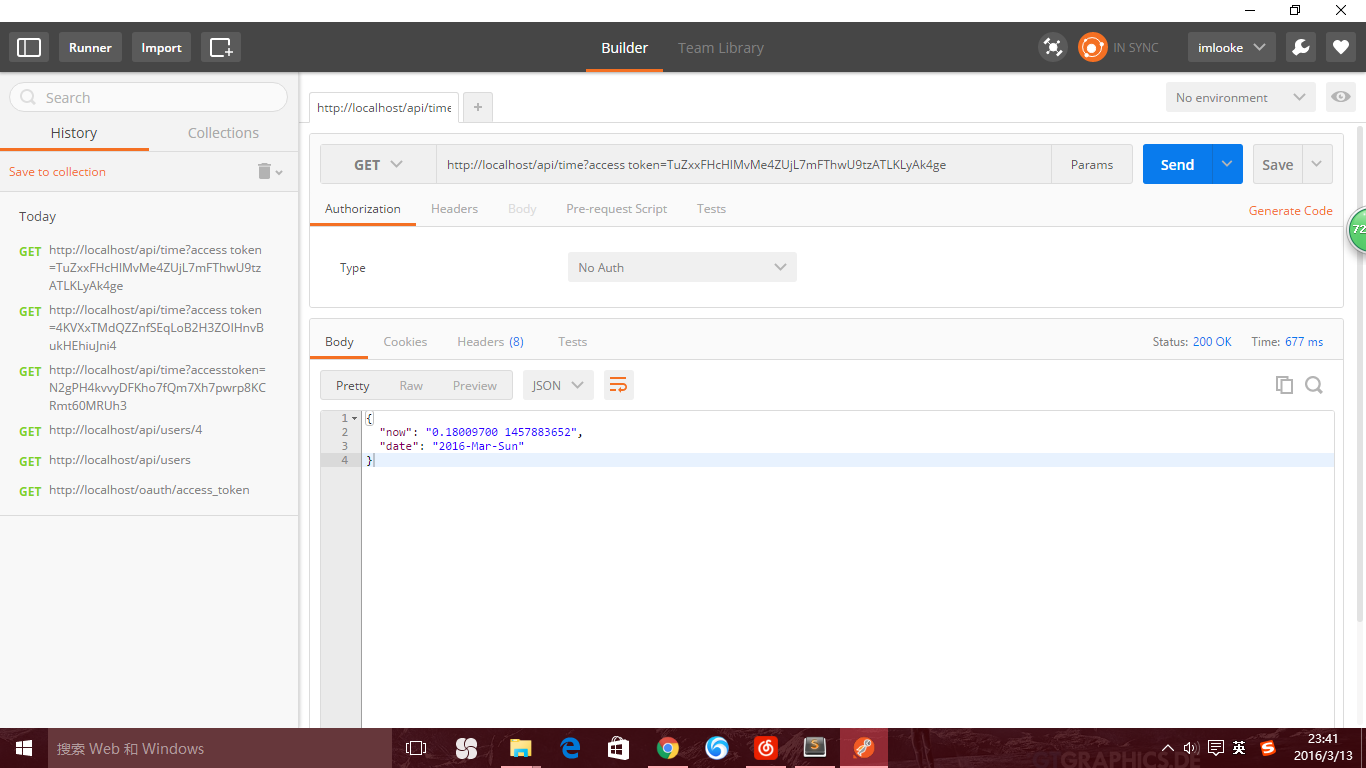
利用token值獲得時間,token值正確才能返回正確值
http://localhost/api/time
打開PostMan