在Smarty模板中主要都是以變量為主,下面就是有關Smarty的三大變量以及一些普通的用法
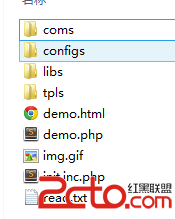
首先在根目錄下建立要用到的文件基本和上一次一樣,configs是配置文件夾
一、從PHP中分配的變量
用$smarty->assign()
$smarty->display()
首先先編寫初始化的php代碼,和上一篇的 conn.inc.php 一樣
assign("title","11111111");
    $smarty->assign("content","2222222222");
    //分配一個關聯數組,用的較少
    $smarty->assign(array("author"=>"何栘烽","time"=>date("Y-m-d H:i:s")));

    //注冊函數
    $smarty->registerPlugin("function","myfun","test");  //注冊插件,將test函數注冊成myfun
    function test($args){
    	//args=array("size"=>7, "color"="yellow", "num"=>5, "connect"=>"3333333")
    	//循環遍歷出
    	$str="";
    	for($i=0; $i<$args["num"]; $i++){
    		$str.=''.$args["content"].'
';
    	}
    	return $str;
    }
    //數組
    $smarty->assign("contacts",array("0575-1241243","kefeng.hyf@gmail.com", array("243214124", "45345")));
    //對象
    class Person{
    	public $name="kefeng";
    	function say(){
    		return $this->name."hhhhhhhh";
    	}
    }
    $smarty->assign("p",new Person());
    $smarty->display("demo.html");  //顯示的模板

二、從配置文件中讀取變量
這裡需要創一個 configs 文件夾,裡面配置文件 test.conf
test.conf:
bodycolor=#3e3e3e
bodybgcolor=yellow
border=10
align=center
width=800
bgcolor=gray

[index]
one=11111

[list]
two=22222

[content]
three=33333
display("demo.html"); //顯示的模板
demo.html :中,這裡寫一些頭文件,以及加載代碼
三、保留變量
主要有: $_GET
$_POST
$_SESSION
$_SERVER
$_ENV
<{$smarty()}>
<{$smarty.session.username}>
<{$smarty.now}>
<{$smarty.const.ROOT}>
<{$smarty.const.M_PI}>
<{$smarty.current_dir}>