簡介:
Mysql 的主從同步功能,這種解決方案是企業很常見的一種。常用於備份數據庫,當客戶端操作主庫時,主庫會產生binlog日志文件,
從庫通過復制主庫的binlog日志文件,然後解析成相應的 SQL 語句在從庫執行,實現主從一致的效果。
這種解決方案只提供了日志的同步執行功能,而從庫只能提供讀操作,當主服務器發生故障時,必須手動處理故障轉移,一般情況下的做法是將一台從服務器改為主服務器。
Master : 192.168.1.88
Slave : 192.168.1.80
一、配置 Master
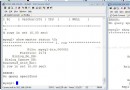
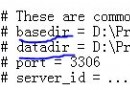
[root@master ~]# vim /etc/my.cnf

log-bin = mysql-bin # 開啟 binlog 日志記錄
server-id = 1 # 設置 id 號,此 ID 號全局唯一

[root@master ~]# service mysqld start

[root@master ~]# netstat -anpt | grep 3306 # 檢測 Mysql 是否啟動成功

[root@master ~]# chkconfig --add mysqld
[root@master ~]# chkconfig --level 35 mysqld on

[root@master ~]# iptables -I INPUT -s 192.168.1.80 -p tcp --dport 3306 -j ACCEPT

[root@master ~]# service iptables save
二、配置 Slave
[root@slave ~]# vim /etc/my.cnf

server-id = 2                           # 設置 id 號,此 ID 號全局唯一
relay-log = mysql-relay-bin             # 指定 relay-log 日志文件的命名格式
replicate-wild-ignore-table = mysql.%   # 過濾不需要復制的表
replicate-wild-ignore-table = test.%
replicate-wild-ignore-table = information_schema.%
replicate-wild-ignore-table = performance_schema.%

[root@slave ~]# service mysqld start

[root@slave ~]# chkconfig --add mysqld
[root@slave ~]# chkconfig --level 35 mysqld on

[root@slave ~]# iptables -I INPUT -s 192.168.1.88 -p tcp --dport 3306 -j ACCEPT

[root@slave ~]# service iptables save
三、小插曲
四、Master 創建復制用戶並授權
[root@master ~]# mysql -u root -p123456

mysql> grant replication slave on *.* to 'rep1_user'@'192.168.1.80' identified by 'rep1_passwd';

mysql> show master status;
+------------------+----------+--------------+------------------+
| File | Position | Binlog_Do_DB | Binlog_Ignore_DB |
+------------------+----------+--------------+------------------+
| mysql-bin.000008 | 324 | | |
+------------------+----------+--------------+------------------+
1 row in set (0.00 sec)
五、Slave 添加 Master 信息
[root@slave ~]# mysql -u root -p123456

mysql> change master to \
-> master_host='192.168.1.88',
-> master_user='rep1_user',
-> master_password='rep1_passwd',
-> master_log_file='mysql-bin.000008',
-> master_log_pos=324;

mysql> start slave;

mysql> show slave status\G
*************************** 1. row ***************************
Slave_IO_State: Waiting for master to send event
Master_Host: 192.168.1.88
Master_User: rep1_user
Master_Port: 3306
Connect_Retry: 60
Master_Log_File: mysql-bin.000008
Read_Master_Log_Pos: 324
Relay_Log_File: mysql-relay-bin.000002
Relay_Log_Pos: 267
Relay_Master_Log_File: mysql-bin.000008
Slave_IO_Running: Yes
Slave_SQL_Running: Yes
Replicate_Do_DB:
Replicate_Ignore_DB:
Replicate_Do_Table:
Replicate_Ignore_Table:
Replicate_Wild_Do_Table:
Replicate_Wild_Ignore_Table: mysql.%,test.%,information_schema.%,performance_schema.%
Last_Errno: 0
Last_Error:
Skip_Counter: 0
Exec_Master_Log_Pos: 324
Relay_Log_Space: 430
Until_Condition: None
Until_Log_File:
Until_Log_Pos: 0
Master_SSL_Allowed: No
Master_SSL_CA_File:
Master_SSL_CA_Path:
Master_SSL_Cert:
Master_SSL_Cipher:
Master_SSL_Key:
Seconds_Behind_Master: 0
Master_SSL_Verify_Server_Cert: No
Last_IO_Errno: 0
Last_IO_Error:
Last_SQL_Errno: 0
Last_SQL_Error:
Replicate_Ignore_Server_Ids:
Master_Server_Id: 1
Master_UUID: b5e20203-86b5-11e4-b69c-000c29d099fa
Master_Info_File: /usr/local/mysql/data/master.info
SQL_Delay: 0
SQL_Remaining_Delay: NULL
Slave_SQL_Running_State: Slave has read all relay log; waiting for the slave I/O thread to update it
Master_Retry_Count: 86400
Master_Bind:
Last_IO_Error_Timestamp:
Last_SQL_Error_Timestamp:
Master_SSL_Crl:
Master_SSL_Crlpath:
1 row in set (0.00 sec)
## 重點關注:Slave_IO_Running 跟 Slave_SQL_Running 這兩個主從復制線程,正常情況下這兩項都為 YES !
## 還需要關注:Slave_IO_State、Master_Host、Master_Log_File、Read_Master_Log_Pos、Relay_Log_File、Relay_Log_Pos、Relay_Master_Log_File
## Replicate_Wild_Ignore_Table 這項可以看到同步過程中過濾了哪些庫(表)。
附:
三、小插曲
## 在做主從同步前,主庫已經有數據時,需要做以下處理。
mysql> flush tables with read lock; # 主庫鎖表操作,讓數據庫只能讀,不能寫
## 保留此終端,重新打開一個 tty ,如果關閉此終端則鎖表失效。
[root@master ~]# cd /usr/local/

[root@master local]# tar zcf mysql.tar.gz mysql   # 備份整個數據庫

[root@master local]# rsync -a mysql.tar.gz 192.168.1.80:/usr/local/   # 將數據傳到從庫

[root@slave local]# service mysqld stop     # 關閉從庫的 Mysql

[root@slave local]# mv mysql old.mysql      # 將原有 mysql 目錄改名

[root@slave local]# tar zxf mysql.tar.gz    # 解壓出主庫的 mysql 目錄

[root@master local]# service mysqld restart # 重啟主庫 Mysql 服務

[root@slave local]# service mysqld start    # 啟動從庫 Mysql 服務