雲平台是個好東西,MySQL-mmm的典型配置是需要五台機器,一台作為mmm admin,兩台master,兩台slave。一下子找五台機器真不容易,何況還要安裝同樣的操作系統。而有了cloud,簡單幾步就有了完備的實驗環境:四台數據庫服務器和一台管理服務器(Memory:8G,CPU:2G,Disk:128G,64bit RHEL6)。在此,向為付出辛勞搭建雲平台的同事們表示由衷的感謝:-)下面言歸正傳,開始全新的MySQL mmm之旅。
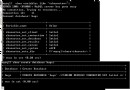
下面要配置的MySQL Cluster環境包含四台數據庫服務器和一台管理服務器,如下:
function
配置完成後,使用下面的虛擬IP訪問MySQL Cluster
一、配置MySQL Relication
1. 安裝MySQL
通過yum命令直接安裝了mysql5.1.52。
2. 修改配置文件/etc/my.cnf
要將添加的內容放在配置文件的[mysqld]部分,如下:
復制代碼 代碼如下:
[mysqld]
datadir=/var/lib/mysql
socket=/var/lib/mysql/mysql.sock
user=mysql
#下面為新添加的內容
default-storage-engine = innodb
replicate-ignore-db = mysql
binlog-ignore-db = mysql
server-id = 1
log-bin = /var/log/mysql/mysql-bin.log
log_bin_index = /var/log/mysql/mysql-bin.log.index
relay_log = /var/log/mysql/mysql-bin.relay
relay_log_index = /var/log/mysql/mysql-bin.relay.index
expire_logs_days = 10
max_binlog_size = 100M
log_slave_updates = 1
注意:
1)server-id在每台服務器上的值都是不一樣,在這裡依次為1、2、3、4。
2)因為在這裡把log文件配置到了/var/log/mysql下,而mysql默認的目錄是在/var/lib/mysql,所以首先要新建mysql文件夾,然後用chown -R mysql.mysql mysql命令將mysql的所有者修改為用戶mysql。其次要保證,mysql文件夾的權限755(即-rwxr-xr-x)。
如果沒有修改權限和所有者,重啟服務時就會在錯誤日志中出現找不到mysql-bin.log或者mysql-bin.log.index的錯誤(/usr/libexec/mysqld: File '/var/log/mysql/mysql-bin.log.index' not found (Errcode: 13))。
3. 重新啟動mysql服務
在完成了對my.cnf的修改後,通過service mysqld restart重新啟動mysql服務。在正確啟動後,可以通過如下方式檢查配置是否正確:
1)登錄mysql,執行show master status,看是否有如下輸出:
復制代碼 代碼如下:
+------------------+----------+--------------+------------------+
| File | Position | Binlog_Do_DB | Binlog_Ignore_DB |
+------------------+----------+--------------+------------------+
| mysql-bin.000001 | 106 | | mysql |
+------------------+----------+--------------+------------------+
2)到/var/log/mysql目錄下,看是否產生了類似mysql-bin.000001和mysql-bin.log.index的文件。
二、新建同步數據庫需要的用戶
使用mysql-mmm時一共需要三個用戶: replication、mmm_agent和mmm_monitor(管理服務器上用來監控cluster狀態的用戶,所以可以限定只能從管理服務器登錄)。使用下面三條命令新建這三個用戶並分配相應的權限:
復制代碼 代碼如下:
GRANT REPLICATION CLIENT ON *.* TO 'mmm_monitor'@'192.168.84.%' IDENTIFIED BY 'monitor';
GRANT SUPER, REPLICATION CLIENT, PROCESS ON *.* TO 'mmm_agent'@'192.168.85.%' IDENTIFIED BY 'agent';
GRANT REPLICATION SLAVE ON *.* TO 'replication'@'192.168.85.%' IDENTIFIED BY 'replication';
三、同步主從數據庫
1. 從主數據庫服務器導出當前數據庫內容
復制代碼 代碼如下:
mysql> FLUSH TABLES WITH READ LOCK;
mysql> SHOW MASTER STATUS;
+------------------+----------+--------------+------------------+
| File | Position | Binlog_Do_DB | Binlog_Ignore_DB |
+------------------+----------+--------------+------------------+
| mysql-bin.000001 | 106 | | mysql |
+------------------+----------+--------------+------------------+
注意保留上述信息,後面還會用到。另外,不要結束當前mysql控制台,重新打開一個窗口,導出數據庫。
復制代碼 代碼如下:
# mysqldump -uroot -proot --all-databases > db01_20111005.sql
釋放鎖
復制代碼 代碼如下:
mysql> UNLOCK TABLES;
2. 將導出的sql文件導入到其他幾台數據庫服務器上。首先通過scp復制過去:
復制代碼 代碼如下:
# scp db01_20111005.sql root@192.168.85.167:/root/
在其他幾台服務其上導入改SQL文件:
復制代碼 代碼如下:
# mysql -uroot -proot < db01_20111005.sql
3. 啟動從數據庫SLAVE進程。
復制代碼 代碼如下:
mysql> flush privileges;
Query OK, 0 rows affected (0.00 sec)
mysql> CHANGE MASTER TO master_host='192.168.85.167', master_port=3306, master_user='replication',master_password='replication', master_log_file='mysql-bin.000001', master_log_pos=106;
Query OK, 0 rows affected (0.07 sec)
mysql> start slave;
Query OK, 0 rows affected (0.00 sec)
mysql> show slave status\G
*************************** 1. row ***************************
Slave_IO_State: Waiting for master to send event
Master_Host: 192.168.85.180
Master_User: replication
Master_Port: 3306
Connect_Retry: 60
Master_Log_File: mysql-bin.000001
Read_Master_Log_Pos: 106
Relay_Log_File: mysql-bin.000003
Relay_Log_Pos: 251
Relay_Master_Log_File: mysql-bin.000001
Slave_IO_Running: Yes
Slave_SQL_Running: Yes
Replicate_Do_DB:
Replicate_Ignore_DB: mysql
Replicate_Do_Table:
Replicate_Ignore_Table:
Replicate_Wild_Do_Table:
Replicate_Wild_Ignore_Table:
Last_Errno: 0
Last_Error:
Skip_Counter: 0
Exec_Master_Log_Pos: 106
Relay_Log_Space: 400
Until_Condition: None
Until_Log_File:
Until_Log_Pos: 0
Master_SSL_Allowed: No
Master_SSL_CA_File:
Master_SSL_CA_Path:
Master_SSL_Cert:
Master_SSL_Cipher:
Master_SSL_Key:
Seconds_Behind_Master: 0
Master_SSL_Verify_Server_Cert: No
Last_IO_Errno: 0
Last_IO_Error:
Last_SQL_Errno: 0
Last_SQL_Error:
1 row in set (0.00 sec)
4. 將db02作為master,db01作為slave,重復1-3。
四、安裝MMM
在管理服務器和數據庫服務器上分別要運行mysql-mmm monitor和agent程序。下面分別安裝:
1. 安裝監控程序
在管理服務器(192.168.84.174)上,執行下面命令:
復制代碼 代碼如下:
# yum -y install mysql-mmm-monitor*
與monitor依賴的所有文件也會隨之安裝,但是有一個例外perl-Time-HiRes,所以還需要執行下面的命令:
復制代碼 代碼如下:
# yum -y install perl-Time-HiRes*
2. 安裝代理程序
在數據庫服務器上執行下面的命令:
復制代碼 代碼如下:
# yum -y install mysql-mmm-agent*
五、配置MMM
1. 編輯mmm_common.conf
完成安裝後,所有的配置文件都放到了/etc/mysql-mmm/下面。管理服務器和數據庫服務器上都要包含一個共同的文件mmm_common.conf,內容如下:
復制代碼 代碼如下:
active_master_role writer
<host default>
cluster_interface eth0
pid_path /var/run/mysql-mmm/mmm_agentd.pid
bin_path /usr/libexec/mysql-mmm/
replication_user replication
replication_password replication
agent_user mmm_agent
agent_password agent
</host>
<host db1>
ip 192.168.85.167
mode master
peer db2
</host>
<host db2>
ip 192.168.85.169
mode master
peer db1
</host>
<host db3>
ip 192.168.85.171
mode slave
</host>
<host db4>
ip 192.168.85.168
mode slave
</host>
<role writer>
hosts db1, db2
ips 192.168.85.200
mode exclusive
</role>
<role reader>
hosts db2, db3, db4
ips 192.168.85.201, 192.168.85.202, 192.168.85.203
mode balanced
</role>
可以在db1上編輯該文件後,通過scp命令分別復制到monitor、db2、db3和db4上。
2. 編輯mmm_agent.conf。在數據庫服務器上,還有一個mmm_agent.conf需要修改,其內容是:
復制代碼 代碼如下:
include mmm_common.conf
# The 'this' variable refers to this server. Proper operation requires
# that 'this' server (db1 by default), as well as all other servers, have the
# proper IP addresses set in mmm_common.conf.
this db1
最後一行的db1,在不同的數據庫服務器上要分別改為db2、db3和db4,否則代理就會無法啟動。
3. 編輯mmm_mon.confg。在管理服務器上,修改mmm_mon.conf文件,修改後內容為:
復制代碼 代碼如下:
include mmm_common.conf
<monitor>
ip 192.168.84.174
pid_path /var/run/mysql-mmm/mmm_mond.pid
bin_path /usr/libexec/mysql-mmm
status_path /var/lib/mysql-mmm/mmm_mond.status
ping_ips 192.168.85.167, 192.168.85.169, 192.168.85.171, 192.168.85.168
auto_set_online 60
# The kill_host_bin does not exist by default, though the monitor will
# throw a warning about it missing. See the section 5.10 "Kill Host
# Functionality" in the PDF documentation.
#
# kill_host_bin /usr/libexec/mysql-mmm/monitor/kill_host
#
</monitor>
<host default>
monitor_user mmm_monitor
monitor_password monitor
</host>
debug 0
六、啟動MMM
1. 在數據庫服務器上啟動代理程序
復制代碼 代碼如下:
# cd /etc/init.d/
# chkconfig mysql-mmm-agent on
# service mysql-mmm-agent start
2. 在管理服務器上啟動監控程序
復制代碼 代碼如下:
# cd /etc/init.d/
# chkconfig mysql-mmm-monitor on
# service mysql-mmm-monitor start
啟動後,稍等幾秒,可以通過mmm_control程序查看狀態:
復制代碼 代碼如下:
# mmm_control show
db1(192.168.85.167) master/ONLINE. Roles: writer(192.168.85.200)
db2(192.168.85.169) master/ONLINE. Roles: reader(192.168.85.202)
db3(192.168.85.171) slave/ONLINE. Roles: reader(192.168.85.203)
db4(192.168.85.168) slave/ONLINE. Roles: reader(192.168.85.201)
七、遇到兩個問題
1. 監控程序服務器無法啟動
在管理服務器上,一切都完成後,通過mmm_control查看狀態,得到下面的錯誤信息:ERROR: Can't connect to monitor daemon! 通過編輯/etc/mysql-mmm/mmm_mon.conf文件將debug 0改為debug 1,打開監控程序的debug狀態。重新啟動監控程序(service mysql-mmm-monitor restart),就會看到詳細的錯誤信息,找不到Perl Time HiRes庫。執行yum -y install perl-Time-HiRes*就可以解決。
2. 防火牆問題導致Warning: agent on host db1 is not reachable.
控制台程序正確啟動後,再次執行mmm_control show,卻看到下面的輸出:
復制代碼 代碼如下:
# Warning: agent on host db1 is not reachable
# Warning: agent on host db2 is not reachable
# Warning: agent on host db3 is not reachable
# Warning: agent on host db4 is not reachable
db1(192.168.85.167) master/ONLINE. Roles:
db2(192.168.85.169) master/ONLINE. Roles:
db3(192.168.85.171) slave/ONLINE. Roles:
db4(192.168.85.168) slave/ONLINE. Roles:
再次打開debug,發現了下面的錯誤信息:
復制代碼 代碼如下:
2011/10/07 13:38:45 DEBUG Sending command 'GET_AGENT_STATUS()' to db4 (192.168.85.167:9989)
2011/10/07 13:38:45 ERROR The status of the agent on host 'db4' could not be determined (answer was: 0).
通過telnet 192.168.85.167 9989下面檢查網絡連接,得到了No route to host的錯誤信息。登錄db1,通過setup程序裡的Firewall configuration關閉Firewall(這不是一個好主意)。同樣,關閉db2、db3和db4上的防火牆,再次重啟監控程序,一切回到正常狀態!
參考文章:
MySQL MMM 官方安裝文檔 http://mysql-mmm.org/mmm2:guide
MMM Manual http://mysql-mmm.org/mysql-mmm.html