on Centos 6.5 64bit minimal
安裝mysql
[root@ftp ~]# yum install -y mysql mysql-server mysql-devel --安裝
[root@ftp ~]# /etc/init.d/mysqld start --啟動
[root@ftp ~]#/usr/bin/mysql_secure_installation --初始化
[root@ftp ~]# chkconfig --levels 235 mysqld on --235level啟動
[root@ftp ~]# chkconfig --list |grep mysqld --look look
mysqld 0:off 1:off 2:on 3:on 4:off 5:on 6:off
安裝apache
[root@ftp ~]# yum install -y httpd --安裝
[root@ftp ~]# /etc/init.d/httpd start --啟動
Starting httpd: httpd: Could not reliably determine the server's fully qualified domain name... ... --在/etc/httpd/conf/httpd.conf 加入"ServerName localhost:80"或本地域名解析
[root@ftp ~]# chkconfig --levels 235 httpd on --啟動
[root@ftp ~]# chkconfig --list |grep httpd --look look
httpd 0:off 1:off 2:on 3:on 4:off 5:on 6:off
[root@ftp html]# pwd
/var/www/html --這是www根目錄
安裝PHP
[root@ftp ~]# yum install -y php --安裝
[root@ftp ~]# yum install -y php-mysql php-gd php-imap php-ldap php-odbc php-pear php-xml php-xmlrpc --mysql關聯
[root@ftp ~]# service httpd restart --重啟httpd服務使php生效,驗證php安裝是否正確http://localhost/info.php(需建立info.php文件)
[root@ftp ~]# vi /var/www/html/info.php #建立php文件內容如下
<?
phpphpinfo();
?>
安裝第三方源
http://pkgs.repoforge.org/rpmforge-release/ --Ctrl+F找到Centos6的對應rpm包
[root@ftp tmp]# wget http://pkgs.repoforge.org/rpmforge-release/rpmforge-release-0.5.2-1.el6.rf.x86_64.rpm --下載它
[root@ftp tmp]# wget http://dag.wieers.com/rpm/packages/RPM-GPG-KEY.dag.txt --下載驗證(可以了解下GPG)
[root@ftp tmp]# rpm --import RPM-GPG-KEY.dag.txt --導入驗證文件
[root@ftp tmp]# rpm -ivh rpmforge-release-0.5.2-1.el6.rf.x86_64.rpm --安裝它
安裝proftpd(一定要編譯安裝,並安裝mysql支持)
[root@ftp ~]# yum install -y gcc make --安裝編譯所需要的工具
[root@ftp ~]# whereis mysql
mysql: /usr/bin/mysql /usr/lib64/mysql /usr/include/mysql /usr/share/mysql /usr/share/man/man1/mysql.1.gz
[root@ftp ~]# which mysql
/usr/bin/mysql
[root@ftp home]# gunzip -c proftpd-1.3.5.tar.gz | tar xf -
[root@ftp home]# cd proftpd-1.3.5
[root@ftp proftpd-1.3.5]# ./configure --with-modules=mod_sql:mod_sql_mysql:mod_quotatab:mod_quotatab_sql \
> --enable-nls \
> --with-includes=/usr/include/mysql \
> --with-libraries=/usr/bin/mysql \
> --prefix=/usr/local/proftpd
[root@ftp proftpd-1.3.5]# make
[root@ftp proftpd-1.3.5]# make install
[root@ftp ~]# vim /usr/local/proftpd/etc/proftpd.conf --配置
1 # This is a basic ProFTPD configuration file (rename it to
2 # 'proftpd.conf' for actual use. It establishes a single server
3 # and a single anonymous login. It assumes that you have a user/group
4 # "nobody" and "ftp" for normal operation and anon.
5
6 ServerName "ProFTPD Default Installation"
7 ServerType standalone
8 DefaultServer on
9
10 # Port 21 is the standard FTP port.
11 Port 21
12
13 # Don't use IPv6 support by default.
14 UseIPv6 off
15
16 # Umask 022 is a good standard umask to prevent new dirs and files
17 # from being group and world writable.
18 Umask 002
19
20 # To prevent DoS attacks, set the maximum number of child processes
21 # to 30. If you need to allow more than 30 concurrent connections
22 # at once, simply increase this value. Note that this ONLY works
23 # in standalone mode, in inetd mode you should use an inetd server
24 # that allows you to limit maximum number of processes per service
25 # (such as xinetd).
26 MaxInstances 30
27
28 # Set the user and group under which the server will run.
29 User nobody
30 Group nobody
31
32 # To cause every FTP user to be "jailed" (chrooted) into their home
33 # directory, uncomment this line.
34 DefaultRoot ~
35
36 # Normally, we want files to be overwriteable.
37 AllowOverwrite on
38
39 # Bar use of SITE CHMOD by default
40 <Limit SITE_CHMOD>
41 DenyAll
42 </Limit>
43
44 # A basic anonymous configuration, no upload directories. If you do not
45 # want anonymous users, simply delete this entire <Anonymous> section.
46 #<Anonymous ~ftp>
47 # User ftp
48 # Group ftp
49
50 # We want clients to be able to login with "anonymous" as well as "ftp"
51 # UserAlias anonymous ftp
52
53 # Limit the maximum number of anonymous logins
54 # MaxClients 10
55
56 # We want 'welcome.msg' displayed at login, and '.message' displayed
57 # in each newly chdired directory.
58 # DisplayLogin welcome.msg
59 # DisplayChdir .message
60
61 # Limit WRITE everywhere in the anonymous chroot
62 # <Limit WRITE>
63 # DenyAll
64 # </Limit>
65 #</Anonymous>
66
67
68 #數據庫連接
69 SQLBackend mysql
70 # The passwords in MySQL are encrypted using CRYPT
71 SQLAuthTypes Plaintext Crypt
72 SQLAuthenticate users groups
73
74 # used to connect to the database
75 # databasename@host database_user user_password
76 SQLConnectInfo ftp@localhost proftpd your_password
77
78 # Here we tell ProFTPd the names of the database columns in the "usertable"
79 # we want it to interact with. Match the names with those in the db
80 SQLUserInfo ftpuser userid passwd uid gid homedir shell
81
82 # Here we tell ProFTPd the names of the database columns in the "grouptable"
83 # we want it to interact with. Again the names match with those in the db
84 SQLGroupInfo ftpgroup groupname gid members
85
86
87 # set min UID and GID - otherwise these are 999 each
88 SQLMinID 500
89
90 # create a user's home directory on demand if it doesn't exist
91 CreateHome on
92
93 # Update count every time user logs in
94 SQLLog PASS updatecount
95 SQLNamedQuery updatecount UPDATE "count=count+1, accessed=now() WHERE userid='%u'" ftpuser
96
97 # Update modified everytime user uploads or deletes a file
98 SQLLog STOR,DELE modified
99 SQLNamedQuery modified UPDATE "modified=now() WHERE userid='%u'" ftpuser
100
101 RootLogin off
102 RequireValidShell off
103 #UseEncoding UTF-8 CP936
104 #禁止刪除文件,可刪除空文件夾。
105 <Directory /home/ftp/*>
106 <Limit DELE >
107 DenyUser rdd1,rdd2,rdd3,amd,fd,wsd,csd,std,asd,ftp
108 </Limit>
109 </Directory>
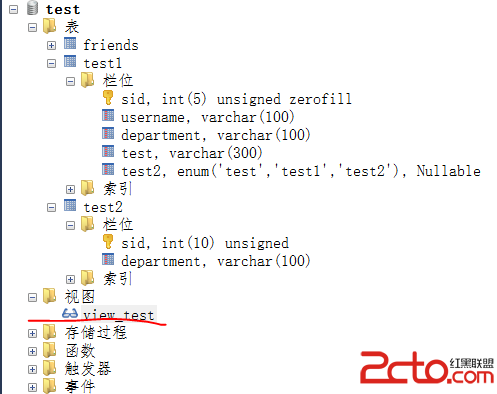
數據庫(ftp)的表結構
mysql> show databases;
+--------------------+
| Database |
+--------------------+
| information_schema |
| ftp |
+--------------------+
2 rows in set (0.00 sec)
mysql> use ftp;
Reading table information for completion of table and column names
You can turn off this feature to get a quicker startup with -A
Database changed
mysql> show tables;
+---------------+
| Tables_in_ftp |
+---------------+
| ftpgroup |
| ftpuser |
+---------------+
2 rows in set (0.00 sec)
mysql> desc ftpgroup;
+-----------+-------------+------+-----+---------+-------+
| Field | Type | Null | Key | Default | Extra |
+-----------+-------------+------+-----+---------+-------+
| groupname | varchar(16) | NO | MUL | | |
| gid | smallint(6) | NO | | 5500 | |
| members | varchar(16) | NO | | | |
+-----------+-------------+------+-----+---------+-------+
3 rows in set (0.00 sec)
mysql> desc ftpuser;
+----------+------------------+------+-----+---------------------+----------------+
| Field | Type | Null | Key | Default | Extra |
+----------+------------------+------+-----+---------------------+----------------+
| id | int(10) unsigned | NO | PRI | NULL | auto_increment |
| userid | varchar(32) | NO | UNI | | |
| passwd | varchar(32) | NO | | | |
| uid | smallint(6) | NO | | 5500 | |
| gid | smallint(6) | NO | | 2001 | |
| homedir | varchar(255) | NO | | | |
| shell | varchar(16) | NO | | /sbin/nologin | |
| count | int(11) | NO | | 0 | |
| accessed | datetime | NO | | 0000-00-00 00:00:00 | |
| modified | datetime | NO | | 0000-00-00 00:00:00 | |
+----------+------------------+------+-----+---------------------+----------------+
10 rows in set (0.00 sec)
mysql數據庫的備份與恢復
[root@amd240 ~]# mysqldump -u root -p --all-databases > all.sql --備份全部數據庫
Enter password:
-- Warning: Skipping the data of table mysql.event. Specify the --events option explicitly. --提示這個是因為mysql默認是不備份事件表的。加上--events --ignore-table=mysql.events參數即可;
/usr/local/mysql/bin/mysqldump -uroot -p --events --ignore-table=mysql.events --all-databases > all.sql
[root@ftp ~]# mysql -u root -p < /home/all.sql --恢復備份數據(恢復時數據庫要開啟,完成後需要重啟生效)
加用戶和組
[root@ftp ~]# groupadd -g 2001 ftpgroup
[root@ftp ~]# useradd -u 2001 -s /bin/false -d /bin/null -c "proftpd user" -g ftpgroup ftpuser
[root@ftp ~]# cat /etc/passwd |grep ftpuser
ftpuser:x:2001:2001:proftpd user:/bin/null:/bin/false
[root@ftp ~]# cat /etc/group |grep ftpgroup
ftpgroup:x:2001:
copy原ftp目錄到新服務器(注意帶屬性copy及目錄的權限和屬組信息等)
# scp -prv /home/ftp root@yourhostname_or_IPaddr:/home/
必要時,需要手動修改各目錄的屬組
啟動proftpd
[root@ftp ~]# /usr/local/proftpd/sbin/proftpd
[root@ftp ~]# pgrep proftpd
10573 --有進程號說明服務起來了
proftpd -nd6 --啟動可以查看錯誤信息
proftpd -l --查看當前支持的模塊 如是否支持mysql
以下是擴展的知識
一般使用mysqldump來備份和恢復,常用的幾種常法:
(1)導出整個數據庫(包括數據庫中的數據)
mysqldump -u username -p dbname > dbname.sql
(2)導出數據庫結構(不含數據)
mysqldump -u username -p -d dbname > dbname.sql
(3)導出數據庫中的某張數據表(包含數據)
mysqldump -u username -p dbname tablename > tablename.sql
(4)導出數據庫中的某張數據表的表結構(不含數據)
mysqldump -u username -p -d dbname tablename > tablename.sql
(5)如要對數據進行還原,可執行如下命令:
mysql -u username -p test_db < test_db.sql
參考資料
http://blog.xuite.net/tunedgr01/knowledge/6378500-RedHat+-+Proftpd+%2B+MySQL+authentication+%2B+Quotas++