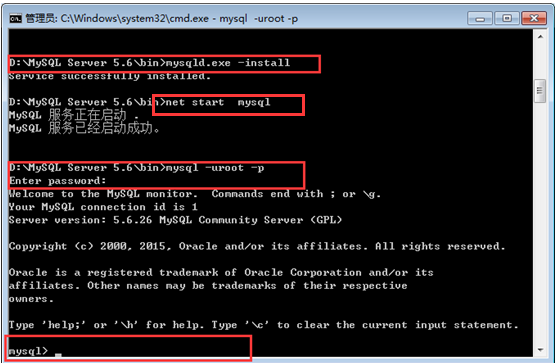
1、首先下載mysql安裝包,下載鏈接mysql下載,然後安裝。
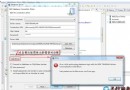
2、輸入安裝時的用戶名和密碼,連接數據庫。
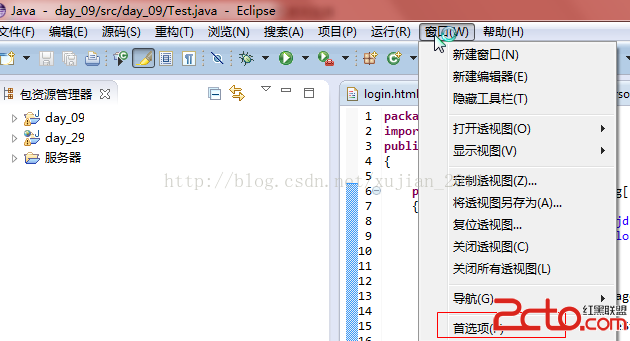
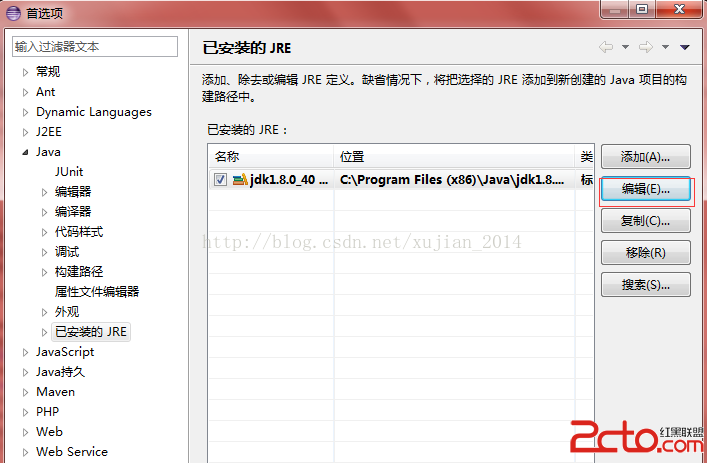
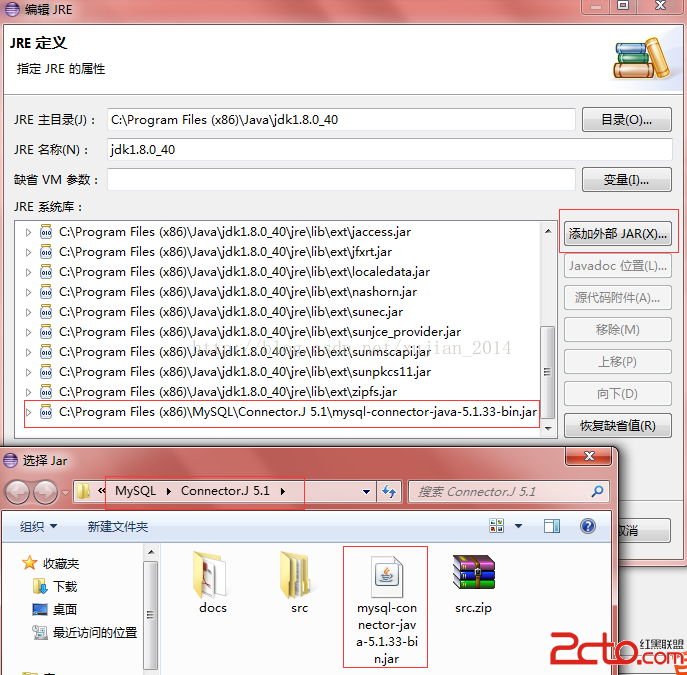
3、在Eclipse 中安裝mysq JDBCl驅動,安裝步驟如下圖示:
測試是否成功連接mql,代碼:
package day_09;
import java.sql.*;
public class Test
{

	public static void main(String[] args)
	{
		 String url="jdbc:mysql://localhost:3306/mydb";
	     String user="root";
	     String password="281889";
	     Connection conn=null;
         Statement stmt=null;
         ResultSet rs=null;
	     try
	     {
			Class.forName("com.mysql.jdbc.Driver");
	        conn=DriverManager.getConnection(url,user,password);
	        stmt=conn.createStatement();
	        String sql;
	        sql="insert into student values(2014218,'李月','女')";
	        stmt.execute(sql);
	        sql="select * from student";
	        rs = stmt.executeQuery(sql);
	        System.out.println("學號" + "\t\t\t" + " 姓名"+"\t\t\t"+"性別");
	        String name = null;
	        while(rs.next())
	        {
	        	name = rs.getString("sname");
	            System.out.println(rs.getString("sno") + "\t\t\t" + name+"\t\t\t"+rs.getString("sex"));
	        }
	     }
	     catch(ClassNotFoundException e1)
         {
             System.out.println("數據庫驅動不存在!"+e1.toString());
         }
         catch(SQLException e2)
         {
             System.out.println("數據庫存在異常"+e2.toString());
         }
         finally
         {
             try
             {
                 if(rs!=null)
                     rs.close();
                 if(stmt!=null)
                     stmt.close();
                 if(conn!=null)
                     conn.close();
             }
             catch(SQLException e)
             {
                 System.out.println(e.toString());
             }
         }
      }
   }
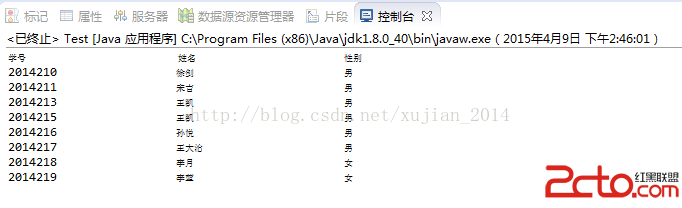
打印結果: