環境
CentOS
Mysql 5.1
前提
安裝了EPEL,具體安裝步驟請參照
http://blog.csdn.net/robinsonmhj/article/details/36184863
機器列表
機器IP 機器名 192.168.0.135 db1 192.168.0.136 monitor 192.168.0.137 db2 虛擬IP 作用 192.168.0.138 writter 192.168.0.139 reader 192.168.0.140 reader安裝步驟
1. 在db1 和 db2 上安裝mysql
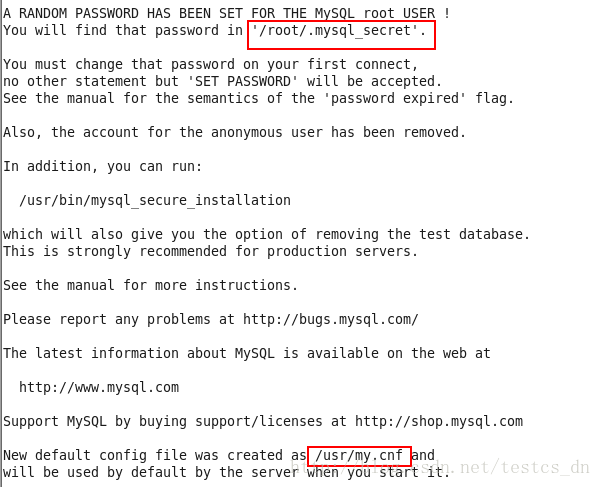
yum install mysql-server
2. 修改配置文件
db1 的配置文件
[mysqld]
datadir = /data/mysql
socket=/data/mysql/mysql.sock
user=mysql
<span style="font-size:18px;"><strong>server-id=1</strong></span>
table_cache = 512
sort_buffer_size = 2M
read_buffer_size = 2M
read_rnd_buffer_size = 8M
myisam_sort_buffer_size = 64M
thread_cache_size = 8
query_cache_size = 64M
thread_concurrency = 8
log-bin=mysql-bin
binlog_format = mixed
max_connections=2048
character_set_server=utf8
wait_timeout=1800
interactive_timeout=1800
skip-show-database
skip-name-resolve
tmp_table_size = 512M
max_heap_table_size = 512M
binlog-ignore-db = mysql
replicate-ignore-db = mysql
binlog-ignore-db = information_schema
replicate-ignore-db = information_schema
binlog-ignore-db = performance_schema
replicate-ignore-db = performance_schema
binlog-ignore-db = test
replicate-ignore-db = test
innodb_data_home_dir=/data/mysql/innodb
innodb_data_file_path=ibdata1:2000M;ibdata2:10M:autoextend
innodb_log_group_home_dir=/data/mysql/innodb/log
innodb_file_per_table=1
innodb_buffer_pool_size = 1000M
innodb_additional_mem_pool_size = 20M
innodb_log_file_size = 100M
innodb_log_buffer_size = 8M
innodb_flush_log_at_trx_commit = 2
innodb_lock_wait_timeout = 50
default-storage-engine = MyISAM
#default-storage-engine = INNODB

[mysqld_safe]
log-error=/var/log/mysqld.log
pid-file=/var/run/mysqld/mysqld.pid

[mysqldump]
quick
max_allowed_packet = 16M
socket=/data/mysql/mysql.sock

[mysql]
no-auto-rehash
socket=/data/mysql/mysql.sock
db2 的配置文件
[mysqld]
datadir = /data/mysql
socket=/data/mysql/mysql.sock
user=mysql
<span style="font-size:18px;"><strong>server-id=2</strong></span>
table_cache = 512
sort_buffer_size = 2M
read_buffer_size = 2M
read_rnd_buffer_size = 8M
myisam_sort_buffer_size = 64M
thread_cache_size = 8
query_cache_size = 64M
thread_concurrency = 8
log-bin=mysql-bin
binlog_format = mixed
max_connections=2048
character_set_server=utf8
wait_timeout=1800
interactive_timeout=1800
skip-show-database
skip-name-resolve
tmp_table_size = 512M
max_heap_table_size = 512M
binlog-ignore-db = mysql
replicate-ignore-db = mysql
binlog-ignore-db = information_schema
replicate-ignore-db = information_schema
binlog-ignore-db = performance_schema
replicate-ignore-db = performance_schema
binlog-ignore-db = test
replicate-ignore-db = test
innodb_data_home_dir=/data/mysql/innodb
innodb_data_file_path=ibdata1:2000M;ibdata2:10M:autoextend
innodb_log_group_home_dir=/data/mysql/innodb/log
innodb_file_per_table=1
innodb_buffer_pool_size = 1000M
innodb_additional_mem_pool_size = 20M
innodb_log_file_size = 100M
innodb_log_buffer_size = 8M
innodb_flush_log_at_trx_commit = 2
innodb_lock_wait_timeout = 50
default-storage-engine = MyISAM
#default-storage-engine = INNODB

[mysqld_safe]
log-error=/var/log/mysqld.log
pid-file=/var/run/mysqld/mysqld.pid

[mysqldump]
quick
max_allowed_packet = 16M
socket=/data/mysql/mysql.sock

[mysql]
no-auto-rehash
socket=/data/mysql/mysql.sock
3. 在db1和db2 上分別建立復制,監控用戶
    GRANT REPLICATION CLIENT                 ON *.* TO 'mmm_monitor'@'192.168.0.136' IDENTIFIED BY 'monitor';
    GRANT SUPER, REPLICATION CLIENT, PROCESS ON *.* TO 'mmm_agent'@'192.168.0.%'   IDENTIFIED BY 'agent';
    GRANT REPLICATION SLAVE                  ON *.* TO 'replication'@'192.168.0.%' IDENTIFIED BY 'replication';
4. 把db1和db2互相設置成master和slave
4.1 在db1上執行,mysql命令
CHANGE MASTER TO master_host='192.168.0.137', master_port=3306, master_user='replication',master_password='replication', master_log_file='mysql-bin.000006', master_log_pos=106;
注意:
<span></span><pre name="code" class="html">master_log_file和master_log_pos的值通過如下命令察看
在db2上執行如下mysql命令 show master status
4.2 在db2上執行,mysql命令
CHANGE MASTER TO master_host='192.168.0.135', master_port=3306, master_user='replication',master_password='replication', master_log_file='mysql-bin.000006', master_log_pos=106;
注意:
<span></span><pre name="code" class="html">master_log_file和master_log_pos的值通過如下命令察看
在db1上執行如下mysql命令 show master status
5. 在db1和db2上安裝mysql-mmm-agent
yum install mysql-mmm-agent*
6. 在monitor上安裝mysql-mmm-monitor
yum install mysql-mmm-monitor*
7. 修改配置文件
在db1,db2和monitor上修改
/etc/mysql-mmm/mmm_common.conf,修改內容如下
active_master_role      writer

<host default>
    cluster_interface       eth0
    pid_path                /var/run/mysql-mmm/mmm_agentd.pid
    bin_path                /usr/libexec/mysql-mmm/
    replication_user        replication
    replication_password    replication
    agent_user              mmm_agent
    agent_password          agent
</host>

<host db1>
    ip      192.168.0.135
    mode    master
    peer    db2
</host>

<host db2>
    ip      192.168.0.137
    mode    master
   peer    db1
</host>

<role writer>
    hosts   db1,db2
    ips     192.168.0.138
    mode    exclusive
</role>

<role reader>
    hosts   db1,db2
    ips     192.168.0.139,192.168.0.140
    mode    balanced
</role>
修改配置文件
/etc/mysql-mmm/mmm_agent.conf
db1上的內容如下
include mmm_common.conf

# The 'this' variable refers to this server.  Proper operation requires
# that 'this' server (db1 by default), as well as all other servers, have the
# proper IP addresses set in mmm_common.conf.
<span style="font-size:18px;"><strong>this db1</strong></span>
db2上的內容如下
include mmm_common.conf

# The 'this' variable refers to this server.  Proper operation requires
# that 'this' server (db1 by default), as well as all other servers, have the
# proper IP addresses set in mmm_common.conf.
<span style="font-size:18px;"><strong>this db2</strong></span>
修改配置monitor文件
/etc/mysql-mmm/mmm_mon.conf,內容如下
include mmm_common.conf

<monitor>
    ip                  <span style="font-size:18px;"><strong>192.168.0.136</strong></span>
    pid_path            /var/run/mysql-mmm/mmm_mond.pid
    bin_path            /usr/libexec/mysql-mmm
    status_path         /var/lib/mysql-mmm/mmm_mond.status
    ping_ips            <span style="font-size:18px;"><strong>192.168.0.135,192.168.0.137</strong></span>
    auto_set_online     60

    # The kill_host_bin does not exist by default, though the monitor will
    # throw a warning about it missing.  See the section 5.10 "Kill Host
    # Functionality" in the PDF documentation.
    #
    # kill_host_bin     /usr/libexec/mysql-mmm/monitor/kill_host
    #
</monitor>

<host default>
    monitor_user        mmm_monitor
    monitor_password    monitor
</host>

debug 0
8.在db1,db2上啟動agent
    # cd /etc/init.d/
    # chkconfig mysql-mmm-agent on
    # service mysql-mmm-agent start
9. 在monitor上啟動monitor
    # cd /etc/init.d/
    # chkconfig mysql-mmm-monitor on
    # service mysql-mmm-monitor start
10. 在monitor上察看
mmm_control -show status
10.2 把一台機器上線
mmm_control set_online db1
10.3 試驗
把db1上的mysql停掉 service mysqld stop
察看狀態mmm_control -show status,db1上的寫ip應該飄到db2上
參考
http://blog.csdn.net/mydeman/article/details/6845567
http://hi.baidu.com/viewehsoitfmyzr/item/5024bec2ef02ccd196445280