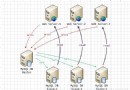
環境:
主服務器:centos 5.2 mysql 5.1.35 源碼 IP:192.168.1.22
從服務器:centos 5.2 mysql 5.1.35 源碼 IP:192.168.1.33
配置:
一、主服務器
1.1、創建一個復制用戶,具有replication slave 權限。
mysql>grant replication slave on *.* to ‘repl’@’192.168.1.22′ identified by ‘repl’;
1.2、編輯my.cnf文件
vi /etc/my.cnf
添加
server-id=1
並開啟log-bin二進制日志文件
log-bin=mysql-bin
注:需要把默認的server-id=1去掉
1.3、啟動mysql數據庫
mysqld_safe –user=mysql &
1.4、設置讀鎖
mysql>flush tables with read lock;
1.5、得到binlog日志文件名和偏移量
mysql>show master status;
+——————+———-+————–+——————+
| File | Position | Binlog_Do_DB | Binlog_Ignore_DB |
+——————+———-+————–+——————+
| mysql-bin.0000010 | 106| | |
+——————+———-+————–+——————+
1.6、備份要同步的數據庫
mysqldump test > test.sql
1.7、解鎖
mysql>unlock tables;
二、從服務器
2.1、編輯my.cnf文件
vi /etc/my.cnf
添加
server-id=2
注:需要把默認的server-id=1去掉
2.2、啟動從數據庫
mysqld_safe –user=mysql &
2.3、對從數據庫進行相應設置
mysql> change master to
-> master_host=’192.168.1.22′
-> master_user=’repl’
-> master_password=’repl’
-> master_log_file=’mysql-bin.0000010′
-> master_log_pos=106;
2.4、啟動從服務器slave線程
mysql>start slave;
執行show processlist命令顯示以下進程:
mysql>show processlist\G
*************************** 2. row ***************************
Id: 2
User: system user
Host:
db: NULL
Command: Connect
Time: 2579
State: Has read all relay log; waiting for the slave I/O thread to update it
Info: NULL表示slave已經連接上master,開始接受並執行日志
2.5、查看slave線程狀態
mysql>show slave status;
*************************** 1. row ***************************
Slave_IO_State: Waiting for master to send event
Master_Host: 192.168.1.22
Master_User: repl
Master_Port: 3306
Connect_Retry: 60
Master_Log_File: mysql-bin.0000010
Read_Master_Log_Pos: 106
Relay_Log_File: centos-relay-bin.000002
Relay_Log_Pos: 529
Relay_Master_Log_File: mysql-bin.0000010
Slave_IO_Running: Yes
Slave_SQL_Running: Yes
Replicate_Do_DB:
Replicate_Ignore_DB:
Replicate_Do_Table:
Replicate_Ignore_Table:
Replicate_Wild_Do_Table:
Replicate_Wild_Ignore_Table:
Last_Errno: 0
Last_Error:
Skip_Counter: 0
Exec_Master_Log_Pos: 106
Relay_Log_Space: 830
Until_Condition: None
Until_Log_File:
Until_Log_Pos: 0
Master_SSL_Allowed: No
Master_SSL_CA_File:
Master_SSL_CA_Path:
Master_SSL_Cert:
Master_SSL_Cipher:
Master_SSL_Key:
Seconds_Behind_Master: 0
Master_SSL_Verify_Server_Cert: No
Last_IO_Errno: 0
Last_IO_Error:
Last_SQL_Errno: 0
Last_SQL_Error:
1 row in set (0.00 sec)
驗證是否配置正確
在從服務器上執行
show slave status\G;
Waiting for master to send event
Slave_IO_Running: Yes
Slave_SQL_Running: Yes
如以上二行同時為Yes 說明配置成功
測試
1、在主服務器test數據庫中創建user表
mysql>use test;
mysql>create table user(id int);
2、在從服務器中查看user表
mysql>use test;
mysql> show tables like ‘user’;
+———————-+
| Tables_in_test(user) |
+———————-+
| user |
+———————-+
1 row in set (0.00 sec)
說明主從數據同步成功。