經常有童鞋在群裡面問同樣一個問題:如何自定義WF4.0活動的外觀。其實一共有兩種方式去實現自定義WF4.0活動的外觀:一種方式我 在以前的博文上實現過,見:WF4.0實戰(十一):郵件通知;另外一種方式我將在這裡講述它的實現。故這篇文章中,我將分別用這兩種 方式去一個最簡單的WF4.0自定義活動外觀的例子。
第一種方式:使用[Designer]屬性。命名空間為:using System.ComponentModel;代碼如下:
[Designer(typeof(CustomWriteLineDesigner))]

public sealed class CustomWriteLine : CodeActivity

{

   [RequiredArgument]

   public InArgument<string> Text { get; set; }


   protected override void Execute(CodeActivityContext context)

   {

     Console.WriteLine(context.GetValue(this.Text));

   }

}
上面代碼中的CustomWriteLineDesigner是自定義外觀的XAML文件。第一種方式代碼還可以這樣寫:
[ ("MyActivityDesigner.CustomWriteLineDesigner,MyActivityDesigner")]

  public sealed class CustomWriteLine : CodeActivity

  {

    [RequiredArgument]

    public InArgument<string> Text { get; set; }


    protected override void Execute(CodeActivityContext context)

    {

      Console.WriteLine(context.GetValue(this.Text));

    }

  }
CustomWriteLineDesigner的代碼如下:
<sap:ActivityDesigner x:Class="MyActivityDesigner.CustomWriteLineDesigner"

   xmlns="http://schemas.microsoft.com/winfx/2006/xaml/presentation"

   xmlns:x="http://schemas.microsoft.com/winfx/2006/xaml"

   xmlns:sadc="clr-namespace:System.Activities.Presentation.Converters;assembly=System.Activities.Presentation"

   xmlns:sap="clr-namespace:System.Activities.Presentation;assembly=System.Activities.Presentation"

   xmlns:sapv="clr-namespace:System.Activities.Presentation.View;assembly=System.Activities.Presentation">

   <sap:ActivityDesigner.Resources>

     <sadc:ArgumentToExpressionConverter x:Key="argConverter"/>

   </sap:ActivityDesigner.Resources>

   <sap:ActivityDesigner.Icon>

     <DrawingBrush>

       <DrawingBrush.Drawing>

         <ImageDrawing>

           <ImageDrawing.Rect>

             <Rect Location="0,0" Size="16,16" ></Rect>

           </ImageDrawing.Rect>

           <ImageDrawing.ImageSource>

             <BitmapImage UriSource="WriteLine.jpg" ></BitmapImage>

           </ImageDrawing.ImageSource>

         </ImageDrawing>

       </DrawingBrush.Drawing>

     </DrawingBrush>

   </sap:ActivityDesigner.Icon>

   <Grid >

     <Grid.ColumnDefinitions>

       <ColumnDefinition Width="Auto"/>

       <ColumnDefinition Width="*"/>

     </Grid.ColumnDefinitions>


     <TextBlock Text="Text " Padding="0,2,4,2"/>

     <sapv:ExpressionTextBox MaxLines="1" Grid.Column="1" Width="200"

                   Expression="{Binding Path=ModelItem.Message, Mode=TwoWay, Converter= {StaticResource argConverter}, ConverterParameter=In}"

                   OwnerActivity="{Binding Path=ModelItem}" />

   </Grid>

</sap:ActivityDesigner>
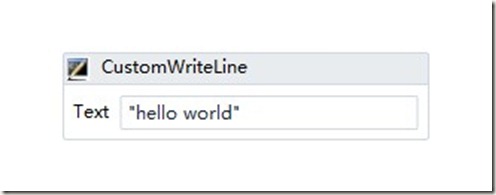
效果:
以上是第一種方式,如果有不清楚的地方可以參考:WF4.0實戰(十一):郵件通知
第二種方式:代碼關聯去實現
上面的方式是硬編碼實現的,有些不夠靈活,微軟內置的活動是采用第二種方式,而不是第一種方式。下面我將一步一步教你如何用第 二種方式去實現同樣的效果。
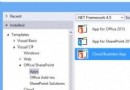
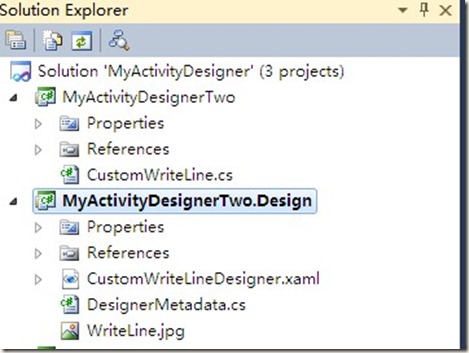
新建一ActivityLibrary項目命名為:MyActivityDesignerTwo,新建一個 ActivityDesignerLibrary項目命名為 MyActivityDesignerTwo.Design。從命名上可以看出,MyActivityDesignerTwo用於實現後台的邏輯代碼。MyActivityDesignerTwo.Design 用於實現自定義活動的UI。項目結構如下圖所示:
其中CustomWriteLineDesigner.xaml代碼和第一種方式相同。不同的是多出了一個 DesignerMetadata.cs,CustomWriteLine.cs中去掉 了Designer屬性的代碼,去掉了Designer屬性的 CustomWriteLine代碼如下:
public sealed class CustomWriteLine : CodeActivity

{

   [RequiredArgument]

   public InArgument<string> Text { get; set; }


   protected override void Execute(CodeActivityContext context)

   {

     Console.WriteLine(context.GetValue(this.Text));

   }

}
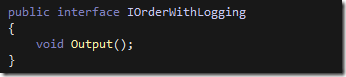
DesignerMetadata.cs的代碼如下:
public class DesignerMetadata : IRegisterMetadata

{

   /// <summary>

   /// Register the designer for the write line activity

   /// </summary>

   public void Register()

   {

     AttributeTableBuilder builder = new AttributeTableBuilder();


     Type t = typeof(CustomWriteLine);


     builder.AddCustomAttributes(t, new DesignerAttribute(typeof(CustomWriteLineDesigner)));


     MetadataStore.AddAttributeTable(builder.CreateTable());

   }

}
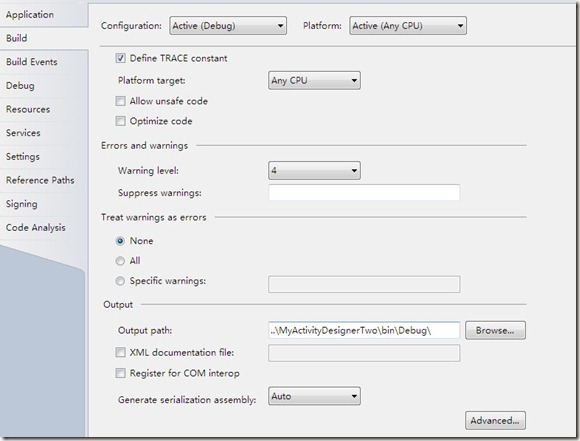
後台的代碼和UI的設計並不在同一個項目中,我們如何將他們關聯起來呢?很簡單,我們只要將兩個項目生成的dll放在同一個目錄下面 就OK了。我們修改MyActivityDesignerTwo.Design的生成路徑。如下圖:
新建一個測試的WorkflowConsoleApplication項目,在這個項目中添加MyActivityDesignerTwo引用。
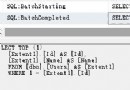
我們將微軟內置的WriteLine和剛才定義的活動做個比較,如下圖:
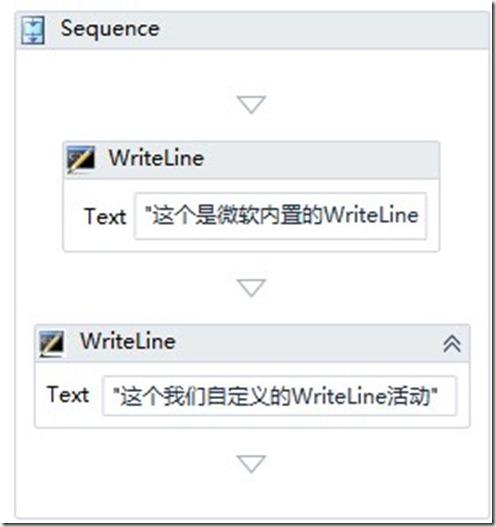
你會發現有一個明顯不同的地方:我們自定義的活動比微軟內置的活動要寬一些。Text屬性上我們自定義的WriteLine活動上顯示全部的 文字:"這個我們自定義的WriteLine活動",而內置的活動隱藏了部分文字沒有顯示。這一點的是蠻有好處的:在流程設計器上自定義的活 動比內置的活動更加直觀。
總結:這篇文章教你用兩種方式去實現自定義活動的外觀。有人可能會問為什麼要自定義活動的外觀,一個CustomWriteLine就好了呀! 自定義活動的外觀的好處是使流程設計器上更加直觀。只有很直觀了,我們的流程設計器才能拿給普通用戶使用。
代碼: http://files.cnblogs.com/zhuqil/MyActivityDesigner.rar