剛開始使用idea,發現idea與myEclipse差別還是很大的,從搭建的簡單的SpringMvc開始,一路遇到種種困難。本文講訴idea搭建springMvc + mybatis+Maven,環境。
1、基本概念
1.1、Spring
Spring是一個開源框架,Spring是於2003 年興起的一個輕量級的Java 開發框架,由Rod Johnson 在其著作Expert One-On-One J2EE Development and Design中闡述的部分理念和原型衍生而來。它是為了解決企業應用開發的復雜性而創建的。Spring使用基本的JavaBean來完成以前只可能由EJB完成的事情。然而,Spring的用途不僅限於服務器端的開發。從簡單性、可測試性和松耦合的角度而言,任何Java應用都可以從Spring中受益。 簡單來說,Spring是一個輕量級的控制反轉(IoC)和面向切面(AOP)的容器框架。
1.2、SpringMVC
Spring MVC屬於SpringFrameWork的後續產品,已經融合在Spring Web Flow裡面。Spring MVC 分離了控制器、模型對象、分派器以及處理程序對象的角色,這種分離讓它們更容易進行定制。
1.3、MyBatis
MyBatis 本是apache的一個開源項目iBatis, 2010年這個項目由apache software foundation 遷移到了google code,並且改名為MyBatis 。MyBatis是一個基於Java的持久層框架。iBATIS提供的持久層框架包括SQL Maps和Data Access Objects(DAO)MyBatis 消除了幾乎所有的JDBC代碼和參數的手工設置以及結果集的檢索。MyBatis 使用簡單的 XML或注解用於配置和原始映射,將接口和 Java 的POJOs(Plain Old Java Objects,普通的 Java對象)映射成數據庫中的記錄。
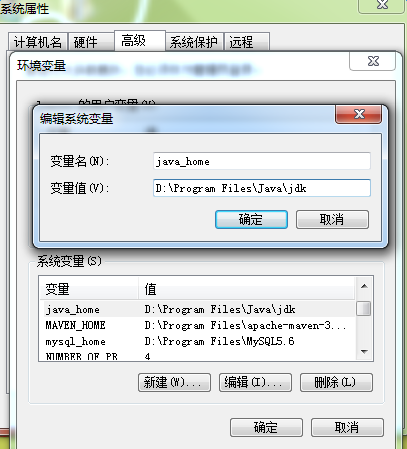
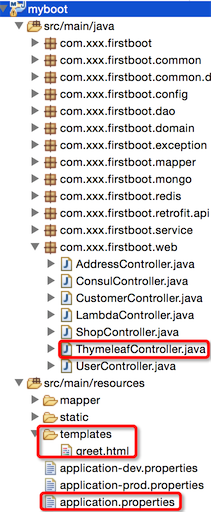
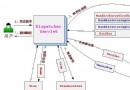
2、開發環境搭建與Maven Web項目創建
3.SSM整合
3.1Maven引入需要的JAR包
    4.0.3.RELEASE

    3.2.6

    1.7.7
    1.2.17


      junit
      junit
      4.0
      test


      org.springframework
      spring-core
      ${spring.version}


      org.springframework
      spring-web
      ${spring.version}


      org.springframework
      spring-oxm
      ${spring.version}


      org.springframework
      spring-tx
      ${spring.version}


      org.springframework
      spring-jdbc
      ${spring.version}


      org.springframework
      spring-webmvc
      ${spring.version}


      org.springframework
      spring-aop
      ${spring.version}


      org.springframework
      spring-context-support
      ${spring.version}


      org.springframework
      spring-test
      ${spring.version}


      org.mybatis
      mybatis
      ${mybatis.version}


      org.mybatis
      mybatis-spring
      1.2.2


      javax
      javaee-api
      7.0


      mysql
      mysql-connector-java
      5.1.30


      commons-dbcp
      commons-dbcp
      1.4


      jstl
      jstl
      1.2


      log4j
      log4j
      ${log4j.version}


      com.alibaba
      fastjson
      1.1.41


      org.slf4j
      slf4j-api
      ${slf4j.version}


      org.slf4j
      slf4j-log4j12
      ${slf4j.version}


      org.codehaus.jackson
      jackson-mapper-asl
      1.9.13


      commons-fileupload
      commons-fileupload
      1.3.1


      commons-io
      commons-io
      2.4


      commons-codec
      commons-codec
      1.9
3.2建立JDBC屬性文件
driver=com.mysql.jdbc.Driver
url=jdbc:mysql://localhost:3306/test
username=root
password=root
#定義初始連接數
initialSize=0
#定義最大連接數
maxActive=20
#定義最大空閒
maxIdle=20
#定義最小空閒
minIdle=1
#定義最長等待時間
maxWait=60000
·3.3建立spring-mybatis.xml配置文件
·3.4Log4j的配置
log4j.rootLogger=INFO,Console,File
#定義日志輸出目的地為控制台
log4j.appender.Console=org.apache.log4j.ConsoleAppender
log4j.appender.Console.Target=System.out
#可以靈活地指定日志輸出格式,下面一行是指定具體的格式
log4j.appender.Console.layout = org.apache.log4j.PatternLayout
log4j.appender.Console.layout.ConversionPattern=[%c] - %m%n

#文件大小到達指定尺寸的時候產生一個新的文件
log4j.appender.File = org.apache.log4j.RollingFileAppender
#指定輸出目錄
log4j.appender.File.File = logs/SpringMVC.log
#定義文件最大大小
log4j.appender.File.MaxFileSize = 10MB
# 輸出所以日志,如果換成DEBUG表示輸出DEBUG以上級別日志
log4j.appender.File.Threshold = ALL
log4j.appender.File.layout = org.apache.log4j.PatternLayout
log4j.appender.File.layout.ConversionPattern =[%p] [%d{yyyy-MM-dd HH\:mm\:ss}][%c]%m%n
3.5JUnit測試
在此之前我們需要新建張表
DROP TABLE IF EXISTS `t_user`;
CREATE TABLE `t_user` (
  `id` int(11) NOT NULL AUTO_INCREMENT,
  `username` varchar(32) DEFAULT NULL,
  `password` varchar(32) DEFAULT NULL,
  PRIMARY KEY (`id`)
) ENGINE=InnoDB AUTO_INCREMENT=5 DEFAULT CHARSET=utf8;

-- ----------------------------
-- Records of t_user
-- ----------------------------
INSERT INTO `t_user` VALUES ('2', 'tom', '123456');
INSERT INTO `t_user` VALUES ('3', 'rose', '123456');
INSERT INTO `t_user` VALUES ('4', 'aa', '123456');
3.6利用MyBatis Generator自動創建代碼

a.生成配置文件
b.cmd進入該目錄下執行:
java -jar mybatis-generator-core-1.3.2.jar -configfile generatorConfig.xml -overwrite

c.將生成的java文件放入項目中

3.7建立Service接口和實現類
a.UserService
package com.wangjie.spring.service;

import com.wangjie.spring.model.User;

/**
 * Created by wangjie on 2016/4/19 0019.
 */
public interface UserService {
    User getUserById(int userId);
}
b.UserServiceImpl
package com.wangjie.spring.service.impl;

import com.wangjie.spring.dao.UserMapper;
import com.wangjie.spring.model.User;
import com.wangjie.spring.service.UserService;
import org.springframework.beans.factory.annotation.Autowired;
import org.springframework.stereotype.Service;

import javax.annotation.Resource;


/**
 * Created by wangjie on 2016/4/19 0019.
 */
@Service("userService")
public class UserServiceImpl implements UserService {
    @Resource
    private UserMapper userMapper;
    public User getUserById(int userId) {
        return this.userMapper.selectByPrimaryKey(userId);
    }

}
3.8建立測試類
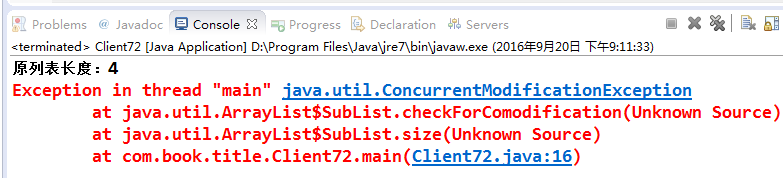
測試類在src/test/java中建立,下面測試類中注釋掉的部分是不使用Spring時,一般情況下的一種測試方法;如果使用了Spring那麼就可以使用注解的方式來引入配置文件和類,然後再將service接口對象注入,就可以進行測試了。
如果測試成功,表示Spring和Mybatis已經整合成功了。輸出信息使用的是Log4j打印到控制台。
package test.java;
import javax.annotation.Resource;

import com.wangjie.spring.model.User;
import com.wangjie.spring.service.UserService;
import org.apache.log4j.Logger;
import org.junit.Test;
import org.junit.runner.RunWith;
import org.springframework.test.context.ContextConfiguration;
import org.springframework.test.context.junit4.SpringJUnit4ClassRunner;

import com.alibaba.fastjson.JSON;


@RunWith(SpringJUnit4ClassRunner.class) // 表示繼承了SpringJUnit4ClassRunner類
@ContextConfiguration(locations = { "classpath:spring-mybatis.xml" })
public class TestMyBatis {
    private static Logger logger = Logger.getLogger(TestMyBatis.class);
    @Resource
    private UserService userService;


    @Test
    public void test() {
        User user = userService.getUserById(2);
        logger.info(JSON.toJSONString(user));
    }
}
測試結果:

至此,完成Spring和mybatis這兩大框架的整合,下面在繼續進行SpringMVC的整合。
3.9整合SpringMVC
上面已經完成了2大框架的整合,SpringMVC的配置文件單獨放,然後在web.xml中配置整合。
4.0配置spring-mvc.xml
配置裡面的注釋也很詳細,在此就不說了,主要是自動掃描控制器,視圖模式,注解的啟動這三個。
text/html;charset=UTF-8
4.1配置web.xml文件
這裡面對spring-mybatis.xml的引入以及配置的spring-mvc的Servlet就是為了完成SSM整合,之前2框架整合不需要在此處進行任何配置。配置一樣有詳細注釋,不多解釋了。
    Archetype Created Web Application


        contextConfigLocation
        classpath:spring-mybatis.xml


        encodingFilter
        org.springframework.web.filter.CharacterEncodingFilter
        true

            encoding
            UTF-8


        encodingFilter
        /*


        org.springframework.web.context.ContextLoaderListener


        org.springframework.web.util.IntrospectorCleanupListener


        SpringMVC
        org.springframework.web.servlet.DispatcherServlet

            contextConfigLocation
            classpath:spring-mvc.xml

        1
        true


        SpringMVC

        /


        /index.jsp
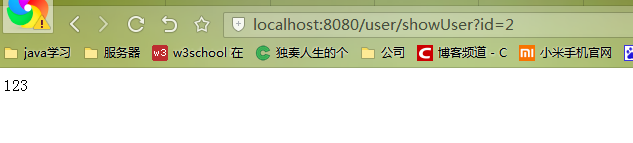
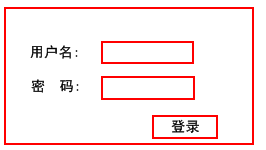
4.2測試
至此已經完成了SSM三大框架的整合了,接下來測試一下,如果成功了,那麼恭喜你,如果失敗了,繼續調試吧,作為程序員就是不停的與BUG做斗爭!
4.3新建jsp頁面

<%--
  Created by IntelliJ IDEA.
  User: Administrator
  Date: 2016/4/20 0020
  Time: 14:14
  To change this template use File | Settings | File Templates.
--%>
<%@ page contentType="text/html;charset=UTF-8" language="java" %>
4.4新建Controller

package com.wangjie.spring.controller;

import com.wangjie.spring.model.User;
import com.wangjie.spring.service.UserService;
import org.springframework.stereotype.Controller;
import org.springframework.web.bind.annotation.RequestMapping;

import javax.annotation.Resource;
import org.springframework.ui.Model; ;
import javax.servlet.http.HttpServletRequest;

/**
 * Created by wangjie on 2016/4/20 0020.
 */
@Controller
@RequestMapping("/user")
public class UserController {
    @Resource
    private UserService userService;

    @RequestMapping("/showUser")
    public String toIndex(HttpServletRequest request, Model model) {
        int userId = Integer.parseInt(request.getParameter("id"));
        User user = this.userService.getUserById(userId);
        model.addAttribute("user", user);
        return "showUser";
    }
}
4.5部署項目