WebSocket
WebSocket 規范的目標是在浏覽器中實現和服務器端雙向通信。雙向通信可以拓展浏覽器上的應用類型,例如實時的數據推送(股票行情)、游戲、聊天等。
原理
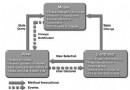
WebSocket protocol 是HTML5一種新的協議(protocol)。它是實現了浏覽器與服務器全雙工通信(full-duplex)。 現很多網站為了實現即時通訊(real-time),所用的技術都是輪詢(polling)。輪詢是在特定的的時間間隔(time interval)(如每1秒),由浏覽器對服務器發出HTTP request,然後由服務器返回最新的數據給客服端的浏覽器。這種傳統的HTTP request d的模式帶來很明顯的缺點 – 浏覽器需要不斷的向服務器發出請求(request),然而HTTP request 的header是非常長的,裡面包含的數據可能只是一個很小的值,這樣會占用很多的帶寬。 而最比較新的技術去做輪詢的效果是Comet – 用了AJAX。但這種技術雖然可達到全雙工通信,但依然需要發出請求(reuqest)。 在 WebSocket API,浏覽器和服務器只需要要做一個握手的動作,然後,浏覽器和服務器之間就形成了一條快速通道。兩者之間就直接可以數據互相傳送。在此WebSocket 協議中,為我們實現即時服務帶來了兩大好處: 1. Header 互相溝通的Header是很小的-大概只有 2 Bytes 2. Server Push 服務器可以主動傳送數據給客戶端
3握手協議
在實現websocket連線過程中,需要通過浏覽器發出websocket連線請求,然後服務器發出回應,這個過程通常稱為“握手” (handshaking)。 PS1:握手協議在後期的版本中,會標明版本編號,下面的例子屬於早期的協定之一,對於新版的 chrome 和 Firefox 皆不適用。 PS2:後期的版本大多屬於功能上的擴充,例如使用第7版的握手協議同樣也適用於第8版的握手協議。
例子: 浏覽器請求 GET /demo HTTP/1.1 Host: 你的網址.com Connection: Upgrade Sec-WebSocket-Key2: 12998 5 Y3 1 .P00 Upgrade: WebSocket Sec-WebSocket-Key1: 4 @1 46546xW%0l 1 5 Origin: http://你的網址.com ^n:ds[4U
服務器回應 HTTP/1.1 101 WebSocket Protocol Handshake Upgrade: WebSocket Connection: Upgrade Sec-WebSocket-Origin: http://你的網址.com Sec-WebSocket-Location: ws://你的網址.com/demo Sec-WebSocket-Protocol: sample 8jKS’y:G*Co,Wxa-
4浏覽器
實現了websocket的浏覽器:
Chrome
Supported in version 4+
Firefox
Supported in version 4+
Internet Explorer
Supported in version 10+
Opera
Supported in version 10+
Safari
Supported in version 5+
5服務器
在服務器端,也出現了一些實現websocket協議的項目: jetty 7.0.1 包含了一個初步的實現 resin 包含有websocket 實現 pywebsocket, apache http server 擴展 apache tomcat 7.0.27 版本 Nginx 1.3.13 版本 websocket api在浏覽器端的廣泛實現似乎只是一個時間問題了, 值得注意的是服務器端沒有標准的api, 各個實現都有自己的一套api, 並且jcp也沒有類似的提案, 所以使用websocket開發服務器端有一定的風險.可能會被鎖定在某個平台上或者將來被迫升級.

咳咳,以上這大坨來自百度百科,欲知詳細請自行查找

好了,准備開發環境:java sdk7,Myeclipse10,Tomcat7.47

下載好了自行安裝,我不管了
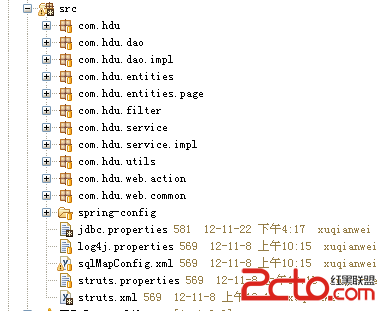
打開MyEclipse新建一個JSP工程,然後導入catalina.jar,websocket-api.jar

什麼,你覺得不爽,那你就多導幾個吧,反正不要錢,也沒人強奸你!


Ok,接下來,新建一個類WebsocketConfig ,有關抽象類ServerApplicationConfig請查看javaEE7 api

這個很重要,你知道嗎,我不哆嗦,你往下看
package com.websocket;

import java.util.HashSet;
import java.util.Set;

import javax.websocket.Endpoint;
import javax.websocket.server.ServerApplicationConfig;
import javax.websocket.server.ServerEndpointConfig;

public class WebsocketConfig implements ServerApplicationConfig{

	@Override
	public Set> getAnnotatedEndpointClasses(Set> scanned) {
		// TODO Auto-generated method stub
		System.out.println(******getAnnotatedEndpointClasses******);
		// Deploy all WebSocket endpoints defined by annotations in the examples
        // web application. Filter out all others to avoid issues when running
        // tests on Gump
		//這主要是掃描類的包,如果前綴為com.websocket.就抓住她,然後做什麼,你懂的
		Set> res=new HashSet<>();
		for(Class cs:scanned){
			if(cs.getPackage().getName().startsWith(com.websocket.)){
				res.add(cs);
			}
		}
		return res;
	}

	@Override
	public Set getEndpointConfigs(
			Set> scanned) {
		// TODO Auto-generated method stub
		System.out.println(******getEndpointConfigs******);
		Set res=new HashSet<>();
		/*
	   //使用Programmatic api的服務器地址

		if (scanned.contains(EchoEndpoint.class)) {
            res.add(ServerEndpointConfig.Builder.create(
                    EchoEndpoint.class,
                    /websocket/echoProgrammatic).build());
        }
        */
		return res;
	}

}
好了,現在我們來建立一個簡單chat的ServerEndpoint,據說有兩種方式:1、使用@ServerEndpoint 2、采用繼承的方式 我們先來第一種,新建一個類chat1
package com.websocket.chat;

import java.io.IOException;
import java.util.Set;
import java.util.concurrent.CopyOnWriteArraySet;
import java.util.concurrent.atomic.AtomicInteger;

import javax.websocket.OnClose;
import javax.websocket.OnMessage;
import javax.websocket.OnOpen;
import javax.websocket.Session;
import javax.websocket.server.ServerEndpoint;
import util.HTMLFilter;

@ServerEndpoint(value=/chat01)
//用了這個之後,你的服務地址為ws://localhost:port/projectName/chat01

public class chat_1 {
    private static final AtomicInteger connectionIds = new AtomicInteger(0);
    private static final Set connections =
            new CopyOnWriteArraySet();

    private final String nickname;
    private Session session;

    public chat_1() {
        nickname = 游客ID: + connectionIds.getAndIncrement();
    }


    @OnOpen
    public void start(Session session) {
        this.session = session;
        connections.add(this);
        String message = String.format(嗨嗨,姑娘們,來接客了: %s %s, nickname, has joined.);
        broadcast(message);
    }


    @OnClose
    public void end() {
        connections.remove(this);
        String message = String.format(客官慢走,嘿嘿,還沒付錢呢: %s %s,
                nickname, has disconnected.);
        broadcast(message);
    }


    @OnMessage
    public void receive(String message) {
        // Never trust the client
        String filteredMessage = String.format(您有新消息:%s: %s,
                nickname, HTMLFilter.filter(message.toString()));
        broadcast(filteredMessage);
    }


    private static void broadcast(String msg) {
        for (chat_1 client : connections) {
            try {
                client.session.getBasicRemote().sendText(msg);
            } catch (IOException e) {
                connections.remove(client);
                try {
                    client.session.close();
                } catch (IOException e1) {
                    // Ignore
                }
                String message = String.format(* %s %s,
                        client.nickname, has been disconnected.);
                broadcast(message);
            }//try
        }//for
    }//void broadcast(String msg)
}
/*
 * 你可能已經注意到我們從 javax.websocket包中引入了一些類。
@ServerEndpoint 注解是一個類層次的注解,它的功能主要是將目
前的類定義成一個websocket服務器端。注解的值將被用於監聽用戶連
接的終端訪問URL地址。
onOpen 和 onClose 方法分別被@OnOpen和@OnClose 所注解。
這兩個注解的作用不言自明:他們定義了當一個新用戶連接和斷開的時候所調
用的方法。
onMessage 方法被@OnMessage所注解。這個注解定義了當服務器接
收到客戶端發送的消息時所調用的方法。注意:這個方法可能包含一個
javax.websocket.Session可選參數(在我們的例子裡就是
session參數)。如果有這個參數,容器將會把當前發送消息客戶端的連接
Session注入進去。
 */
index.jsp
<%@ page language=java import=java.util.* pageEncoding=ISO-8859-1%>
<%
String path = request.getContextPath();
String basePath = request.getScheme()+://+request.getServerName()+:+request.getServerPort()+path+/;
%>
>


OK,接下來,我們用第二種方法,這也是本人比較喜歡的方法
/*
 *  Licensed to the Apache Software Foundation (ASF) under one or more
 *  contributor license agreements.  See the NOTICE file distributed with
 *  this work for additional information regarding copyright ownership.
 *  The ASF licenses this file to You under the Apache License, Version 2.0
 *  (the License); you may not use this file except in compliance with
 *  the License.  You may obtain a copy of the License at
 *
 *      http://www.apache.org/licenses/LICENSE-2.0
 *
 *  Unless required by applicable law or agreed to in writing, software
 *  distributed under the License is distributed on an AS IS BASIS,
 *  WITHOUT WARRANTIES OR CONDITIONS OF ANY KIND, either express or implied.
 *  See the License for the specific language governing permissions and
 *  limitations under the License.
 */
package websocket.echo;

import java.io.IOException;

import javax.websocket.Endpoint;
import javax.websocket.EndpointConfig;
import javax.websocket.MessageHandler;
import javax.websocket.RemoteEndpoint;
import javax.websocket.Session;

public class EchoEndpoint extends Endpoint {

    @Override
    public void onOpen(Session session, EndpointConfig endpointConfig) {
        RemoteEndpoint.Basic remoteEndpointBasic = session.getBasicRemote();
        session.addMessageHandler(new EchoMessageHandler(remoteEndpointBasic));
    }

    private static class EchoMessageHandler
            implements MessageHandler.Whole {

        private final RemoteEndpoint.Basic remoteEndpointBasic;

        private EchoMessageHandler(RemoteEndpoint.Basic remoteEndpointBasic) {
            this.remoteEndpointBasic = remoteEndpointBasic;
        }

        @Override
        public void onMessage(String message) {
            try {
                if (remoteEndpointBasic != null) {
                    remoteEndpointBasic.sendText(message);
                }
            } catch (IOException e) {
                // TODO Auto-generated catch block
                e.printStackTrace();
            }
        }
    }
}

我就不演示了,其它這些在Tomcat目錄下的examples都能找到