值參數化測試允許您使用不同的參數測試代碼,而無需編寫同一測試的多個副本。
假設您為代碼編寫測試,然後意識到您的代碼受到布爾參數的影響。
TEST(MyCodeTest, TestFoo) {
  // A code to test foo().
}
通常人們在這種情況下將他們的測試代碼考慮為具有布爾參數的函數。 該函數設置標志,然後執行測試代碼:
void TestFooHelper(bool flag_value) {
  flag = flag_value;
  // A code to test foo().
}

TEST(MyCodeTest, TestFoo) {
  TestFooHelper(false);
  TestFooHelper(true);
}
但這種設置有嚴重的缺點。 首先,當測試斷言在測試中失敗時,不清楚參數的什麼值導致它失敗。 您可以將澄清消息流式傳輸到EXPECT / ASSERT語句中,但是您必須對所有這些語句進行。 第二,你必須為每個測試添加一個這樣的幫助函數。 如果你有十個測試怎麼辦? 二十? 一百?
值參數化測試將允許您只寫一次測試,然後輕松實例化並使用任意數量的參數值運行它。
1. 要寫值參數化測試,首先應該定義一個fixture類。 它必須繼承:: testing :: Test和:: testing :: WithParamInterface <T>(後者是純粹的接口),其中T是參數值的類型。
為了方便,你可以從:: testing :: TestWithParam <T>派生fixture類,它本身是從:: testing :: Test和:: testing :: WithParamInterface <T>派生的。 T可以是任何可復制類型。 如果它是一個原始指針,你負責管理指向的值的生命周期。
class FooTest : public ::testing::TestWithParam<const char*> {
  // You can implement all the usual fixture class members here.
  // To access the test parameter, call GetParam() from class
  // TestWithParam<T>.
};

// Or, when you want to add parameters to a pre-existing fixture class:
class BaseTest : public ::testing::Test {
  ...
};
class BarTest : public BaseTest,
                public ::testing::WithParamInterface<const char*> {
  ...
};
2.告訴gtest你拿到參數的值後,具體做些什麼樣的測試
這裡,我們要使用一個新的宏(嗯,挺興奮的):TEST_P,關於這個"P"的含義,Google給出的答案非常幽默,就是說你可以理解為”parameterized" 或者 "pattern"。我更傾向於 ”parameterized"的解釋,呵呵。在TEST_P宏裡,使用GetParam()獲取當前的參數的具體值。
TEST_P(FooTest, DoesBlah) {
  // Inside a test, access the test parameter with the GetParam() method
  // of the TestWithParam<T> class:
  //在測試中,使用TestWithParam <T>類的GetParam()方法訪問測試參數:
  int n =  GetParam();
  EXPECT_TRUE(IsPrime(n));
  ...
}

TEST_P(FooTest, HasBlahBlah) {
  ...
}
3. 您可以使用INSTANTIATE_TEST_CASE_P來實例化具有任何您想要的參數的測試用例。 Google Test定義了一些用於生成測試參數的函數。 它們返回我們所謂的參數生成器(surprise!)。 這裡是它們的摘要,它們都在testing命名空間中:
Range(begin, end[, step]){begin, begin+step, begin+step+step, ...}. The values do not include end. step defaults to 1.Values(v1, v2, ..., vN)
Yields values {v1, v2, ..., vN}.
ValuesIn(container)and ValuesIn(begin, end)
Yields values from a C-style array, an STL-style container, or an iterator range [begin, end). container, begin, and end can be expressions whose values are determined at run time.
Bool()
Yields sequence {false, true}.
Combine(g1, g2, ..., gN)
這個比較強悍,它將g1,g2,...gN進行排列組合,g1,g2,...gN本身是一個參數生成器,每次分別從g1,g2,..gN中各取出一個值,組合成一個元組(Tuple)作為一個參數。
說明:這個功能只在提供了<tr1/tuple>頭的系統中有效。gtest會自動去判斷是否支持tr/tuple,如果你的系統確實支持,而gtest判斷錯誤的話,你可以重新定義宏GTEST_HAS_TR1_TUPLE=1。See comments in include/gtest/internal/gtest-port.h for more information.
有關更多詳細信息,請參閱源代碼中這些函數的定義中的注釋。
以下語句將從FooTest測試用例中實例化測試,每個測試用參數值“meeny”,“miny”和“moe”。
INSTANTIATE_TEST_CASE_P(InstantiationName,
                        FooTest,
                        ::testing::Values("meeny", "miny", "moe"));
為了區分模式的不同實例(是的,您可以多次實例化),
INSTANTIATE_TEST_CASE_P的第一個參數是測試案例的前綴,可以任意取。
第二個參數是測試案例的名稱,需要和之前定義的參數化的類的名稱相同,如:IsPrimeParamTest
第三個參數是可以理解為參數生成器,上面的例子使用test::Values表示使用括號內的參數。Google提供了一系列的參數生成的函數:
請記住為不同的實例化選擇唯一的前綴。 從上面的實例化的測試將有這些名稱:
您可以在--gtest_filter.中使用這些名稱。
請注意,INSTANTIATE_TEST_CASE_P將實例化給定測試用例中的所有測試,無論它們的定義是在INSTANTIATE_TEST_CASE_P語句之前還是之後。
You can see these files for more examples.
在上面,我們在同一個源文件中定義和實例化FooTest。有時您可能想在庫中定義值參數化測試,並讓其他人稍後實例化它們---這種模式稱為抽象測試。
作為其應用程序的一個例子,當你設計一個接口時,你可以編寫一個標准的抽象測試套件(也許使用一個工廠函數作為測試參數),該接口的所有實現都應該通過。當有人實現該接口時,他可以實例化您的套件以免費獲得所有的接口一致性測試。
要定義抽象測試,你應該這樣組織你的代碼:
1.將參數化測試夾具類(例如FooTest)的定義放在頭文件中,例如foo_param_test.h。這是你抽象測試的聲明。
2.將TEST_P定義放在foo_param_test.cc中,其中include foo_param_test.h。這是你抽象測試的實現。
一旦定義它們,您可以通過包括foo_param_test.h,調用INSTANTIATE_TEST_CASE_P()和鏈接foo_param_test.cc來實例化它們。您可以多次實例化相同的抽象測試用例,可能在不同的源文件中。
//被測函數

  bool IsPrime(int n) {
  // Trivial case 1: small numbers
  if (n <= 1) return false;

  // Trivial case 2: even numbers
  if (n % 2 == 0) return n == 2;

  // Now, we have that n is odd and n >= 3.

  // Try to divide n by every odd number i, starting from 3
  for (int i = 3; ; i += 2) {
  // We only have to try i up to the squre root of n
  if (i > n / i) break;

  // Now, we have i <= n/i < n.
  // If n is divisible by i, n is not prime.
  if (n % i == 0) return false;
 }

  // n has no integer factor in the range (1, n), and thus is prime.
  return true;
}
//第一步
class FooTest : public ::testing::TestWithParam<int> {
	// You can implement all the usual fixture class members here.
	// To access the test parameter, call GetParam() from class
	// TestWithParam<T>.
	//在這裡面可以實現fixture類的所有成員

};
//第二步
TEST_P(FooTest, DoesBlah) {
	// Inside a test, access the test parameter with the GetParam() method
	// of the TestWithParam<T> class:
	//在測試中,使用TestWithParam <T>類的GetParam()方法訪問測試參數:
	int n = GetParam();
	EXPECT_TRUE(IsPrime(n));
	//...
}

//第三步
//第一個參數是前綴;第二個是類名;第三個是參數生成器
INSTANTIATE_TEST_CASE_P(MyPrimeParamTest,
	FooTest,
	::testing::Values(-5,0, 3, 5, 11));

int main(int argc, char** argv)
{
	testing::InitGoogleTest(&argc, argv);

	return RUN_ALL_TESTS();
}
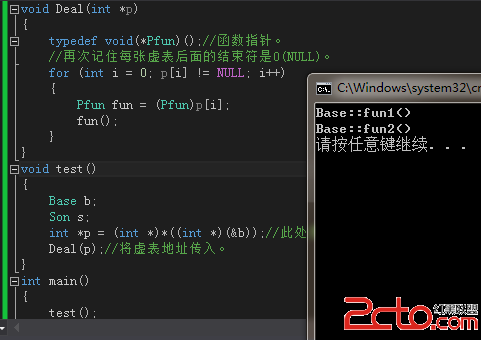
運行結果:
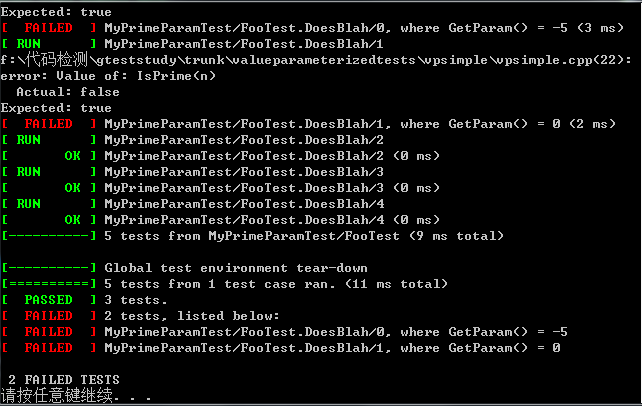
從上面的框框中的案例名稱大概能夠看出案例的命名規則,對於需要了解每個案例的名稱的我來說,這非常重要。 命名規則大概為:
prefix/test_case_name.testname/index