Windows 10 IoT Core 是微軟針對物聯網市場的一個重要產品,既可以開發設備UI與用戶交互式操作,又可以控制GPIO等接口,使得原來嵌入式繁瑣的開發變得簡單。通過Remote Debug功能可以進行斷點追蹤調試。C#語言本身也有很好的用戶基礎,相信Win10 IoT 不遠的將來會火起來。
上個月幫朋友解決了關於Win10 IoT 的一些技術問題,當前也有很多公司在嘗試采用Win10 IoT進行開發,可能也會遇到這些問題,相關文檔現在還非常少,這裡寫出來供大家參考。
因為要做一個Java Web與Restful的自宿主框架和其他一大堆事情,這篇文章也拖了半個月,框架剛剛完成,以後可以擺脫Tomcat這些HttpServer了,現在靜下來把這篇文章寫完。
Win10 IoT的安裝部署過程後面我會寫文章進行補充,下面直接介紹串口通信的開發過程。
1.連接設備
首先將 Raspberry Pi 2 與傳感器連接。GND,5V 對接,TX與RX交叉連接。
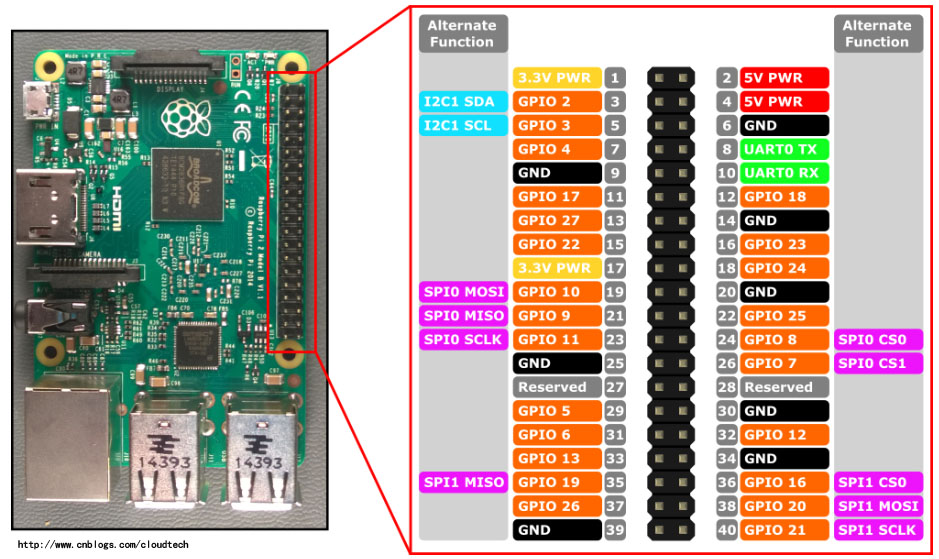
Raspberry Pi 2 GPIO 接口
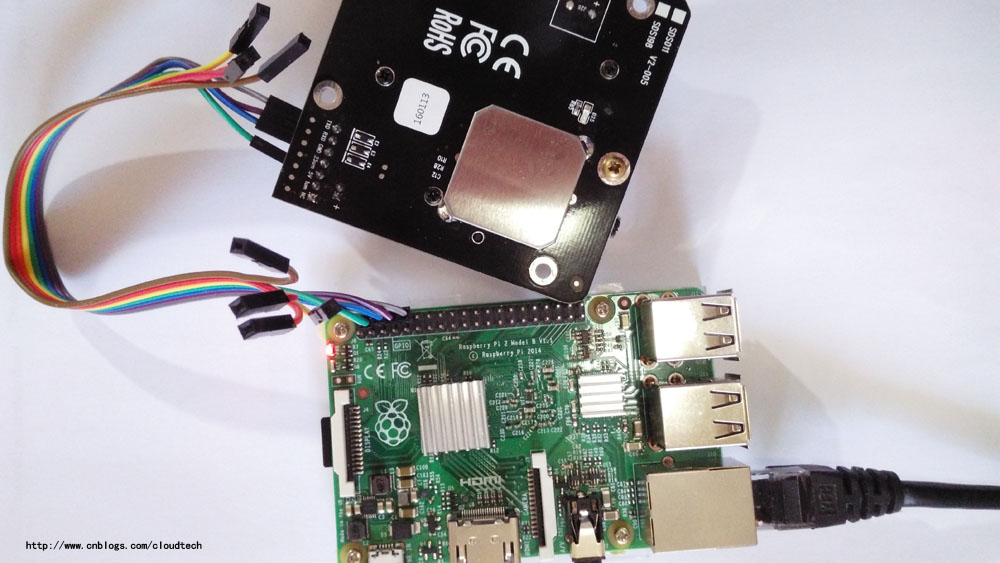
傳感器與設備連接
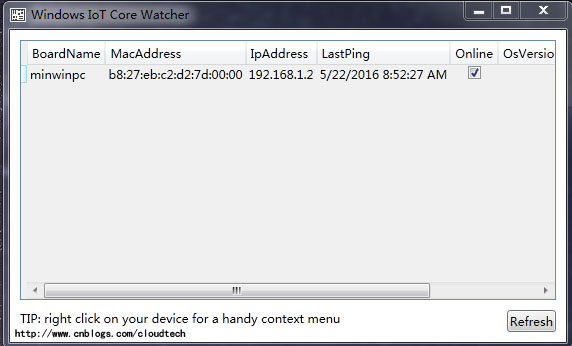
2.啟動設備
將Raspberry連接到局域網並啟動。打開 Windows IoT Core Watcher 查看設備的工作狀態。包含名稱,mac地址,ip地址,當前在線等信息。
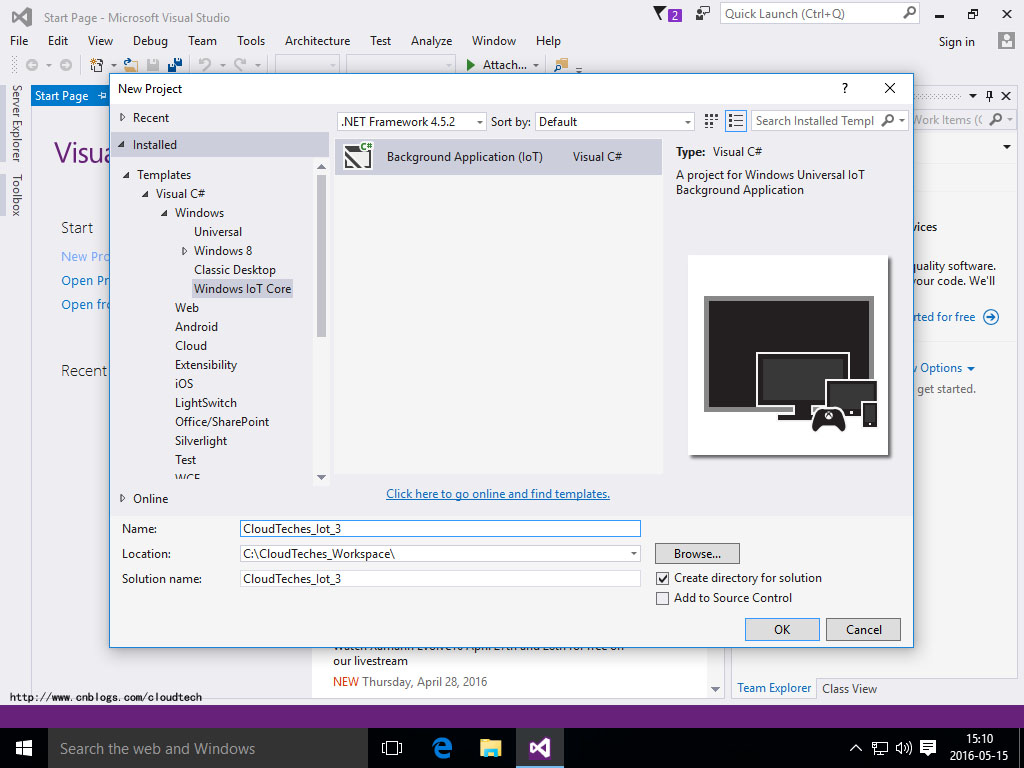
3.創建項目
打開VS2015創建項目,在C#分類下選擇Windows IoT Core 模板。
4.配置權限
Package.appxmanifest文件的節點中加入讀取網絡與串口通訊的權限,這步很像Android的uses-permission。
<Capabilities>
    <Capability Name="internetClient" />
    <Capability Name="internetClientServer" />
    <Capability Name="privateNetworkClientServer" />
    <DeviceCapability Name="serialcommunication">
      <Device Id="any">
        <Function Type="name:serialPort" />
      </Device>
    </DeviceCapability>
</Capabilities>
5.模塊代碼
創建UART的串口設備並設置參數。
string aqsFilter = SerialDevice.GetDeviceSelector("UART0");
DeviceInformationCollection dis = await DeviceInformation.FindAllAsync(aqsFilter);
//獲取串口設備
_derialPort = await SerialDevice.FromIdAsync(dis[0].Id);
//串口設備是否獲取成功
if (null != _derialPort)
{
    _derialPort.ReadTimeout = TimeSpan.FromMilliseconds(1000);//超時
    _derialPort.BaudRate = 9600;//波特率
    _derialPort.Parity = SerialParity.None;//校驗檢查
    _derialPort.StopBits = SerialStopBitCount.One;//停止位
    _derialPort.DataBits = 8;//數據位
    _derialPort.Handshake = SerialHandshake.None;//握手方式
    //設置讀取輸入流
    _dataReader = new DataReader(_derialPort.InputStream);
}
讀取串口數據
 Task<UInt32> loadAsyncTask;
_dataReader.InputStreamOptions = InputStreamOptions.Partial;
//讀取數據
loadAsyncTask = _dataReader.LoadAsync(_readBufferLength).AsTask();
uint bytesRead = await loadAsyncTask;
//判斷獲取數據長度
if (bytesRead > 0)
{
     //轉換十六進制數據
     string res = LoadData(bytesRead);
     SendMsg(res);
}
StringBuilder str_builder = new StringBuilder();
//轉換緩沖區數據為16進制
while (_dataReader.UnconsumedBufferLength > 0)
{
    str_builder.Append(_dataReader.ReadByte().ToString("x2"));
}
推送數據
HttpClient httpClient = new HttpClient();
httpClient.GetAsync(new Uri(string.Format("http://192.168.1.9:8099/{0}", res)));
6.調試代碼
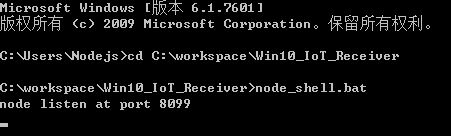
先用Nodejs創建了一個http的監聽服務模擬服務器,監聽8099端口上設備發送過來的串口數據,並打印到Console裡。
在VS2015的工具欄中選擇Remote Machine進行調試,IP地址輸入設備對應地址,可以在Windows IoT Core Watcher中查看到。點擊運行後會自動部署到設備上。


7.運行結果
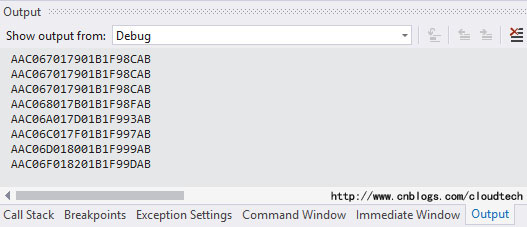
代碼部署完成後開始執行任務,Output窗口打印獲取到的串口數據。
Nodejs模擬的服務器打印接收到的推送數據。從打印結果上可以看到發送和接收到的數據一致。
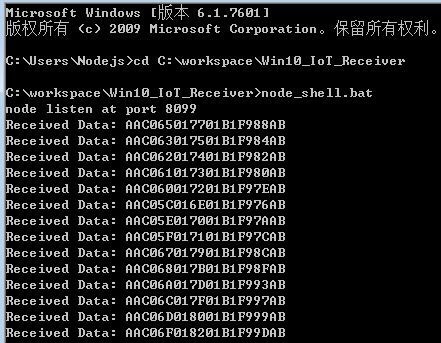
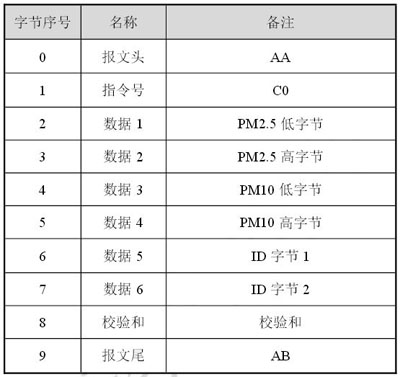
與傳感器的數據協議約定一致。
完整代碼:
using System;
using System.Diagnostics;
using System.Text;
using System.Threading.Tasks;
using Windows.ApplicationModel.Background;
using Windows.Devices.Enumeration;
using Windows.Devices.SerialCommunication;
using Windows.Storage.Streams;
using Windows.Web.Http;

namespace CloudTechIot3
{
    //http://www.cnblogs.com/cloudtech
    //librastarwing@hotmail.com
    public sealed class StartupTask : IBackgroundTask
    {
        #region Fileds

        private DataReader _dataReader;
        private SerialDevice _derialPort;
        //緩沖區大小
        private uint _readBufferLength = 10;

        #endregion

        #region Main Method

        public async void Run(IBackgroundTaskInstance taskInstance)
        {

            await Listen();
            Close();
        }

        #endregion

        #region Private Methods

        //監聽串口
        private async Task Listen()
        {
            try
            {
                string aqsFilter = SerialDevice.GetDeviceSelector("UART0");
                DeviceInformationCollection dis = await DeviceInformation.FindAllAsync(aqsFilter);
                //獲取串口設備
                _derialPort = await SerialDevice.FromIdAsync(dis[0].Id);
                //串口設備是否獲取成功
                if (null != _derialPort)
                {
                    _derialPort.ReadTimeout = TimeSpan.FromMilliseconds(1000);//超時
                    _derialPort.BaudRate = 9600;//波特率
                    _derialPort.Parity = SerialParity.None;//校驗檢查
                    _derialPort.StopBits = SerialStopBitCount.One;//停止位
                    _derialPort.DataBits = 8;//數據位
                    _derialPort.Handshake = SerialHandshake.None;//握手方式
                    //設置讀取輸入流
                    _dataReader = new DataReader(_derialPort.InputStream);
                    //循環讀取數據
                    while (true)
                    {
                        await ReadAsync();
                    }
                }
                else
                {
                    //TODO
                }
            }
            catch (Exception ex)
            {
                //TODO
            }
            finally
            {
                Close();
            }
        }

        //異步讀取數據
        private async Task ReadAsync()
        {
            Task<UInt32> loadAsyncTask;
            _dataReader.InputStreamOptions = InputStreamOptions.Partial;
            //讀取數據
            loadAsyncTask = _dataReader.LoadAsync(_readBufferLength).AsTask();
            Task.Delay(TimeSpan.FromSeconds(2.1)).Wait();
            uint bytesRead = await loadAsyncTask;
            //判斷獲取數據長度
            if (bytesRead > 0)
            {
                //轉換十六進制數據
                string res = LoadData(bytesRead);
                SendMsg(res);
            }
            else
            {
                //TODO
            }
        }

        //輸出結果
        private void SendMsg(string res)
        {
            //打印
            Debug.WriteLine(res);
            //推送到服務器
            HttpClient httpClient = new HttpClient();
            httpClient.GetAsync(new Uri(string.Format("http://192.168.1.9:8099/{0}", res)));
        }

        //轉換數據
        private string LoadData(uint bytesRead)
        {
            StringBuilder str_builder = new StringBuilder();
            //轉換緩沖區數據為16進制
            while (_dataReader.UnconsumedBufferLength > 0)
            {
                str_builder.Append(_dataReader.ReadByte().ToString("x2"));
            }
            return str_builder.ToString().ToUpper();
        }

        //釋放資源
        private void Close()
        {
            if (null != _dataReader)
            {
                _dataReader.DetachStream();
            }
            if (null != _derialPort)
            {
                _derialPort.Dispose();
            }
        }

        #endregion
    }
}
到這裡整個數據讀取發送的過程就完成了,如果對代碼有優化的建議,歡迎留言或發郵件給我(librastarwing@hotmail.com)。
也可以加我的微信號查看以前的文章。