 var mapUrl = {

/**** * 高德地圖 * lang可以通過zh_cn設置中文,en設置英文,size基本無作用,scl設置標注還是底圖,scl=1代表注記, * scl=2代表底圖(矢量或者影像),style設置影像和路網,style=6為影像圖, * vec——街道底圖 * img——影像底圖 * roadLabel---路網+標注 */
"aMap-img": "http://webst0{1-4}.is.autonavi.com/appmaptile?style=6&x={x}&y={y}&z={z}",
"aMap-vec": "http://webrd0{1-4}.is.autonavi.com/appmaptile?lang=zh_cn&size=1&scale=1&style=8&x={x}&y={y}&z={z}",
"aMap-roadLabel": "http://webst0{1-4}.is.autonavi.com/appmaptile?style=8&x={x}&y={y}&z={z}",
/*** * 天地圖 要key的 * vec——街道底圖 * img——影像底圖 * ter——地形底圖 * cva——中文注記 * cta/cia——道路+中文注記 ---roadLabel */
"tian-img": "http://t{0-7}.tianditu.gov.cn/DataServer?T=img_w&x={x}&y={y}&l={z}&tk=a4ee5c551598a1889adfabff55a5fc27",
"tian-roadLabel": "http://t{0-7}.tianditu.gov.cn/DataServer?T=cta_w&x={x}&y={y}&l={z}&tk=a4ee5c551598a1889adfabff55a5fc27",
"tian-label": "http://t{0-7}.tianditu.gov.cn/DataServer?T=cva_w&x={x}&y={y}&l={z}&tk=a4ee5c551598a1889adfabff55a5fc27",
"tian-vec": "http://t{0-7}.tianditu.gov.cn/DataServer?T=vec_w&x={x}&y={y}&l={z}&tk=a4ee5c551598a1889adfabff55a5fc27",
"tian-ter": "http://t{0-7}.tianditu.gov.cn/DataServer?T=ter_w&x={x}&y={y}&l={z}&tk=a4ee5c551598a1889adfabff55a5fc27",
/*** *geoq地圖 * http://cache1.arcgisonline.cn * http://map.geoq.cn * vec:標准彩色地圖 * gray、blue、warm * line 中國輪廓圖 * china 中國輪廓圖+標注 * Hydro 水系 * green 植被 */
"geoq-vec": "http://cache1.arcgisonline.cn/arcgis/rest/services/ChinaOnlineCommunity/MapServer/tile/{z}/{y}/{x}",
"geoq-gray": "http://cache1.arcgisonline.cn/arcgis/rest/services/ChinaOnlineStreetGray/MapServer/tile/{z}/{y}/{x}",
"geoq-blue": "http://cache1.arcgisonline.cn/arcgis/rest/services/ChinaOnlineStreetPurplishBlue/MapServer/tile/{z}/{y}/{x}",
"geoq-warm": "http://cache1.arcgisonline.cn/arcgis/rest/services/ChinaOnlineStreetWarm/MapServer/tile/{z}/{y}/{x}",
"geoq-line": "http://cache1.arcgisonline.cn/arcgis/rest/services/SimpleFeature/ChinaBoundaryLine/MapServer/tile/{z}/{y}/{x}",//不穩定
"geoq-china": "http://thematic.geoq.cn/arcgis/rest/services/ThematicMaps/administrative_division_boundaryandlabel/MapServer/tile/{z}/{y}/{x}",//不穩定
"geoq-Hydro": "http://thematic.geoq.cn/arcgis/rest/services/ThematicMaps/WorldHydroMap/MapServer/tile/{z}/{y}/{x}",//不穩定
"geoq-green": "http://thematic.geoq.cn/arcgis/rest/services/ThematicMaps/vegetation/MapServer/tile/{z}/{y}/{x}",//不穩定
/*** * Google * m 街道 * s 影像 */
"google-vec": "http://www.google.cn/maps/[email protected]&gl=cn&x={x}&y={y}&z={z}",
"google-img": "http://www.google.cn/maps/[email protected]&gl=cn&x={x}&y={y}&z={z}"
};
xsq = "120.22940239501227;30.226915680225147;120.28948387694587;30.146807031535218"
xsqlist = xsq.split(";")
xsq_x_list = []
xsq_y_list = []
for i in range(len(xsqlist)):
if i % 2 == 0:
xsq_x_list.append(float(xsqlist[i]))
else:
xsq_y_list.append(float(xsqlist[i]))
xsq_x_y_list = []
for x, y in zip(xsq_x_list, xsq_y_list):
xsq_x_y_list.append([float(x), float(y)])
MINX = min(xsq_x_list)
MAXX = max(xsq_x_list)
MINY = min(xsq_y_list)
MAXY = max(xsq_y_list)
print([MINX, MINY])
print([MINX, MAXY])
print([MAXX, MAXY])
print([MAXX, MINY])
print([MINX, MINY])
<!DOCTYPE html>
<html lang="en">
<head>
<meta charset="UTF-8">
<title>高德地圖+ol</title>
<link rel="stylesheet" href="https://cdnjs.cloudflare.com/ajax/libs/openlayers/4.6.5/ol.css" integrity="sha256-rQq4Fxpq3LlPQ8yP11i6Z2lAo82b6ACDgd35CKyNEBw=" crossorigin="anonymous"/>
<script src="https://cdnjs.cloudflare.com/ajax/libs/openlayers/4.6.5/ol.js" integrity="sha256-77IKwU93jwIX7zmgEBfYGHcmeO0Fx2MoWB/ooh9QkBA=" crossorigin="anonymous"></script>
<style> #map {
 width: 100%; height: 100%; position: absolute; } </style>
</head>
<body>
<div id="map"></div>
<script type="text/javascript"> var gaodeMapLayer = new ol.layer.Tile({
 title: "titile", source: new ol.source.XYZ({
 url: mapUrl["tian-vec"] }) }); var fa = new ol.layer.Vector({
 source: new ol.source.Vector({
 features: [new ol.Feature({
 geometry: new ol.geom.Polygon( [[ [120.22940239501227, 30.146807031535218], [120.22940239501227, 30.226915680225147], [120.28948387694587, 30.226915680225147], [120.28948387694587, 30.146807031535218], [120.22940239501227, 30.146807031535218], ]] ), name: 'pg' })] }), }); var map = new ol.Map({
 layers: [gaodeMapLayer, fa], view: new ol.View({
 center: [120, 30], projection: 'EPSG:4326', zoom: 10 }), target: 'map' }); // 點選地圖用 map.on('singleclick', function (e) {
 console.log(map.getEventCoordinate(e.originalEvent)); }) </script>
</body>
</html>
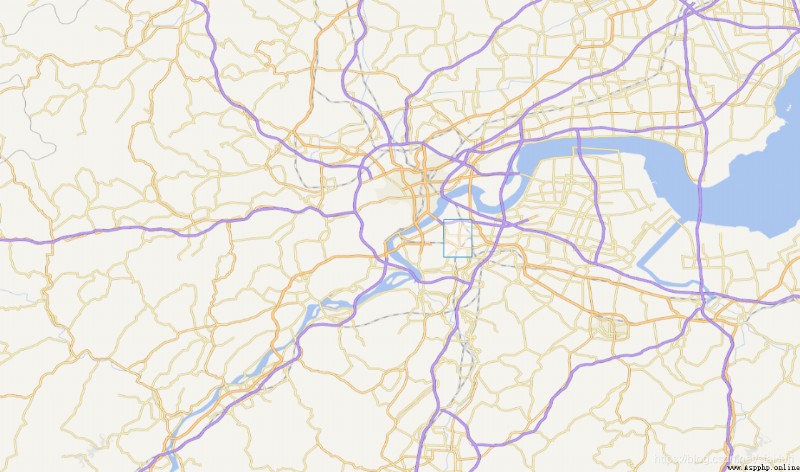
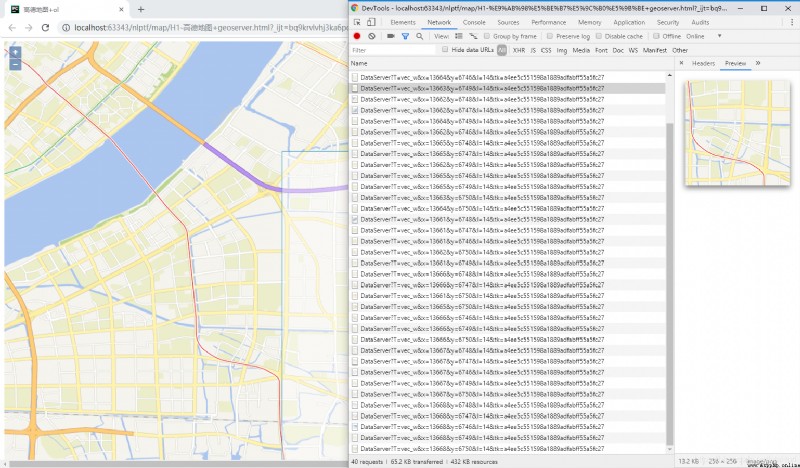
介紹XYZ 的規則
有興趣可以查看 這篇博客:openlayers-自定義瓦片
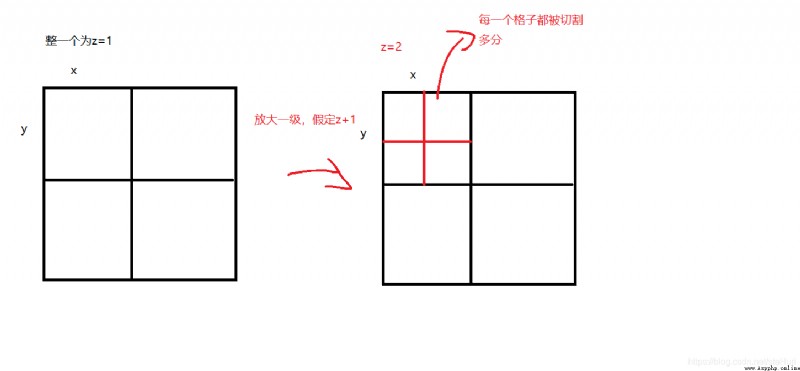
根據圖中描述,所需要素為 x ,y ,z 三者 ,在資源路由中不難看出 xyz 都是作為未知數
{
"tian-vec": "http://t{0-7}.tianditu.gov.cn/DataServer?T=vec_w&x={x}&y={y}&l={z}&tk=a4ee5c551598a1889adfabff55a5fc27"}
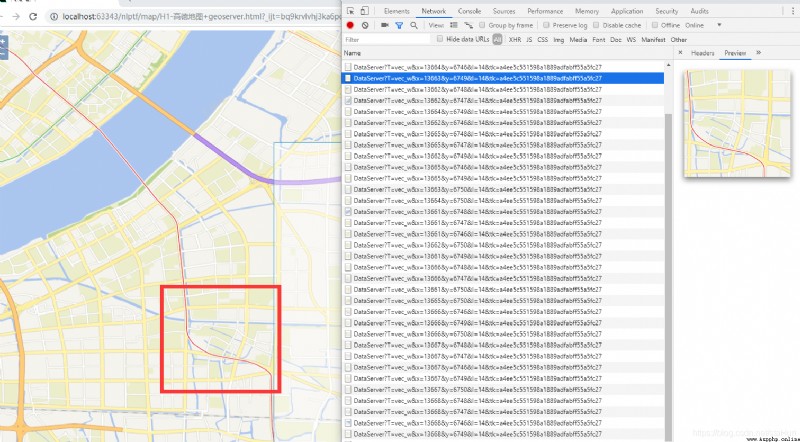
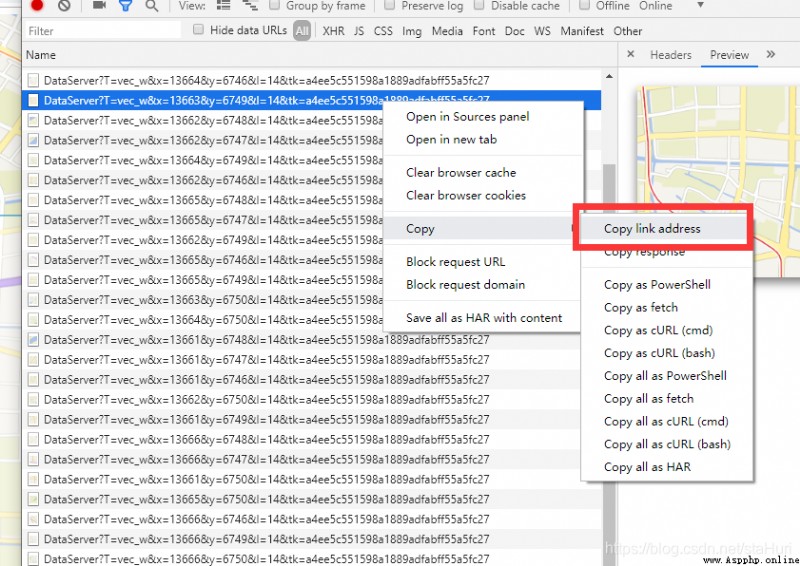
使用同樣的方式獲取右下角地址
不變的是z 在天地圖url中是l ,本文示例l=15
在地址中x y 存在關系: x 向右增加,y向下增加
本文x范圍 [ 27326,27333 ]
本文y范圍[ 13492, 13507 ]
到目前所有參數准備就緒
import requests
import os
# 文件存放位置設置
BASE_PATH = os.path.join(os.path.abspath(os.curdir), 'disc')
print(BASE_PATH)
# 簡單反爬蟲 , 可以不寫
headers = {

"Connection": "keep-alive",
"User-Agent": "Mozilla/5.0 (Windows NT 10.0; Win64; x64) AppleWebKit/537.36 (KHTML, like Gecko) Chrome/73.0.3683.86 Safari/537.36",
}
# 單個圖片的參數
x = 27326
y = 13492
z = 15
key = 'a4ee5c551598a1889adfabff55a5fc27'
# 完整url
url = "http://t3.tianditu.gov.cn/DataServer?T=vec_w&x={}&y={}&l={}&tk={}".format(x, y, z, key)
# 保存文件名稱
fileName = os.path.join(BASE_PATH, "x={}y={}z={}.png".format(x, y, z))
# 具體下載操作
if (os.path.exists(fileName)) == False:
r = requests.get(url=url, headers=headers)
if r.status_code == 200:
with open(fileName, 'wb') as f:
for chunk in r:
f.write(chunk)
下載成功
import requests
import os
# 文件存放位置設置
BASE_PATH = os.path.join(os.path.abspath(os.curdir), 'disc')
BASE_PATH_res = os.path.join(os.path.abspath(os.curdir), 'result')
# 簡單反爬蟲 , 可以不寫
headers = {

"Connection": "keep-alive",
"User-Agent": "Mozilla/5.0 (Windows NT 10.0; Win64; x64) AppleWebKit/537.36 (KHTML, like Gecko) Chrome/73.0.3683.86 Safari/537.36",
}
def download_pic(x, y, z):
try:
# 下載圖片
key = 'a4ee5c551598a1889adfabff55a5fc27'
for xi in x:
for yi in y:
url = "http://t3.tianditu.gov.cn/DataServer?T=vec_w&x={}&y={}&l={}&tk={}".format(xi, yi, z, key)
# 保存文件名稱
fileName = os.path.join(BASE_PATH, "x={}y={}z={}.png".format(xi, yi, z))
# 具體下載操作
if (os.path.exists(fileName)) == False:
r = requests.get(url=url, headers=headers)
if r.status_code == 200:
with open(fileName, 'wb') as f:
for chunk in r:
f.write(chunk)
else:
print("訪問異常")
except Exception as e:
print(e)
pass
if __name__ == '__main__':
x = range(27326 - 1, 27326 + 2)
y = range(13492 - 1, 13492 + 2)
z = 15
picSize = 256
download_pic(x, y, z)
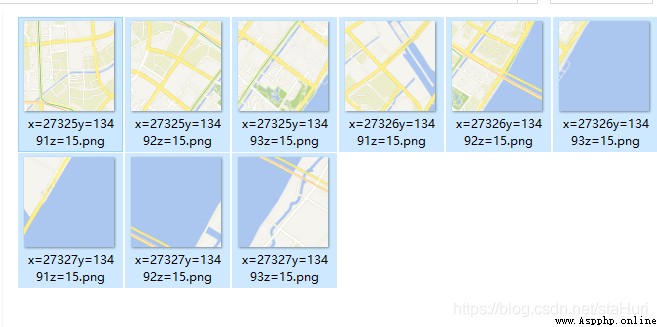
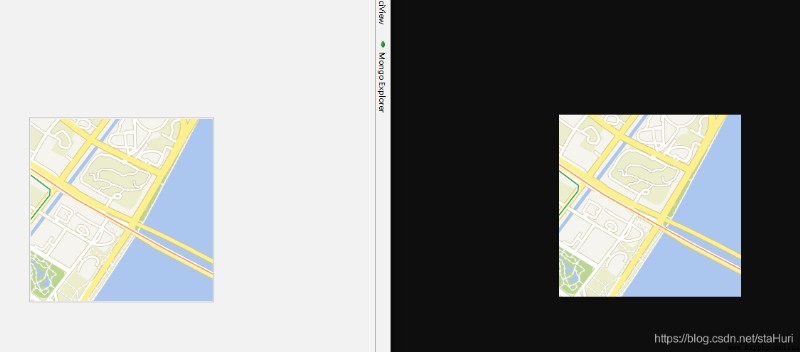
至此我們將一部分圖片下載完成

def merge_pic(x, y, z):
picSize = 256
try:
# 構造平圖矩陣
li = []
for xi in x:
lis = []
for yi in y:
fileName = os.path.join(BASE_PATH, "x={}y={}z={}.png".format(xi, yi, z))
lis.append(fileName)
li.append(lis)
oca = len(x)
ocb = len(y)
toImage = Image.new('RGBA', (oca * picSize, ocb * picSize))
for i in range(oca):
for j in range(ocb):
fromImge = Image.open(li[i][j])
picx = 256 * i
picy = 256 * j
loc = (picx, picy)
toImage.paste(fromImge, loc)
toImage.save(os.path.join(BASE_PATH_res, "rs.png"))
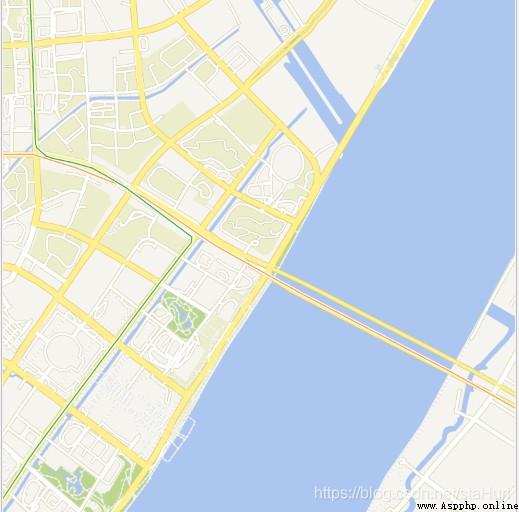
print("構造完成輸出圖片")
except Exception as e:
print(e)
pass
#! /usr/bin/env python
# -*- coding: utf-8 -*-
import requests
from PIL import Image
import os
# 文件存放位置設置
BASE_PATH = os.path.join(os.path.abspath(os.curdir), 'disc')
BASE_PATH_res = os.path.join(os.path.abspath(os.curdir), 'result')
# 簡單反爬蟲 , 可以不寫
headers = {

"Connection": "keep-alive",
"User-Agent": "Mozilla/5.0 (Windows NT 10.0; Win64; x64) AppleWebKit/537.36 (KHTML, like Gecko) Chrome/73.0.3683.86 Safari/537.36",
}
def download_pic(x, y, z):
try:
# 下載圖片
key = 'a4ee5c551598a1889adfabff55a5fc27'
for xi in x:
for yi in y:
url = "http://t3.tianditu.gov.cn/DataServer?T=vec_w&x={}&y={}&l={}&tk={}".format(xi, yi, z, key)
# 保存文件名稱
fileName = os.path.join(BASE_PATH, "x={}y={}z={}.png".format(xi, yi, z))
# 具體下載操作
if (os.path.exists(fileName)) == False:
r = requests.get(url=url, headers=headers)
if r.status_code == 200:
with open(fileName, 'wb') as f:
for chunk in r:
f.write(chunk)
else:
print("訪問異常")
except Exception as e:
print(e)
pass
def merge_pic(x, y, z):
picSize = 256
try:
# 構造平圖矩陣
li = []
for xi in x:
lis = []
for yi in y:
fileName = os.path.join(BASE_PATH, "x={}y={}z={}.png".format(xi, yi, z))
lis.append(fileName)
li.append(lis)
oca = len(x)
ocb = len(y)
toImage = Image.new('RGBA', (oca * picSize, ocb * picSize))
for i in range(oca):
for j in range(ocb):
fromImge = Image.open(li[i][j])
picx = 256 * i
picy = 256 * j
loc = (picx, picy)
toImage.paste(fromImge, loc)
toImage.save(os.path.join(BASE_PATH_res, "rs.png"))
print("構造完成輸出圖片")
except Exception as e:
print(e)
pass
if __name__ == '__main__':
x = range(27326 - 1, 27326 + 2)
y = range(13492 - 1, 13492 + 2)
z = 15
download_pic(x, y, z)
merge_pic(x, y, z)
本文代碼及可視化代碼均放在 github 歡迎star & fork