PPLiteSeg是百度飛漿研發的一種兼具高精度和低延時的實時語義分割算法,目前已經開源。
github地址:GitHub - PaddlePaddle/PaddleSeg: Easy-to-use image segmentation library with awesome pre-trained model zoo, supporting wide-range of practical tasks in Semantic Segmentation, Interactive Segmentation, Panoptic Segmentation, Image Matting, 3D Segmentation, etc.
實時語義分割領域更講究運行流程性和分割准確度之間的平衡。
PP-LiteSeg 是一個同時兼顧精度與速度的 SOTA(業界最佳)語義分割模型。它基於 Cityscapes 數據集,在 1080ti 上精度為 mIoU 72.0 時,速度高達273.6 FPS(mIoU 77.5 時,FPS 為102.6),超越現有 CVPR SOTA 模型 STDC,真正實現了精度和速度的 SOTA 均衡。
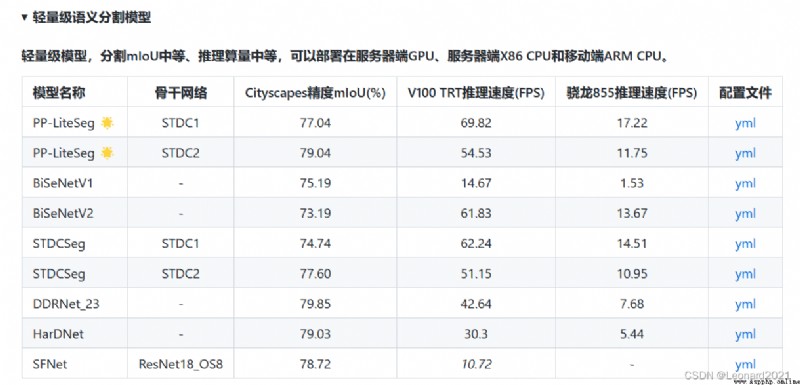
更值得令人驚喜的是,PP-LiteSeg 不僅在開源數據集評測效果優秀,在產業數據集也表現出了驚人的實力!例如在質檢、遙感場景,PP-LiteSeg 的精度與高精度、大體積的 OCRNet 持平,而速度卻快了近7倍!!!
本人使用PP-LiteSeg 的目的是嘗試將語義分割和目標檢測相結合,來實現自動駕駛的視覺部分。
由於PP-LiteSeg 在實時語義分割領域的實時檢測流程性和分割准確率都是SOTA,故選擇其進行訓練與部署。
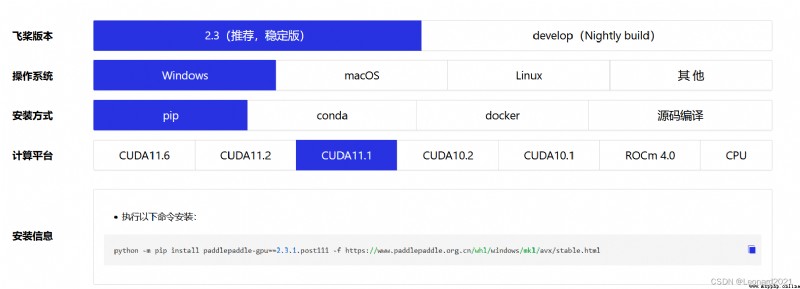
開始使用_飛槳-源於產業實踐的開源深度學習平台
根據你電腦的顯卡類型、安裝的顯卡驅動來安裝 paddlepaddle-gpu ,比如我的電腦顯卡是英偉達的 RTX 2060,CUDA是11.1,CUDNN是8.1,選擇對應的版本進行命令行下載。
使用如下命令驗證PaddlePaddle是否安裝成功,並且查看版本。
# 在Python解釋器中順利執行如下命令
>>> import paddle
>>> paddle.utils.run_check()
# 如果命令行出現以下提示,說明PaddlePaddle安裝成功
# PaddlePaddle is installed successfully! Let's start deep learning with PaddlePaddle now.
# 查看PaddlePaddle版本
>>> print(paddle.__version__)
安裝完成後,安裝 PaddleSeg
pip install paddleseg首先,我使用的數據集是Kaggle上獲取的CARLA自動駕駛汽車模擬器的數據集,後續會嘗試使用真實環境下的數據集進行訓練與分割。
Semantic Segmentation for Self Driving Cars | Kaggle
CARLA Simulator
它的原始數據集分成了A、B、C、D、E五個部分,每個部分含有1000張image和1000張對應的mask。
數據集處理的官方教程:
https://github.com/PaddlePaddle/PaddleSeg/blob/release/2.6/docs/data/marker/marker_cn.md
可能需要用到的代碼, change_channel.py :
# 將三通道變成單通道。
import os
import os.path as osp
import sys
import numpy as np
from PIL import Image
input = 'data/dataA_B/annotations'
# os.walk()方法用於通過在目錄樹中游走輸出在目錄中的文件名
for fpath, dirs, fs in os.walk(input):
print(fpath)
for f in fs:
try:
path = osp.join(fpath, f)
# _output_dir = fpath.replace(input, '')
# _output_dir = _output_dir.lstrip(os.path.sep)
image = Image.open(path)
image,_,_ = image.split()
image.save(path)
except:
continue
print("已變為單通道!")
可能用到的命令行:
# 變成偽彩色圖
python gray2pseudo_color.py /CARLA_data/annotations /CARLA_data/annotations
# 數據劃分
python split_dataset_list.py CARLA_data images annotations --split 0.9 0.1 0 --format png png我將原始數據集整理到一起,並且進行了重命名和數據集劃分,方便操作。免費提供給大家:
鏈接:https://pan.baidu.com/s/1dzQw8XD-URdBiEq8XArDdw
提取碼:8888
整體架構:
CARLA_data-
-annotations
---000000.png
---000001.png
---**********
-images
---000000.png
---000001.png
---**********
-test.txt
-train.txt
-val.txt百度飛漿官方教程:https://github.com/PaddlePaddle/PaddleSeg/blob/release/2.6/docs/whole_process_cn.md
PaddleSeg動態圖API使用教程 - 飛槳AI Studio
我使用的是API的簡易版本,具體如下:
建立一個 train.py 文件
from paddleseg.models import PPLiteSeg
from paddleseg.models.backbones import STDC1
import paddleseg.transforms as T
from paddleseg.datasets import Dataset
from paddleseg.models.losses import CrossEntropyLoss
import paddle
from paddleseg.core import train
backbone = STDC1()
#構建模型
model = PPLiteSeg(num_classes=13,
backbone= backbone,
arm_out_chs = [32, 64, 128],
seg_head_inter_chs = [32, 64, 64],
pretrained=None)
# 構建訓練用的transforms
transforms = [
T.ResizeStepScaling(min_scale_factor=0.5,max_scale_factor=2.5,scale_step_size=0.25),
T.RandomPaddingCrop(crop_size=[960,720]),
T.RandomHorizontalFlip(),
T.RandomDistort(brightness_range=0.5,contrast_range=0.5,saturation_prob=0.5),
T.Normalize()
]
# 構建訓練集
train_dataset = Dataset(
transforms = transforms,
dataset_root = 'CARLA_data',
num_classes= 13,
train_path = 'CARLA_data/train.txt',
mode='train'
)
# 構建驗證用的transforms
transforms = [
T.Normalize()
]
# 構建驗證集
val_dataset = Dataset(
transforms = transforms,
dataset_root = 'CARLA_data',
num_classes= 13,
val_path = 'CARLA_data/val.txt',
mode='val'
)
# 設置學習率
base_lr = 0.01
lr = paddle.optimizer.lr.PolynomialDecay(base_lr, power=0.9, decay_steps=1000, end_lr=0)
optimizer = paddle.optimizer.Momentum(lr, parameters=model.parameters(), momentum=0.9, weight_decay=4.0e-5)
#構建損失函數
losses = {}
losses['types'] = [CrossEntropyLoss()] * 3
losses['coef'] = [1]* 3
#設置訓練函數
train(
model=model,
train_dataset=train_dataset,
val_dataset=val_dataset,
optimizer=optimizer,
save_dir='output',
iters=10000,
batch_size=4,
save_interval=200,
log_iters=10,
num_workers=0,
losses=losses,
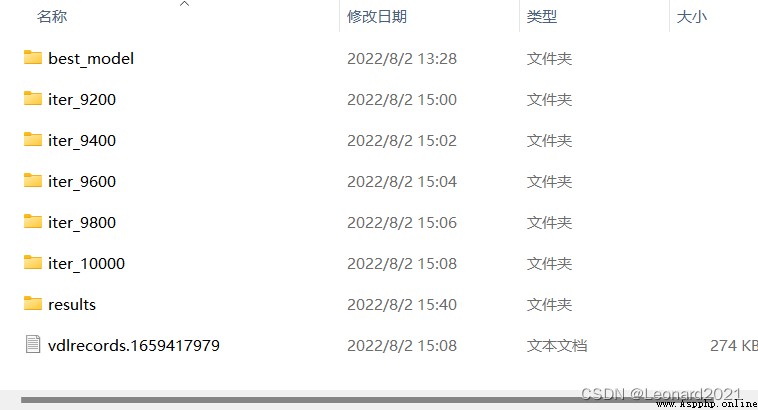
use_vdl=True)訓練完成後會在根目錄下的output文件夾中生成訓練好的模型以及訓練過程的日志。
對圖像文件或者文件夾內的圖像文件進行識別與保存:建立 predict.py 文件
from paddleseg.models import PPLiteSeg
from paddleseg.models.backbones import STDC1
import paddleseg.transforms as T
import os
from paddleseg.core import predict
backbone = STDC1()
model = PPLiteSeg(num_classes=13,
backbone= backbone,
arm_out_chs = [32, 64, 128],
seg_head_inter_chs = [32, 64, 64],
pretrained=None)
transforms = T.Compose([
T.Resize(target_size=(512, 512)),
T.RandomHorizontalFlip(),
T.Normalize()
])
def get_image_list(image_path):
"""Get image list"""
valid_suffix = [
'.JPEG', '.jpeg', '.JPG', '.jpg', '.BMP', '.bmp', '.PNG', '.png'
]
image_list = []
image_dir = None
if os.path.isfile(image_path):
if os.path.splitext(image_path)[-1] in valid_suffix:
image_list.append(image_path)
elif os.path.isdir(image_path):
image_dir = image_path
for root, dirs, files in os.walk(image_path):
for f in files:
if os.path.splitext(f)[-1] in valid_suffix:
image_list.append(os.path.join(root, f))
else:
raise FileNotFoundError(
'`--image_path` is not found. it should be an image file or a directory including images'
)
if len(image_list) == 0:
raise RuntimeError('There are not image file in `--image_path`')
return image_list, image_dir
if __name__ == '__main__':
image_path = 'CARLA_data/image/000658.png' # 也可以輸入一個包含圖像的目錄
image_list, image_dir = get_image_list(image_path)
predict(
model,
model_path='output/best_model/model.pdparams',
transforms=transforms,
image_list=image_list,
image_dir=image_dir,
save_dir='output/results'
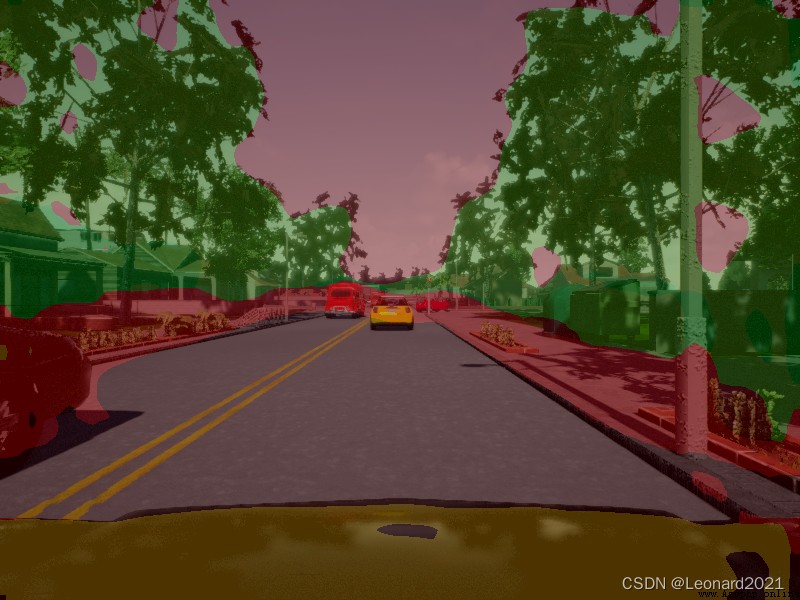
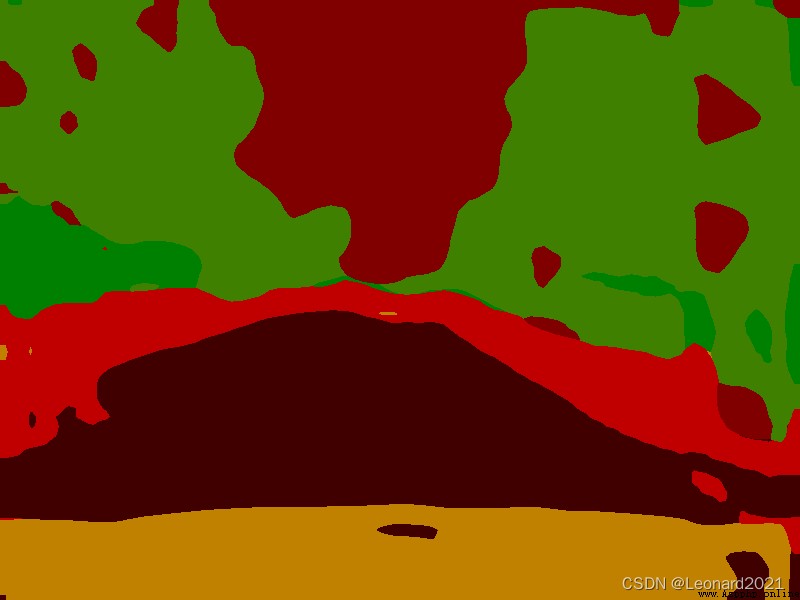
)識別結果將保存到根目錄下output文件夾內的 result文件夾內,這種預測方式只能針對圖像,無法做到實時檢測,非常地不人性化。
原始圖像:
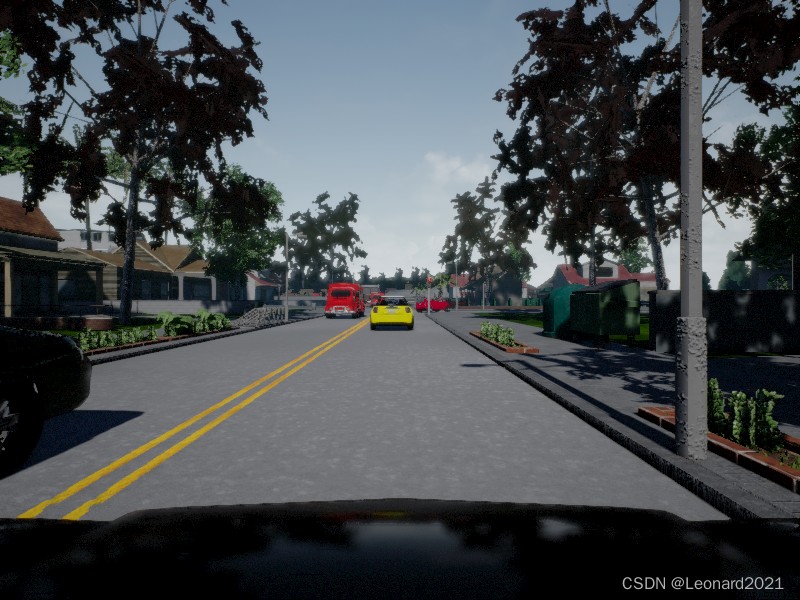
原始的paddleseg.core.py下的predict函數輸入端要求是文件的地址,即要求:string格式的輸入,故直接改成 0 來調用攝像頭來獲取圖像是完全不可行的,且輸出端只有保存到指定地址的代碼,沒有實時識別與顯示的代碼,中間還夾雜了很多用於記錄訓練過程的代碼和寫入文件的代碼。我的整體思路是將輸入端改成:由調用端的程序獲取攝像頭圖像後輸入到predict函數中,predict函數再進行實時預測並且顯示到屏幕上,刪去其他用於記錄的代碼,提高運行流暢性。
根目錄下新建 visualize_myself.py :
# Copyright (c) 2020 PaddlePaddle Authors. All Rights Reserved.
#
# Licensed under the Apache License, Version 2.0 (the "License");
# you may not use this file except in compliance with the License.
# You may obtain a copy of the License at
#
# http://www.apache.org/licenses/LICENSE-2.0
#
# Unless required by applicable law or agreed to in writing, software
# distributed under the License is distributed on an "AS IS" BASIS,
# WITHOUT WARRANTIES OR CONDITIONS OF ANY KIND, either express or implied.
# See the License for the specific language governing permissions and
# limitations under the License.
import os
import cv2
import numpy as np
from PIL import Image as PILImage
def visualize(image, result, color_map, save_dir=None, weight=0.6):
"""
Convert predict result to color image, and save added image.
Args:
image (str): The path of origin image.
result (np.ndarray): The predict result of image.
color_map (list): The color used to save the prediction results.
save_dir (str): The directory for saving visual image. Default: None.
weight (float): The image weight of visual image, and the result weight is (1 - weight). Default: 0.6
Returns:
vis_result (np.ndarray): If `save_dir` is None, return the visualized result.
"""
color_map = [color_map[i:i + 3] for i in range(0, len(color_map), 3)]
color_map = np.array(color_map).astype("uint8")
# Use OpenCV LUT for color mapping
c1 = cv2.LUT(result, color_map[:, 0])
c2 = cv2.LUT(result, color_map[:, 1])
c3 = cv2.LUT(result, color_map[:, 2])
pseudo_img = np.dstack((c3, c2, c1))
#im = cv2.imread(image)
im = image.copy()
vis_result = cv2.addWeighted(im, weight, pseudo_img, 1 - weight, 0)
if save_dir is not None:
if not os.path.exists(save_dir):
os.makedirs(save_dir)
image_name = os.path.split(image)[-1]
out_path = os.path.join(save_dir, image_name)
cv2.imwrite(out_path, vis_result)
else:
return vis_result
def get_pseudo_color_map(pred, color_map=None):
"""
Get the pseudo color image.
Args:
pred (numpy.ndarray): the origin predicted image.
color_map (list, optional): the palette color map. Default: None,
use paddleseg's default color map.
Returns:
(numpy.ndarray): the pseduo image.
"""
pred_mask = PILImage.fromarray(pred.astype(np.uint8), mode='P')
if color_map is None:
color_map = get_color_map_list(256)
pred_mask.putpalette(color_map)
return pred_mask
def get_color_map_list(num_classes, custom_color=None):
"""
Returns the color map for visualizing the segmentation mask,
which can support arbitrary number of classes.
Args:
num_classes (int): Number of classes.
custom_color (list, optional): Save images with a custom color map. Default: None, use paddleseg's default color map.
Returns:
(list). The color map.
"""
num_classes += 1
color_map = num_classes * [0, 0, 0]
for i in range(0, num_classes):
j = 0
lab = i
while lab:
color_map[i * 3] |= (((lab >> 0) & 1) << (7 - j))
color_map[i * 3 + 1] |= (((lab >> 1) & 1) << (7 - j))
color_map[i * 3 + 2] |= (((lab >> 2) & 1) << (7 - j))
j += 1
lab >>= 3
color_map = color_map[3:]
if custom_color:
color_map[:len(custom_color)] = custom_color
return color_map
def paste_images(image_list):
"""
Paste all image to a image.
Args:
image_list (List or Tuple): The images to be pasted and their size are the same.
Returns:
result_img (PIL.Image): The pasted image.
"""
assert isinstance(image_list,
(list, tuple)), "image_list should be a list or tuple"
assert len(
image_list) > 1, "The length of image_list should be greater than 1"
pil_img_list = []
for img in image_list:
if isinstance(img, str):
assert os.path.exists(img), "The image is not existed: {}".format(
img)
img = PILImage.open(img)
img = np.array(img)
elif isinstance(img, np.ndarray):
img = PILImage.fromarray(img)
pil_img_list.append(img)
sample_img = pil_img_list[0]
size = sample_img.size
for img in pil_img_list:
assert size == img.size, "The image size in image_list should be the same"
width, height = sample_img.size
result_img = PILImage.new(sample_img.mode,
(width * len(pil_img_list), height))
for i, img in enumerate(pil_img_list):
result_img.paste(img, box=(width * i, 0))
return result_img
根目錄下新建 predict_with_api.py :
import cv2
import numpy as np
import paddle
from paddleseg.core import infer
from paddleseg.utils import visualize
import visualize_myself
def preprocess(im_path, transforms):
data = {}
data['img'] = im_path
data = transforms(data)
data['img'] = data['img'][np.newaxis, ...]
data['img'] = paddle.to_tensor(data['img'])
return data
def predict(model,
model_path,
transforms,
image_list,
aug_pred=False,
scales=1.0,
flip_horizontal=True,
flip_vertical=False,
is_slide=False,
stride=None,
crop_size=None,
custom_color=None
):
# 加載模型權重
para_state_dict = paddle.load(model_path)
model.set_dict(para_state_dict)
# 設置模型為評估模式
model.eval()
# 讀取圖像
im = image_list.copy()
color_map = visualize.get_color_map_list(256, custom_color=custom_color)
with paddle.no_grad():
data = preprocess(im, transforms)
# 是否開啟多尺度翻轉預測
if aug_pred:
pred, _ = infer.aug_inference(
model,
data['img'],
trans_info=data['trans_info'],
scales=scales,
flip_horizontal=flip_horizontal,
flip_vertical=flip_vertical,
is_slide=is_slide,
stride=stride,
crop_size=crop_size)
else:
pred, _ = infer.inference(
model,
data['img'],
trans_info=data['trans_info'],
is_slide=is_slide,
stride=stride,
crop_size=crop_size)
# 將返回數據去除多余的通道,並轉為uint8類型,方便保存為圖片
#pred_org =pred.clone()
pred = paddle.squeeze(pred)
pred = pred.numpy().astype('uint8')
# 保存結果
added_image = visualize_myself.visualize(image= im,result= pred,color_map=color_map, weight=0.6)
cv2.imshow('image_predict', added_image)
#cv2.waitKey(0)
#cv2.destroyAllWindows()
#return pred_org
根目錄下新建 detect_with_API.py,調用制作好的API來嘗試使用攝像頭圖像實時預測分割:
import cv2
from predict_with_api import predict
from paddleseg.models import PPLiteSeg
from paddleseg.models.backbones import STDC1
import paddleseg.transforms as T
backbone = STDC1()
model = PPLiteSeg(num_classes=13,
backbone= backbone,
arm_out_chs = [32, 64, 128],
seg_head_inter_chs = [32, 64, 64],
pretrained=None)
transforms = T.Compose([
T.Resize(target_size=(512, 512)),
T.RandomHorizontalFlip(),
T.Normalize()
])
model_path = 'output/best_model/model.pdparams'
cap=cv2.VideoCapture(0)# 0
if __name__ == '__main__':
while True:
rec,img = cap.read()
predict(model=model,model_path=model_path, transforms=transforms,image_list=img)
#print("pred_org:", type(list), list)
if cv2.waitKey(1)==ord('q'):
break
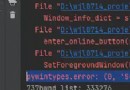
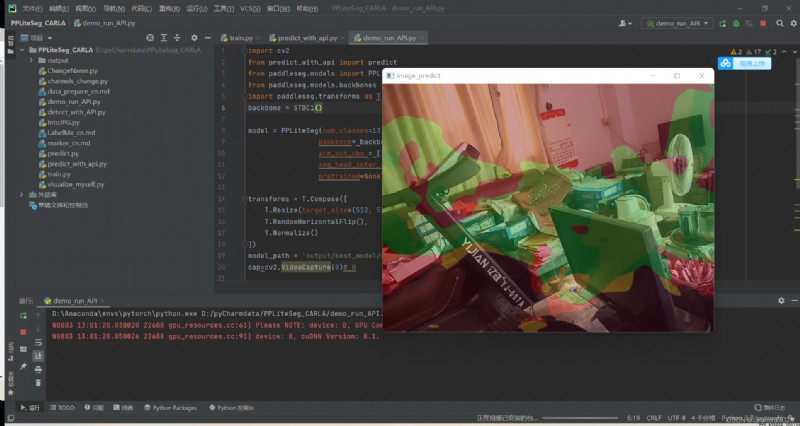
配置完成後,運行 detect_with_API.py即可實現調用攝像頭輸入到訓練好的模型框架中進行預測分割並輸出到屏幕上。
由於我使用的是仿真數據集,使用攝像頭識別的話沒有對應的識別環境,故這裡我就簡單展示實時識別的狀態,識別效果不作評價。
我的整體項目框架:
PPLiteSeg_CARLA.zip-深度學習文檔類資源-CSDN下載
後續在對真實環境下的道路數據集進行收集與訓練後,通過攝像頭獲取實時圖像並輸出對應的mask預測結果,比如:對車道線和道路的語義分割,再通過霍夫線變換找到車道線的位置和角度來控制無人車的轉向,實現沿道路自動駕駛。後續可能會加更,敬請期待。
再與目標檢測相結合,實現對道路上的目標進行識別,返回目標的二維坐標、目標種類、置信度,目標可以通過自己收集數據進行訓練,比如:車、紅綠燈、人、動物、綠植等,通過返回的信息設置相應的邏輯,比如:紅燈停、綠燈行、遇行人停等。
爆改YOLOV7的detect.py制作成API接口供其他python程序調用(超低延時)_Leonard2021的博客-CSDN博客
這樣以後整體上就完成了無人駕駛的視覺識別部分。
後續再加上ROS的激光雷達實現避障和SLAM,就形成了一個簡易自制版的無人駕駛系統。
我的初步想法是 上位機使用Jeston Nano,下位機使用Arduino,以python為主要編程語言,pyserial庫來實現上位機與下位機之間的通訊。
python與arduino通訊(windows和linux)_Leonard2021的博客-CSDN博客_python與arduino通信