Today, I want to share with you Python Specific applications in image processing , Since it is image processing , It must be mentioned opencv Module , This module supports many algorithms related to computer vision and machine learning , And the application field is expanding , There are roughly the following areas
Object recognition : Judge objects through vision and internal storage
Image segmentation
Face recognition
Safe driving
human-computer interaction
wait
Of course, this little editor doesn't intend to put such profound content , Today, let's start with the most basic opencv The module starts with the basic operation of images
We install modules through pip By order
pip install opencv-python
pip install opencv-contrib-pythonHaving learned the positive matrix of linear algebra is not strange . Images are essentially matrices , Grayscale image is a common matrix , And color image is a multidimensional matrix , Our operations on images can be naturally transformed into operations on matrices
First, let's read the image , It's called cv2.imread() Method , Its syntax is as follows
cv2.imread(filename, flag=1) Among them flag Parameter is used to set the format of the read image , The default is 1, In accordance with RGB Three channel format to read , If I set it to 0, It means to read in the way of gray-scale image single channel ,
import cv2
import numpy as np
img=cv2.imread('1.jpg', 0) After reading the picture , We hope to show it , The function method used here is cv2.imshow(), Its syntax format is as follows
cv2.imshow(name, img)The parameters are explained as follows :
name: It represents the name of the display window
img: Matrix form of picture
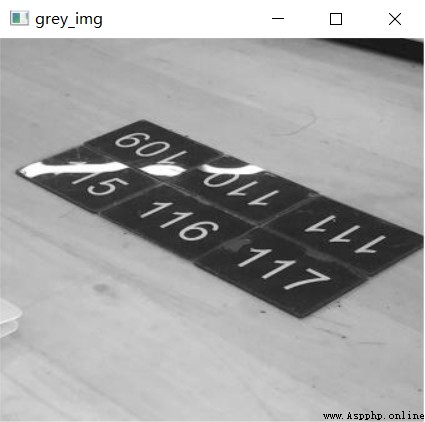
We try to show the pictures read above , The code is as follows
cv2.imshow("grey_img", img)
##  If used cv2.imshow() function , The following must be followed by a function that destroys the window
cv2.destroyAllWindows()
When we run the above code , It can be found that the picture pops up in an instant , But we closed it directly before we could see the picture clearly , The reason lies in cv2.imshow() Function method has no function of delay , We add a delay function , The code is as follows
import cv2
import numpy as np
img = cv2.imread('1.jpg')
cv2.imshow("grey_img", img)
cv2.waitKey(0)
cv2.destroyAllWindows()
output
Finally, we save the picture , The function used here is cv2.imwrite(), Its syntax is as follows
cv2.imwrite(imgname, img)The parameters are explained as follows :
imgname: The name of the picture to save
img: Matrix form of picture
The sample code is as follows
import cv2
import numpy as np
img = cv2.imread('1.jpg')
cv2.imshow("grey_img", img)
cv2.waitKey(0)
cv2.imwrite('1.png', img)
cv2.destroyAllWindows() Sometimes we want to know the pixel size of the picture , The essence of pictures is matrix , For example, a 1024 Pixels *960 Pixel image , It means that the number of rows in the matrix is 960 That's ok , The number of columns is 1024 Column , stay opencv Called in the module shape() Function method , The code is as follows
import cv2
img = cv2.imread('1.jpg')
print(img.shape[0]) #  Row number
print(img.shape[1]) #  Number of columns
print(img.shape[2]) #  The channel number
output
308
340
3
You can see that the pixels of this picture are 340*380, The number of channels is 3, For gray-scale images , Let's take a look at the properties of the image , The code is as follows
img = cv2.imread('1_grey.png', 0)
print(img.shape)
output
(308, 340)You can see that for gray-scale images , We don't see the number of channels , Only the number of rows and columns
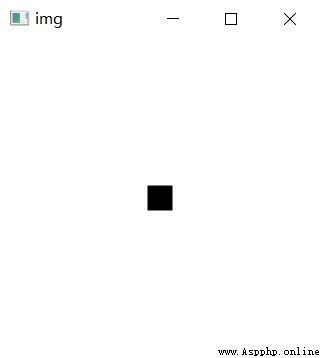
Finally, let's do some basic operations on the image , It's nothing more than changing some pixel values , We import a blank picture , By modifying the pixel value in the middle, add a black dot , The code is as follows
import cv2
import numpy as np
img = cv2.imread('2.jpg')
(x, y, z) = img.shape
for i in range(-10, 10):
    for j in range(-10, 10):
        #  Change the pixel value at the right center of the picture ,
        img[int(x/2) + i, int(y/2) + j] = (0, 0, 0)
cv2.imshow("img", img)
cv2.waitKey(0)
cv2.destroyAllWindows()
output
NO.1
Previous recommendation
Historical articles
【 Hard core dry goods 】 Which company is better in data analysis ? choose Pandas Or choose SQL
【 Hard core original 】 Inventory Python Common encryption algorithms in crawlers , Recommended collection !!
【 Hard core dry goods 】Pandas Data type conversion in modules
use Python among Plotly.Express The module draws several charts , I was really amazed !!
Share 、 Collection 、 give the thumbs-up 、 I'm looking at the arrangement ?