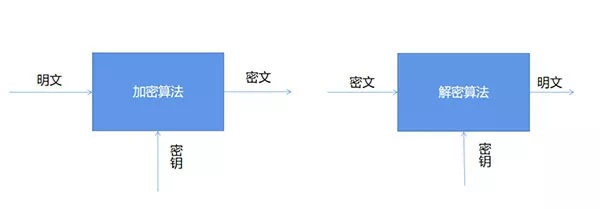
Before introducing the article , Say sorry to everyone in advance , At the end of the last article , In this article, I will introduce you about using OpenCV Realize face fusion technology , Because face fusion technology requires a little more knowledge , It's not just the feature point extraction introduced before , And the triangulation mentioned in this article , Therefore, the article will be postponed a little later , But please rest assured , Face fusion technology will be scheduled in the next few articles .
See two words in the title Delaunay Triangulation and Voronoi, It is estimated that the little friend I met for the first time may look confused ( I'm talking about myself ), In order to understand these two concepts more intuitively , Please look at the chart below. :
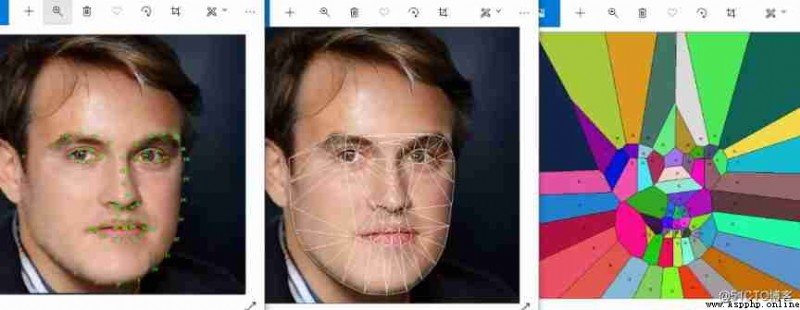 On the left :68 Personal face feature points Chinese :Delaunay Triangulation , Right picture Voronoi Chart
The picture on the left is mentioned in the previous article 68 Personal face feature point marking , The middle figure is based on the left figure 68 I'll do it at two points Between points Delaunay Triangulation ( Delaunay ), The left figure is drawn based on the middle figure Voronoi Diagram ( Voronoitu )
Delaunay The name of triangulation algorithm comes from Russian mathematicians Boris Delaunay, The purpose of this method is to maximize the minimum angle of triangle in triangulation , The aim is to avoid “ Extremely thin “ The appearance of triangle

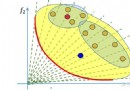
The transformation station of the left and right figures above shows Delaunay How to maximize the minimum angle , The left and right figures are two different ways of dividing the four vertices ; But in the left picture The vertices A、C Not in the triangle BCD、ABD Inside the circumscribed circle of , bring horn C A very large
The right figure has two sides of the partition form changes :1,B、D Coordinate shift right ;2, The dividing line is composed of BD Turn into AC ; Finally, the triangulated triangle is not so ” Thin “
Voronoi The name also comes from a Russian mathematician Georgy Voronoy, Interestingly Georgy Voronoy yes Boris Delaunay Doctoral tutor
Voronoi Figure is based on Delaunay Triangulation creation , take Delaunay All vertices of the partition , Connect the circumscribed center of adjacent triangles with line segments , Form an area , Adjacent different areas are covered with different colors ;Voronoi Graph is commonly used in the field of convex region segmentation
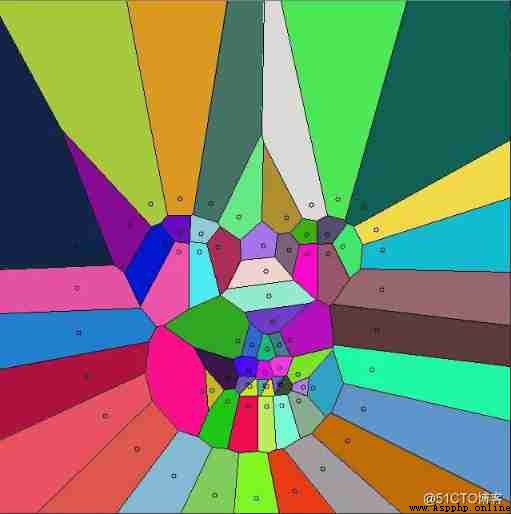
From below 20 Composed of two vertices Voronoi You can know , The distance between adjacent points in the graph is equal
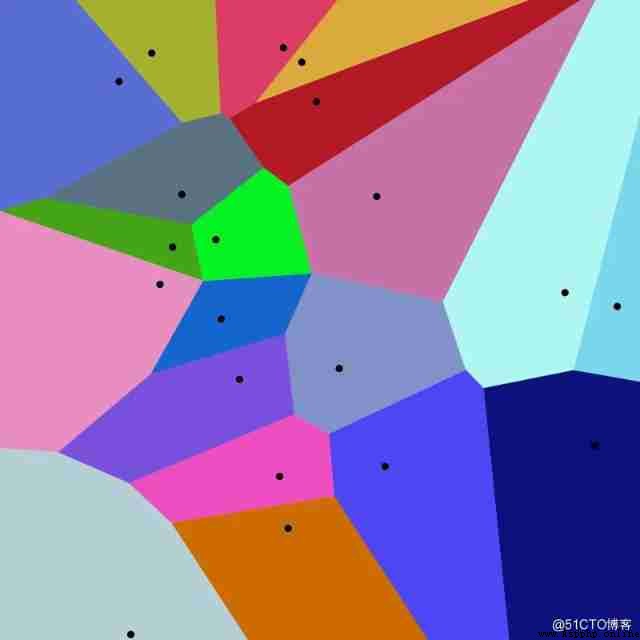 20 Composed of vertices Voronoi
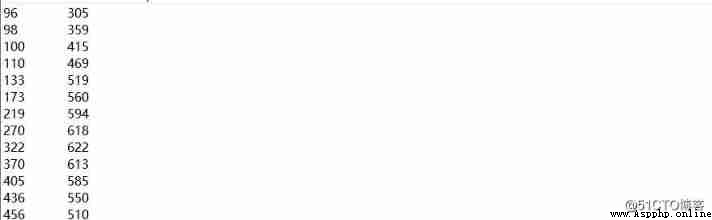
1, First, we need to get the face 68 Coordinates of feature points , And write txt file , Easy to use at the back , The code that will be used here
import dlib

import cv2


predictor_path = "E:/data_ceshi/shape_predictor_68_face_landmarks.dat"

png_path = "E:/data_ceshi/timg.jpg"


txt_path = "E:/data_ceshi/points.txt"

f = open(txt_path,'w+')


detector = dlib.get_frontal_face_detector()

# Collision

predicator = dlib.shape_predictor(predictor_path)

win = dlib.image_window()

img1 = cv2.imread(png_path)


dets = detector(img1,1)

print("Number of faces detected : {}".format(len(dets)))

for k,d in enumerate(dets):

 print("Detection {} left:{} Top: {} Right {} Bottom {}".format(

 k,d.left(),d.top(),d.right(),d.bottom()

 ))

 lanmarks = [[p.x,p.y] for p in predicator(img1,d).parts()]

 for idx,point in enumerate(lanmarks):

 f.write(str(point[0]))

 f.write("\t")

 f.write(str(point[1]))

 f.write('\n')
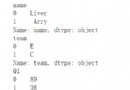
After writing ,txt The format in is as follows
2, Use the image size to create a rectangular range ( Because facial feature points are all in the picture ), Create a Subdiv2D example ( This class will be used in the drawing of the following two diagrams ), Insert all points into the created class :
#Create an instance of Subdiv2d

 subdiv = cv2.Subdiv2D(rect)

 #Create an array of points

 points = []

 #Read in the points from a text file

 with open("E:/data_ceshi/points.txt") as file:

 for line in file:

 x,y = line.split()

 points.append((int(x),int(y)))

 #Insert points into subdiv

 for p in points:

 subdiv.insert(p)
3, Draw... On the original Delaunay Triangulate and preview , Here I add animation effects — Draw line by line ( It was used for loop )
#Draw delaunay triangles

def draw_delaunay(img,subdiv,delaunay_color):

 trangleList = subdiv.getTriangleList()

 size = img.shape

 r = (0,0,size[1],size[0])

 for t in trangleList:

 pt1 = (t[0],t[1])

 pt2 = (t[2],t[3])

 pt3 = (t[4],t[5])

 if (rect_contains(r,pt1) and rect_contains(r,pt2) and rect_contains(r,pt3)):

 cv2.line(img,pt1,pt2,delaunay_color,1)

 cv2.line(img,pt2,pt3,delaunay_color,1)

 cv2.line(img,pt3,pt1,delaunay_color,1)


 #Insert points into subdiv

 for p in points:

 subdiv.insert(p)


 #Show animate

 if animate:

 img_copy = img_orig.copy()

 #Draw delaunay triangles

 draw_delaunay(img_copy,subdiv,(255,255,255))

 cv2.imshow(win_delaunary,img_copy)

 cv2.waitKey(100)
The preview effect is as follows :
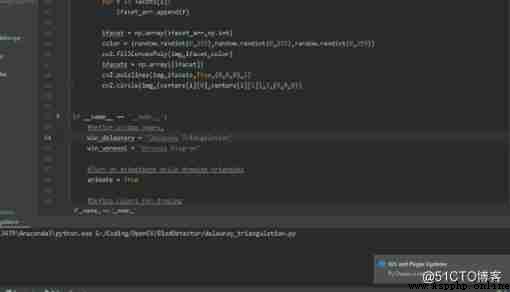
4, Finally draw Voronoi Diagram
def draw_voronoi(img,subdiv):

 (facets,centers) = subdiv.getVoronoiFacetList([])


 for i in range(0,len(facets)):

 ifacet_arr = []

 for f in facets[i]:

 ifacet_arr.append(f)


 ifacet = np.array(ifacet_arr,np.int)

 color = (random.randint(0,255),random.randint(0,255),random.randint(0,255))

 cv2.fillConvexPoly(img,ifacet,color)

 ifacets = np.array([ifacet])

 cv2.polylines(img,ifacets,True,(0,0,0),1)

 cv2.circle(img,(centers[i][0],centers[i][1]),3,(0,0,0))


 for p in points:

 draw_point(img,p,(0,0,255))


 #Allocate space for Voroni Diagram

 img_voronoi = np.zeros(img.shape,dtype = img.dtype)


 #Draw Voonoi diagram

 draw_voronoi(img_voronoi,subdiv)
Delaunay Triangulation may not be fully understood by the little partner who comes into contact for the first time , But this segmentation technology is very important for face recognition 、 The fusion 、 Face changing is indispensable , This article is only through OpenCV Of Subdiv2D Function , The real recognition technology is much more complicated than this .
For interested partners , My suggestion is to follow the code provided , The complete code is posted below :
import cv2

import numpy as np

import random


#Check if a point is insied a rectangle

def rect_contains(rect,point):

 if point[0]
<
rect[0]:


return
False


elif
point[1]
<rect[1]:

 return False

 elif point[0]>rect[2]:

 return False

 elif point[1] >rect[3]:

 return False

 return True


# Draw a point

def draw_point(img,p,color):

 cv2.circle(img,p,2,color)


#Draw delaunay triangles

def draw_delaunay(img,subdiv,delaunay_color):

 trangleList = subdiv.getTriangleList()

 size = img.shape

 r = (0,0,size[1],size[0])

 for t in trangleList:

 pt1 = (t[0],t[1])

 pt2 = (t[2],t[3])

 pt3 = (t[4],t[5])

 if (rect_contains(r,pt1) and rect_contains(r,pt2) and rect_contains(r,pt3)):

 cv2.line(img,pt1,pt2,delaunay_color,1)

 cv2.line(img,pt2,pt3,delaunay_color,1)

 cv2.line(img,pt3,pt1,delaunay_color,1)


# Draw voronoi diagram

def draw_voronoi(img,subdiv):

 (facets,centers) = subdiv.getVoronoiFacetList([])


 for i in range(0,len(facets)):

 ifacet_arr = []

 for f in facets[i]:

 ifacet_arr.append(f)


 ifacet = np.array(ifacet_arr,np.int)

 color = (random.randint(0,255),random.randint(0,255),random.randint(0,255))

 cv2.fillConvexPoly(img,ifacet,color)

 ifacets = np.array([ifacet])

 cv2.polylines(img,ifacets,True,(0,0,0),1)

 cv2.circle(img,(centers[i][0],centers[i][1]),3,(0,0,0))


if __name__ == '__main__':

 #Define window names;

 win_delaunary = "Delaunay Triangulation"

 win_voronoi = "Voronoi Diagram"


 #Turn on animations while drawing triangles

 animate = True


 #Define colors for drawing

 delaunary_color = (255,255,255)

 points_color = (0,0,255)


 #Read in the image

 img_path = "E:/data_ceshi/timg.jpg"


 img = cv2.imread(img_path)


 #Keep a copy around

 img_orig = img.copy()


 #Rectangle to be used with Subdiv2D

 size = img.shape

 rect = (0,0,size[1],size[0])


 #Create an instance of Subdiv2d

 subdiv = cv2.Subdiv2D(rect)

 #Create an array of points

 points = []

 #Read in the points from a text file

 with open("E:/data_ceshi/points.txt") as file:

 for line in file:

 x,y = line.split()

 points.append((int(x),int(y)))

 #Insert points into subdiv

 for p in points:

 subdiv.insert(p)


 #Show animate

 if animate:

 img_copy = img_orig.copy()

 #Draw delaunay triangles

 draw_delaunay(img_copy,subdiv,(255,255,255))

 cv2.imshow(win_delaunary,img_copy)

 cv2.waitKey(100)


 #Draw delaunary triangles

 draw_delaunay(img,subdiv,(255,255,255))


 #Draw points

 for p in points:

 draw_point(img,p,(0,0,255))


 #Allocate space for Voroni Diagram

 img_voronoi = np.zeros(img.shape,dtype = img.dtype)


 #Draw Voonoi diagram

 draw_voronoi(img_voronoi,subdiv)


 #Show results

 cv2.imshow(win_delaunary,img)

 cv2.imshow(win_voronoi,img_voronoi)

 cv2.waitKey(0)
Reference link :
https://www.learnopencv.com/