Catalog
One 、 Download and install cuda9.2
1. First, check the computer graphics card cuda edition , Look at the most supported cuda How much?
2. download cuda9.2 Installation package
3. install cuda9.2
Two 、 Download and install cudnn (for cuda9.2)
1. download cudnn
2. install cudnn
3、 ... and 、 Configure environment variables
Four 、 install GPU Version of PyTorch0.4.1
1. Get ready :
2. download gpu Version of torch、torchvision Of whl package (cu92):
3. Offline installation gpu Version of torch、torchvision(cu92):
It's useful to test yourself !!!
My computer :win10 + There are NVIDIA graphics cards (GeForce GTX 1650) + Anaconda3 5.2.0 ( among Anaconda Inside Python The version is 3.6), To install CUDA、PyTorch 0.4.1 edition (gpu edition )
The goal is : install gpu Version of PyTorch0.4.1(cuda9.2+pytorch0.4.1)
Write it at the front : Due to the recent need , To install pytorch Older version ( A few tenths of a version ), My computer happens to have a graphics card , So I want to install one directly gpu Version of pytorch Ancient early version .pytorch Old version , Then the corresponding one pytorch Version support cuda The version is also older , So I'm going to :1) Let's start with cuda9.2( Roughly cuda8.0、cuda9.0、cuda9.1、cuda9.2、cuda10.0 And so on ), And install the corresponding cudnn, If then cuda9.2 Too old , You can change to another version .....2) Install well cuda9.2 and cudnn9.2 after , Then install another gpu edition (cu92, And the one in front cuda9.2 Corresponding ) Of PyTorch0.4.1 edition .( I was going to install PyTorch0.4.0 Previous version , But first, the installation packages of previous versions are quite few , The second is corresponding to the previous version gpu Matching under version cuda Versions are rarely very old , There is less choice . So I plan to install cu92/PyTorch0.4.1 Try water , If you can't, you can change to another one .)
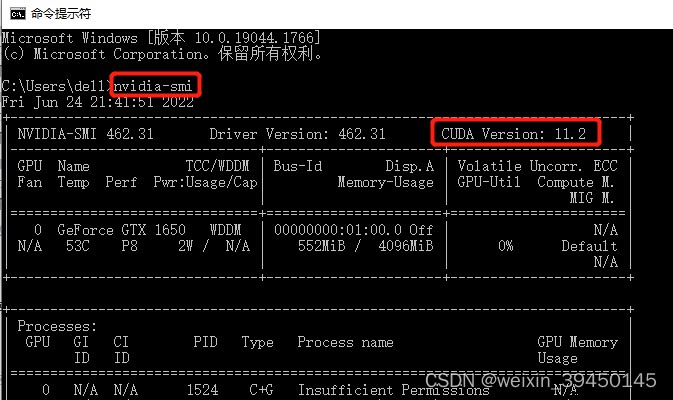
On the command line, pass the command nvidia-smi see cuda edition , Here's the picture . You can see the highest support of my graphics card cuda11.2, It can be installed cuda10.0、cuda11.0 etc. , But you can't pretend cuda11.3 And above .( View graphics cards and cuda You can refer to the previous blog :win10 see Nvidia The graphics card 、cuda edition )
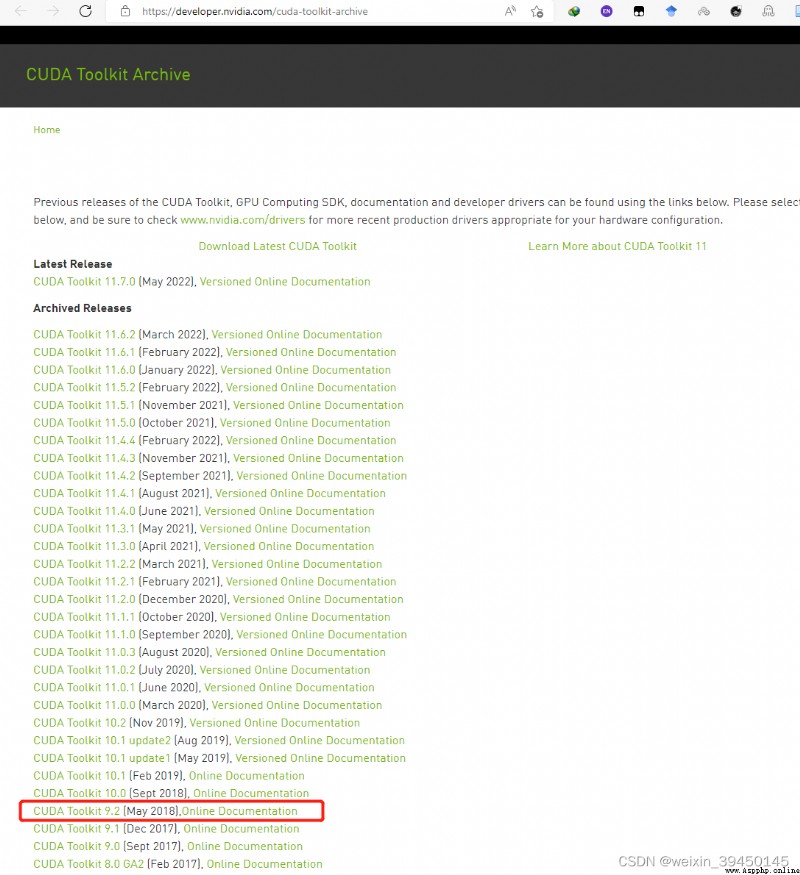
cuda Official website download address :CUDA Toolkit Archive | NVIDIA Developer
Click the download link on the official website above , choice cuda9.2, Click in .( Select download here cuda9.2, It's about 1.5G Of exe file .)
Then select the appropriate option (windows、x86_64、win10、exe[local]), Click on download that will do . Many blogs on the Internet emphasize that we must choose exe[local] Offline installation , Otherwise, the online installation package is very stupid , Download too slow ...
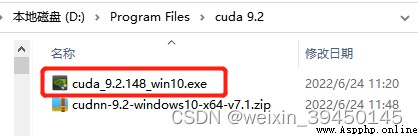
cuda9.2 After downloading it, it's a exe Installation package .
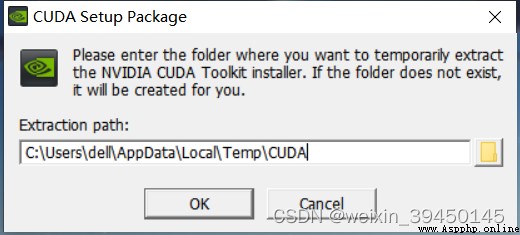
Double click to run the downloaded cuda9.2 Of exe file , direct Choose the default C Disk installation path ( Try not to customize the path , Avoid unnecessary trouble in configuring environment variables later ).
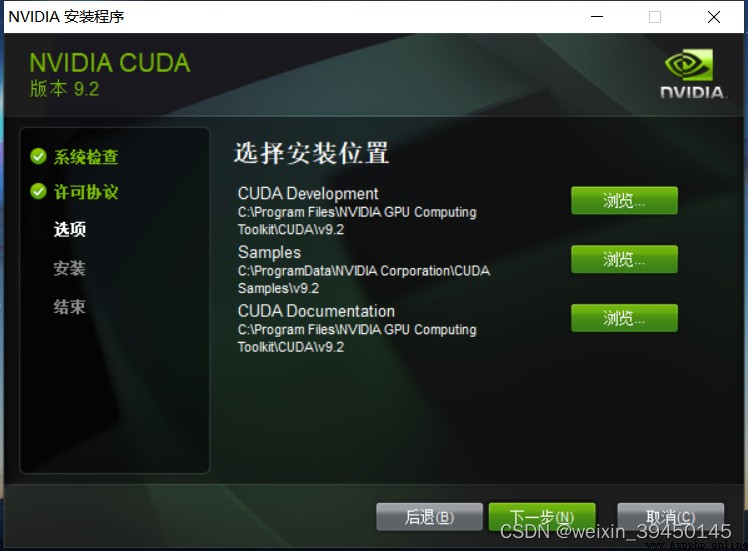
Choose Custom installation :
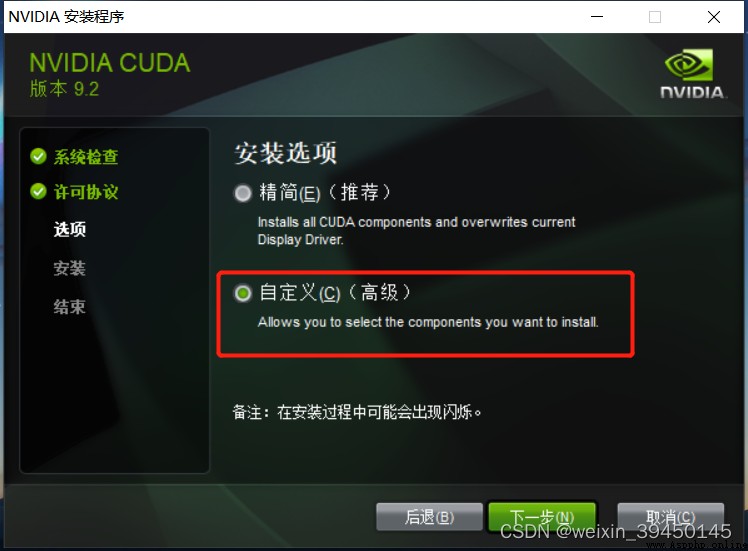
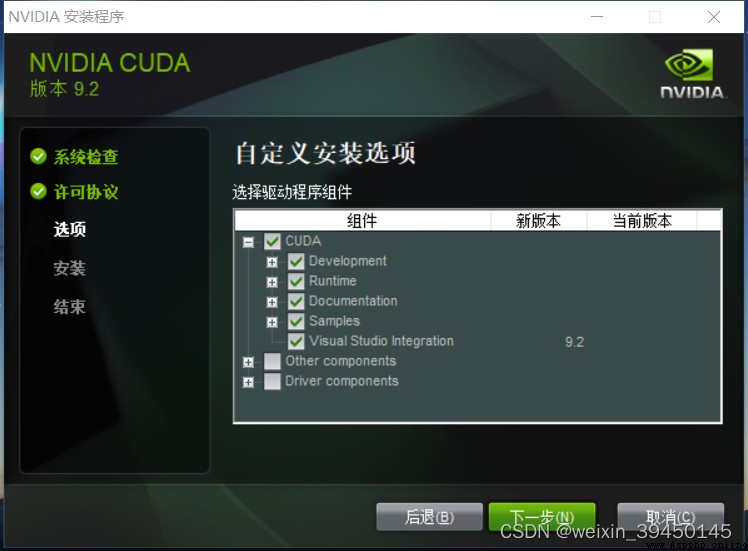
Select only the first option CUDA that will do , Others do not need to be checked .( Refer to other blogs on the Internet , Many suggestions are the first CUDA Inside "Visual Studo Integration" It is better not to check ,CUDA Installation failures are usually caused by it . But I have installed it on my computer before VS2015, So... Is checked here "Visual Studo Integration", It shouldn't be a big problem , I did install it later , No problem . therefore , If this option is checked , You'd better install it first VS, Then install cuda.)
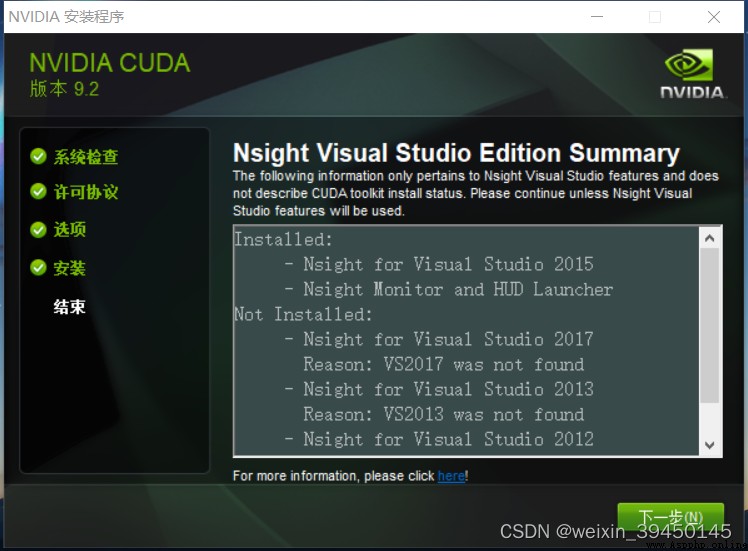
The following processes are all direct clicks " next step “, that will do .
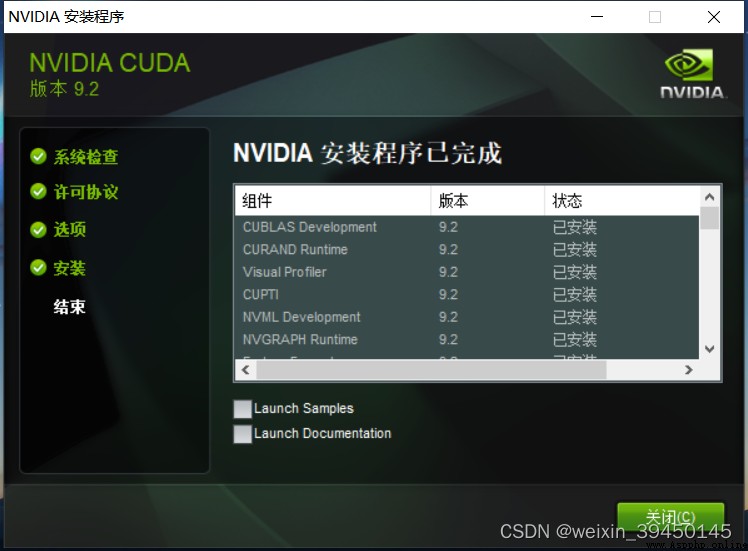
Last cuda9.2 Installation successful !!! No problem .
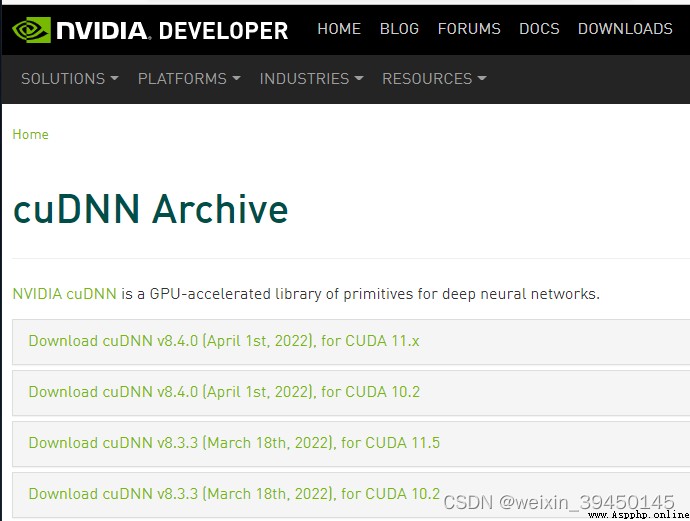
cudnn Official website download address :cuDNN Archive | NVIDIA Developer
Download the CUDA9.2 after , stay cudnn Find the download link on the official website CUDA9.2 The version matches cuDNN, Select the latest installation .( It seems that you need to register to download from the official website . You can use it directly cuda9.2 Baidu cloud link provided during download , There are cuda9.2 Corresponding cudnn9.2, In this way, you don't need to download it on the official website .)
Download good cudnn Compressed package :
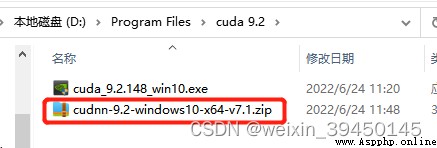
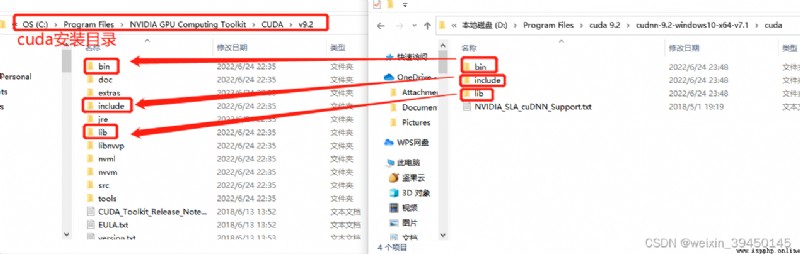
Download the cudnn Compression package decompression , Then decompress the bin、include、lib\x64 In three folders .dll、.h and .lib File copy to CUDA In the corresponding folder under the installation directory , that will do .( Attention is to copy the past , Instead of directly covering !!! I tried , Directly pull the three folders to the left path , The corresponding files will be directly copied to the corresponding folder .)
1) Right click on the computer , Open properties -> Advanced system setup -> environment variable , You can see that the following two environment variables have been automatically added to the system .
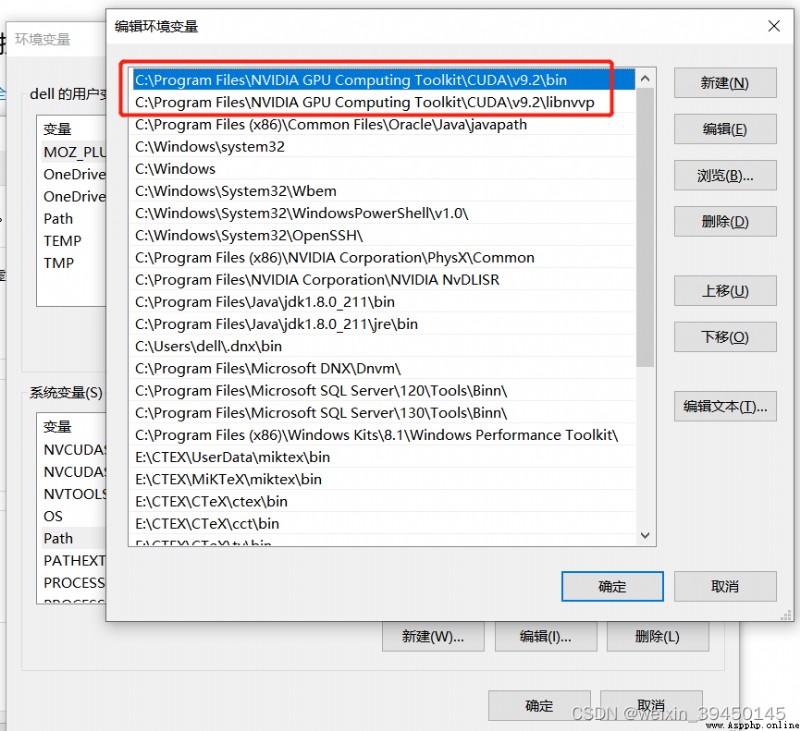
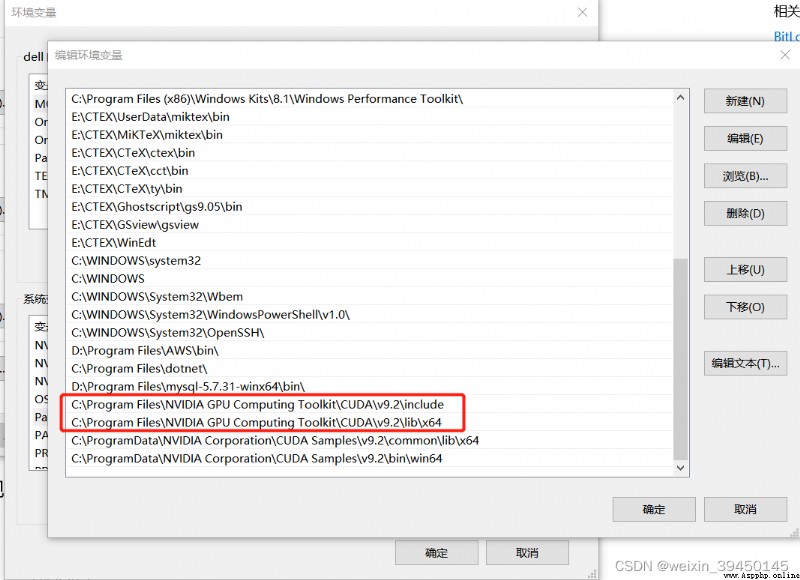
2) Next , Continue to add several environment variables to the system :
C:\Program Files\NVIDIA GPU Computing Toolkit\CUDA\v10.0\include
C:\Program Files\NVIDIA GPU Computing Toolkit\CUDA\v10.0\lib\x64
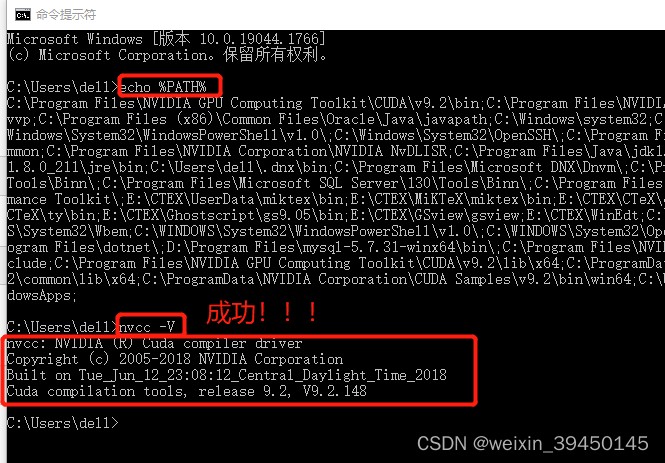
3) After adding environment variables , stay cmd Commands are used on the command line nvcc -V To test , Test to fail .... Show nvcc Not an internal or external command ... Unable to recognize command ...( Use the method in the following reference blog , Final ncvv -V Test success !!!)
resolvent :
solve nvcc Display is not a problem with internal or external commands _Lonely Planet. The blog of - Programmer secret _nvcc' Not an internal or external command - Programmer secret
open “cmd”, Input set PATH=c: , Then input echo %PATH%, close “cmd”, Then open the command prompt again , Input echo %PATH%, You will find that the newly added environment variables have taken effect , Input again ncvv -V, success .
1) First installation Anaconda.( It's simple , Self search )
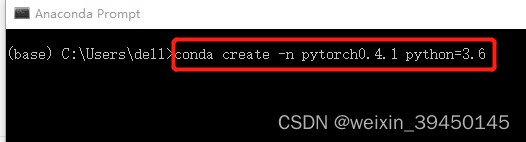
2) Secondly, we are using Anaconda Build a virtual environment .
open Anaconda Prompt Input :conda create -n pytorch0.4.1 python=3.6(n Said parameters name,pytorch0.4.1 The name of your environment ,python=3.6 Indicates some packages that need to be used .)
conda create -n pytorch0.4.1 python=3.6
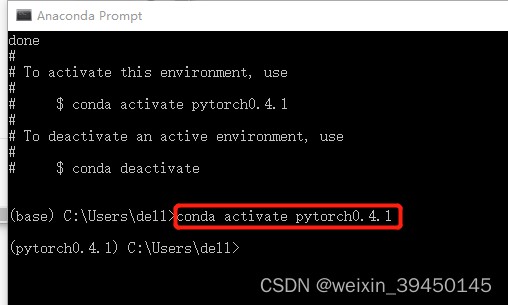
3) Activate the virtual environment :
conda activate pytorch0.4.1
torch and torchvision Of whl Package download link :http://download.pytorch.org/whl/torch_stable.html( according to cuda Version and python Download the corresponding version pytorch edition .)
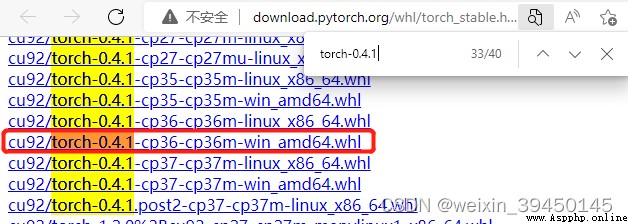
download 2 individual whl package :
here , Downloaded 2 individual whl package :cuda9.2 Corresponding torch0.4.1、cuda9.2 Of torchvision0.4.1.( according to torch and torchvision Version compatible matching table https://github.com/pytorch/vision#installation ,torch0.4.1 It should match torchivision0.2.2 edition , however cuda9.2 Corresponding torchvision The bag doesn't have 0.2.2 Version of , So I downloaded cuda9.2/torchivision0.4.1 edition , I think it shouldn't be a problem ... But in the final test, it was changed back to torchvision0.2.2 edition ...)
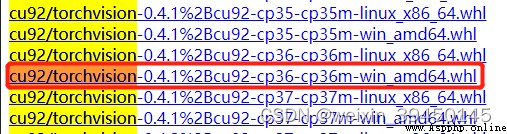
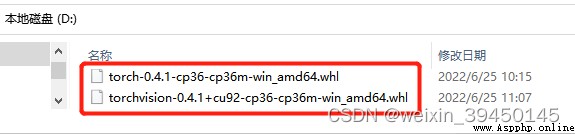
take whl Package download to D Under the plate , As shown in the figure below :
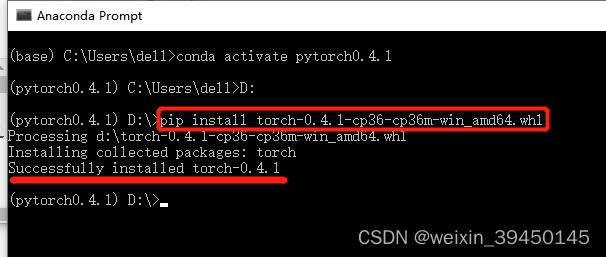
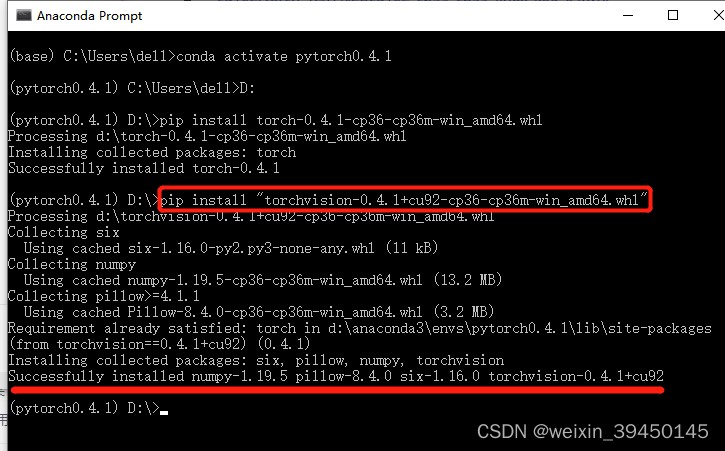
stay cmd The command line goes to torch and torchvision Of whl Package save Directory ,pip install whl Package for offline installation , that will do .
1) install gpu edition (cu92) Of pytorch0.4.1:
pip install torch-0.4.1-cp36-cp36m-win_amd64.whl
2) install gpu edition (cu92) Of torchvision0.4.1:
pip install "torchvision-0.4.1+cu92-cp36-cp36m-win_amd64.whl"
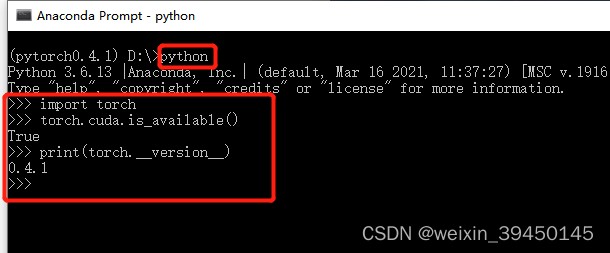
3) test :
import torch
torch.__version__
torch.cuda.is_available()
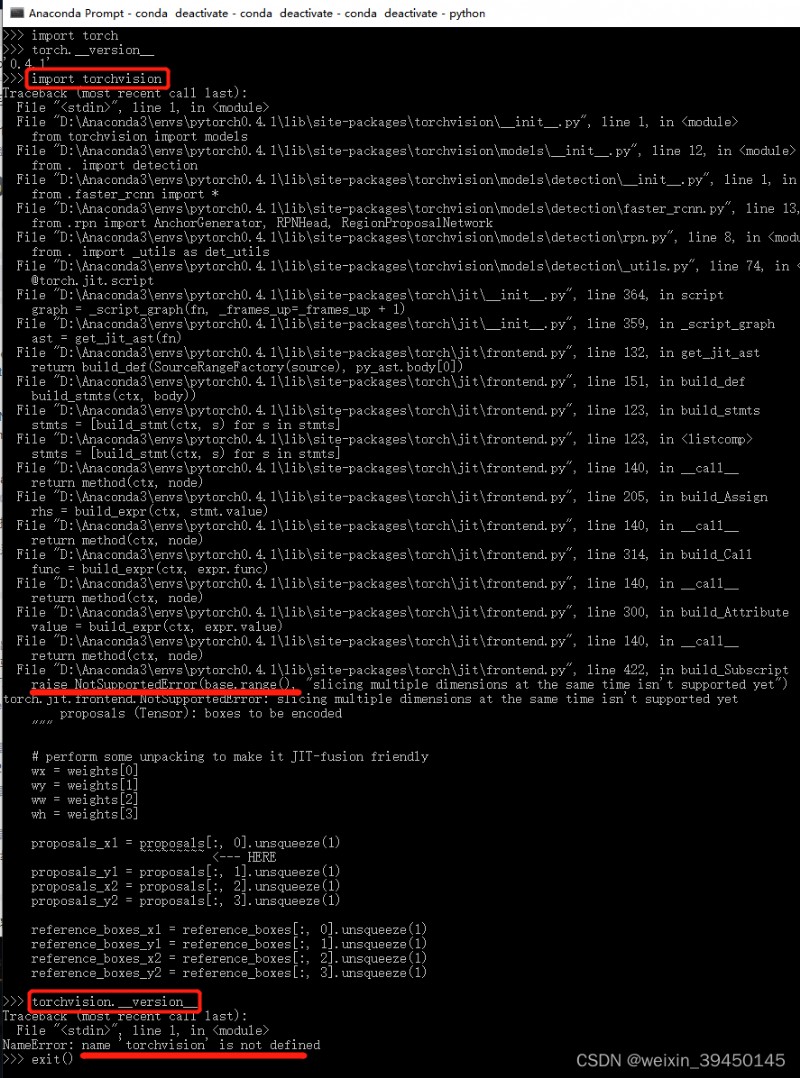
But the test torchvision Time error ... The error is shown in the figure below ... Probably mainly because of torch0.4.1 and torchvision0.4.1 The version of does not match , According to the version compatibility table ,torch0.4.1 The version should match torchvision0.2.2 edition .... therefore , Plan to reinstall torchvision0.2.2.
Here's the picture , reinstall torchvision0.2.2. This time, , The test was successful .( But I don't know if there will be any problems in the future , If there are questions , Then according to your own situation , Reinstall the required version .)
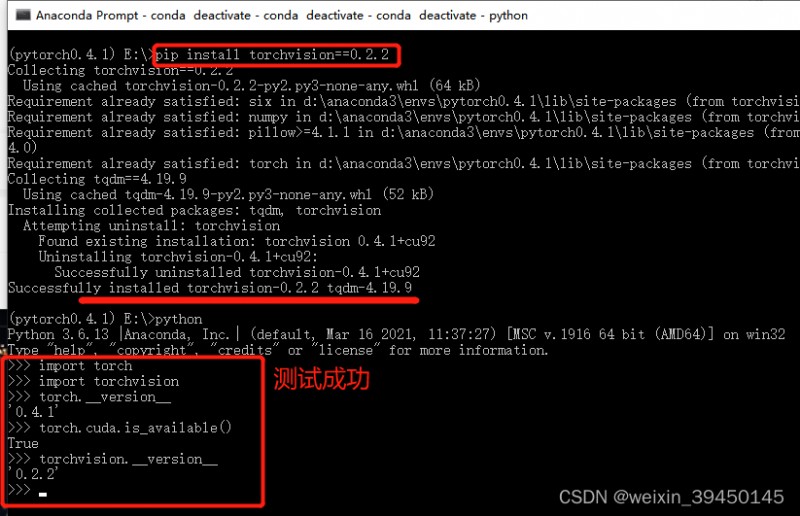
thus ,gpu Version of PyTorch0.4.1 installation is complete !!!(cuda9.2+pytorch0.4.1)
Reference resources :
 django 報錯:‘staticfiles‘ is not a registered tag library. Must be one of:
報錯內容如下:TemplateSyntaxError at
 Ice lake extraction algorithm based on random forest (implemented in Python)
One 、 background This article