Now? , We need to update the authentication system to use tokens . The first step is to update our DEFAULT_AUTHENTICATION_CLASSES Set up to use TokenAuthentication , As shown below :
# blog_project/settings.pyREST_FRAMEWORK = { 'DEFAULT_PERMISSION_CLASSES': [ 'rest_framework.permissions.IsAuthenticated', ], 'DEFAULT_AUTHENTICATION_CLASSES': [ 'rest_framework.authentication.SessionAuthentication', 'rest_framework.authentication.TokenAuthentication', # new ], }We reserve the SessionAuthentication, Because of our Browsable API Still need it , But now use tokens in HTTP Pass authentication credentials back and forth in the header .
We also need to add authtoken application , The application will generate a token on the server . It is contained in Django REST Framework in , But it must be added to our INSTALLED_ APPS Setting up :
# blog_project/settings.pyINSTALLED_APPS = [ 'django.contrib.admin', 'django.contrib.auth', 'django.contrib.contenttypes', 'django.contrib.sessions', 'django.contrib.messages', 'django.contrib.staticfiles', # 3rd-party apps 'rest_framework', 'rest_framework.authtoken', # new # Local 'posts.apps.PostsConfig', ]Because we are right INSTALLED_APPS Made changes , So we need to synchronize the database . Use Control + c Stop server . Then run the following command .
(blogapi) $ python manage.py migrateNow start the server again .
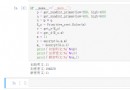
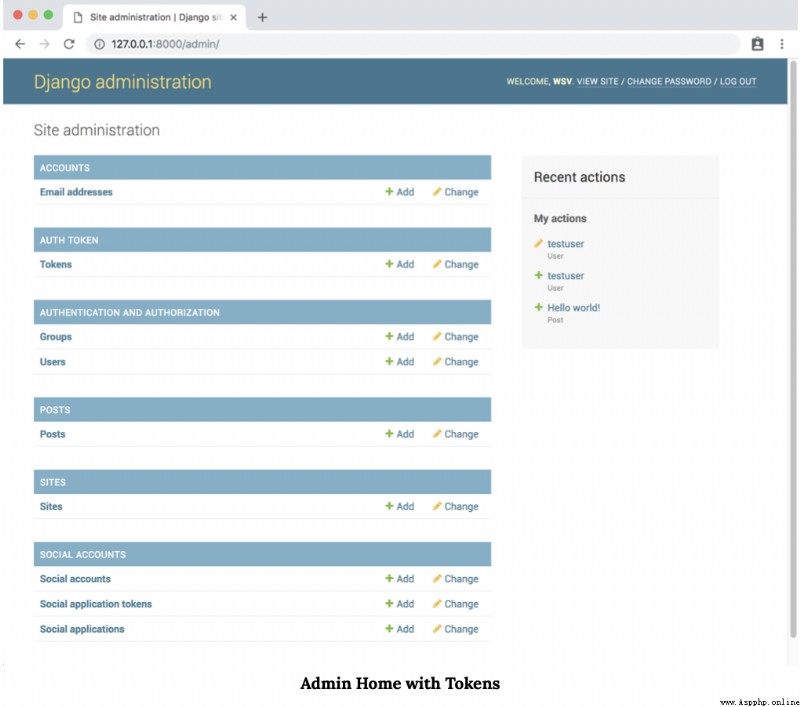
(blogapi) $ python manage.py runserver If you visit http://127.0.0.1:8000/admin/ Upper Django admin, You will see that there is now a Tokens part . Make sure you are logged in with a superuser account to access .
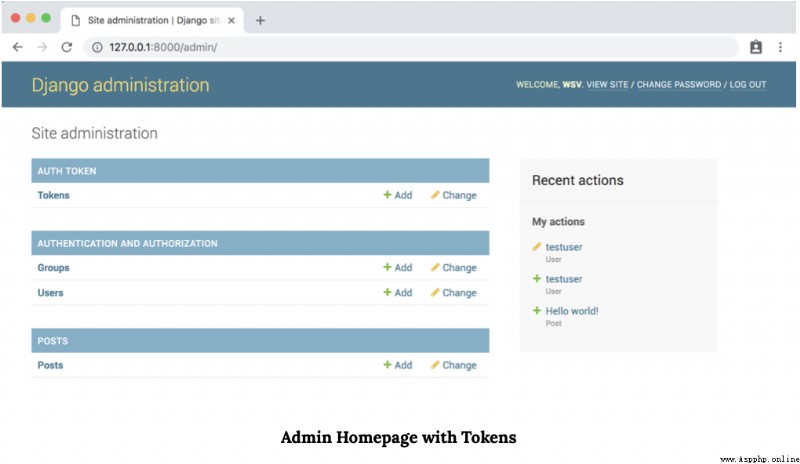
Click the token link to go to the token page , The website is :http://127.0.0.1:8000/admin/authtoken/token/.
It may be surprising that there are no tokens at this time . After all, we have existing users . however , Only when there is a for user login API The token is not generated until it is called . We have not yet done so , So there is no token . We will soon !
We also need to create endpoints , So that users can log in and log out . So , We can create a dedicated user application , Then add our own website , Views and serializers . however , User authentication is an area where we really don't want to make mistakes . And because of almost all API All need this function , Therefore, it makes sense to use some excellent and tested third-party packages .
It is worth noting that , We will combine django-rest-auth and django-allauth To simplify operations . For using third-party software packages , Please don't feel sad . They exist for a reason , Even the best Django Professionals always rely on them . You don't have to redesign the wheels !
First , We will add login , Logout and password reset API Endpoint . These are related to popular django-rest-auth Provided with the software package . Use Control + c Stop server , Then install it .
(blogapi) $ pipenv install django-rest-auth==0.9.5 Add new apps to our blog_project/settings.py In the document INSTALLED_APPS Configuration in progress .
# blog_project/settings.pyINSTALLED_APPS = [ 'django.contrib.admin', 'django.contrib.auth', 'django.contrib.contenttypes', 'django.contrib.sessions', 'django.contrib.messages', 'django.contrib.staticfiles', # 3rd-party apps 'rest_framework', 'rest_framework.authtoken', 'rest_auth', # new # Local 'posts.apps.PostsConfig', ] Use rest_auth The package updates our blog_project/urls.py file . We set the URL route to api/v1/rest-auth.
# blog_project/urls.pyfrom django.contrib import admin from django.urls import include, pathurlpatterns = [ path('admin/', admin.site.urls), path('api/v1/', include('posts.urls')), path('api-auth/', include('rest_framework.urls')), path('api/v1/rest-auth/', include('rest_auth.urls')), # new]We finished ! If you've ever tried to implement your own user authentication endpoint , that django-rest-auth How much time and headaches have been saved for us , It's amazing .
Now we can start the server to see django-rest-auth What is offered .
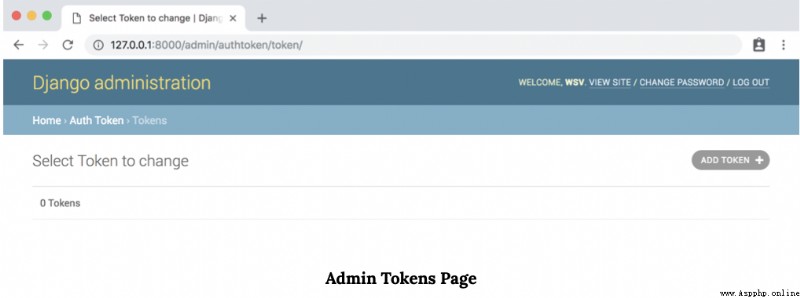
(blogapi) $ python manage.py runserver We are http://127.0.0.1:8000/api/v1/rest-auth/login/ There is a valid login endpoint on .
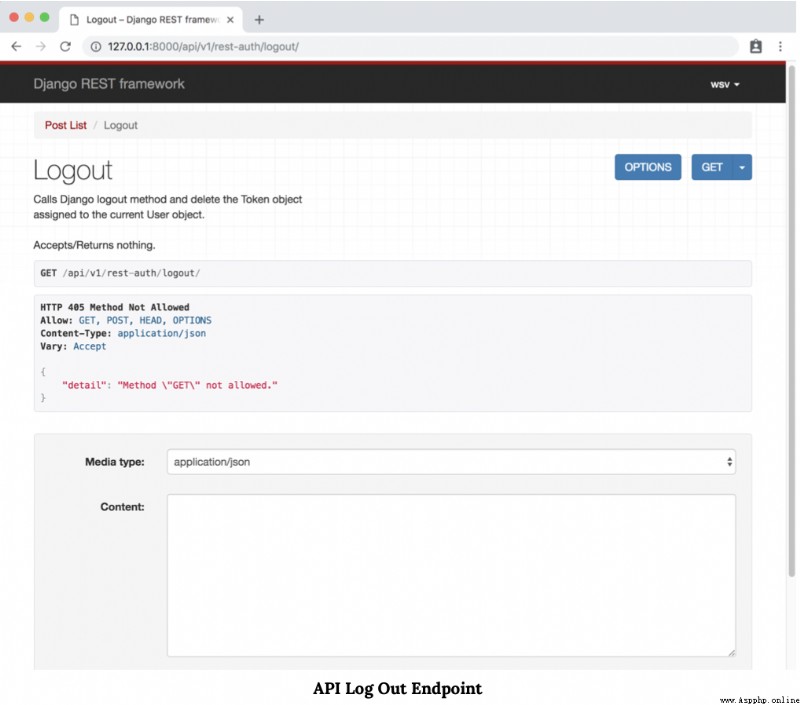
And in http://127.0.0.1:8000/api/v1/rest-auth/logout/ Unregister endpoint .
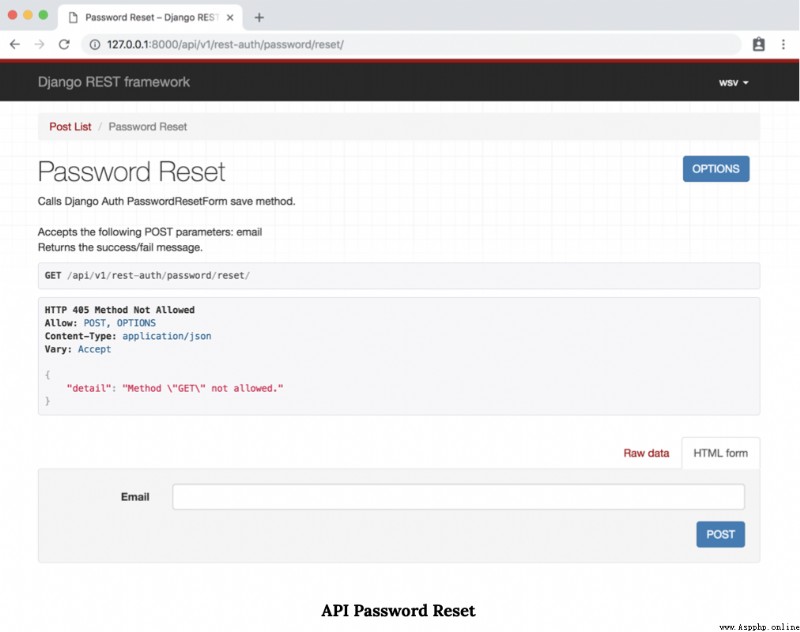
There are also endpoints for password reset :
http://127.0.0.1:8000/api/v1/rest-auth/password/reset
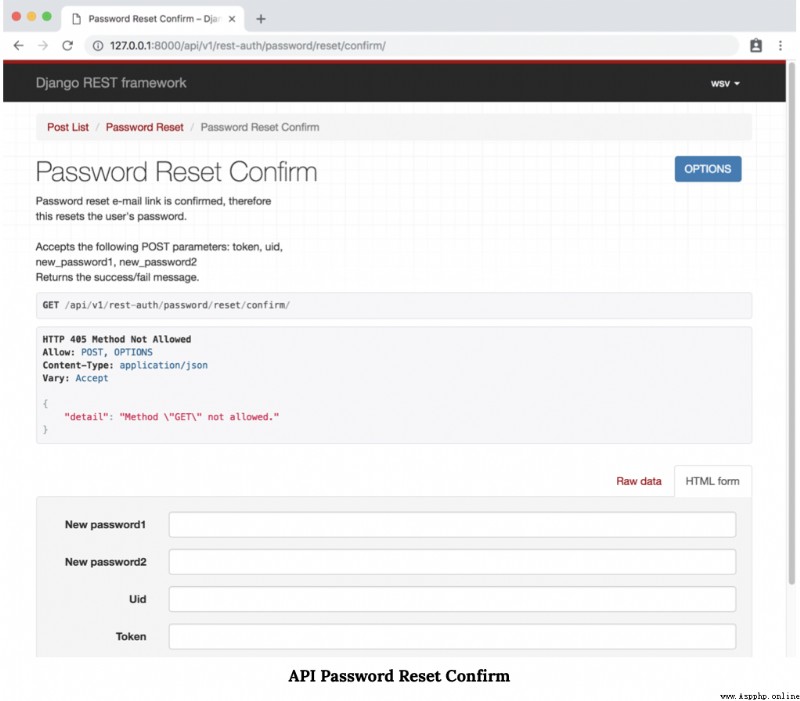
And confirm the password reset :
http://127.0.0.1:8000/api/v1/rest-auth/password/reset/confirm
Next is our user registration or registration endpoint . Tradition Django There is no built-in view or... For user registration URL,Django REST Framework either . This means that we need to write our own code from scratch ; Considering the severity and security of the error , This approach is a bit risky .
A popular approach is to use third-party software packages django-allauth , The package comes with user registration and Django Many other functions of the authentication system , For example, through Facebook,Google,Twitter Wait for social Authentication . If you add rest_auth. from django-rest-auth The software package is registered , Then we also have user registration endpoints !
Use Control + c Stop the local server , Then install django-allauth .
(blogapi) $ pipenv install django-allauth==0.40.0Then update our INSTALLED_APPS Set up . We have to add several new configurations :
django.contrib.sites
allauth
allauth.account
allauth.socialaccount
rest_auth.registration
Make sure you also include EMAIL_BACKEND and SITE_ID . Technically speaking , They are settings.py It doesn't matter where you put it in the file , However, other configurations are usually added at the bottom .
# blog_project/settings.pyINSTALLED_APPS = [ 'django.contrib.admin', 'django.contrib.auth', 'django.contrib.contenttypes', 'django.contrib.sessions', 'django.contrib.messages', 'django.contrib.staticfiles', 'django.contrib.sites', # new # 3rd-party apps 'rest_framework', 'rest_framework.authtoken', 'allauth', # new 'allauth.account', # new 'allauth.socialaccount', # new 'rest_auth', 'rest_auth.registration', # new # Local 'posts.apps.PostsConfig', ]...EMAIL_BACKEND = 'django.core.mail.backends.console.EmailBackend' # newSITE_ID = 1 # newE-mail backend configuration is required , Because by default , An email will be sent when registering a new user , Ask them to confirm their account . Instead of setting up an e-mail server , Better use console.EmailBackend Set up e-mail output to the console .
SITE_ID It's built in Django “ Site ” Part of the frame , The framework is hosted from the same Django One way to project multiple websites . obviously , We have only one site here , but django-allauth Use the site framework , Therefore, we must specify the default settings . good . We added a new application , Now it's time to update the database .
(blogapi) $ python manage.py migrateAnd then add new URL Route registration .
# blog_project/urls.pyfrom django.contrib import admin from django.urls import include, pathurlpatterns = [ path('admin/', admin.site.urls), path('api/v1/', include('posts.urls')), path('api-auth/', include('rest_framework.urls')), path('api/v1/rest-auth/', include('rest_auth.urls')), path('api/v1/rest-auth/registration/', include('rest_auth.registration.urls')),]We finished . We can run local servers .
(blogapi) $ python manage.py runserverNow there is a user registration endpoint in the following location :
http://127.0.0.1:8000/api/v1/rest-auth/registration/

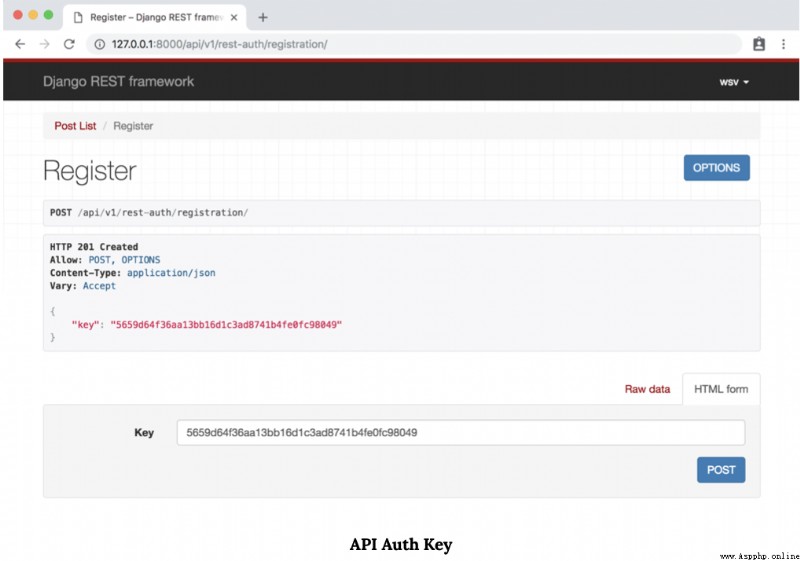
To make sure everything is normal , Please browse through API The endpoint creates a third user account . I've called my users testuser2 . And then click “ POST” Button .
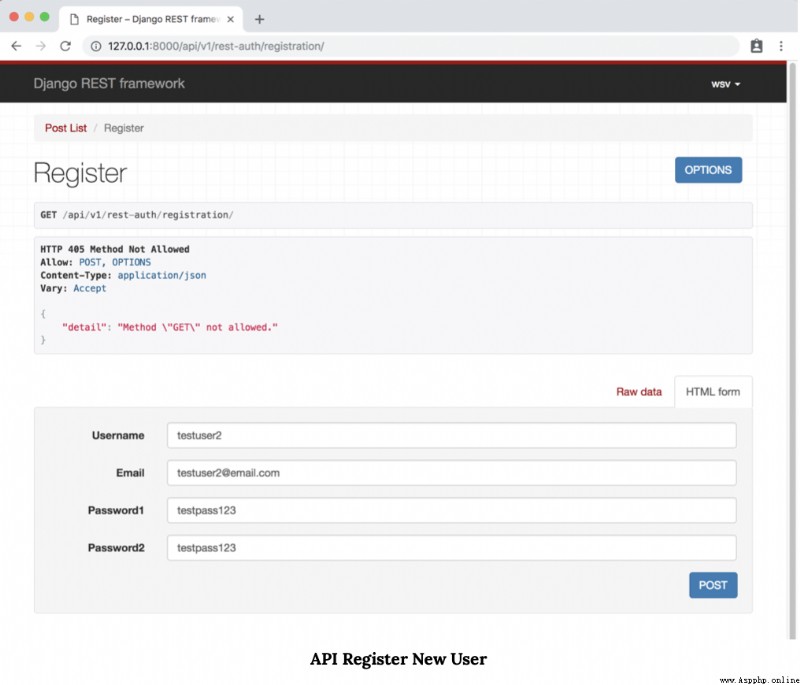
The next screen shows... From the server HTTP Respond to . Our user registration POST success , So the status code is created at the top HTTP 201. The return value key is the authentication token for this new user .
If you look at the command line console , that django-allauth An email will be generated automatically . This default text can be updated , And add with Django Other configurations of e-mail introduced by beginners SMTP The server .
Content-Type: text/plain; charset="utf-8"MIME-Version: 1.0Content-Transfer-Encoding: 7bitSubject: [example.com] Please Confirm Your E-mail Address From: [email protected]: [email protected]: Wed, 10 Oct 2019 19:29:24 -0000Message-ID: <[email protected]> Hello from example.com!You're receiving this e-mail because user testuser2 has given yours as an\ e-mail address to connect their account.To confirm this is correct, go to http://127.0.0.1:8000/api/v1/rest-auth/\ registration/account-confirm-email/MQ:1fxzy0:4y-f6DqQFZVNB_-PgBI4Iq_M4iM/ Thank you from example.com! example.com In your web browser , adopt http://127.0.0.1:8000/admin/ Switch to Django admin. You will need to use your super user account .
then , Click the token link at the top of the page .
You will be redirected to the token page at :
http://127.0.0.1:8000/admin/authtoken/token/.
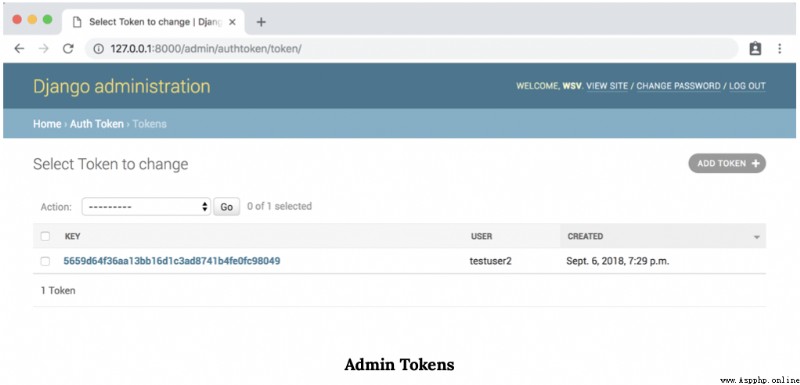
Django REST The frame is already testuser2 The user generated a token . adopt API When creating other users , Its token will also be displayed here .
The logical question is , Why our super user account or test user doesn't have a token ? The answer is that we created these accounts before adding token authentication . But don't worry , Once we get through API Log in with any account , The token is automatically added and available .
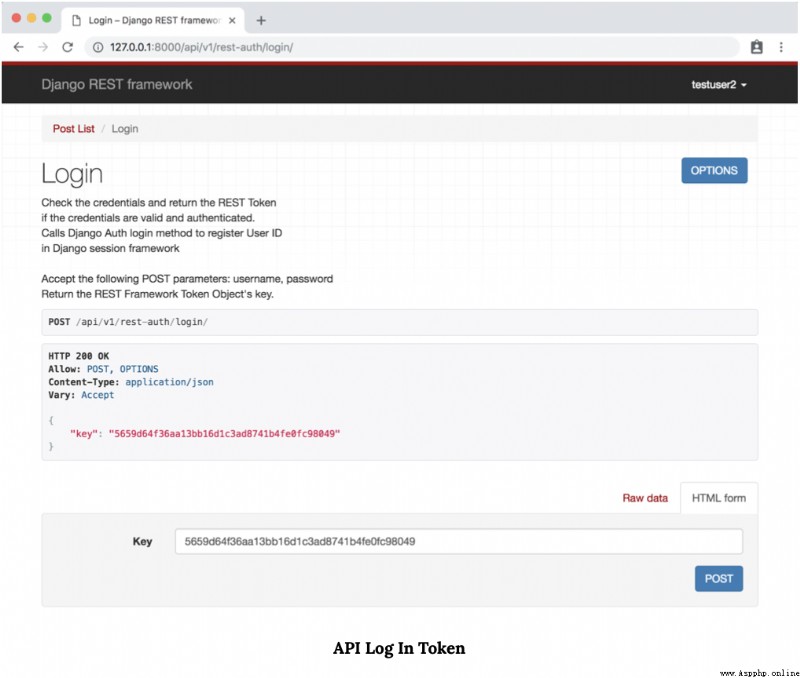
continue , Let's use our new testuser2 Account login . open Web browser , visit http://127.0.0.1:8000/api/v1/rest-auth/login/.
Enter our testuser2 Account information . Click on “ POST” Button .
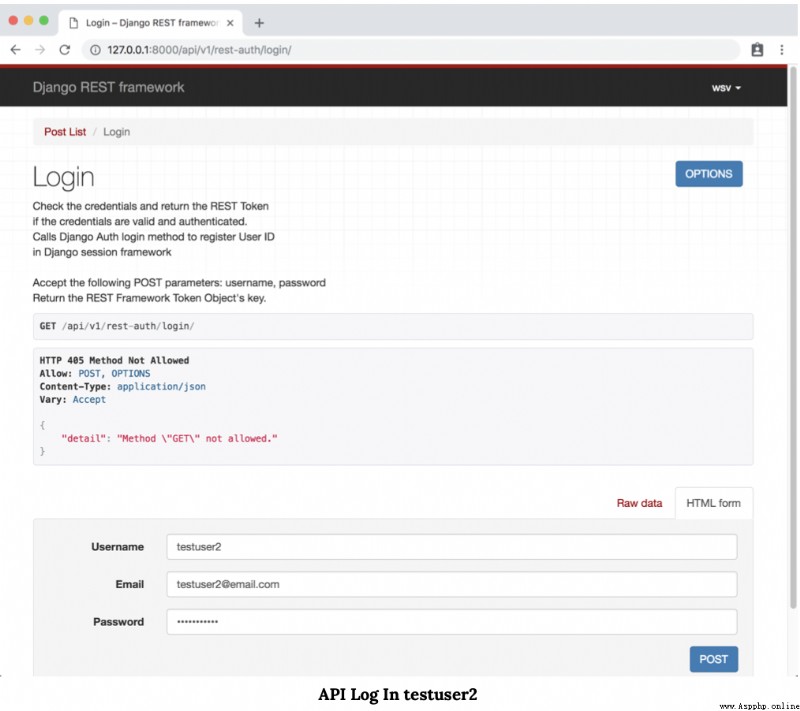
Two things happened . In the upper right corner , Our user account testuser2 so , Confirm that we are now logged in . The server also sent a message with a token HTTP Respond to .
In our front end framework , We need to be in The local store Medium or cookie Capture and store this token on the client in the form of . Then configure our application , So that all future requests include tokens in the header , As a way of authenticating users .
For the first time to use Web API when , User authentication is one of the hardest areas to master . The benefits of no overall structure , As a developer , We must have a deep understanding and properly configure our HTTP request / Response period .
Django REST Framework There is a lot of built-in support for this process , Including built-in TokenAuthentication. however , Developers must configure other areas themselves , For example, user registration and dedicated url/ View . therefore , A fashion , A powerful and secure approach is to rely on third-party software packages django-rest-auth and django-allauth To minimize the amount of code you have to write from scratch .