Socket programming is a method of connecting two nodes on a network to communicate with each other . A socket ( node ) Listen IP Specific port at , The other socket extends to the other socket to form a connection . The server forms a listener socket , The client connects to the server .
They are the real pillars behind Web browsing . Simply speaking , There is a server and a client .
Socket programming starts by importing the socket library and creating a simple socket .
import socket
s = socket.socket(socket.AF_INET, socket.SOCK_STREAM)
ad locum , We made a socket instance , And pass it two parameters . The first parameter is zero AF_INET, The second parameter is SOCK_STREAM.AF_INET Refers to the address series ipv4.SOCK_STREAM Represents connection oriented TCP agreement .
Now? , We can use this socket to connect to the server .
Please note that , If any error occurs during socket creation , Socket . Errors are thrown , We can only know its IP Connect to the server . You can use the following command to find the server's IP:
$ ping www.google.com
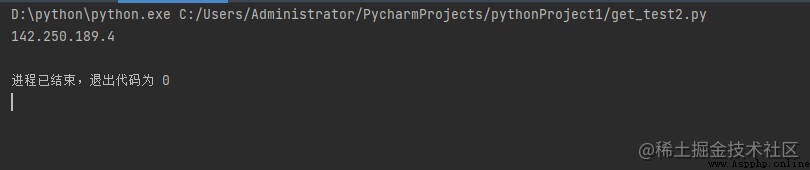
You can also use python find IP:
import socket
ip = socket.gethostbyname('www.google.com')
print(ip)
Output results :
The following is for connecting to Google Example script for .
import socket
import sys
try:
s = socket.socket(socket.AF_INET, socket.SOCK_STREAM)
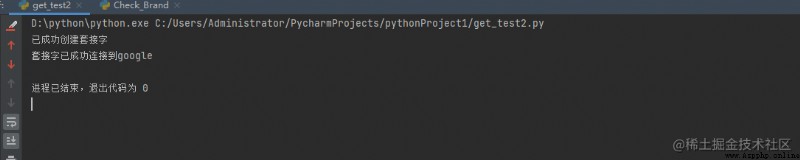
print(" Successfully created socket ")
except socket.error as err:
print(" Socket creation failed , There is an error %s" % (err))
# Socket default port
port = 80
try:
host_ip = socket.gethostbyname('www.google.com')
except socket.gaierror:
print(" Error parsing host ")
sys.exit()
# Connect to the server
s.connect((host_ip, port))
print(" Socket successfully connected to google")
Running results :
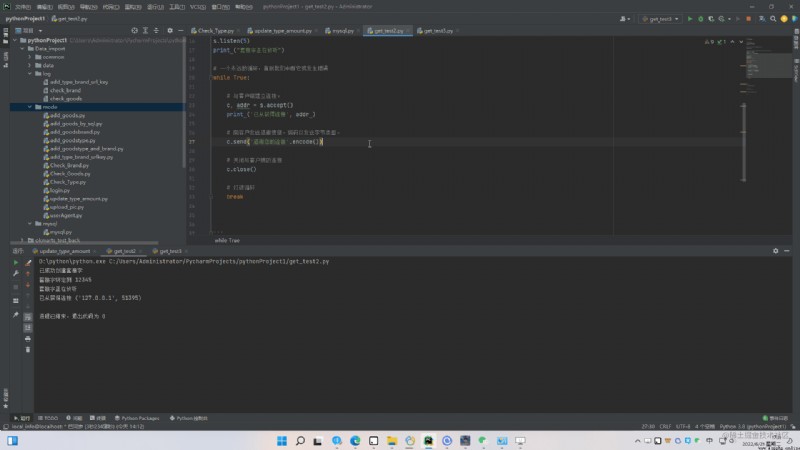
The server has a bind() Method , This method binds it to a specific IP And port , So that it can listen to the IP And incoming requests on the port . The server has a listen() Method , It puts the server in listening mode . This allows the server to listen for incoming connections . Last , The server has a accept() and close() Method .accept Method to start the connection with the client ,close Method to close the connection with the client .
# First, import the socket font
import socket
# Next, create the socket object
s = socket.socket()
print (" Successfully created socket ")
# Keeping a port on your computer in our case is 12345, But it can be any port
port = 12345
# Next, bind to port , We didn't ip Field ip, Instead, you enter an empty string , This enables the server to listen for requests from other computers on the network
s.bind(('', port))
print (" The socket is bound to %s" %(port))
# Switch socket to listening mode
s.listen(5)
print (" Socket is listening ")
# A perpetual cycle , Until we interrupt it or something goes wrong
while True:
# Establish a connection with the client .
c, addr = s.accept()
print (' Got a connection from ', addr )
# Send a thank you message to the customer . Encode to send byte type .
c.send(' Thank you for your connection '.encode())
# Close connection to client
c.close()
# Break the cycle
break
Now we need something that the server can interact with . We can believe in servers like this , Just to know that our server is working . Type the following command in the terminal :
# Start the server
$ python server.py
# Keep the above terminals open
# Now open another terminal and type :
$ telnet localhost 12345
If the following error is reported :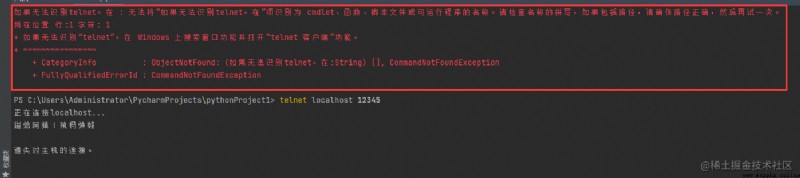
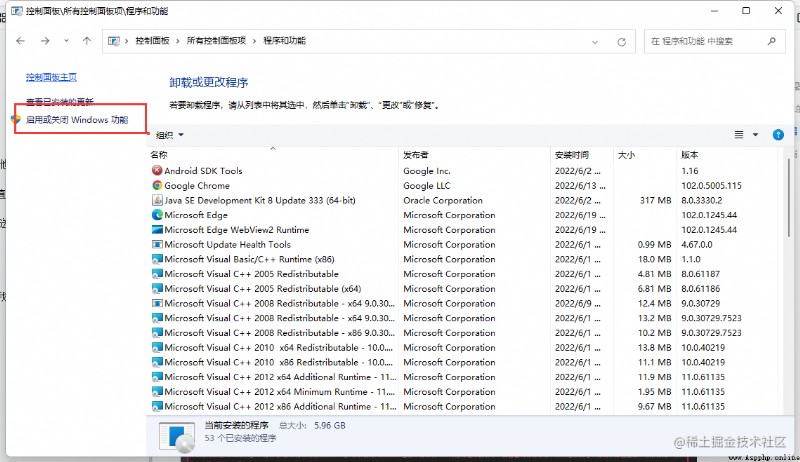
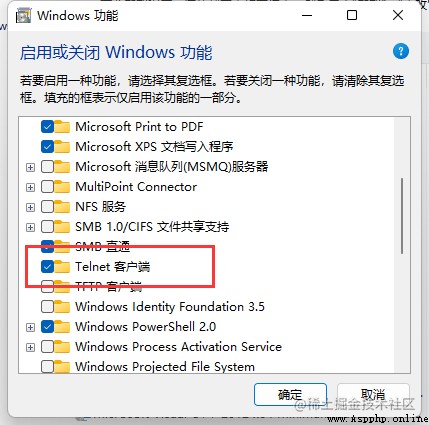
You can click enable or disable... In the control panel windows Found in the function telent client And check the Click ok
Output :
# # In the server .py Terminal you will see the following output :
Successfully created socket
The socket is bound to 12345
Socket is listening
Got connection from ('127.0.0.1', 52617)
# stay telnet In the end , You will see :
Trying ::1...
Trying 127.0.0.1...
Connected to localhost.
Escape character is '^]'.
Thank you for your connection .
This output shows that our server is working .
Now for the client :
# Import socket modular
import socket
# Ships socket object
s = socket.socket()
# Define the port to be connected
port = 12345
# Connect to the server on the local computer
s.connect(('127.0.0.1', port))
# Receive data from the server and decode it to get a string .
print(s.recv(1024).decode())
# Close the connection
s.close()
Running results :