???一個帥氣的boy,你可以叫我
?? 個人主頁:的個人主頁
???如果對你有幫助的話希望三連???支持一下博主
在一個月黑風高的夜晚,我的捨友小許搖起我來,面色驚恐地說道:“快來幫我,我要不行了o(╥﹏╥)o”。我連忙起身,問到他你怎麼了,他把我拉到他電腦面前,一臉凝重的說道:這兩張圖片我找不出第五個不同的地方。我上來…就給他個大B兜,睡覺。淒淒慘慘戚戚,獨留一人守空房…
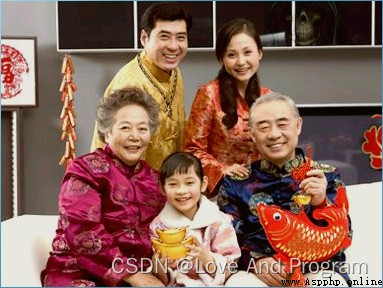
原圖:

灰度圖使用skimage庫可以輕松解決pip install scikit-image,同時安裝pip install opencv-python以顯示圖片。
imageA = cv2.imread("./first.png")
imageB = cv2.imread("./second.png")
grayA = cv2.cvtColor(imageA, cv2.COLOR_BGR2GRAY)
grayB = cv2.cvtColor(imageB, cv2.COLOR_BGR2GRAY)
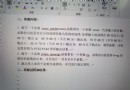
擴展:用到了SSIM原理,也可以叫他結構相似性指數,是一種衡量兩幅圖像相似度的指標。
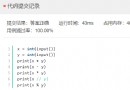
#調用ssim函數
from skimage.metrics import structural_similarity
#返回三個值
mssim, grad , S = structural_similarity(grayA, grayB, gradient=True,full=True)
'''
mssim:float
圖像上的平均結構相似性指數。
grad:ndarray
im1 和 im2 [2]之間結構相似性的梯度。這僅在梯度設置為 True 時返回。
S:ndarray
完整的 SSIM 圖像。這僅在full設置為 True 時返回。
'''
可以打印mssim數值觀察ssim指數,此指數越高說明越相似
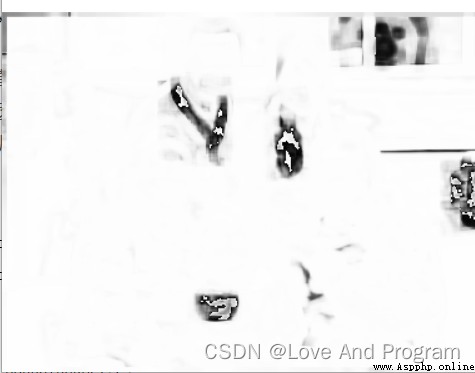
但是需要注意的是 SSIM返回的ndarray裡面的值為[0, 1]的float型,而OpenCV的[0, 255]為uint8型,用如下轉換:
grad= (grad* 255).astype("uint8")
grad對應圖片:
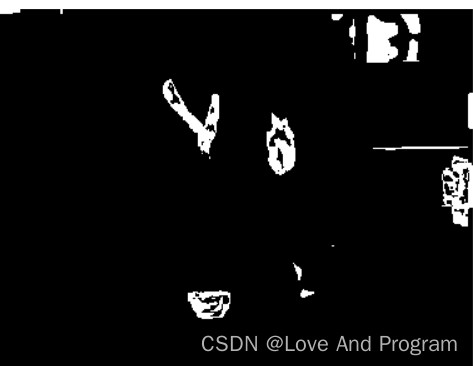
然後用cv2中圖像阈值處理threshold函數去尋找輪廓,然後用imutils.grab_contours返回cnts中的countors(輪廓),然後用cv2.boundingRect獲取邊界框位置,直接用cv2.rectangle畫出方框
thresh = cv2.threshold(S, 0, 255,cv2.THRESH_BINARY_INV | cv2.THRESH_OTSU)[1]
cnts = imutils.grab_contours(cnts)
threshold函數尋找到的輪廓:
for c in cnts:
#獲取邊界框位置
(x, y, w, h) = cv2.boundingRect(c)
cv2.rectangle(imageA, (x, y), (x + w, y + h), (0, 0, 255), thickness = 4)
cv2.rectangle(imageB, (x, y), (x + w, y + h), (0, 0, 255), thickness = 4)
最後打印圖片保存即可。
源碼:
#Image_Compare
from skimage.metrics import structural_similarity
import imutils
import cv2
import argparse
def Make_picture() -> object:
parser = argparse.ArgumentParser(description="查找茬圖像輸入")
parser.add_argument("-f","--first",default=False,help="first image")
parser.add_argument("-s","--second",help="first image")
args = vars(parser.parse_args())
imageA = cv2.imread("./first.png")
imageB = cv2.imread("./second.png")
#灰度圖
grayA = cv2.cvtColor(imageA, cv2.COLOR_BGR2GRAY)
grayB = cv2.cvtColor(imageB, cv2.COLOR_BGR2GRAY)
#計算兩幅圖像之間的結構相似性指數(SSIM),確保返回差異圖像
(mssim, grad ,S) = structural_similarity(grayA, grayB, full=True,gradient=True)
S = (S * 255).astype("uint8")
thresh = cv2.threshold(S, 0, 255,cv2.THRESH_BINARY_INV | cv2.THRESH_OTSU)[1]
cnts = cv2.findContours(thresh.copy(), cv2.RETR_EXTERNAL,cv2.CHAIN_APPROX_SIMPLE)
cnts = imutils.grab_contours(cnts)
for c in cnts:
(x, y, w, h) = cv2.boundingRect(c)
cv2.rectangle(imageA, (x, y), (x + w, y + h), (0, 0, 255), thickness = 4)
cv2.rectangle(imageB, (x, y), (x + w, y + h), (0, 0, 255), thickness = 4)
cv2.waitKey(0)
cv2.imwrite(filename="Find_Different.png", img=imageB)
#測試時解開注釋
#Make_picture()
需要安裝pip install pywin32,這個庫可以完成根據自己電腦打開的程序抓取所需句柄(也就是已經打開的任意程序)
具體操作:打開qq游戲大廳中的大家來找茬小游戲,咳咳,找個座位坐下,進入游戲前點開程序,然後開始游戲後點擊開始!!開始檢測!!!十圖場亂殺!!!!!
#PyQt5_catchWindows.py
import win32gui
from PyQt5.QtWidgets import QApplication
from PyQt5.QtGui import *
import sys
from Image_Compare import Make_picture
from PIL import Image # 導入PIL庫
import win32con
hwnd_title = dict()
def get_all_hwnd(hwnd,mouse):
if win32gui.IsWindow(hwnd) and win32gui.IsWindowEnabled(hwnd) and win32gui.IsWindowVisible(hwnd):
hwnd_title.update({hwnd: win32gui.GetWindowText(hwnd)})
hwnd_title.update({hwnd:win32gui.GetWindowText(hwnd)})
win32gui.EnableWindow(hwnd,True)
#print(win32gui.IsWindow(hwnd))
def Get_Windows():
#通過將句柄依次傳遞給應用程序定義的回調函數,枚舉屏幕上的所有頂級窗口。
win32gui.EnumWindows(get_all_hwnd, 0)
for h,t in hwnd_title.items():
if t != '':
print(h,t)
if t == '大家來找茬':
hwnd = win32gui.FindWindow(None, t)
#返回屏幕坐標中窗口的矩形
b = win32gui.GetWindowRect(hwnd)
screen = QApplication.primaryScreen()
img1 = screen.grabWindow(hwnd,549,311,383,288).toImage()
img1.save("first.png", "png")
img2 = screen.grabWindow(hwnd, 92, 311, 383, 288).toImage()
img2.save("second.png", "png")
clsname = win32gui.GetClassName(hwnd)
title = win32gui.GetWindowText(hwnd)
return img1,img2
#print(clsname, title)
def Start():
img1,img2 = Get_Windows()
Make_picture()
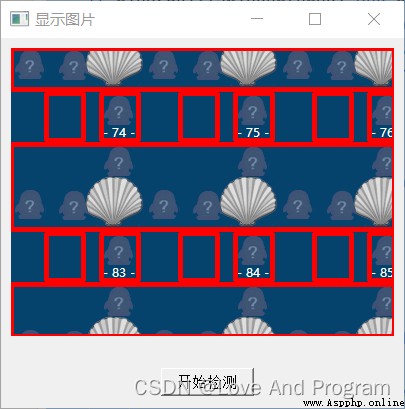
按上述操作完成後打開界面如下
#Pyqt_UI.py
import sys
from PyQt5 import QtWidgets, QtCore, QtGui
from PyQt5.QtWidgets import *
from PyQt5.QtCore import *
import PyQt5_catchWindows
class picture(QWidget):
def __init__(self):
super(picture, self).__init__()
self.setWindowTitle("顯示圖片")
self.label = QLabel(self)
self.label.setText("生成圖像框")
self.label.setFixedSize(383,288)
self.label.move(10, 10)
self.label.setStyleSheet("QLabel{background:white;}"
"QLabel{color:rgb(300,300,300,120);"
"font-size:70px;font-weight:bold;"
"font-family:黑體;}"
)
btn = QPushButton(self)
btn.setText("開始檢測")
print(1)
btn.move(160, 330)
btn.clicked.connect(self.openimage)
def openimage(self):
PyQt5_catchWindows.Start()
imgName = "Find_Different.png"
jpg = QtGui.QPixmap(imgName).scaled(self.label.width(), self.label.height())
self.label.setPixmap(jpg)
if __name__ == "__main__":
app = QtWidgets.QApplication(sys.argv)
my = picture()
my.show()
sys.exit(app.exec_())
純純輔助神器,喜歡的朋友們可以去玩一玩哦???求一鍵三連。
項目地址