GUI Programming Pack、Place、Grid The difference between
Pack Layout management
Place Layout management
Grid Layout management
GUI About packaging geometry manager in (Pack) Some of the details of
Let's talk about packer How the layout system works
The packing order will affect the cutting results
Package the details of the various options of the geometry Manager
GUI Programming Pack、Place、Grid The difference betweenThis article describes how to use tkinter The layout management of ( It's called layout managers or geometry managers). tkinter There are three types of layout management :
pack
grid
place
Note that the three layouts are managed in the same master window You must not mix them up in the ! Layout management has the following functions :
Place the control on the screen , Including the position and size of the control
Register the control in the local window system
Manage the display of controls on the screen
Although the control itself can also specify information such as size and alignment , However, the final control size and position are determined by layout management .
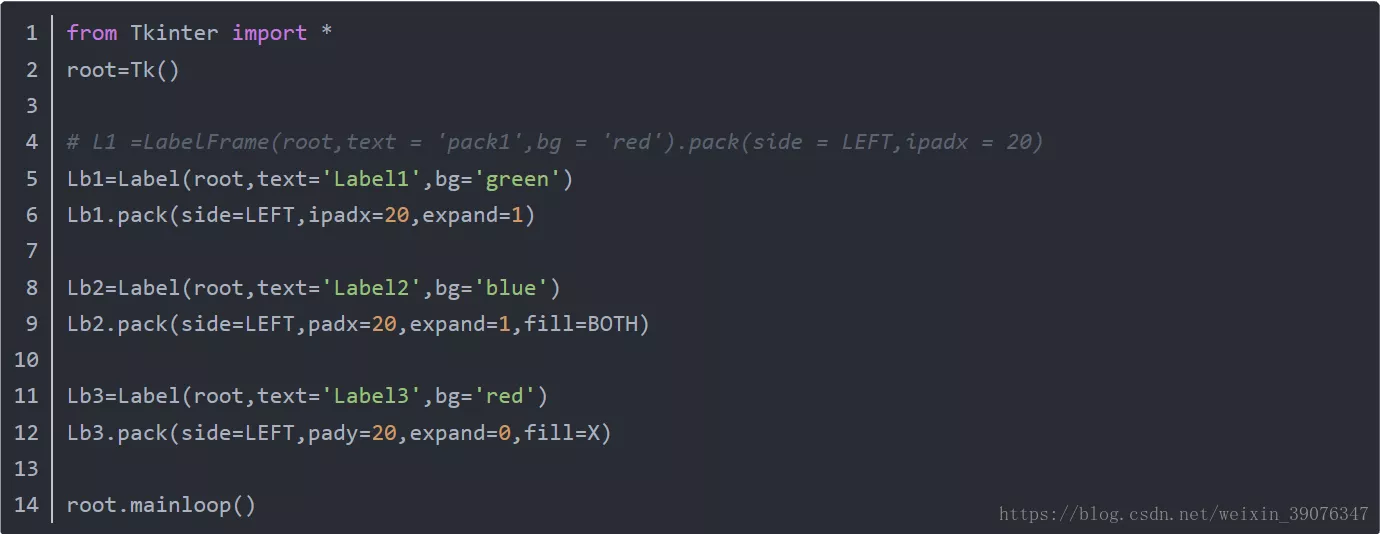
Pack Layout managementpack Is the most commonly used of the three layout management . The other two layouts need to specify the specific display position of the control , and pack The layout can specify the relative position , The exact location will be determined by pack System auto complete . It also makes pack The layout is not as flexible as the other two . therefore pack yes
Preferred layout for simple applications
fill Control fill mode
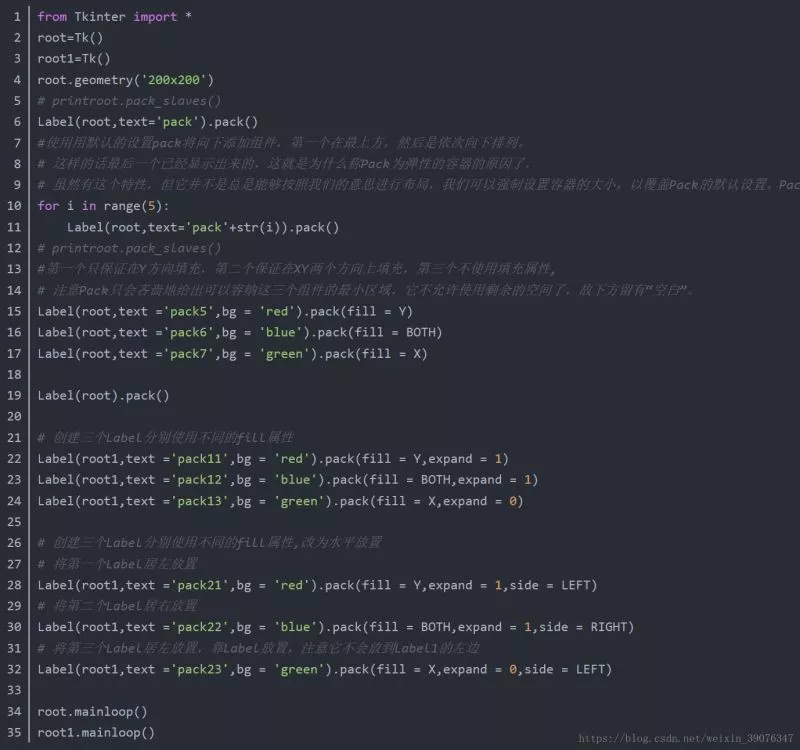
Set the gap size between components
ipadx,ipady Set the internal clearance
padx,pady Set the external clearance
side Place controls in sequence
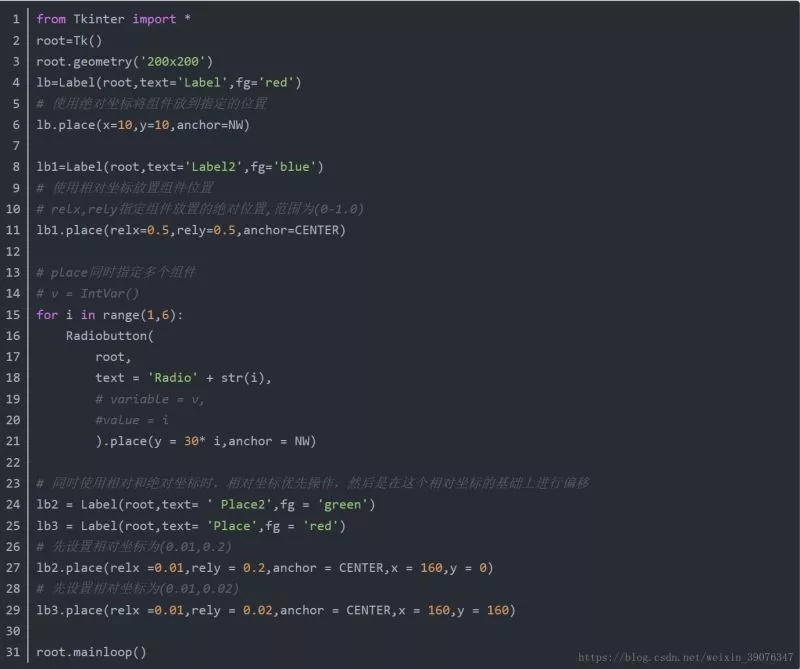
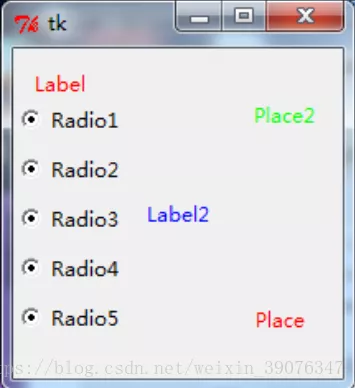
Place Layout management can explicitly specify the absolute position of the control or the position relative to other controls . To use Place Layout , Call the place() The method is ok . all tkinter All the standard controls of can call place() Method .
Here is a use Place Example of layout : by Label Control to set a random background color , Then calculate each Label The brightness of the background color ( Gray value ), If its brightness is less than 120, Then the foreground view ( Text color , fg attribute ) Set to white , Otherwise set to black . This is to avoid making the background color and foreground color too close to make the text difficult to read
Pack As the preferred layout management method , The way it works is not particularly easy to understand . Already by Pack It is also difficult to change the design of the completed layout . Grid Layout in 1996 The year was introduced as another alternative layout . Grid The layout is easy to learn and use , But it seems that people are still used to Pack.
Grid It is the best layout in many scenarios . Compared with , Pack The layout is not able to control the details . Place Although the layout can completely control the control position , But this also leads to the use of Place It will be more complicated than the other two layouts .
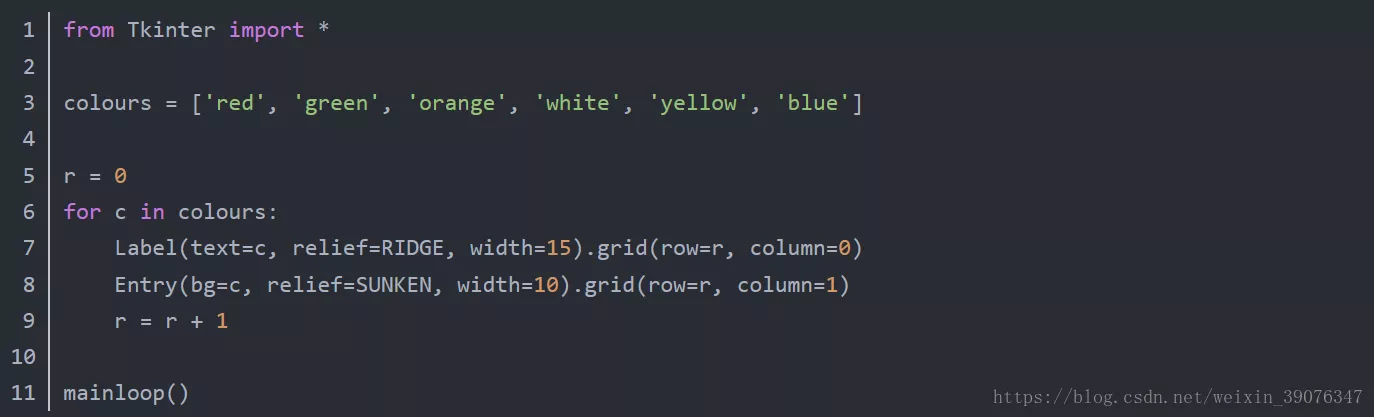
Grid Maintain the control position as a two-dimensional table structure , That is, arrange the controls in rows and columns : The position of the control is determined by its row and column numbers . Several controls with the same row number but different column number are arranged up and down with each other ; Several controls with the same column number but different row number will be arranged to the left and right of each other .
Use Grid The process of layout is to specify row number and column number for each control . You don't need to specify a size for each cell , Grid The layout will automatically set a suitable size .
pack The packaging steps are as follows :
packer At the beginning , Have free space for the entire parent component container ( Such as the space of the whole frame or the top-level window )
As components are packaged on one side , This component obtains the required edge in the remaining space , The remaining space shrinks ( The default is the top edge , namely TOP).
After previous packaging requirements , Space shrinks , Later packaging requires that only one side of the reduced remaining space be obtained .
After the components are allocated space ,expand Option to partition all remaining space ,fill Options and anchor Option to stretch and adjust the component within the space allocated by the component
thus it can be seen ,pack The order in which the options are executed is side>expand>fill/anchor.
fill And anchor Options must be assigned to the space where the component is located , Complete the packaging sequence ,expand Use only when required .
The packing order will affect the cutting resultsDuring packaging ,pack The order is important . Notice the cropping problem caused by the shrinking of the parent window : First packed and finally cut .( Technically speaking , After the window size is changed, perform the packaging steps . It means , Shrink the window , There is not enough space left for the last packaged component , It looks like the components that were packaged first were cut off )
Observe the different effects of the following two codes as the window shrinks :
# We only focus on the cutting problem from tkinter import *def greeting(): print('Hello stdout world!...')win = Frame()win.pack(expand=YES,fill=BOTH)Button(win, text='Hello', command=greeting).pack()Label(win, text='Hello container world').pack(side=TOP)#side Option to place the label at the top win.mainloop()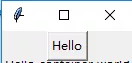
You can see that when the window is shrunk, the result due to the cutting problem is as follows , Obviously label Be squeezed out first , because label The label is then packaged
from tkinter import *def greeting(): print('Hello stdout world!...')win = Frame()win.pack(expand=YES,fill=BOTH)Label(win, text='Hello container world').pack(side=TOP)#side Option to place the label at the top Button(win, text='Hello', command=greeting).pack()win.mainloop()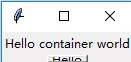
You can see that when the window is shrunk, the result due to the cutting problem is as follows , because Button The label is then packaged .
*** therefore : The packing order will affect the cutting results ***
Package the details of the various options of the geometry Managerside: Decide to get one side of the remaining space ( Optional LEFT,RIGHT,TOP,BOTTOM), The default is TOP;
expand: Space from extension and offset allocation ( Optional NO,YES), The default is NO;
fill: Fill the allocated space ( Optional Y,X,BOTH), The default is None;
anchor: Locate the position of the component in the allocated space ( The default is CENTER; Optional N,S,W,E,NW,NE,SW,SE), The default is CENTER.
The above is personal experience , I hope I can give you a reference , I also hope you can support the software development network .