SpringSide 3.1.4.3是目前SpringSide的最新版本,也是完成度比較高的一 個版本,用來做實際項目的開發應該絲毫不成問題。這裡寫一下使用該版本開發 一個簡單Web項目的全過程,當然,最重要的是我自己的一些心得體會。我的文 章很長,只有耐下性子細看,才能體會個中三味。
第一步、下載SpringSide 3.1.4.3 all-in-one版。這個過程太簡單了, SpringSide的官方網站是www.springside.org.cn,去那裡就可以下載了,all- in-one版當然是懶人們的不二選擇。這裡有一點很搞笑,該版本標的是 SpringSide 3.1.4.3,但是下載後解壓縮,解壓縮出來的文件是springside- 3.1.4.2,這可能是江南白衣的一點小小的失誤,據我猜測,3.1.4.3較3.1.4.1 的進步應該是加入了jsp-api.jar這一個庫,希望白衣這次不要為了更改這個版 本號上的失誤而再推出一個新版本,如果真要推出新版本,怎麼樣也應該把我最 近研究出來的多數據庫的配置加進去。
第二步、安裝SpringSide。如果安裝過SpringSide以前的版本,最好把用戶 目錄下的.m2文件夾刪掉,這個文件夾是Maven的本地倉庫所在地,雖說Maven可 以有效保證庫文件不會發生版本沖突,但是刪除這個文件夾會使安裝過程加快,否則,SpringSide的安裝過程會不停詢問你是否覆蓋某某文件。刪除.m2文件夾 後,運行springside-3.1.4.2目錄下的bin目錄中的quickstart.bat即可(前提 條件是已經安裝好了JDK5或以上版本,如果你的電腦中連JDK都沒有,就別來趟 SpringSide的渾水了)。 等待這個文件運行完,就可以看到SpringSide 3提供 的三個示例項目mini-web、mini-service、showcase都運行起來了,這時你可以 細細體會一下SpringSide實現的各種特性。
仔細察看SpringSide的bin目錄,發現該版本提供的腳本更加明確和有用,如 start-db.bat可以用來啟動Derby數據庫,start-selenium.bat用來啟動 selenium server,而start-tomcat.bat那就別說了,地球人都知道。
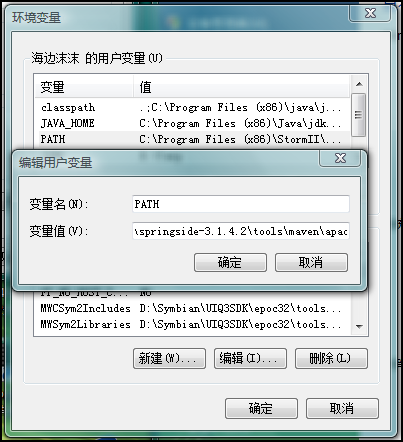
如果要想使用SpringSide來生成項目,還有一點點小工作要做,就是把Maven 的bin目錄加入到PATH環境變量中,如下圖:
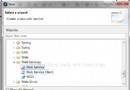
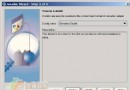
第三步,使用SpringSide生成項目。運行bin目錄下的new-project.bat即可 ,如下圖:
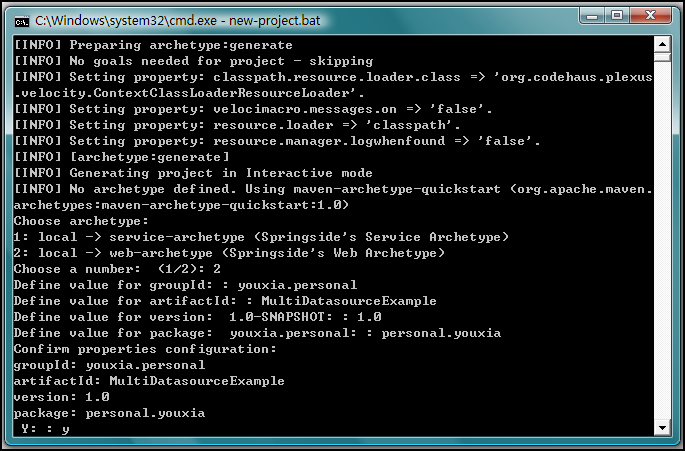
在創建項目的過程中,該腳本會提出一些問題,其中groupId指的是你的組織 的名稱,由於該項目由我私人貢獻,純屬示范用,所以我填了 youxia.personal ,因此,在第5個問題上,我選擇了personal.you作為我項目中的package的名字 ,這也是符合國際慣例的;artifactId指的是項目的名字,這裡為 MultiDatasourceExample,名字有點長,從名字就可以看出來我要示范多個數據 源的配置。
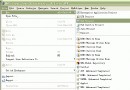
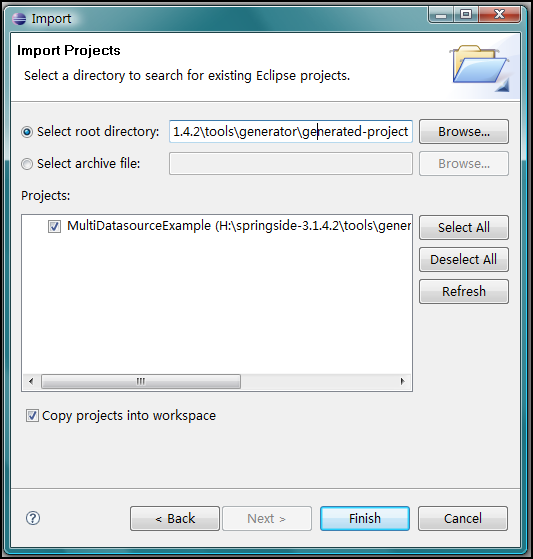
第四步、啟動Eclipse,導入項目。 生成的項目位於SpringSide目錄下的 tools\generator\generated-project目錄下,下面是Eclipse的截圖:
項目導入成功後,Eclispe資源管理器的截圖:
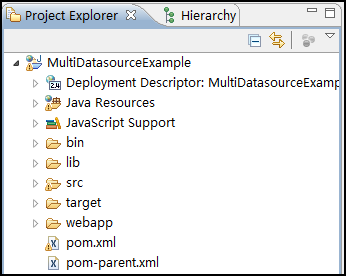
可以看到,該項目一經導入,立即可用,一個煩人 的紅叉都沒有,這也正說明了該版本是SpringSide 3的一個革命性版本,從該版 本開始,SpringSide 3的易用性提高了不止一個檔次。
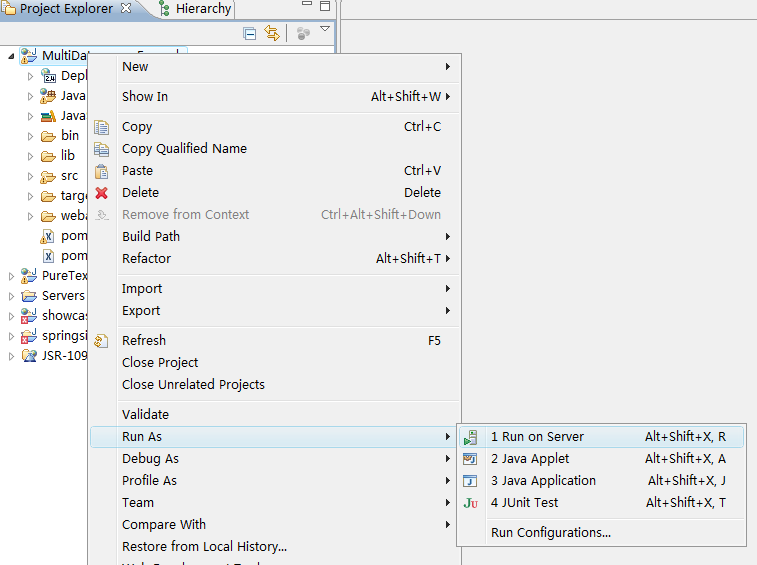
Eclipse推薦 使用3.4及以上版本,因為在該版本中,對Tomcat服務器的管理更加方便,只需 要在項目的快捷菜單中選擇Run On Server,即可自動打開Tomcat服務器並部署 項目,如下圖:
這裡有一點一定要注意,由於SpringSide生成的項目默認使用的是Derby 數據庫,所以要想成功運行項目,必須先啟動Derby數據庫,還記得前面提到的 start-db.bat嗎?運行它!然後運行該項目的bin目錄下的init-db.jar,在數據 庫中放入該項目的初始化數據。
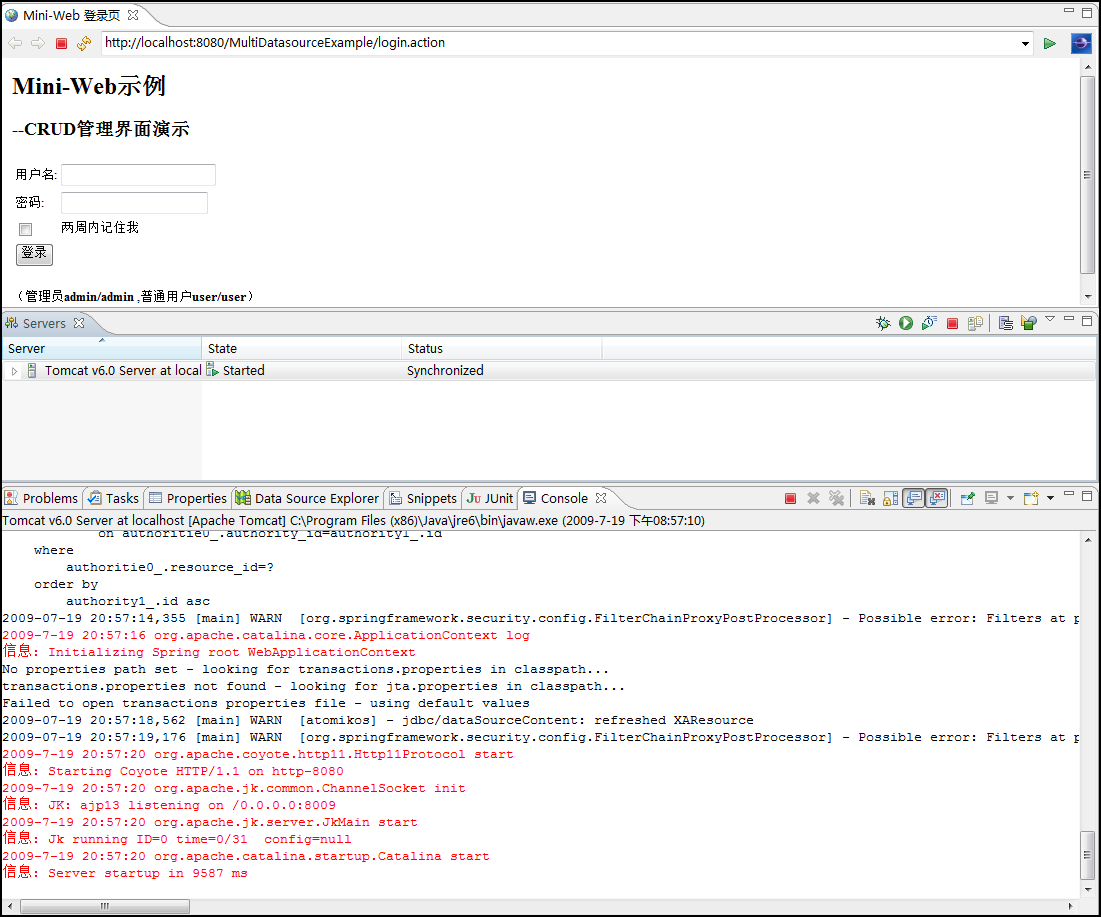
然後就可以點Run On Server來啟動 項目了,讓大家見識一下Eclipse的嵌入式浏覽器、Tomcat服務器視圖、Console 視圖。真的是太方便了:
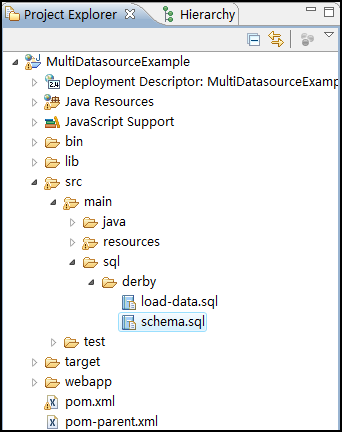
第五步、將數據庫遷移到MySQL中。在項目中,創建數據庫和初始化數據庫的 語句都是以SQL文件存在的,如下圖:
但是該語句都是針對Derby的,如果要應用於MySQL,還必須得要做一些修改 才行,先修改schema.sql,如下:
drop table if exists RESOURCES_AUTHORITIES;

drop table if exists ROLES_AUTHORITIES;

drop table if exists USERS_ROLES;

drop table if exists RESOURCES;

drop table if exists AUTHORITIES;

drop table if exists USERS;

drop table if exists ROLES;

create table USERS (

ID integer primary key auto_increment,

LOGIN_NAME varchar(20) not null unique,

PASSWORD varchar(20),

NAME varchar(20),

EMAIL varchar(30)

);

create unique index USERS_LOGIN_NAME_INDEX on USERS (LOGIN_NAME);

create table ROLES (

ID integer primary key auto_increment,

NAME varchar(20) not null unique

);

create table USERS_ROLES (

USER_ID integer not null,

ROLE_ID integer not null,

FOREIGN KEY (ROLE_ID) references ROLES(ID),

FOREIGN KEY (USER_ID) references USERS(ID)

);

CREATE TABLE AUTHORITIES (

ID integer primary key auto_increment,

NAME varchar(20) not null,

DISPLAY_NAME varchar(20) not null

);

create table ROLES_AUTHORITIES (

ROLE_ID integer not null,

AUTHORITY_ID integer not null,

FOREIGN KEY (ROLE_ID) references ROLES(ID),

FOREIGN KEY (AUTHORITY_ID) references AUTHORITIES(ID)

);

CREATE TABLE RESOURCES (

ID integer primary key auto_increment,

RESOURCE_TYPE varchar(20) not null,

VALUE varchar(255) not null,

ORDER_NUM float not null

);

create table RESOURCES_AUTHORITIES (

AUTHORITY_ID integer not null,

RESOURCE_ID integer not null,

FOREIGN KEY (AUTHORITY_ID) references AUTHORITIES(ID),

FOREIGN KEY (RESOURCE_ID) references RESOURCES(ID)

);
該修改主要包含兩個地方,一個是在drop table後面加上了if exists,一個 是把GENERATED ALWAYS as IDENTITY修改為auto_increment。而load-data.sql 不需要修改。
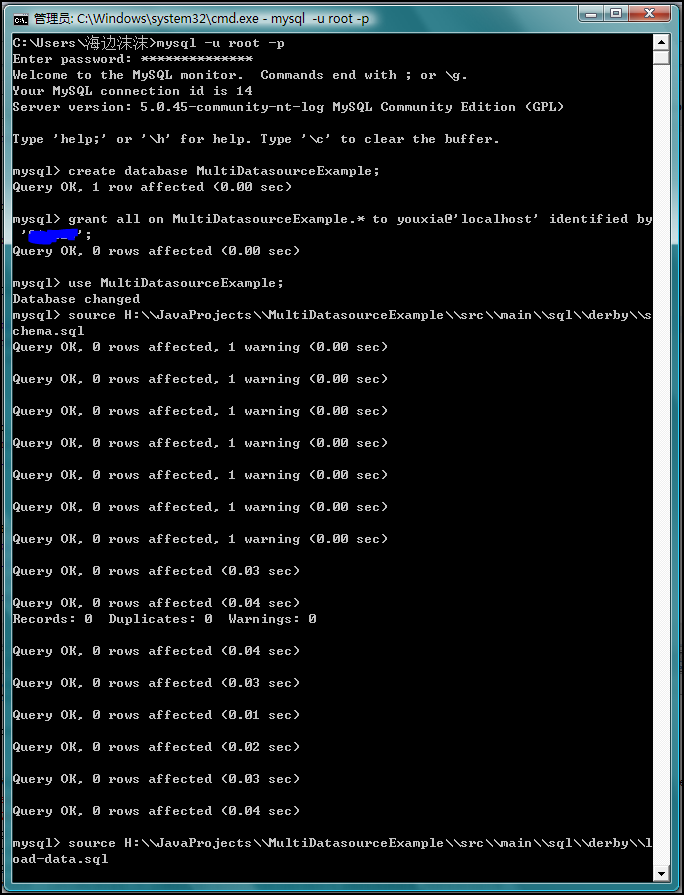
然後,啟動MySQL,在MySQL中使用上面的兩個sql文件創建數據庫和添加初始 化數據,如下圖:
然後更改數據庫連接,修改項目的application.properties文件,如下:
#jdbc settings

jdbc.url=jdbc:mysql://localhost:3306/MultiDatasourceExample? useUnicode=true&characterEncoding=utf8

jdbc.username=youxia

jdbc.password=******

#hibernate settings

hibernate.show_sql=false

hibernate.format_sql=false

hibernate.ehcache_config_file=/ehcache/ehcache-hibernate- local.xml
修改項目的applicationContext.xml文件,這裡要修改兩個地方,一個為 DriverClassName,一個為hibernate.dilect,如下:
<?xml version="1.0" encoding="UTF-8"?>

<beans xmlns="http://www.springframework.org/schema/beans"  xmlns:xsi="http://www.w3.org/2001/XMLSchema-instance"

     xmlns:jee="http://www.springframework.org/schema/jee"  xmlns:tx="http://www.springframework.org/schema/tx"

     xmlns:context="http://www.springframework.org/schema/context"

     xsi:schemaLocation="http://www.springframework.org/schema/beans  http://www.springframework.org/schema/beans/spring-beans-2.5.xsd  http://www.springframework.org/schema/tx  http://www.springframework.org/schema/tx/spring-tx-2.5.xsd  http://www.springframework.org/schema/jee  http://www.springframework.org/schema/jee/spring-jee-2.5.xsd  http://www.springframework.org/schema/context  http://www.springframework.org/schema/context/spring-context- 2.5.xsd"

     default-lazy-init="true">

     <description>Spring公共配置文件 </description>

     <!-- 定義受環境影響易變的變量 -->

     <bean  class="org.springframework.beans.factory.config.PropertyPlaceholderCon figurer">

         <property name="systemPropertiesModeName"  value="SYSTEM_PROPERTIES_MODE_OVERRIDE" />

         <property name="ignoreResourceNotFound" value="true" />

         <property name="locations">

             <list>

                 <!-- 標准配置 -->

                 <value>classpath*:/application.properties</value>

                 <!-- 本地開發環境配置 -->

                 <value>classpath*:/application.local.properties</value>

                 <!-- 服務器生產環境配置 -->

                 <!--  <value>file:/var/myapp/application.server.properties</value&g t; -->

             </list>

         </property>

     </bean>

     <!-- 使用annotation 自動注冊bean,並保證@Required,@Autowired的屬性 被注入 -->

     <context:component-scan base-package="personal.youxia" />

     <!-- 數據源配置,使用應用內的DBCP數據庫連接池 -->

     <bean id="dataSource"  class="org.apache.commons.dbcp.BasicDataSource" destroy- method="close">

         <!-- Connection Info -->

         <property name="driverClassName"  value="com.mysql.jdbc.Driver" />

         <property name="url" value="${jdbc.url}" />

         <property name="username" value="${jdbc.username}" />

         <property name="password" value="${jdbc.password}" />

         <!-- Connection Pooling Info -->

         <property name="initialSize" value="5" />

         <property name="maxActive" value="100" />

         <property name="maxIdle" value="30" />

         <property name="maxWait" value="1000" />

         <property name="poolPreparedStatements" value="true" />

         <property name="defaultAutoCommit" value="false" />

     </bean>

     <!-- 數據源配置,使用應用服務器的數據庫連接池 -->

     <!--<jee:jndi-lookup id="dataSource" jndi- name="java:comp/env/jdbc/ExampleDB" />-->

     <!-- Hibernate配置 -->

     <bean id="sessionFactory"  class="org.springframework.orm.hibernate3.annotation.AnnotationSession FactoryBean">

         <property name="dataSource" ref="dataSource" />

         <property name="namingStrategy">

             <bean class="org.hibernate.cfg.ImprovedNamingStrategy" />

         </property>

         <property name="hibernateProperties">

             <props>

                 <prop  key="hibernate.dialect">org.hibernate.dialect.MySQL5InnoDBDialect&l t;/prop>

                 <prop key="hibernate.show_sql">${hibernate.show_sql} </prop>

                 <prop key="hibernate.format_sql">${hibernate.format_sql} </prop>

                 <prop  key="hibernate.cache.provider_class">org.hibernate.cache.EhCachePro vider

                 </prop>

                 <prop  key="hibernate.cache.provider_configuration_file_resource_path">${h ibernate.ehcache_config_file}</prop>

             </props>

         </property>

         <property name="packagesToScan" value="personal.youxia.entity.*"  />

     </bean>

     <!-- 事務管理器配置,單數據源事務 -->

     <bean id="transactionManager"  class="org.springframework.orm.hibernate3.HibernateTransactionManager" >

         <property name="sessionFactory" ref="sessionFactory" />

     </bean>

     <!-- 事務管理器配置,多數據源JTA事務-->

     <!--

         <bean id="transactionManager"  class="org.springframework.transaction.jta.JtaTransactionManager  or

         WebLogicJtaTransactionManager" />

     -->

     <!-- 使用annotation定義事務 -->

     <tx:annotation-driven transaction- manager="transactionManager" />

</beans>
由於SpringSide不提供Mysql的jdbc驅動,所以需要自己去MySQL的官方網站 下載,將下載到的mysql-connector-5.*.jar復制到項目的WEB-INF中的lib目錄 中。然後運行項目,成功。至此,成功將項目遷移到MySQL中。
第六步、添加數據表、編寫Entity類、編寫Dao類、Manager類,並進行單元 測試。還是以前幾篇文章中提到的文章發布系統為例,每一篇文章對應多篇評論 ,所以說據庫中需創建articles和comments兩個數據表,如下:
create   table  articles(

id  int   primary   key  auto_increment,

subject  varchar ( 20 )  not   null ,

content  text );

create   table  comments(

id  int   primary   key  auto_increment,

content  varchar ( 255 ),

article_id  int   not   null ,

foreign   key  (article_id)  references  articles(id)

);
在編寫Java代碼之前,我還要做一點小工作,什麼工作呢?那就是要為我自 己的項目創建一個單獨的源文件夾,因為src\main\java這個文件夾已經被江南 白衣放入了太多的package,而且因為涉及到security,所以層次也不明顯,操 作起來不方便,找起代碼來也不夠快。下面是我創建了自己的源文件夾後的截圖 :
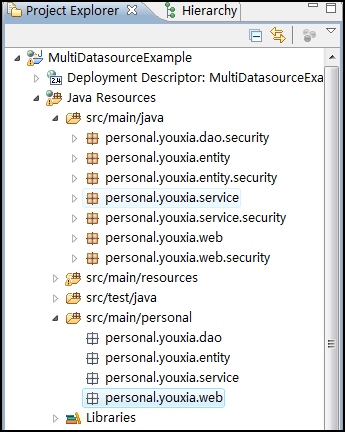
在我自己的源文件夾中,只創建了四個package,剛好代表從底到上的四個層 次,這樣,找起代碼來要方便得多。
先來Entity層,Article.java的代碼如下:
package personal.youxia.entity;

import java.util.LinkedHashSet;

import java.util.Set;

import javax.persistence.CascadeType;

import javax.persistence.Entity;

import javax.persistence.JoinColumn;

import javax.persistence.OneToMany;

import javax.persistence.OrderBy;

import javax.persistence.Table;

import org.hibernate.annotations.Cache;

import org.hibernate.annotations.CacheConcurrencyStrategy;

import org.hibernate.annotations.Fetch;

import org.hibernate.annotations.FetchMode;

@Entity

// 表名與類名不相同時重新定義表名.

@Table(name = "articles")

// 默認的緩存策略.

@Cache(usage = CacheConcurrencyStrategy.READ_WRITE)

public class Article extends IdEntity {

     private String subject;

     private String content;

     private Set<Comment> comments = new  LinkedHashSet<Comment>();

     public String getSubject() {

         return subject;

     }

     public void setSubject(String subject) {

         this.subject = subject;

     }

     public String getContent() {

         return content;

     }

     public void setContent(String content) {

         this.content = content;

     }

     @OneToMany(cascade = { CascadeType.ALL })

     @JoinColumn(name = "article_id")

     // Fecth策略定義

     @Fetch(FetchMode.SUBSELECT)

     // 集合按id排序.

     @OrderBy("id")

     // 集合中對象id的緩存.

     @Cache(usage = CacheConcurrencyStrategy.READ_WRITE)

     public Set<Comment> getComments() {

         return comments;

     }

     public void setComments(Set<Comment> comments)  {

         this.comments = comments;

     }

}
Comment.java如下:
package personal.youxia.entity.entities;

import javax.persistence.Column;

import javax.persistence.Entity;

import javax.persistence.Table;

import org.hibernate.annotations.Cache;

import org.hibernate.annotations.CacheConcurrencyStrategy;

import personal.youxia.entity.IdEntity;

@Entity

// 表名與類名不相同時重新定義表名.

@Table(name = "comments")

// 默認的緩存策略.

@Cache(usage = CacheConcurrencyStrategy.READ_WRITE)

public class Comment extends IdEntity {

     private String content;

     private Long articleId;

     public String getContent() {

         return content;

     }

     public void setContent(String content) {

         this.content = content;

     }


     @Column(name = "article_id")

     public Long getArticleId() {

         return articleId;

     }

     public void setArticleId(Long articleId) {

         this.articleId = articleId;

     }

}
編寫Dao層代碼,ArticleDao.java如下:
package personal.youxia.dao;

import org.springside.modules.orm.hibernate.HibernateDao;

import personal.youxia.entity.Article;

public class ArticleDao extends HibernateDao<Article,  Long> {

}
CommentDao.java如下:
package personal.youxia.dao;

import org.springside.modules.orm.hibernate.HibernateDao;

import personal.youxia.entity.Comment;

public class CommentDao extends HibernateDao<Comment,  Long> {

}
可以看出,以上代碼都從HibernateDao繼承,得益於泛型支持,基本不需要 編寫一行代碼。
編寫Bussiness層代碼,這一層,白衣使用的包名為service,而類名的後綴 都是Manager,我就跟他學算了,懶得改了。
ArticleManager.java如下:
package personal.youxia.service;

import org.springframework.beans.factory.annotation.Autowired;

import org.springside.modules.orm.hibernate.HibernateDao;

import personal.youxia.dao.ArticleDao;

import personal.youxia.entity.Article;

public class ArticleManager extends EntityManager<Article,  Long> {

     @Autowired

     private ArticleDao articleDao;

     public void setArticleDao(ArticleDao articleDao) {

         this.articleDao = articleDao;

     }

     @Override

     protected HibernateDao<Article, Long>  getEntityDao() {

         // TODO Auto-generated method stub

         return articleDao;

     }

}
CommentManager.java如下:
package personal.youxia.service;

import org.springframework.beans.factory.annotation.Autowired;

import org.springside.modules.orm.hibernate.HibernateDao;

import personal.youxia.dao.CommentDao;

import personal.youxia.entity.Comment;

public class CommentManager extends EntityManager<Comment,  Long> {

     @Autowired

     private CommentDao commentDao;

     public void setCommentDao(CommentDao commentDao) {

         this.commentDao = commentDao;

     }

     @Override

     protected HibernateDao<Comment, Long>  getEntityDao() {

         // TODO Auto-generated method stub

         return commentDao;

     }

}
以上代碼大同小異,都是從EntityManager繼承,並使用Spring的IoC特性, 將Dao類注入到Manager類之中,並重載 getEntityDao方法來使用該注入的Dao。 這個時候,為了驗證這些數據訪問相關的層能否正常運行,可以編寫單元測試。 代碼如下:
package personal.youxia.test;

import org.junit.Test;

import org.springframework.beans.factory.annotation.Autowired;

import org.springside.modules.test.junit4.SpringTxTestCase;

import personal.youxia.entity.entities.Article;

import personal.youxia.entity.entities.Comment;

import personal.youxia.service.ArticleManager;

import personal.youxia.service.CommentManager;

public class DataAccessTest extends SpringTxTestCase {

     @Autowired

     private ArticleManager articleManager;

     @Autowired

     private CommentManager commentManager;

     public void setArticleManager(ArticleManager  articleManager) {

         this.articleManager = articleManager;

     }

     @Test

     public void addArticle() {

         Comment comment = new Comment();

         Article article = new Article();

         article.setSubject("test");

         article.setContent("test");

         articleManager.save(article);

         comment.setArticleId(article.getId());

         commentManager.save(comment);

     }

}
單元測試一運行,發現了三個問題,先是出現Manager類沒有注入成功的錯誤 ,經檢查發現所有的Manager類都應該使用@Service注解,再出現的錯誤是提示 Dao類沒有注入成功,經檢查發現所有的Dao類須使用@Repository注解,最後出 現的錯誤是找不到Entity類的錯誤,經檢查發現Entity類不能位於 personal.youxia.entity包中,必須位於其子包中,這是由 applicationContext.xml文件中的配置決定的,更改包名為 personal.youxia.entity.entities後,問題解決。
下一步就應該是編寫Action和JSP了,由於文章太長,在Blogjava的編輯器中 編輯已經非常緩慢了,所以只有將該文章分為上中下三部分。且看下回分解!