由於現在很多IDE都支持Maven, 所以我們將使用Maven構建該工程;
開始之前,需要先安裝Java和Maven:
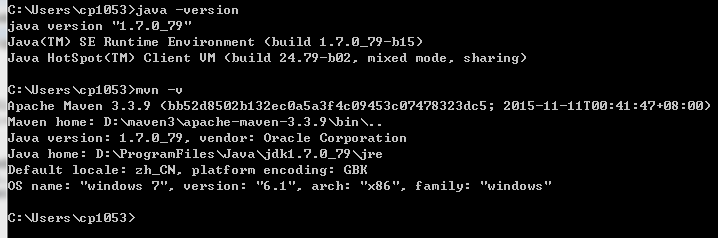
本工程將基於Spring Boot 1.4.3.RELEASE開發,推薦的Java版本是Java 7+,maven版本是3.2+,可使用如下命令檢查是否符合要求:
由於使用Maven構建,所以我們首先需要創建一個pom.xml文件,用於構建本工程,打開你最喜歡的編輯器(如Notepad++),添加如下內容:
<?xml version="1.0" encoding="UTF-8"?>
<project xmlns="http://maven.apache.org/POM/4.0.0" xmlns:xsi="http://www.w3.org/2001/XMLSchema-instance"
    xsi:schemaLocation="http://maven.apache.org/POM/4.0.0 http://maven.apache.org/xsd/maven-4.0.0.xsd">
    <modelVersion>4.0.0</modelVersion>

    <groupId>com.example</groupId>
    <artifactId>myproject</artifactId>
    <version>0.0.1-SNAPSHOT</version>

    <parent>
        <groupId>org.springframework.boot</groupId>
        <artifactId>spring-boot-starter-parent</artifactId>
        <version>1.4.3.RELEASE</version>
    </parent>

    <!-- Additional lines to be added here... -->

</project>
Spring Boot提供了一系列的“啟動器”,使得添加依賴變得非常簡單;
由於本工程是一個Web工程,所以我們選擇添加spring-boot-starter-web“啟動器”依賴;
添加spring-boot-starter-web依賴
    <dependencies>
        <dependency>
            <groupId>org.springframework.boot</groupId>
            <artifactId>spring-boot-starter-web</artifactId>
        </dependency>
    </dependencies>
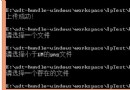
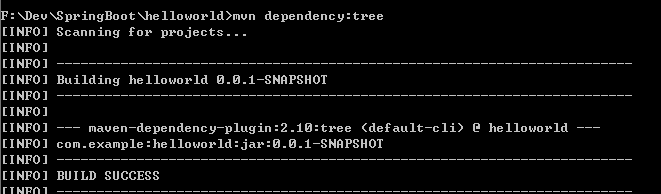
為了更加直觀的看到spring-boot-starter-web引入的依賴,我們可以使用mvn dependency:tree命令查看工程的依賴樹,如下是添加前後的區別:
前(注意觀察,雖然繼承了spring-boot-starter-parent,但是並沒有引入任何依賴):
後:
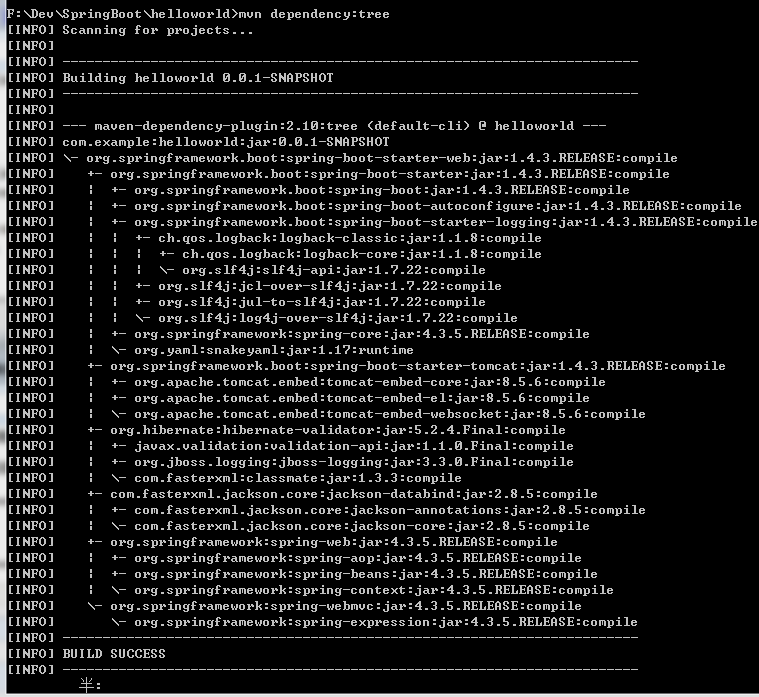
可以發現,在添加前,項目沒有任何依賴,添加完spring-boot-starter-web依賴後,Tomcat、Jackson、Spring Boot等依賴也都自動添加了進來。
最後,有一點值得注意的是,為了簡便,我們這個工程是繼承spring-boot-starter-parent工程,spring-boot-starter-parent幫我們預先定義了很多插件管理配置、編譯級別(Java 6)、編碼(utf-8)等,不過並沒有添加任何依賴,有興趣的可以查看spring-boot-starter-parent工程的pom.xml文件,鏈接如下:
https://github.com/spring-projects/spring-boot/blob/master/spring-boot-starters/spring-boot-starter-parent/pom.xml
為了完成這個應用,我們需要創建一個簡單的Java文件,如下,Maven默認情況下會去src/main/java目錄編譯java文件,所以我們要先創建這個目錄結構,然後添加src/main/java/Example.java文件:
import org.springframework.boot.*;
import org.springframework.boot.autoconfigure.*;
import org.springframework.stereotype.*;
import org.springframework.web.bind.annotation.*;

@RestController
@EnableAutoConfiguration
public class Example {

    @RequestMapping("/")
    String home() {
        return "Hello World!";
    }

    public static void main(String[] args) throws Exception {
        SpringApplication.run(Example.class, args);
    }

}
注意觀察以上代碼,我們使用了@RestController和@RequestMapping兩個Spring MVC的注解,
@RestController用於表明該類是一個Controller,且返回的內容直接寫入到響應body裡;
@RequestMapping
另外,還使用了@EnableAutoConfiguration注解,添加這個注解後,Spring Boot會基於你添加的依賴去自動配置Spring,由於spring-boot-starter-web添加了Tomcat和Spring MVC,所以,Spring Boot自動配置會假定你正在開發一個web應用程序,並依此自動添加相關Spring配置。
最後,要關注的是main方法,跟普通的main方法沒什麼區別,只有一句話,調用SpringApplication的run方法啟動應用。
由於繼承了spring-boot-starter-parent工程,所以我們可以直接使用mvn spring-boot:run命令來運行程序,如下所示:
$ mvn spring-boot:run

  .   ____          _            __ _ _
 /\\ / ___'_ __ _ _(_)_ __  __ _ \ \ \ \
( ( )\___ | '_ | '_| | '_ \/ _` | \ \ \ \
 \\/  ___)| |_)| | | | | || (_| |  ) ) ) )
  '  |____| .__|_| |_|_| |_\__, | / / / /
 =========|_|==============|___/=/_/_/_/
 :: Spring Boot ::  (v1.4.3.RELEASE)
....... . . .
....... . . . (log output here)
....... . . .
........ Started Example in 2.222 seconds (JVM running for 6.514)
啟動後,在浏覽器輸入http://localhost:8080/ 即可以看到Controller中home方法返回的結果:
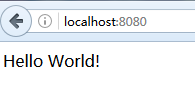
另外使用ctrl-c,可以關閉應用。
很簡單,添加一個maven插件,如下代碼;
<build>
    <plugins>
        <plugin>
            <groupId>org.springframework.boot</groupId>
            <artifactId>spring-boot-maven-plugin</artifactId>
        </plugin>
    </plugins>
</build>
然後運行mvn package命令即可(注意,spring-boot-starter-parent的POM已經幫我們做了配置,綁定了repackage goal, 如果沒使用繼承parent POM,我們需要做更多配置,詳情參考plugin documentation):
打完包後,我們可以在target目錄下找到helloworld-0.0.1-SNAPSHOT.jar包。
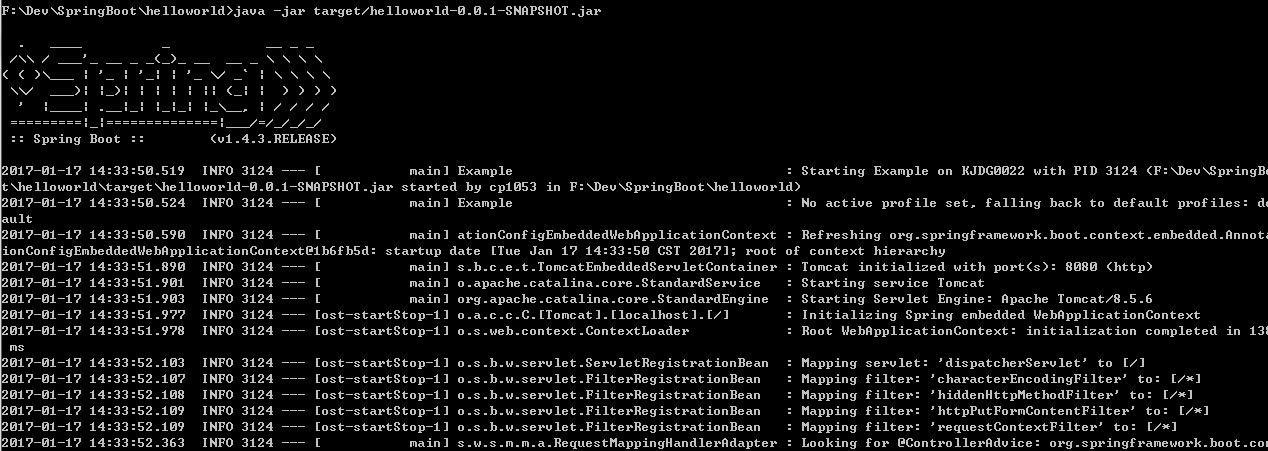
如果要運行程序的話,也很簡便,輸入 java -jar target/helloworld-0.0.1-SNAPSHOT.jar 命令即可啟動應用,如下所示:
$ java -jar target/helloworld-0.0.1-SNAPSHOT.jar

  .   ____          _            __ _ _
 /\\ / ___'_ __ _ _(_)_ __  __ _ \ \ \ \
( ( )\___ | '_ | '_| | '_ \/ _` | \ \ \ \
 \\/  ___)| |_)| | | | | || (_| |  ) ) ) )
  '  |____| .__|_| |_|_| |_\__, | / / / /
 =========|_|==============|___/=/_/_/_/
 :: Spring Boot ::  (v1.4.3.RELEASE)
....... . . .
....... . . . (log output here)
....... . . .
........ Started Example in 2.536 seconds (JVM running for 2.864)
同樣,啟動後,在浏覽器輸入http://localhost:8080/ 即可以看到Controller中home方法返回的結果。
最後,雖然本例子未使用任何IDE,主要是因為比較簡單;如果開發復雜的應用,還是強烈推薦使用IDE,如Spring Tool Suite,我使用的是sts-3.8.3.RELEASE版本。
http://docs.spring.io/spring-boot/docs/1.4.3.RELEASE/reference/htmlsingle/