Spring中的aop增強,Springaop增強
在Spring中,目前我學習了幾種增強的方式,和大家分享一下
之前的話:
1.AOP (Aspect Oriented Programming 面向切面編程)
在軟件業,AOP為Aspect Oriented Programming的縮寫,意為:面向切面編程,通過預編譯方式和運行期動態代理實現程序功能的統一維護的一種技術。AOP是OOP的延續,是軟件開發中的一個熱點,也是Spring框架中的一個重要內容,是函數式編程的一種衍生范型。利用AOP可以對業務邏輯的各個部分進行隔離,從而使得業務邏輯各部分之間的耦合度降低,提高程序的可重用性,同時提高了開發的效率。
面向對象編程是從【靜態角度】考慮程序的結構,而面向切面編程是從【動態角度】考慮程序運行過程。
AOP底層,就是采用【動態代理】模式實現的。采用了兩種代理:JDK動態代理和CGLIB動態代理。
基本術語(一些名詞):
(1)切面(Aspect)
切面泛指[*交叉業務邏輯*]。事務處理和日志處理可以理解為切面。常用的切面有通知(Advice)與顧問(Advisor)。實際就是對主業務邏輯的一種增強。
(2)織入(Weaving)
織入是指將切面代碼插入到目標對象的過程。代理的invoke方法完成的工作,可以稱為織入。
(3) 連接點(JoinPoint)
連接點是指可以被切面織入的方法。通常業務接口的方法均為連接點
(4)切入點(PointCut)
切入點指切面具體織入的方法
注意:被標記為final的方法是不能作為連接點與切入點的。因為最終的是不能被修改的,不能被增強的。
(5)目標對象(Target)
目標對象指將要被增強的對象。即包含主業務邏輯的類的對象。
(6)通知(Advice)
通知是切面的一種實現,可以完成簡單的織入功能。通知定義了增強代碼切入到目標代碼的時間點,是目標方法執行之前執行,還是執行之後執行等。切入點定義切入的位置,通知定義切入的時間。
(7)顧問(Advisor)
顧問是切面的另一種實現,能夠將通知以更為復雜的方式織入到目標對象中,是將通知包裝為更復雜切面的裝配器。
AOP是一種思想,而非實現
AOP是基於OOP,而又遠遠高於OOP,主要是將主要核心業務和交叉業務分離,交叉業務就是切面。例如,記錄日志和開啟事務。
一:前置增強和後置增強
源碼介紹:
1.User.java

![]()
package cn.zhang.entity;
public class User {
private Integer id; // 用戶ID
private String username; // 用戶名
private String password; // 密碼
private String email; // 電子郵件
public Integer getId() {
return id;
}
public void setId(Integer id) {
this.id = id;
}
public String getUsername() {
return username;
}
public void setUsername(String username) {
this.username = username;
}
public String getPassword() {
return password;
}
public void setPassword(String password) {
this.password = password;
}
public String getEmail() {
return email;
}
public void setEmail(String email) {
this.email = email;
}
}
View Code
2.IDao.java
![]()
package cn.zhang.dao;
//定義接口
import cn.zhang.entity.User;
public interface IDao {
//定義方法
public void save(User user);
}
View Code
3.UserDao.java
![]()
package cn.zhang.dao.impl;
//實現接口
import cn.zhang.dao.IDao;
import cn.zhang.entity.User;
public class UserDao implements IDao {
@Override
//實現方法
public void save(User user) {
System.out.println("save success!");
}
}
View Code
4.IUserBiz.java
![]()
package cn.zhang.biz;
//業務接口
import cn.zhang.entity.User;
public interface IUserBiz {
//待處理的方法
public void save(User user);
}
View Code
5.UserBiz.java
![]()
package cn.zhang.biz.impl;
//業務接口的實現類
import cn.zhang.biz.IUserBiz;
import cn.zhang.dao.IDao;
import cn.zhang.entity.User;
public class UserBiz implements IUserBiz {
//引入IDao接口
private IDao dao;
@Override
//實現方法
public void save(User user) {
dao.save(user);
}
//dao 屬性的setter訪問器,會被Spring調用,實現設值注入
public IDao getDao() {
return dao;
}
public void setDao(IDao dao) {
this.dao = dao;
}
}
View Code
6.LoggerAfter.java(後置增強)
![]()
package cn.zhang.aop;
//後置增強
import java.lang.reflect.Method;
import org.springframework.aop.AfterReturningAdvice;
public class LoggerAfter implements AfterReturningAdvice {
@Override
public void afterReturning(Object arg0, Method arg1, Object[] arg2,
Object arg3) throws Throwable {
System.out.println("後置增強代碼");
}
}
View Code
7.LoggerBefore.java(前置增強)
![]()
package cn.zhang.aop;
//前置增強
import java.lang.reflect.Method;
import org.apache.log4j.Logger;
import org.springframework.aop.MethodBeforeAdvice;
public class LoggerBefore implements MethodBeforeAdvice {
private static final Logger log = Logger.getLogger(LoggerBefore.class);
@Override
public void before(Method arg0, Object[] arg1, Object arg2)
throws Throwable {
log.info("前置內容AAA");
System.out.println("前置增強代碼");
}
}
View Code
8.applicationContext.xml(Spring配置文件)
![]()
<?xml version="1.0" encoding="UTF-8"?>
<beans xmlns="http://www.springframework.org/schema/beans"
xmlns:xsi="http://www.w3.org/2001/XMLSchema-instance" xmlns:aop="http://www.springframework.org/schema/aop"
xmlns:p="http://www.springframework.org/schema/p"
xsi:schemaLocation="
http://www.springframework.org/schema/beans
http://www.springframework.org/schema/beans/spring-beans.xsd
http://www.springframework.org/schema/aop
http://www.springframework.org/schema/aop/spring-aop-4.1.xsd
">
<bean id="dao" class="cn.zhang.dao.impl.UserDao" />
<bean id="biz" class="cn.zhang.biz.impl.UserBiz">
<property name="dao" ref="dao"></property>
</bean>
<!-- 定義前置增強組件 -->
<bean id="loggerBefore" class="cn.zhang.aop.LoggerBefore" />
<!-- 定義後置增強組件 -->
<bean id="loggerAfter" class="cn.zhang.aop.LoggerAfter" />
<!-- 針對AOP的配置 -->
<aop:config>
<aop:pointcut id="pointcut"
expression="execution(public void save(cn.zhang.entity.User))" />
<!-- 將增強處理和切入點結合在一起,在切入點處插入增強處理,完成"織入" -->
<aop:advisor pointcut-ref="pointcut" advice-ref="loggerBefore" />
<aop:advisor pointcut-ref="pointcut" advice-ref="loggerAfter" />
</aop:config>
</beans>
View Code
當然,針對AOP的配置也可以使用代理對象 ProxyFactoryBean 代理工廠bean來實現,在測試類中:IUserBiz biz=(IUserBiz)ctx.getBean("serviceProxy");
![]()
<!-- 代理對象 ProxyFactoryBean 代理工廠bean -->
<bean id="serviceProxy" class="org.springframework.aop.framework.ProxyFactoryBean">
<property name="targetName" value="biz"></property>
<property name="interceptorNames" value="loggerBefore,loggerAfter"></property>
</bean>
View Code
9.MyTest.java
![]()
package cn.zhang.test;
//測試類
import org.springframework.context.ApplicationContext;
import org.springframework.context.support.ClassPathXmlApplicationContext;
import cn.zhang.biz.IUserBiz;
import cn.zhang.entity.User;
public class MyTest {
public static void main(String[] args) {
ApplicationContext ctx = new ClassPathXmlApplicationContext("applicationContext.xml");
IUserBiz biz=(IUserBiz)ctx.getBean("biz");
User user=new User();
biz.save(user);
System.out.println("success!");
}
}
View Code
10.log4j.properties(日志的配置文件)
![]()
### direct log messages to stdout ###
log4j.appender.stdout=org.apache.log4j.ConsoleAppender
log4j.appender.stdout.Target=System.out
log4j.appender.stdout.layout=org.apache.log4j.PatternLayout
log4j.appender.stdout.layout.ConversionPattern=%d{ABSOLUTE} %5p %c{1}:%L - %m%n
### direct messages to file mylog.log ###
log4j.appender.file=org.apache.log4j.FileAppender
log4j.appender.file.File=c\:mylog.log
log4j.appender.file.layout=org.apache.log4j.PatternLayout
log4j.appender.file.layout.ConversionPattern=%d{ABSOLUTE} %5p %c{1}:%L - %m%n
### set log levels - for more verbose logging change 'info' to 'debug' ###
log4j.rootLogger=info, stdout
View Code
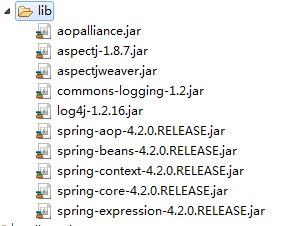
當然,別忘了引入我們需要的jar包啊!
常用的jar:
二:異常拋出增強和環繞增強
源碼介紹:
1.User.java
![]()
package cn.zhang.entity;
public class User {
private Integer id; // 用戶ID
private String username; // 用戶名
private String password; // 密碼
private String email; // 電子郵件
public User() {
super();
// TODO Auto-generated constructor stub
}
public User(Integer id, String username, String password, String email) {
super();
this.id = id;
this.username = username;
this.password = password;
this.email = email;
}
public Integer getId() {
return id;
}
public void setId(Integer id) {
this.id = id;
}
public String getUsername() {
return username;
}
public void setUsername(String username) {
this.username = username;
}
public String getPassword() {
return password;
}
public void setPassword(String password) {
this.password = password;
}
public String getEmail() {
return email;
}
public void setEmail(String email) {
this.email = email;
}
}
View Code
2.UserService.java
![]()
package cn.zhang.service;
public class UserService {
public void delete() {
//int i = 5 / 0;//制造一個錯誤,用於測試異常拋出增強
System.out.println("delete success!");
}
}
View Code
3.ErrorLog.java(異常拋出增強)
![]()
package cn.zhang.aop;
//異常拋出增強
import java.lang.reflect.Method;
import org.apache.log4j.Logger;
import org.springframework.aop.ThrowsAdvice;
public class ErrorLog implements ThrowsAdvice {
private static final Logger log = Logger.getLogger(ErrorLog.class);
public void afterThrowing(Method method, Object[] args, Object target,
RuntimeException e){
log.error(method.getName() + " 方法發生異常:" + e);
}
}
View Code
4.AroundLog(環繞增強)
![]()
package cn.zhang.aop;
//環繞增強
import java.lang.reflect.Method;
import java.util.Arrays;
import org.aopalliance.intercept.MethodInterceptor;
import org.aopalliance.intercept.MethodInvocation;
import org.apache.log4j.Logger;
public class AroundLog implements MethodInterceptor {
private static final Logger log = Logger.getLogger(AroundLog.class);
@Override
public Object invoke(MethodInvocation invocation) throws Throwable {
Object target=invocation.getThis();//獲取被代理對象
Method method = invocation.getMethod();//獲得被代理方法
Object[] args = invocation.getArguments();//獲得方法參數
System.out.println("調用"+target+"的"+method.getName()+"方法。方法參數:"+Arrays.toString(args));
Object result;//調用目標方法,獲取目標方法返回值
try {
result = invocation.proceed();
System.out.println("調用" + target + "的" + method.getName()
+ "方法。方法返回值:" + result);
return result;
} catch (Exception e) {
log.error(method.getName()+"方法發生異常:"+e);
throw e;
}
}
}
View Code
5.applicationContext.xml(Spring配置文件)
![]()
<?xml version="1.0" encoding="UTF-8"?>
<beans xmlns="http://www.springframework.org/schema/beans"
xmlns:xsi="http://www.w3.org/2001/XMLSchema-instance"
xmlns:aop="http://www.springframework.org/schema/aop"
xmlns:p="http://www.springframework.org/schema/p"
xsi:schemaLocation="
http://www.springframework.org/schema/beans
http://www.springframework.org/schema/beans/spring-beans.xsd
http://www.springframework.org/schema/aop
http://www.springframework.org/schema/aop/spring-aop-4.1.xsd
">
<bean id="service" class="cn.zhang.service.UserService" />
<!-- 異常拋出增強 -->
<!-- <bean id="error" class="cn.zhang.aop.ErrorLog"/> -->
<!-- 環繞增強 -->
<bean id="error" class="cn.zhang.aop.AroundLog"/>
<aop:config>
<aop:pointcut expression="execution(public void delete())"
id="pointcut" />
<aop:advisor advice-ref="error" pointcut-ref="pointcut" />
</aop:config>
</beans>
View Code
6.MyTest.java
![]()
package cn.zhang.test;
//測試類
import org.springframework.context.ApplicationContext;
import org.springframework.context.support.ClassPathXmlApplicationContext;
import cn.zhang.service.UserService;
public class MyTest {
public static void main(String[] args) {
ApplicationContext ctx = new ClassPathXmlApplicationContext(
"applicationContext.xml");
UserService service = (UserService) ctx.getBean("service");
try {
service.delete();
} catch (Exception e) {
System.out.println("錯誤了");
}
System.out.println("success!");
}
}
View Code
三:注解增強方式實現前置增強和後置增強
源碼介紹:
1.UserService.java
![]()
package cn.service;
//業務處理類
public class UserService {
//方法
public void delete() {
System.out.println("delete success!");
}
}
View Code
2.AnnotationAdvice.java(注解增強)
![]()
package cn.aop;
//注解增強
import org.aspectj.lang.JoinPoint;
import org.aspectj.lang.annotation.AfterReturning;
import org.aspectj.lang.annotation.Aspect;
import org.aspectj.lang.annotation.Before;
@Aspect
public class AnnotationAdvice {
// 定義前置增強
@Before("execution(* cn.service.UserService.*(..))")
public void before(JoinPoint jp) {
System.out.println("調用"+jp.getTarget()+"的"+jp.getSignature().getName()+"方法,參數:"+jp.getArgs()+",參數個數:"+jp.getArgs().length);
System.out.println("before");
}
// 定義後置增強
@AfterReturning(pointcut="execution(* cn.service.UserService.*(..))",returning="returnValue")
public void afterReturning(JoinPoint jp,Object returnValue) {
System.out.println("調用"+jp.getTarget()+"的"+jp.getSignature().getName()+"方法,參數:"+jp.getArgs()+",返回值為:"+returnValue);
System.out.println("after");
}
}
View Code
注:
java.lang.Object[] getArgs():獲取連接點方法運行時的入參列表
Signature getSignature() :獲取連接點的方法簽名對象
java.lang.Object getTarget() :獲取連接點所在的目標對象
java.lang.Object getThis() :獲取代理對象本身
3.applicationContext.xml(Spring配置文件)
![]()
<?xml version="1.0" encoding="UTF-8"?>
<beans xmlns="http://www.springframework.org/schema/beans"
xmlns:xsi="http://www.w3.org/2001/XMLSchema-instance" xmlns:aop="http://www.springframework.org/schema/aop"
xmlns:p="http://www.springframework.org/schema/p"
xsi:schemaLocation="
http://www.springframework.org/schema/beans
http://www.springframework.org/schema/beans/spring-beans.xsd
http://www.springframework.org/schema/aop
http://www.springframework.org/schema/aop/spring-aop-4.1.xsd
">
<bean id="service" class="cn.service.UserService" />
<bean id="error" class="cn.aop.AnnotationAdvice" />
<!-- 針對AOP的配置 -->
<aop:aspectj-autoproxy />
</beans>
View Code
4.MyTest.java
![]()
package cn.test;
//注解增強測試
import org.springframework.context.ApplicationContext;
import org.springframework.context.support.ClassPathXmlApplicationContext;
import cn.service.UserService;
public class MyTest {
public static void main(String[] args) {
ApplicationContext ctx = new ClassPathXmlApplicationContext("applicationContext.xml");
UserService biz=(UserService)ctx.getBean("service");
biz.delete();
System.out.println("success!");
}
}
View Code