JPA規范推薦使用Annotation來管理實體類與數據表之間的映射關系,從而避免同時維護兩份文件(Java 實體類 和 XML 映射文件),將映射信息(寫在Annotation中)與實體類集中在一起。
以下我將使用eclipse來構建一個簡單使用注解取代*.hbm.xml的查詢小例子。(p.s 建議不要使用Myeclipse,他很方便但是對於初學者來說沒有eclipse學得牢靠)
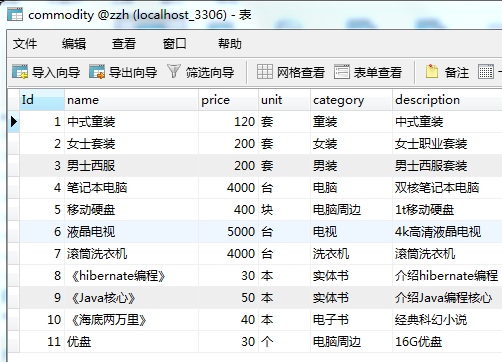
1.在數據庫中構建一張表
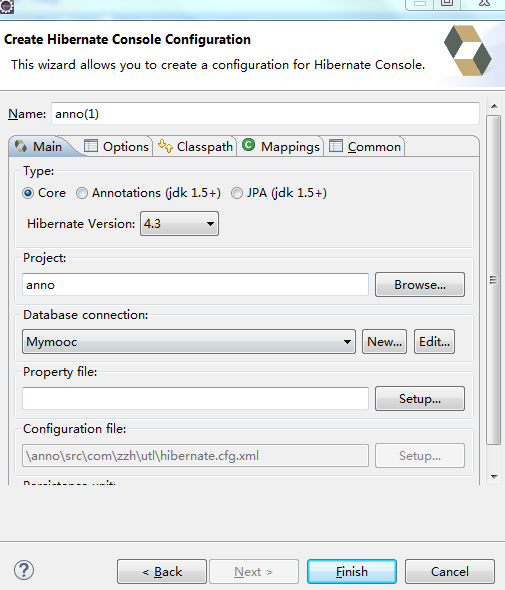
2.生成相應的hibernate.cfg.xml文件

注意,在生成cfg.xml文件時,要create Hibernate Console Configuration
3.生成hibernate.reveng.xml逆向工程
在Eclipse界面工具欄,擇Hibernate code generation Configuration,new 一個新的配置。
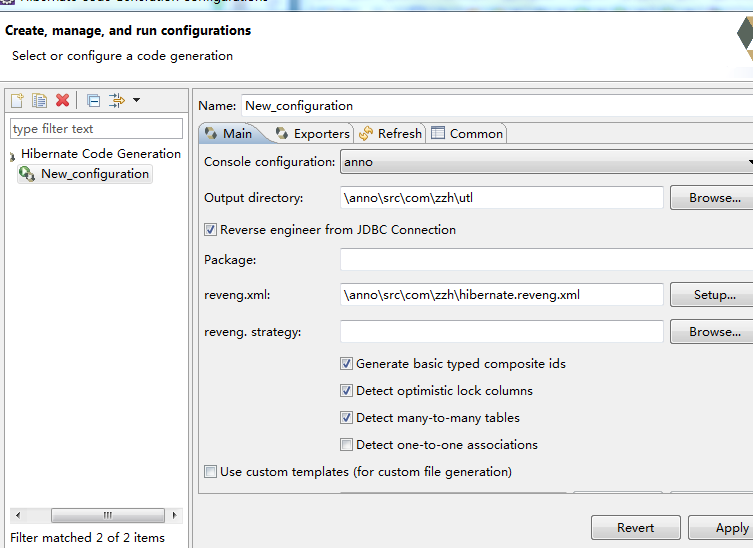
4.選擇Exporters的選項,接下來是重點!!!

選擇勾選的兩項,不再選.hbm.xml.
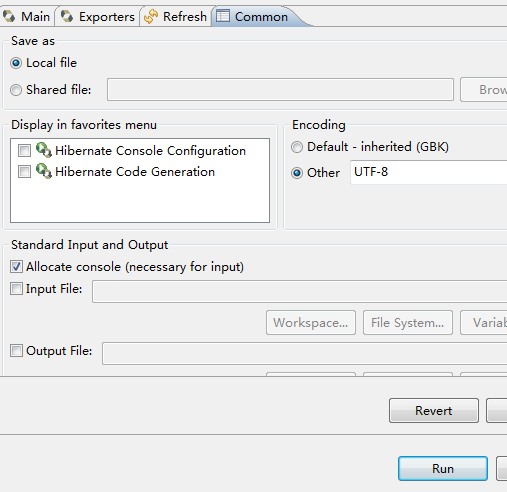
點擊Run。
5.只生成了與數據表對應的實體類Commodity.java,而沒有生成與該實體類對應的映射文件Commodity.hbm.xml,打開實體類
package com.zzh;
// Generated 2016-8-28 9:42:01 by Hibernate Tools 4.3.1.Final

import javax.persistence.Column;
import javax.persistence.Entity;
import javax.persistence.GeneratedValue;
import static javax.persistence.GenerationType.IDENTITY;
import javax.persistence.Id;
import javax.persistence.Table;

/**
 * Commodity generated by hbm2java
 */
@Entity
@Table(name = "commodity", catalog = "zzh")
public class Commodity implements java.io.Serializable {

    private Integer id;
    private String name;
    private Double price;
    private String unit;
    private String category;
    private String description;
    private Integer seller;

    public Commodity() {
    }

    public Commodity(String name, Double price, String unit, String category, String description, Integer seller) {
        this.name = name;
        this.price = price;
        this.unit = unit;
        this.category = category;
        this.description = description;
        this.seller = seller;
    }

    @Id
    @GeneratedValue(strategy = IDENTITY)

    @Column(name = "Id", unique = true, nullable = false)
    public Integer getId() {
        return this.id;
    }

    public void setId(Integer id) {
        this.id = id;
    }

    @Column(name = "name", length = 100)
    public String getName() {
        return this.name;
    }

    public void setName(String name) {
        this.name = name;
    }

    @Column(name = "price", precision = 11)
    public Double getPrice() {
        return this.price;
    }

    public void setPrice(Double price) {
        this.price = price;
    }

    @Column(name = "unit", length = 50)
    public String getUnit() {
        return this.unit;
    }

    public void setUnit(String unit) {
        this.unit = unit;
    }

    @Column(name = "category", length = 100)
    public String getCategory() {
        return this.category;
    }

    public void setCategory(String category) {
        this.category = category;
    }

    @Column(name = "description", length = 1000)
    public String getDescription() {
        return this.description;
    }

    public void setDescription(String description) {
        this.description = description;
    }

    @Column(name = "seller")
    public Integer getSeller() {
        return this.seller;
    }

    public void setSeller(Integer seller) {
        this.seller = seller;
    }

}
使用@Entity注解,表示當前類為實體Bean,需要進行持久化,使用@Table注解實現數據表 commodity 與持久化類Commodity之間的映射,@Id注解指定當前持久化類的ID屬性,使用@GeneratedValue注解指定ID表示生成器,使用@Column注解指定當前屬性所對應的數據表中的字段,name指定字段名;unique指定是否為唯一,nullable指定是否可為null。
6.在hibernate.cfg.xml中配置映射信息
<mapping class="com.zzh.Commodity"/>
一定要注意mapping後面是class,如果是配置*.hbm.xml就是resource。
7.添加會話工廠類HibernateUtil以獲取Session
8.用JUnit創建一個類ZhuShi.java用於測試
package anno;
import static org.junit.Assert.*;
import java.util.List;
import org.hibernate.Query;
import org.hibernate.Session;
import org.junit.After;
import org.junit.Before;
import org.junit.Test;
import org.hibernate.annotations.*;
import com.zzh.Commodity;
import com.zzh.utl.HibernateUtil;
public class ZhuShi {
Session session = null;
@Before
public void setUp() throws Exception {
session = HibernateUtil.getSession();
}
@After
public void tearDown() throws Exception {
session.close();
}
@Test
public void test() {
String hql = " from Commodity ";
Query query = session.createQuery(hql);
List<Commodity> c = query.list();
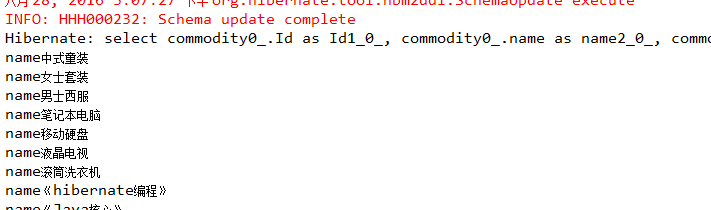
for (Commodity commodity : c) {
System.out.println("name"+commodity.getName());
}
}
}
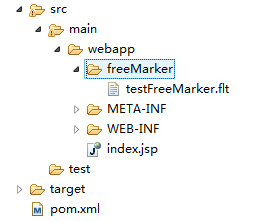
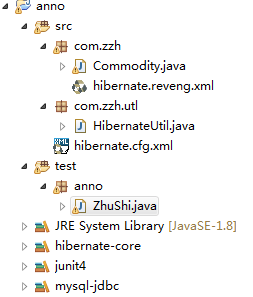
9.整個文件已經形成
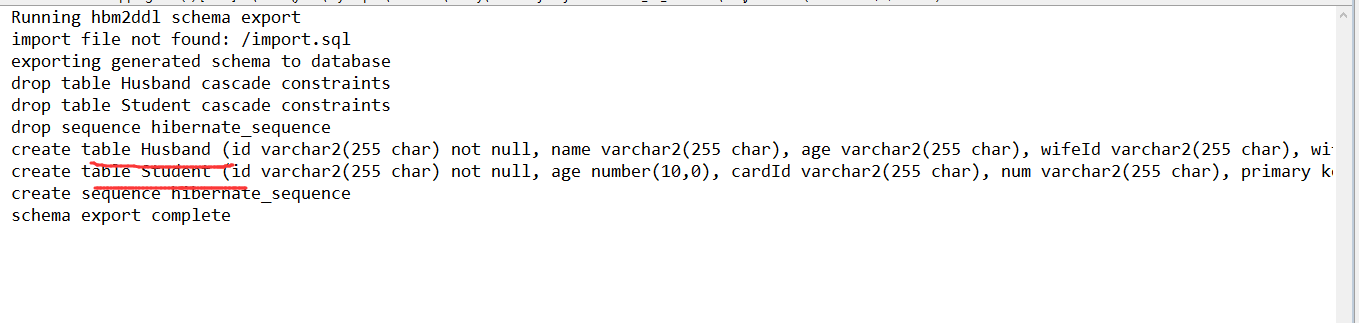
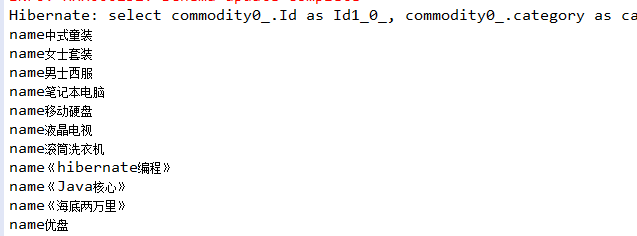
運行測試,得到結果
10.總結
原來大量的*.hbm.xml文件不再需要了,所有的配置都通過Annotation注解直接在持久化類中配置完成。
11.個人想法
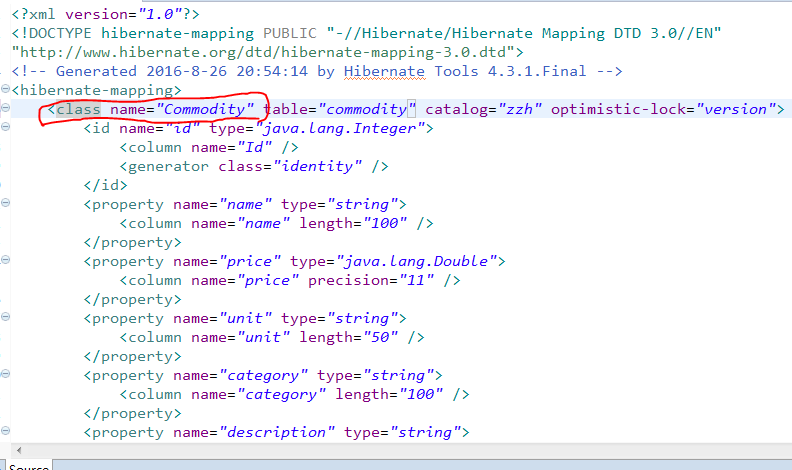
之前我有過不用注解後來因為路徑調試半天的經歷,那時自己也是笨,我就跟大家講講;我當時也是用反向工程生成實體類,還有*.hbm.xml文件,當時的hbm.xml文件如下所示:(注意看我紅筆畫出的部分)
由於是工具幫我生成的我也沒在意,然後高高興興去配置cfg.xml文件去了(如下所示):
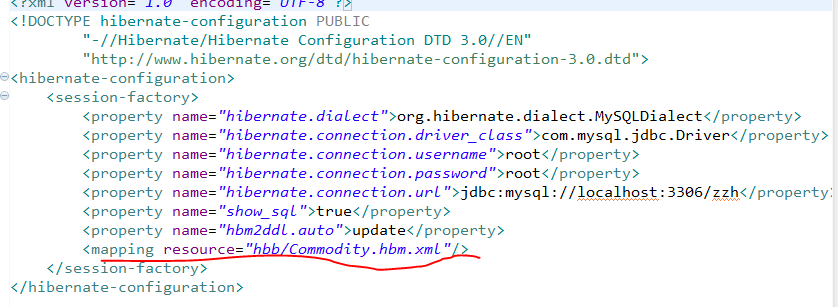
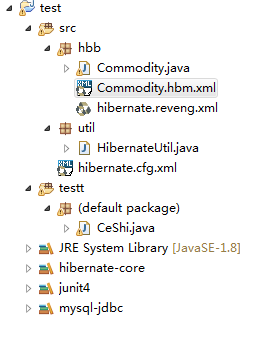
全部文件如下所示:
以為一切順利,便用JUnit進行測試:
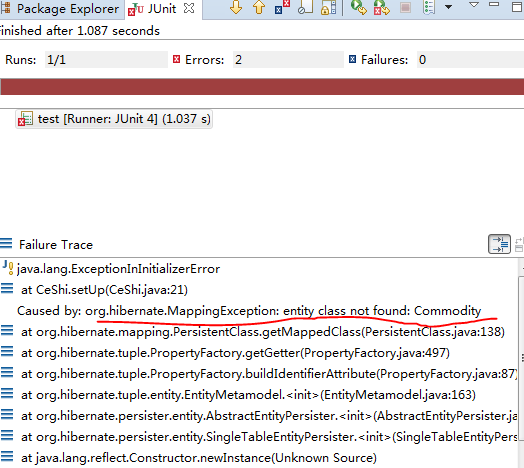
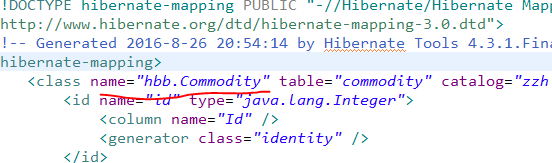
實體類無法找到,坑爹呀,我都是按工具一步一步來的呀,為什麼會這樣,後來才發現*.hbm.xml中class便簽中name出錯了,必須加上包名才行:
再進行測試:
總算成功了,這不代表*.hbm.xml不好,其實主要還是怪自己經驗不足,亂用工具,初學者還是多用*.hbm.xml文件要好,畢竟能更好掌握其中的元素和映射信息與方式,不過就以後熟練後,還是用注釋更為簡潔和方便管理。
在這之後我會繼續寫一些關聯映射的注釋案例(比如雙向一對多和雙向多對多),如果你覺得還不錯,請繼續關注我或幫我點贊,謝謝觀看!
---參考資料《Struts2+Spring3+Hibernate框架技術精講與整合案例》