一個程序可以被劃分為多個獨立的任務,每個獨立的任務可以由線程來驅動執行;
一個進程可以包含若干個線程,即擁有若干個並發執行的任務,在程序運行時,CPU時間被劃分成片段分配給所有的線程;
在單處理器的機器上使用多線程可以提高性能的原因在於任務阻塞;
為機器增加處理器可以顯著加快使用多線程程序的運行速度;
使用線程機制使程序更加透明、可擴展,代碼不需要知道它是運行在單處理器還是多處理器上;
創建一個發射類LiftOff實現Runnable接口:

以上代碼中調用了Thread.yield()方法,該方法的作用是建議線程調度器切換到其它線程執行任務,注意,只是建議,不保證采納;
創建完任務類之後,可以在Main函數中使用LiftOff對象創建一個Thread對象,並調用其start方法啟動該線程,如下:
package concurrency;

public class BasicThreads {
    public static void main(String[] args) {
        Thread t = new Thread(new LiftOff());
        t.start();
        System.out.println(Thread.currentThread() + "Waiting for LiftOff");
    }
}
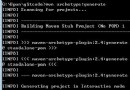
打印結果如下,注意該程序中是同時存在兩個線程(main和Thread-0)在運行的;
另外關於Thread對象的打印形式為[Thread-0,5,main],其中依次代表[線程名,線程優先級、線程組名], 具體可查看Thread類的toString方法;
Thread[main,5,main]Waiting for LiftOff
Thread[Thread-0,5,main]#0(9),
Thread[Thread-0,5,main]#0(8),
Thread[Thread-0,5,main]#0(7),
Thread[Thread-0,5,main]#0(6),
Thread[Thread-0,5,main]#0(5),
Thread[Thread-0,5,main]#0(4),
Thread[Thread-0,5,main]#0(3),
Thread[Thread-0,5,main]#0(2),
Thread[Thread-0,5,main]#0(1),
Thread[Thread-0,5,main]#0(Liftoff!),
最後,提個醒,有些人在創建完任務類後,直接在main函數中新建一個任務類對象,並調用其run方法,如下代碼,運行正常,也看到了run方法中的運行結果,以為創建了線程,其實這種使用方式是錯誤的,並沒有創建任何新線程,只是在main線程裡調用執行了一個普通對象的方法而已;
package concurrency;

public class MainThread {
    public static void main(String[] args) {
        LiftOff launch = new LiftOff();
        launch.run();
    }
}
對比通過實現Runnable接口的方式,該方式不建議使用,因為java的單繼承機制,通常通過實現接口比繼承會更好點;
另外還可以通過內部內部類將線程代碼隱藏在類中,如下寫法;
java.util.concurrent包中的執行器Executors可以幫助我們管理Thread對象,簡化並發編程,如下,可以使用Executors類中的newCachedThreadPool靜態方法創建一個可緩存的線程池,並用其執行相關任務;
package concurrency;

import java.util.concurrent.*;

public class CachedThreadPool {
    public static void main(String[] args) {
        ExecutorService exec = Executors.newCachedThreadPool();
        for (int i = 0; i < 5; i++)
            exec.execute(new LiftOff());
        exec.shutdown();
    }
}
在Executors類中,除了通過newCachedThreadPool創建線程池外,還可以創建通過以下方法創建其它種類的線程池:
newFixedThreadPool:固定大小度的線程池
newSingleThreadExecutor:單線程線程池
newScheduledThreadPool:執行定時和周期性任務
實現Callable接口的類同樣是一個任務類,與實現Runnable接口的區別是該方式可以有返回值;
在實現Callable接口的類中,線程執行的方法是call方法(有返回值),而不是run方法;
在main方法中可以通過調用ExecutorService的submit方法,返回一個Future對象,通過該對象可以獲取線程運行的返回值,注意需要等Future完成後才能取得結果,可以通過isDone方法來查詢Future是否已完成,或者直接調用get方法來獲取(會阻塞,直到結果准備就緒)。
package concurrency;

import java.util.concurrent.*;
import java.util.*;

class TaskWithResult implements Callable<String> {
    private int id;

    public TaskWithResult(int id) {
        this.id = id;
    }

    public String call() {
        return "result of TaskWithResult " + id;
    }
}

public class CallableDemo {
    public static void main(String[] args) {
        ExecutorService exec = Executors.newCachedThreadPool();
        ArrayList<Future<String>> results = new ArrayList<Future<String>>();
        for (int i = 0; i < 10; i++)
            results.add(exec.submit(new TaskWithResult(i)));
        for (Future<String> fs : results)
            try {
                System.out.println(fs.get());
            } catch (InterruptedException e) {
                System.out.println(e);
                return;
            } catch (ExecutionException e) {
                System.out.println(e);
            } finally {
                exec.shutdown();
            }
    }
}
實際上,個人感覺創建線程就兩種方式,通過實現Runnable接口和實現Callable接口,Thread實際上也是實現了Runnable接口的類;
daemon線程是指在程序運行的時候,在後台提供一種通用服務的線程,這種線程的優先級非常低;
當所有其他線程結束時,會殺死進程中的所有守護線程;
可以在線程啟動之前通過setDaemon(true)方法將線程設置為守護線程,注意只能在啟動之前設置;
通過守護線程創建的線程會被自動設置為守護線程;
可以通過isDaemon方法來判斷一個線程是否是守護線程;
舉個守護線程的例子,代碼如下,當main線程運行結束後,所有的守護線程也被終止:
package concurrency;

import java.util.concurrent.*;

public class SimpleDaemons implements Runnable {
    public void run() {
        try {
            while (true) {
                TimeUnit.MILLISECONDS.sleep(100);
                System.out.println(Thread.currentThread() + " " + this);
            }
        } catch (InterruptedException e) {
            System.out.println("sleep() interrupted");
        }
    }

    public static void main(String[] args) throws Exception {
        for (int i = 0; i < 10; i++) {
            Thread daemon = new Thread(new SimpleDaemons());
            daemon.setDaemon(true); // Must call before start()
            daemon.start();

        }
        System.out.println("All daemons started");
        TimeUnit.MILLISECONDS.sleep(175);
    }
}
一個線程(T1)可以在其它線程(T2)之上調用join方法,結果是T1線程被掛起,等待T2線程執行完畢(T2.isAlive()==false),然後繼續執行T1線程;
也可以在join方法上加一個超時參數,保證join方法在指定時間內總能返回;
join方法可以被中斷,如調用T2.interrupt()方法,中斷後,join方法可以立即返回;
代碼實例:
package concurrency;

class Sleeper extends Thread {
    private int duration;

    public Sleeper(String name, int sleepTime) {
        super(name);
        duration = sleepTime;
        start();
    }

    public void run() {
        try {
            sleep(duration);
        } catch (InterruptedException e) {
            System.out.println(getName() + " was interrupted. "
                    + "isInterrupted(): " + isInterrupted());
            return;
        }
        System.out.println(getName() + " has awakened");
    }
}

class Joiner extends Thread {
    private Sleeper sleeper;

    public Joiner(String name, Sleeper sleeper) {
        super(name);
        this.sleeper = sleeper;
        start();
    }

    public void run() {
        try {
            sleeper.join();
        } catch (InterruptedException e) {
            System.out.println("Interrupted");
        }
        System.out.println(getName() + " join completed");
    }
}

public class Joining {
    public static void main(String[] args) {
        Sleeper sleepy = new Sleeper("Sleepy", 1500), grumpy = new Sleeper(
                "Grumpy", 1500);
        Joiner dopey = new Joiner("Dopey", sleepy), doc = new Joiner("Doc",
                grumpy);
        grumpy.interrupt();

        try {
            sleepy.join();
        } catch (InterruptedException e) {

            e.printStackTrace();
        }
        System.out.println("main thread continue until sleepy thread over");
    }
}
在該示例中,我們把dopey、main線程加入到sleepy線程,doc線程加入到grumpy線程,結果如下:
grumpy線程被中斷,然後join方法立即返回,打印Doc join completed,在grumpy線程中,isInterrupted()之所以打印false是因為異常捕獲時把該標志清理了;
sleepy線程執行完畢後,join方法返回,繼續執行dopey線程和main線程未完成部分,打印“main thread continue until sleepy thread over”和“Dopey join completed”;
在main方法中使用try-catch不能捕獲其它線程產生的異常,如下示例,RuntimeException未被處理:
package concurrency;

import java.util.concurrent.*;

public class ExceptionThread implements Runnable {
    public void run() {
        throw new RuntimeException();
    }

    public static void main(String[] args) {
        try {
            ExecutorService exec = Executors.newCachedThreadPool();
            exec.execute(new ExceptionThread());
        } catch (RuntimeException ue) {

            System.out.println("Exception has been handled!");
        }
    }
}
在JAVA SE5之前,可以使用線程組捕獲異常,在JAVA SE5之後可以用Executor來解決這個問題;
只需要寫一個異常處理類並實現Thread.UncaughtExceptionHandler接口,然後在創建線程的時候,設置該線程的未捕獲異常處理器為該類實例,通過setUncaughtExceptionHandler方法設置,如下代碼;
除了為每個線程設置專門的未捕獲異常處理器外,還可以設置默認的未捕獲異常處理器,當系統檢查到某個線程沒有專門的未捕獲異常處理器的時候,會使用默認的未捕獲異常處理器;
package concurrency;

import java.util.concurrent.*;

public class SettingDefaultHandler {
  public static void main(String[] args) {
    Thread.setDefaultUncaughtExceptionHandler(new MyUncaughtExceptionHandler());
    ExecutorService exec = Executors.newCachedThreadPool();
    exec.execute(new ExceptionThread());
  }
}
參考資料:JAVA編程思想-4