在工作流開發中,郵件通知是必不可少。這篇文章中,我將是使用WF4.0一步一步打造一個功能完整的郵件通知節點。
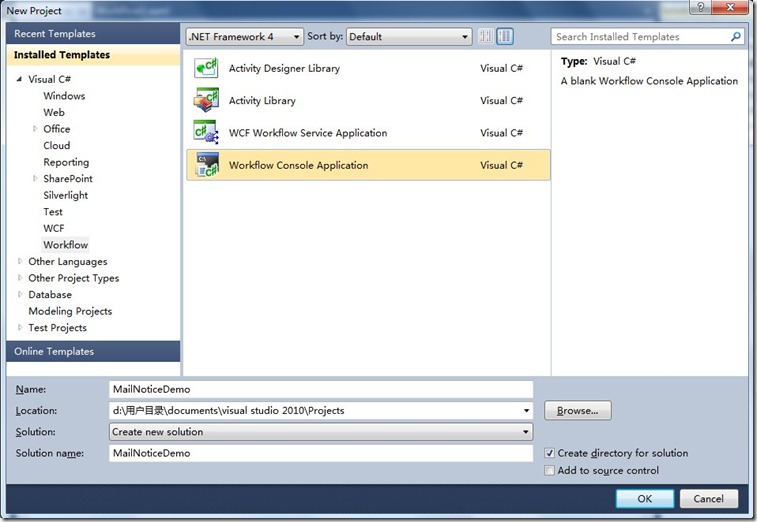
首先,新建一個WorkflowConsoleApplication項目,改名為MailNoticeDemo,如下圖:
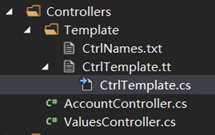
添加一個CodeActivity活動命名為MailNotice,添加一個ActivityDesigner活動命名為MailNoticeDesigner。項目結構如下圖:
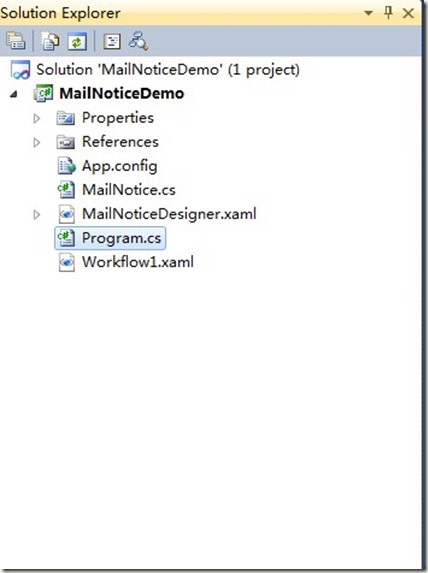
MailNotice 用於寫發送郵件的業務邏輯,MailNoticeDesigner用於設計活動的界面,現在MailNotice和MailNoticeDesigner 是沒有任 何關聯的,我們在MailNotice類上添加[Designer(typeof(MailNoticeDesigner))],關聯 MailNotice和MailNoticeDesigner,還需要引入 System.ComponentModel命名空間,代碼如下。
using System.Activities;

using System.ComponentModel;

using System.Activities.Presentation.Metadata;

using System.Activities.Presentation.PropertyEditing;

using System;

namespace MailNoticeDemo

{

[Designer(typeof(MailNoticeDesigner))]

public sealed class MailNotice : CodeActivity

{

                  ………

}
這時,MailNotice和MailNoticeDesigner活動中還沒有進行編碼。在項目中引入一個郵件發送類MailHelper.cs,編寫MailNotice代碼, 如下:
[Designer(typeof(MailNoticeDesigner))]

  public sealed class MailNotice : CodeActivity

  {

      public InArgument<string> Receive { get; set; }

      public InArgument<string> Subject { get; set; }

      public InArgument<string> Content { get; set; }

      public string Attachment { get; set; }

      static MailNotice()

      {

          AttributeTableBuilder builder = new AttributeTableBuilder();

          builder.AddCustomAttributes(typeof(MailNotice), "Attachment", new EditorAttribute(typeof (FilePickerEditor), typeof(DialogPropertyValueEditor)));

          MetadataStore.AddAttributeTable(builder.CreateTable());

      }


      // If your activity returns a value, derive from CodeActivity<TResult>

      // and return the value from the Execute method.

      protected override void Execute(CodeActivityContext context)

      {


          SMTP smtp = new SMTP("你郵箱地址·", "顯示的名稱", new string[] { Receive.Get(context) },  null, null, Subject.Get(context), Content.Get(context), new string[] { Attachment }, "郵件發送服務", 25, "你郵 箱地址·", "你郵箱密碼", false);

          try

          {

              smtp.Send();

          }

         catch (Exception ex)

          {

             string error = ex.Message;

              if (ex.InnerException != null)

              {

                   error = ex.InnerException.Message;

              }

               Console.WriteLine("郵箱發送失敗: " + error);

           }

       }

  }
設計MailNoticeDesigner活動的UI,設計UI之前讓你可以先了解一下ExpressionTextBox。詳見:expressiontextbox-101
通過expressiontextbox和WPF的控件,設計UI界面如下:
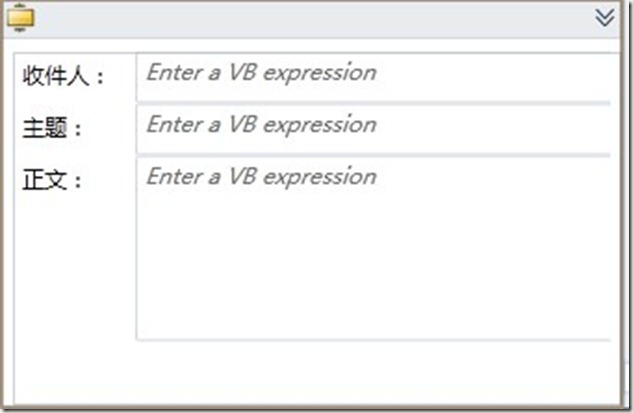
Xaml代碼如下:
<sap:ActivityDesigner x:Class="MailNoticeDemo.MailNoticeDesigner"

     xmlns="http://schemas.microsoft.com/winfx/2006/xaml/presentation"

     xmlns:x="http://schemas.microsoft.com/winfx/2006/xaml"

     xmlns:sap="clr-namespace:System.Activities.Presentation;assembly=System.Activities.Presentation"

     xmlns:sapc="clr- namespace:System.Activities.Presentation.Converters;assembly=System.Activities.Presentation"

     xmlns:sapv="clr-namespace:System.Activities.Presentation.View;assembly=System.Activities.Presentation"

                       mc:Ignorable="d"  xmlns:d="http://schemas.microsoft.com/expression/blend/2008" xmlns:mc="http://schemas.openxmlformats.org/markup- compatibility/2006" d:DesignHeight="221" d:DesignWidth="336">

     <sap:ActivityDesigner.Resources>

         <ResourceDictionary x:Uid="ResourceDictionary_1">

             <sapc:ArgumentToExpressionConverter x:Uid="sadv:ArgumentToExpressionConverter_1"  x:Key="ArgumentToExpressionConverter" />

         </ResourceDictionary>

         </sap:ActivityDesigner.Resources>

         <Grid Height="190" Width="328">

         <Grid.RowDefinitions>

             <RowDefinition Height="28"></RowDefinition>

             <RowDefinition  Height="28"></RowDefinition>

             <RowDefinition  Height="54"></RowDefinition>

             <RowDefinition Height="47" />

             <RowDefinition Height="31*" />

         </Grid.RowDefinitions>

         <Grid.ColumnDefinitions>

             <ColumnDefinition Width=".2*"></ColumnDefinition>

             <ColumnDefinition Width=".8*"></ColumnDefinition>

         </Grid.ColumnDefinitions>

         <Label Content="收件人" Height="28" HorizontalAlignment="Left" Grid.Row="0" Grid.Column="0" Name="label1"  VerticalAlignment="Top" />

         <sapv:ExpressionTextBox  Grid.Row="0" Grid.Column="1"

                                  OwnerActivity="{Binding Path=ModelItem}"

                                  Expression="{Binding Path=ModelItem.Receive,  Mode=TwoWay, Converter={StaticResource ArgumentToExpressionConverter}, ConverterParameter=In }"

                                  UseLocationExpression="False"   />

         <Label Content="主題:"  Grid.Row="1" Grid.Column="0"  HorizontalAlignment="Left"  Name="label2"  VerticalAlignment="Top" />

         <sapv:ExpressionTextBox  Grid.Row="1" Grid.Column="1"

                                  OwnerActivity="{Binding Path=ModelItem}"

                                  Expression="{Binding Path=ModelItem.Subject,  Mode=TwoWay, Converter={StaticResource ArgumentToExpressionConverter}, ConverterParameter=In }"

                                  UseLocationExpression="False"   />

         <Label Content="正文:" Grid.Row="2" HorizontalAlignment="Left"  Name="label3" VerticalAlignment="Top"    />

         <sapv:ExpressionTextBox  Grid.Row="2" Grid.Column="1"

                                  OwnerActivity="{Binding Path=ModelItem}"

                                  Expression="{Binding Path=ModelItem.Content,  Mode=TwoWay, Converter={StaticResource ArgumentToExpressionConverter}, ConverterParameter=In }"

                                  UseLocationExpression="False" Margin="0,0,0,1"  Grid.RowSpan="2" />


     </Grid>

</sap:ActivityDesigner>
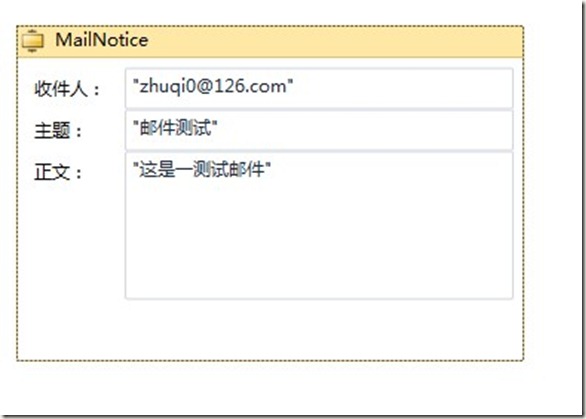
這樣我們就完成了這個郵件活動。測試一下。在Workflow1中拖入這個活動。輸入收件人、主題、正文,如下圖:
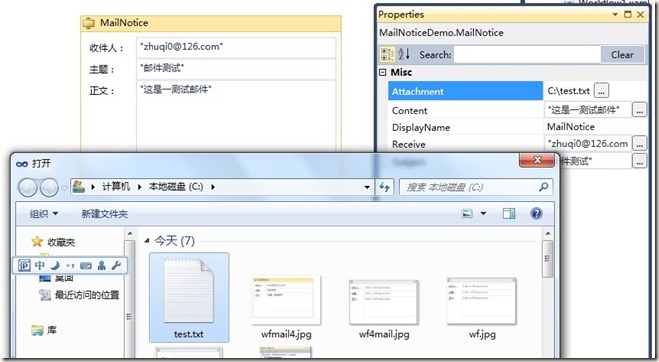
查看原圖(大圖) 設置附件,如下圖:
啟動工作流發送郵件:
WorkflowInvoker.Invoke(new Workflow1());
你會發現這個活動的圖標不夠美觀,讓我們修改一下這個自定義活動的圖標。 在MailNoticeDesigner.xaml中加入下面代碼
<sap:ActivityDesigner.Icon>
    <DrawingBrush>

       <DrawingBrush.Drawing>

         <ImageDrawing>

           <ImageDrawing.Rect>

             <Rect Location="0,0" Size="16,16" ></Rect>

           </ImageDrawing.Rect>

           <ImageDrawing.ImageSource>

             <BitmapImage UriSource="mail.ico" ></BitmapImage>

           </ImageDrawing.ImageSource>

         </ImageDrawing>

       </DrawingBrush.Drawing>

     </DrawingBrush>

   </sap:ActivityDesigner.Icon>
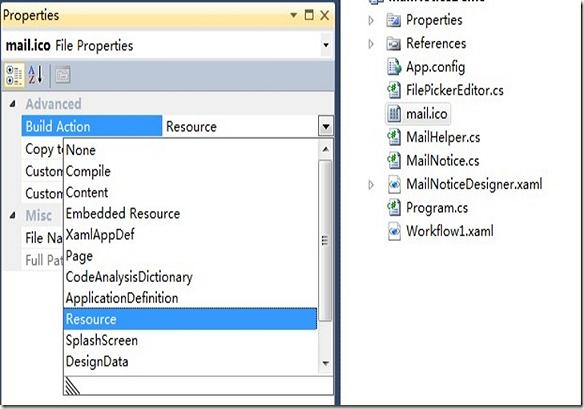
設置圖標mail.ico,將Build action設置為Resource,如下圖:
看一下我們最終打造的郵件活動:
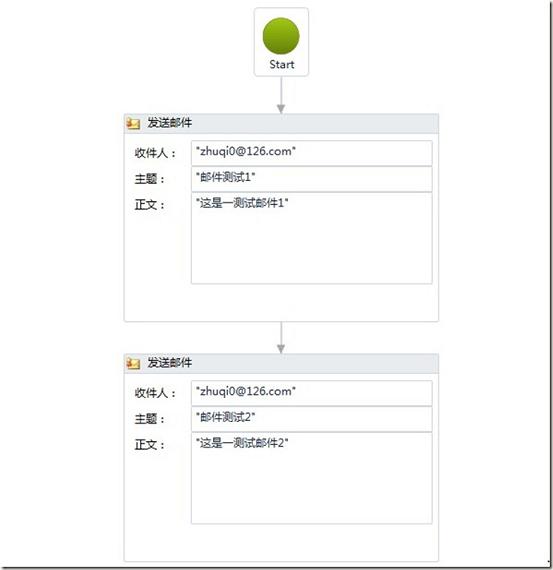
總結:這篇文章詳細講解了創建WF4.0一個自定義活動的完整過程,雖然很簡單,但對創建自定義活動很有參考價值。
代碼:http://files.cnblogs.com/zhuqil/MailNoticeDemo.rar