版本
1.2 [2006-11-12]
簡介
本教程演示如何基於NBearV3的IoC模塊開發一個Web應用程序的基本過程。本教程同時演示使用NBear.Tools.DbToEntityDesign.exe工具從現有的數據庫生成設計實體的過程。
注:在閱讀本文之前,建議讀者先閱讀《NBearV3 Step by Step教程——ORM篇》以掌握NBearV3中有關ORM的基本知識。
目標
通過本教程,讀者應能夠掌握使用NBearV3的IoC模塊的基本過程,以及使用NBear.Tools.DbToEntityDesign.exe工具,對已有數據庫結構的項目,使用NBearV3的ORM組件進行數據持久化的過程。
代碼
本教程演示創建的所有工程和代碼,包含於可以從sf.net下載的NBearV3最新源碼zip包中的tutorials\IoC_Tutorial目錄中。因此,在使用本教程的過程中如有任何疑問,可以直接參考這些代碼。
時間
<45分鐘。
正文
Step 1 下載NBearV3最新版本
1.1 訪問http://sf.net/projects/nbear,下載NBearV3的最新版本到本地目錄。
1.2 將下載的zip文件解壓至C:\,您將看到,加壓後的NBearV3目錄中包括:dist、doc、cases、src等目錄。其中,在本教程中將會使用的是dist目錄,該目錄下包含所有release編譯版本的dll和exe。
Step 2 創建應用程序解決方案
2.1 打開VS2005開發環境,新建一個空的解決方案sln。
2.2 向sln中添加兩個新建的C#類庫工程,兩個類庫工程的名稱分別為EntityDesigns和Entities,刪除IDE自動創建的Class1.cs文件。
2.3 向sln中再添加兩個新建的C#類庫工程,兩個類庫工程的名稱分別為ServiceInterfaces和ServiceImpls,刪除IDE自動創建的Class1.cs文件。
2.4 向sln中新建一個名叫website的ASP.NET Web應用程序,為website添加一個Web.config文件。
Step 3 設計實體、關系及元數據
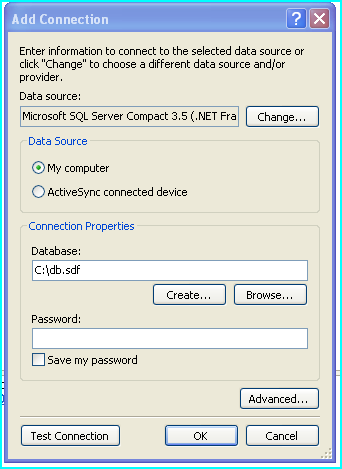
3.1 運行dist\ NBear.Tools.DbToEntityDesign.exe,在Connection String文本框中輸入下面的連接子串:
Server=(local);Database=Northwind;Uid=sa;Pwd=sa
我們將從SQL Server 2000自帶的演示數據庫Northwind,為我們需要的某些表和視圖生成設計實體。
點擊Connect按鈕,連接上數據庫後,從左邊的Tables和Views列表中分別選擇下面這些表或視圖(因為這裡主要是演示,我們只選擇和Category和Product相關的幾個表和視圖):Categories, Products, Products by Category。點擊Generate Entities Design按鈕,在代碼生成文本框內的任意位置右鍵單擊鼠標,並選擇Copy to ClipBoard,這將能把所有的代碼復制到剪貼板。
3.2 為EntityDesigns工程添加到dist目錄下的NBear.Common.Design.dll的引用,因為每一個設計實體接口必須繼承自NBear.Common.Design.Entity這個接口。在EntitiyDesigns工程中新建一個代碼文件EntityDesigns.cs,添加using System和using NBear.Common.Design設置namespace為EntityDesigns。並將剛才從DbToEntityDesign復制的代碼粘貼至該文件中。
此時,EntityDesigns.cs文件中的內容應該象下面這樣:
using System;

using NBear.Common.Design;


namespace EntityDesigns

{

  public interface Categories : Entity

  {

    [PrimaryKey]

    int CategoryID { get; }

    [SqlType("nvarchar(15)")]

    string CategoryName { get; set; }

    [SqlType("ntext")]

    string Description { get; set; }

    byte[] Picture { get; set; }

  }


  //…

}
您會注意到,生成的代碼中,數據庫中的表或視圖名稱對應設計實體的名稱,字段名稱對應設計實體的屬性名稱,如果名稱中包含空格,空格會被轉換為_nbsp_。同時,是主鍵的標字段對應的屬性,會自動包含PrimaryKey這個Attribute,而所有的文本類型的字段,則會自動包含從數據庫中繼承的數據類型和長度。另外,所有從視圖生成的實體接口會包含ReadOnly這個Attribute,代表,該實體是一個只能用來從數據庫取數據,不能用來保存數據到數據庫的實體。
3.3 下面,我們可以對這些生成的代碼做一下改造,讓我們看著更舒服。比如,用_nbsp_代表空格多少影響視覺審美,我們可以給設計實體添加MappingName這個Attribute,來修改實體接口名稱,但是,保證實體還是對應數據庫中的這個表或視圖。例如,對於Products_nbsp_by_nbsp_Category視圖,我們可以將它修改為下面的樣子:
[ReadOnly]我們可能同樣不喜歡實體名稱是復數的英文單詞,所以,我們也可以象下面這樣把Categories實體的名稱改為Category:
[MappingName("Products by Category")]
public interface ProductsByCategory : Entity
{
[SqlType("nvarchar(15)")]
string CategoryName { get; }
[SqlType("nvarchar(40)")]
string ProductName { get; }
[SqlType("nvarchar(20)")]
string QuantityPerUnit { get; }
short UnitsInStock { get; }
bool Discontinued { get; }
}
[MappingName("Categories")]
public interface Category : Entity
{
[PrimaryKey]
int CategoryID { get; }
[SqlType("nvarchar(15)")]
string CategoryName { get; set; }
[SqlType("ntext")]
string Description { get; set; }
byte[] Picture { get; set; }
}
我們可以用同樣的方法,修改所有的實體名稱,和屬性名稱。屬性名稱同樣支持MappingName這個Attribute。我們將所有的實體名稱的復數改為單數,並去掉_nbsp_。現在,所有的設計實體應該象下面這個樣子:
using System;
using NBear.Common.Design;
namespace EntityDesigns
{
[MappingName("Categories")]
public interface Category : Entity
{
[PrimaryKey]
int CategoryID { get; }
[SqlType("nvarchar(15)")]
string CategoryName { get; set; }
[SqlType("ntext")]
string Description { get; set; }
byte[] Picture { get; set; }
[Query(Where="{CategoryID} = @CategoryID", OrderBy="{ProductName}", LazyLoad=true)]
[Contained]
Product[] Products
{
get;
set;
}
}
[MappingName("Products")]
public interface Product : Entity
{
[PrimaryKey]
int ProductID { get; }
[SqlType("nvarchar(40)")]
string ProductName { get; set; }
int SupplierID { get; set; }
int CategoryID { get; set; }
[SqlType("nvarchar(20)")]
string QuantityPerUnit { get; set; }
decimal UnitPrice { get; set; }
short UnitsInStock { get; set; }
short UnitsOnOrder { get; set; }
short ReorderLevel { get; set; }
bool Discontinued { get; set; }
[Query(Where="{CategoryID} = @CategoryID", LazyLoad=false)]
Category Category
{
get;
set;
}
}
  [ReadOnly]

  [MappingName("Products by Category")]

  public interface ProductsByCategory : Entity

  {

    [SqlType("nvarchar(15)")]

    string CategoryName { get; }

    [SqlType("nvarchar(40)")]

    string ProductName { get; }

    [SqlType("nvarchar(20)")]

    string QuantityPerUnit { get; }

    short UnitsInStock { get; }

    bool Discontinued { get; }

  }
}
3.4 實體和屬性名稱我們改造完了,下面還可以給設計實體添加一點關聯。我們可以注意到,Category和Product是一個明顯的1對多關聯。因此,我們可以像下面這樣,為Category實體添加一個Products屬性,1對多關聯到Product表。
  [MappingName("Categories")]

  public interface Category : Entity

  {

    [PrimaryKey]

    int CategoryID { get; }

    [SqlType("nvarchar(15)")]

    string CategoryName { get; set; }

    [SqlType("ntext")]

    string Description { get; set; }

    byte[] Picture { get; set; }


    [FkQuery("Category", OrderBy="{ProductName}", Contained=true, LazyLoad=true)]

    Product[] Products

    {

      get;

      set;

    }

  }
如果您看過之前的ORM教程,您應該能理解加粗的代碼的意思。它表示Category實體的CategoryID屬性和Product實體的CategoryID關聯,Products屬性的Product按ProductName正序排序,同時,該屬性延遲載入(即到第一次訪問該屬性才載入)。Contained同時代表Products屬性在Category保存或刪除時,會自動級聯保存或刪除。
3.5
ORM教程,您應該能理解加粗的代碼的意思。它表示Category實體的CategoryID屬性和Product實體的CategoryID關聯,Products屬性的Product按ProductName正序排序,同時,該屬性延遲載入(即到第一次訪問該屬性才載入)。Contained同時代表Products屬性在Category保存或刪除時,會自動級聯保存或刪除。
3.5
我們同時也可以給Product添加到Category的引用,因為,在查看一個Product信息時,查看相關的Category是非常常見的。注意,此時我們可以刪掉Product中原來的CategoryID屬性,將它合並到Category屬性中:
  [MappingName("Products")]

  public interface Product : Entity

  {

    [PrimaryKey]

    int ProductID { get; }

    [SqlType("nvarchar(40)")]

    string ProductName { get; set; }

    int SupplierID { get; set; }

    [SqlType("nvarchar(20)")]

    string QuantityPerUnit { get; set; }

    decimal UnitPrice { get; set; }

    short UnitsInStock { get; set; }

    short UnitsOnOrder { get; set; }

    short ReorderLevel { get; set; }

    bool Discontinued { get; set; }


    [FkReverseQuery(LazyLoad = true)]

    [MappingName("CategoryID")]

    Category Category

    {

      get;

      set;

    }

  }
注意,我們沒有添加
ContainedAttribute,因為,我們並不希望一個Category跟隨他的一個Product的更新級聯更新。同時,我們將Category屬性設置為非延遲載入(即實例化Product的同時就載入Category屬性的數據)。
這裡要特別引起注意的是,當兩個實體互相關聯,或者,多個實體循環關聯時,千萬注意不要同時將互相關聯的屬性全都設為LazyLoad=fasle,否則將可能導致循環載入,造成程序死循環。在NBearV3的後續有版本將會引入緩存機制來解決這個問題,但是在這之前,請大家自己注意小心避免。
Step 4 從實體設計代碼生成實體代碼、實體配置文件
4.1 至此,實體的設計就完畢了。編譯EntityDesigns工程。下面我們將從設計實體生成實際的實體代碼和配置文件。注意,這裡和之前的ORM教程不同的是,我們不生成數據庫創建腳本,而直接使用一個已經存在的數據庫Northwind。
4.2 運行dist目錄中的NBear.Tools.EntityDesignToEntity.exe工具,載入EntityDesigns工程編譯生成的EntityDesigns.dll。
4.3 點擊Generate Entities按鈕,將生成的代碼保存到Entities工程中的一個名叫Entities.cs的新代碼文件。並為Entities工程添加到dist\NBear.Common.Common.dll的引用。
4.4 點擊Generate Configuration按鈕,將生成的代碼保存到website工程下的名為EntityConfig.xml的新文件中。
Step 5 使用實體及NBear.Data.Gateway訪問數據庫
5.1 現在我們就可以使用前面生成的實體了。我們先要讓website工程引用Entities工程,以及dist/NBear.Data.dll。
5.2 我們還需要設置website的Web.config文件,添加一個entityConfig section以包含EntityConfig.xml這個實體配置文件,並設置數據庫連接字串。下面是設置完的Web.config,注意,粗體的部分都是我們添加的代碼(注意修改數據庫登錄密碼。):
<?xml version="1.0"?>

<configuration>

<configSections>

  <section name="entityConfig" type="NBear.Common.EntityConfigurationSection, NBear.Common" />

</configSections>

<entityConfig>

  <includes>

   <add key="Sample Entity Config" value="~/EntityConfig.xml" />

  </includes>

</entityConfig>

<appSettings/>

<connectionStrings>

  <add name=" Northwind" connectionString="Server=(local);Database=Northwind;Uid=sa;Pwd=sa" providerName="NBear.Data.SqlServer.SqlDbProvider"/>

</connectionStrings>

<system.web>

    <compilation debug="false" />

    <authentication mode="Windows" />

</system.web>

</configuration>
5.3 好了,到目前為止,實體設置和配置完畢了。下面我們將開始討論IoC模塊的使用。
Step 6 定義Service接口和Service實現
6.1 下面我們開始定義一個基於NBear.IoC的Service。我們先要為ServiceInterfaces工程添加到dist\NBear.Common.dll和dist\NBear.IoC.dll的引用。一個Service由一個接口定義。我們這個Service的功能很簡單,就是我們想獲得一些需要的Category和Product。所以,我們還需要為ServiceInterfaces工程添加到Entities工程的引用。在ServiceInterfaces工程中定義接口ICategoryService和IProductService如下:
using System;

using NBear.IoC.Service;

using Entities;


namespace ServiceInterfaces

{

  public interface ICategoryService : IService

  {

    Category[] GetAllCategories();

    Category GetCategoryByID(int categoryID);

  }

}

using System;

using NBear.IoC.Service;

using Entities;


namespace ServiceInterfaces

{

  public interface IProductService

  {

    Product[] GetAllProducts();

    Product GetProductByID(int productID);

  }

}
注意,基於NBear.IoC的Service,必須從NBear.IoC.Service.IServiceInterface這個接口繼承。
6.2 定義完Service接口,我們還需要實現它。在ServiceImpls工程中,添加到Entities,ServiceInterfaces和到dist\NBear.Common.dll,dist\NBear.Data.dll和dist\NBear.IoC.dll的引用,分別實現這兩個接口如下:
using System;

using NBear.Common;

using NBear.Data;

using Entities;

using ServiceInterfaces;


namespace ServiceImpls

{

  public class CategoryService : ICategoryService

  {

    ICategoryService Members#region ICategoryService Members


    public Category[] GetAllCategories()

    {

      return Gateway.Default.FindArray<Category>(WhereClip.All, OrderByClip.Default);

    }


    public Category GetCategoryByID(int categoryID)

    {

      return Gateway.Default.Find<Category>(categoryID);

    }


    #endregion

  }

}

using System;

using NBear.Common;

using NBear.Data;

using Entities;

using ServiceInterfaces;


namespace ServiceImpls

{

  public class ProductService : IProductService

  {

    IProductService Members#region IProductService Members


    public Product[] GetAllProducts()

    {

      return Gateway.Default.FindArray<Product>(WhereClip.All, OrderByClip.Default);

    }


    public Product GetProductByID(int productID)

    {

      return Gateway.Default.Find<Product>(productID);

    }


    #endregion

  }

}
Step 7 配置Service,使用ServiceFactory,調用Service
7.1 編譯ServiceImpls。我們就可以准備在website中使用Service了。為website添加到Entities、ServiceInterfacs、dist\NBear.Common.dll、dist\NBear.IoC.dll的引用。
注意,這裡無需為website添加到ServiceImpls的引用。想想為什麼?如果website依賴ServiceImpls的實現代碼,那麼就不叫IoC了。IoC的核心是基於容器的依賴注入。換句話說,我們只需要在配置文件中指定一個Service的接口和對應的實現類的位置,從而使得Service的調用者與Service的實現者松散耦合。但是,為了能讓我們的website能根據配置文件找到Service的實現類,我們還是需要復制ServiceImpls編譯輸出的ServiceImpls.dll到website的Bin目錄中。
7.2 接著,我們需要在Web.config中配置IoC容器。NBearV3的IoC組件使用castle作為IoC容器,因此,可以使用標准的castle配置與法進行配置。不過一般,只需要使用下面這樣最簡單的語法就行了:
<?xml version="1.0"?>

<configuration>

  <configSections>

    <section name="entityConfig" type="NBear.Common.EntityConfigurationSection, NBear.Common"/>

    <section name="castle" type="Castle.Windsor.Configuration.AppDomain.CastleSectionHandler, Castle.Windsor"/>

  </configSections>

  <entityConfig>

    <includes>

      <add key="Sample Entity Config" value="~/EntityConfig.xml"/>

    </includes>

  </entityConfig>

 <castle>

  <components>

   <!--You can use standard castle component decleration schema to define service interface impls here-->

   <component id="category service" service="ServiceInterfaces.ICategoryService, ServiceInterfaces" type="ServiceImpls.CategoryService, ServiceImpls"/>

   <component id="product service" service="ServiceInterfaces.IProductService, ServiceInterfaces" type="ServiceImpls.ProductService, ServiceImpls"/>

  </components>

 </castle>

 <appSettings/>

  <connectionStrings>

    <add name="Northwind" connectionString="Server=(local);Database=Northwind;Uid=sa;Pwd=sa" providerName="NBear.Data.SqlServer.SqlDbProvider"/>

  </connectionStrings>

  <system.web>

    <compilation debug="true">

      <assemblies>

        <add assembly="System.Transactions, Version=2.0.0.0, Culture=neutral, PublicKeyToken=B77A5C561934E089"/>

        <add assembly="System.Data.OracleClient, Version=2.0.0.0, Culture=neutral, PublicKeyToken=B77A5C561934E089"/>

        <add assembly="System.Runtime.Remoting, Version=2.0.0.0, Culture=neutral, PublicKeyToken=B77A5C561934E089"/></assemblies></compilation>

    <authentication mode="Windows"/>

  </system.web>

</configuration>
注意加粗的部分,這裡我們添加了一個castle的配置塊,並且配置了兩個我們定義的Service和他們對應的實現。
7.3 接著,在Default.aspx.cs文件中的PageLoad中,添加下面的代碼,訪問Service。
注意,所有的Service只需簡單地從ServiceFactory.GetService<ServiceType>()得到。然後就能使用了。
  protected void Page_Load(object sender, EventArgs e)

  {

    ServiceFactory factory = ServiceFactory.Create();


    IProductService ps = factory.GetService<IProductService>();

    Product[] products = ps.GetAllProducts();

    WriteLine(string.Format("Got all products, {0} in total.", products.Length));


    ICategoryService cs = factory.GetService<ICategoryService>();

    Category[] categories = cs.GetAllCategories();

    WriteLine(string.Format("Got all categories, {0} in total.", categories.Length));


    WriteLine("In each category:");

    foreach (Category item in categories)

    {

      WriteLine(string.Format("ID={0}, Name={1}, Products in category: {2}.", item.CategoryID, item.CategoryName, item.Products.Length));

    }

  }


  private void WriteLine(string str)

  {

    Response.Write(Server.HtmlEncode(str) + "<br /><br />");

  }
正文結束。
附錄
1 關於ServiceFactory.Create()
在website中,您一定注意到,我們使用NBear.IoC.Service.ServiceFactory.Create()方法獲得了ServiceFactory實例,並通過他獲得Service接口的實現類實例。
在實際的項目中,您也無需在一個統一的地方定義全局的ServiceFactory實例引用,可以在每一個需要ServiceFactory實例的地方直接調用ServiceFactory.Create(),因為ServiceFactory.Create()內部實際上使用了Singleton模式,它總是返回的唯一的一個ServiceFactory實例。
同時,除了在website中通過ServiceFactory訪問service之外,在某一個Service的實現代碼中,也可以訪問ServiceFactory.Create(),從而訪問另一個同樣在Web.config的castle塊中配置的service。這樣,當不同的Service實現程序集之間互相調用Service時,只需要互相引用Service Interfaces,Service的實現代碼互相就能避免任何依賴,從而將模塊間的耦合度降至最低。
//本文結束