One 、 install Selenium and ChromeDriver
Two 、 install Geoserver Necessary plug-ins
3、 ... and 、 About Selenium in XPath Use skills
Four 、 scripting
First , Make a statement , The steps I completed here belong to semi-automatic , I jokingly call it “ Supervised semi-automatic ” Script . The specific reasons will be explained in detail later .
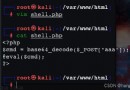
One 、 install Selenium and ChromeDriverinstall Selenium:
pip install seleniuminstall ChromeDriver
ChromeDriver Download address : chromedirver.
Be careful : Download the version number with yourself Chrome Same version number
Two 、 install Geoserver Necessary plug-insBe careful : Installed geoserver The plug-in version should be consistent with the installed geoserver The version number is exactly the same , Otherwise, an error will be reported
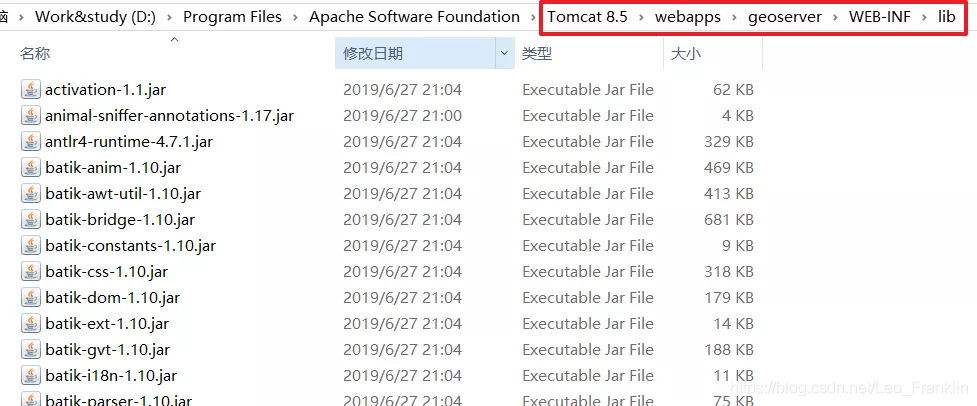
1. install Mongodb plug-in unit :
Take my local geoserver Version as an example :
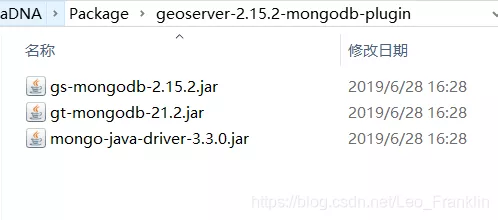
After decompression jar file
What will be obtained jar Paste the file here , restart tomcat The server can be installed
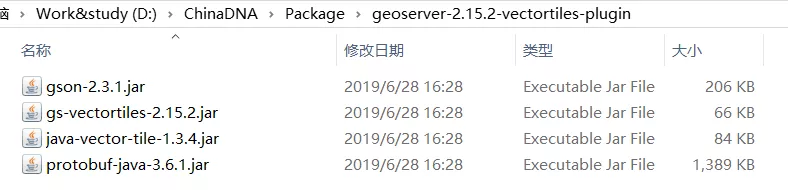
2. Install the vector plug-in
This is what it looks like after downloading and decompressing the plug-in from the official website , The installation method is the same as Mongo The plug-in is the same
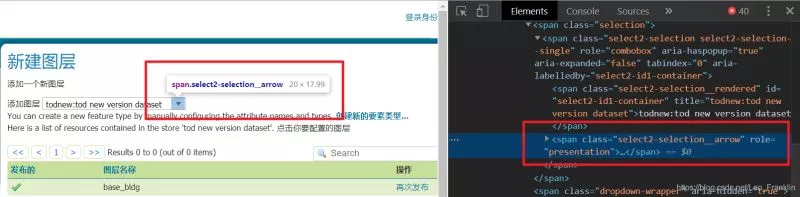
1. Press F12 open Chrome Debugging tools for , Select element selection tool , As shown in the figure below :

2. Select the element you want to operate , As shown below : Insert picture description here
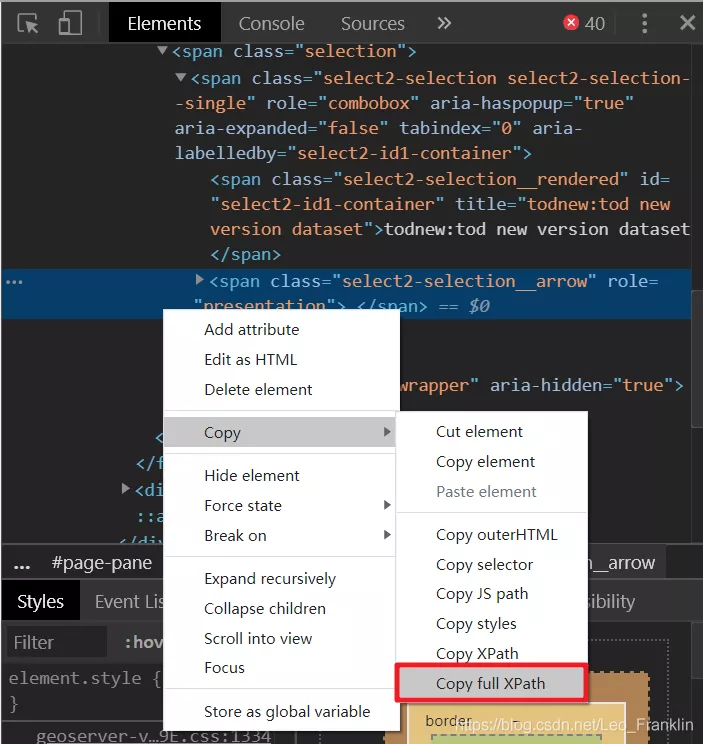
3. Right click Copy, Choose to copy the complete XPath route , In this way, it can be accurately referenced into the code .
The complete code is as follows :
from selenium import webdriverfrom selenium.webdriver.support.ui import Selectimport timecount = 0 # Used to count the number of published layers wd = webdriver.Chrome()wd.implicitly_wait(5) # Hidden waiting wd.get('http://localhost:8080/geoserver/web/') # Link local geoserverwd.find_element_by_id("username").send_keys("admin") # Fill in the user name wd.find_element_by_id("password").send_keys("geoserver") # Fill in the password wd.find_element_by_css_selector(".positive").click()time.sleep(1)wd.find_element_by_xpath('//*[@id="navigation"]/li[2]/ul/li[4]/a/span').click() # Select layer page time.sleep(1)wd.find_element_by_xpath('//*[@id="page"]/div[1]/div[2]/ul/li[1]/a').click() # New layer time.sleep(1)select = Select(wd.find_element_by_css_selector(".select2-hidden-accessible")) # Choose a workspace time.sleep(1)select.select_by_index(4) # The number here is adjusted according to the demand elements = wd.find_elements_by_xpath('/html/body/div[2]/div/div[2]/div[2]/div/div[2]/div/table/tbody/tr[*]/td[2]/span')# Statistics MongoDB Number of layers to be published in for element in elements: print(element.text) count = count + 1print(count)wd.find_element_by_xpath('//*[@id="navigation"]/li[2]/ul/li[4]/a/span').click() # Return to the layers page for i in range(1, count): # there count Don't have to , Directly specify the scope wd.find_element_by_xpath('//*[@id="page"]/div[1]/div[2]/ul/li[1]/a').click() # New layer time.sleep(1) select = Select(wd.find_element_by_css_selector(".select2-hidden-accessible")) # Choose a workspace time.sleep(1) select.select_by_index(14) # The number here is adjusted according to the demand time.sleep(1) wd.find_element_by_xpath('/html/body/div[2]/div/div[2]/div[2]/div/div[2]/div/table/tbody/tr['+ str(i) + ']/td[3]/span/a/span').click() # Click to enter the release configuration time.sleep(1) wd.find_element_by_xpath('/html/body/div[2]/div/div[2]/div[2]/form/div[2]/div[2]/div[1]/div/ul/div/li[2]/fieldset/ul/li[1]/div[2]/a[1]').click() # Choice range time.sleep(6) wd.find_element_by_xpath('/html/body/div[2]/div/div[2]/div[2]/form/div[2]/div[2]/div[1]/div/ul/div/li[2]/fieldset/ul/li[2]/a').click()# Choice range time.sleep(6) wd.find_element_by_xpath('/html/body/div[2]/div/div[2]/div[2]/form/div[2]/div[1]/ul/li[4]/a/span').click() # Switch to title cacheing time.sleep(1) wd.find_element_by_xpath("/html/body/div[2]/div/div[2]/div[2]/form/div[2]/div[2]/div/fieldset/ul/li[2]/div/ul/li[6]/div[1]/input").click() # Click the vector slice you want to add # time.sleep(1) wd.find_element_by_xpath("/html/body/div[2]/div/div[2]/div[2]/form/div[2]/div[2]/div/fieldset/ul/li[2]/div/ul/li[6]/div[2]/input").click() # Click the vector slice you want to add # time.sleep(1) wd.find_element_by_xpath("/html/body/div[2]/div/div[2]/div[2]/form/div[2]/div[2]/div/fieldset/ul/li[2]/div/ul/li[6]/div[3]/input").click() # Click the vector slice you want to add # time.sleep(1) wd.find_element_by_xpath("/html/body/div[2]/div/div[2]/div[2]/form/div[2]/div[2]/div/fieldset/ul/li[2]/div/ul/li[6]/div[4]/input").click() # Click the vector slice you want to add # time.sleep(1) wd.find_element_by_xpath("/html/body/div[2]/div/div[2]/div[2]/form/div[2]/div[2]/div/fieldset/ul/li[2]/div/ul/li[7]/input").send_keys(10) # Add duration # time.sleep(1) wd.find_element_by_xpath("/html/body/div[2]/div/div[2]/div[2]/form/div[2]/div[2]/div/fieldset/ul/li[2]/div/ul/li[8]/input").send_keys(10) # Add duration # time.sleep(1) wd.find_element_by_css_selector("#page div.button-group.selfclear > a:nth-child(1)").click() time.sleep(1)Explain it. : In the code time.sleep(6),6 second , You may feel that the waiting time is a little long , But this is the time when bloggers feel feasible in practice . Because there is too much data in some places ,geoserver It takes a long time to calculate the border , Cause crash , If you have a small amount of data , Then you can put , The time here is reduced , Or not .
here Mongon Links and other work are in , Previously operated manually , No automation , After all, there is not much , This is semi automation , Supervision is unavoidable during script execution , Calculation time is too long , Then the corresponding layer is published manually , Later adjustment code for Cyclic range Then execute it again .
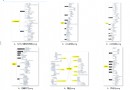
Let's sun it again geoserver Calculate the consequences of the frame longer than :
This is about Python+Selenium Realize in Geoserver Batch release Mongo This is the end of the article on vector data , More about Python Batch release Mongo For vector data content, please search the previous articles of software development network or continue to browse the relevant articles below. I hope you will support software development network more in the future !