Hello everyone , I meet you again , After the serialization of the previous articles , I believe we can learn by ourselves , Must have mastered Python Basic knowledge of . Starting Today , Brother Wen began to lead us gradually to the graphical interface .
Tell the truth , Play a game , More often, you need a graphical interface , This is all 2022 Years. , The days of word games are long gone . Although brother Wen misses the colorful words on the black background and the words on the screen MUD years , But I have to admit , Graphic games , even to the extent that 3D game , To be a game . therefore ,GUI Programming is inevitable .
You don't have to worry , In fact, what we learned before Python Knowledge is enough , and GUI It is implemented through other modules . such as Python Built in Tkinter,Turtle, Third-party module Pygame and PyZero(Pygame Simplified edition ),PyQT5 Etc., etc. . Each of these modules has its own characteristics and usage , If you put Python Compared to paint , These modules can be called pens 、 Compasses and rulers . There is no way to master all the tools with just one set of rules .
But each of these tools has its advantages , such as Pygame It is specially used to develop games , So we don't need to master it all . But consider Tkinter yes Python Graphics tools , No additional installation is required . Although the function is limited , You can still develop some interesting small programs . Ask brother to decide whether to use it first Tkinter Play a few games , To start Pygame Learning from .
The first thing that comes to mind is to guess idioms by looking at pictures , It's easy to implement , You can also learn Tkinter How it works , You will also be exposed to a little bit of object-oriented knowledge . However, due to the space , I still want to divide it into two parts :
Part 1 —— Build the game interface
The next part —— Implementation of background program
Look at the picture and guess the idiom. Everyone has played it . The rules are simple : open programs , A picture describing the idiom will be displayed automatically , Then there are some confusing Chinese characters . Players should find the correct Chinese characters to form idioms , If you succeed, you will enter the next level .
screenshots :
GUI Sometimes it is difficult to draw a flow chart in programming , Because the keyboard is typing 、 The execution of events such as mouse clicking or moving is often not sequential . But if you can draw the flow , Even a simple flow chart , It will also make our program easier and clearer to implement .
A simple flow chart for guessing idioms is as follows :
To write GUI There are many differences between game programs and plain text programs , I think the most important one is , The importance of the game's appearance design has been greatly improved . A good game , The first thing is to make people look like they want to play . So good UI Design is so valuable . Although it is difficult for an independent programmer to have multiple jobs , Write code , And art work , But at least it can be drawn GUI The interface is simple and tidy , The functions should be clear . Try more , At least you should find a comfortable typesetting first .
Take this small project for example , Analyze the screenshot of the game , You can see that the game interface mainly includes the following 7 Parts of :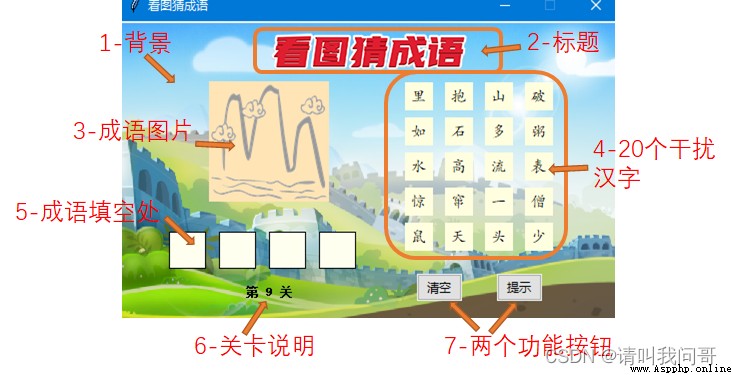
Next, let's build this framework step by step , The implementation of the program will be changed later .
First we need to have a game window , Otherwise, there is no place to put the above materials . So we can use it tkinter The module draws the game window first .
Don't forget to quote first tikinter modular
import tkinter as tk # introduce tkinter Module and abbreviated as tk
root = tk.Tk() # Define a main window
root.geometry("500x300") # Size of main window
root.resizable(0,0) # The main window cannot be resized
root.title(' Look at the picture and guess the idiom ') # The title of the main window
root.mainloop() # The main window is displayed circularly
With the above codes , We can draw a width on the computer 500 Pixels , high 300 Pixel window .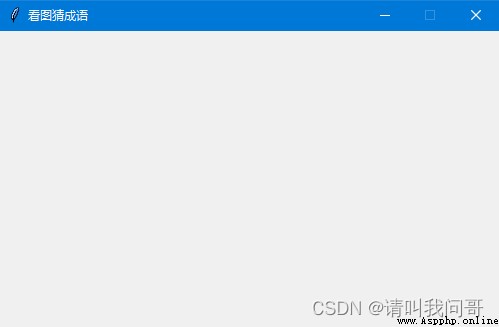
The only thing you should pay attention to is the code format :
Next, we will add elements like this blank window .
Although there are many ways to insert pictures into tkinter in , But what I like to use is Canvas Canvas method . Because canvases can be very flexible , In addition to inserting pictures on it , You can also draw various shapes , And other components can also be accurately placed on the canvas by positioning .
**Canvas yes Tkinter A component of (widget), It can be understood as a small module that can be placed in the window , It's like furniture that can be placed at home . There are many other components , Such as Label, Button, Entry wait , Wait until we need it . Each component is actually a class in the program ( object-oriented ), We create a component by creating an instance .
Define a Canvas The canvas has only one command , For example, the following defines a white canvas the same size as the main window :
cv=tk.Canvas(root,bg='white',width=500,height=300)
Canvas The first parameter required by the class is the main window , Indicates where to place Canvas Canvas components , We have defined a variable when creating the main window above root, therefore root It represents the main window . Other parameters are keyword parameters . Include Canvas Each component, including, has many key attributes , But there are only a few commonly used . Here we just use bg( background ),width( Width ),height( Height ).
And each component also needs to use pack() And so on “ Pile up ”(pack) Go to the main window , To be seen by us :
cv.pack()

however , In the use of pack() hold Canvas Before the canvas is placed in the window , We must first paint other elements or components on the canvas , It's like we have to draw on paper first , To mount it . Otherwise, there is only such a white canvas , I can't draw anything else . So we put pack() Put the sentence in root Of mainloop() front , And put it all at the end .
cv.pack()
root.mainloop()
before this , Let's put other components on the canvas first
First find a background picture . Brother Wen searched on the Internet , You can also find a picture you like as the background .
It's important to point out that ,tkinter Because it is not designed to support animation , So support for images is not friendly , If your tkinter The version is 8.5, Will not be able to support PNG picture .
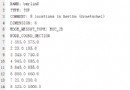
You can use the following command in the console window to view tkinter Version of
import tkinter
tkinter.TkVersion
8.6
Python3.7 Later versions default to include 8.6 Version of tkinter. even so ,tkinter Your own method does not support functions such as zooming in and out . So it will be troublesome to use , Need to use python Another built-in module of PIL To process pictures . We will use it later , But based on the current small project , We can use... Without changing the size PNG picture .
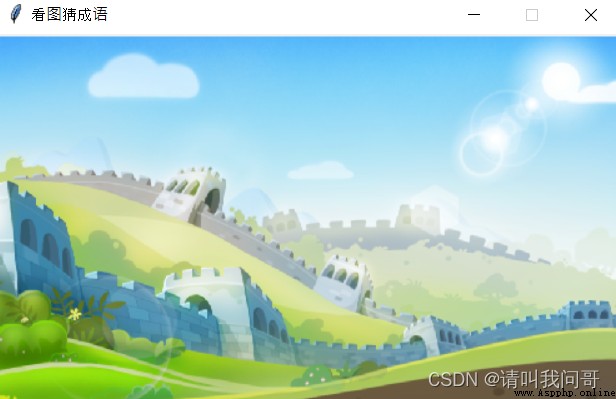
use first tkinter Of PhotoImage Methods will bg.png Picture read into memory , Take a name bg. And then you can use it Canvas Of create_image Method to set the background image bg.png Put it on the canvas , The specific code is as follows :
bg = tk.PhotoImage(file=r"images\bg.png")
cv_bg = cv.create_image(250,150,image = bg)
cv That's what we just created Canvas Canvas example , Call it the create_image Method to save the image in memory bg Load into coordinates (250,150) On . This coordinate is the position of the center of the picture . Because our window size is 500x300, So to center the picture , Put the center of the picture in the center of the window , That is, the horizontal and vertical coordinates are halved .
Finally, you can name the created background cv_gb), We can directly call this name to change the background later ( If necessary ).
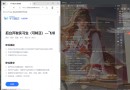
Then we need to write “ Look at the picture and guess the idiom ” The title of the . Here we can write directly , But it's so ugly , So I finally decided to insert a picture . You can find all kinds of ps The font file , Find one you like , Then replace the words with “ Look at the picture and guess the idiom ”. Because I'm right ps Not good at , It's just more about . All in all , Get one “title.png” Pictures of the ,
Then use the method of inserting the background just now to put the title image into the canvas .
title = tk.PhotoImage(file=r"images\title.png")
cv_tt = cv.create_image(250,30,image = title)
Put the coordinates (250,30) Indicates that the horizontal axis is centered ( Window width 500 Half of ), Vertically from top to bottom 30 Pixel .
The coordinates of the graphical interface always take the upper left corner as the origin (0, 0), The horizontal axis pixel increments to the right , The vertical axis pixel is incremented downward .
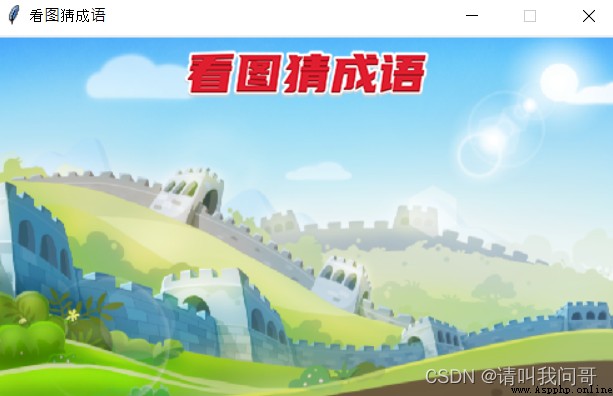
Be careful : Be sure to pay attention to the order of placing , If you put the title before the background , The background picture will cover the title . You should also pay attention to this when drawing other components on the canvas “ Put it down first ” The order of .
Now we can put the prepared idiom pictures , It's the same thing , Insert into the appropriate position on the canvas . How to randomly display idiom pictures , We will explain it again in the next code implementation . Here we will select the first picture and put it in .
img = tk.PhotoImage(file=f"images\words\ everything is going smoothly .png")
cv_word = cv.create_image(150,120,image = img)
The position coordinate is the best position for me to adjust and select for many times , You don't have to worry about , You can change the coordinates to see how the position is pleasing to the eye .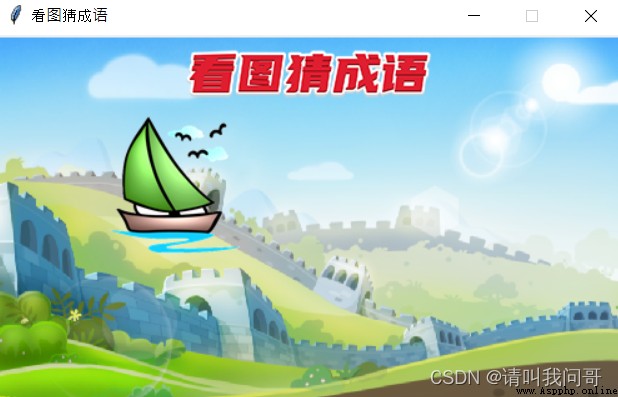
And then we found out , Because idiom pictures are transparent (PNG Format ), So the background picture is also displayed . This is not necessarily bad , But it is easy to confuse the elements in the idiom picture with the background picture , Make idioms look less clear .
So we are still under the idiom picture , Above the background picture ,“ Pad ” upper story “ cloth ”. And we can be in Canvas Draw a rectangular picture on the canvas , To serve as this layer “ cloth ” The role of .
You can call Canvas Class create_rectangle Method to draw such a rectangle .
cv.create_rectangle(90,60,210,180,fill='moccasin',outline = '')
Let's talk about create_rectangle Several common parameters of the method .
Brother Wen just said , Want to achieve a kraft paper effect , So I found a deer skin color instead 
remember , Just said , The order of drawing is very important , We want to put this layer of rectangle between the idiom picture and the background picture , So the order of drawing , Also draw the background first , Then draw a rectangle , Finally draw idiom pictures . It looks like this :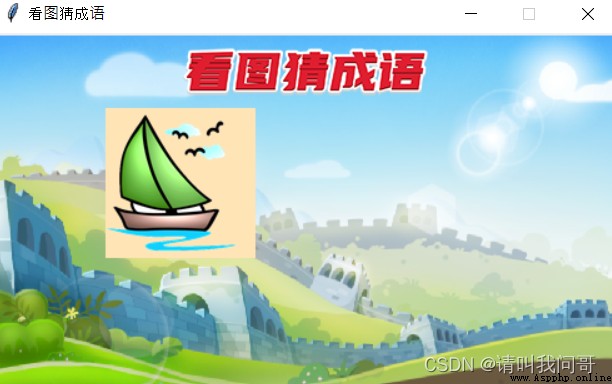
Since we do not need to change the position and other properties of the rectangle later , So there is no need to define a variable to represent the rectangle .
Here are some blanks to fill in Chinese characters under the idiom pictures . Because in this project , We don't need players to use the keyboard to input Chinese characters , So you don't need to use text boxes . So just draw four blank rectangles , Reserve the position of Chinese characters . Wait until the later code implementation , The player can select the button to fill in the corresponding Chinese characters .
So we do the same , draw 4 A rectangle :
cv.create_rectangle(50,210,86,246,fill='ivory')
cv.create_rectangle(100,210,136,246,fill='ivory')
cv.create_rectangle(150,210,186,246,fill='ivory')
cv.create_rectangle(200,210,236,246,fill='ivory')
These coordinates are the more appropriate positions that I have tried many times , You can also change it yourself , See how it works .
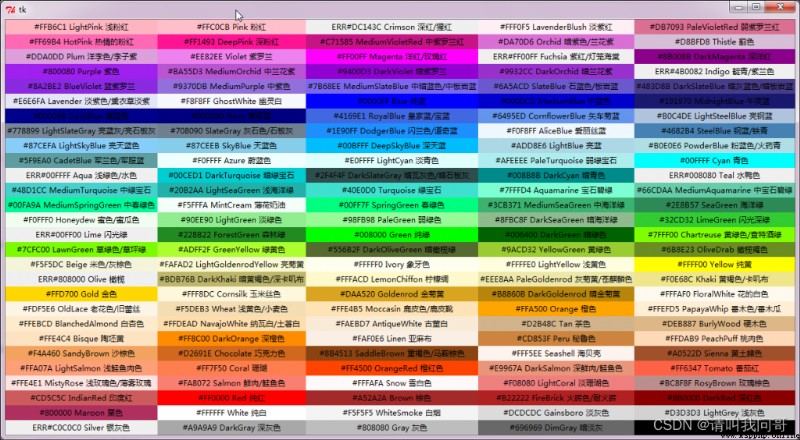
I think it is appropriate to keep the borders of these four rectangles , It looks more like filling in the blanks , So there is no designation outline Parameters . The color is ivory white in the color list above (ivory). Again , We also do not need to define additional variables to represent the four rectangles , Just draw it once .
Then we noticed that , In fact, the four rectangles are parallel , Then the horizontal spacing is equal , So you can use a 4 Loop statement of , Is that the code looks simpler . The following code achieves the same effect :
for i in range(4):
cv.create_rectangle(50*i+50,210,50*i+86,246,fill='ivory')
The effect is like this :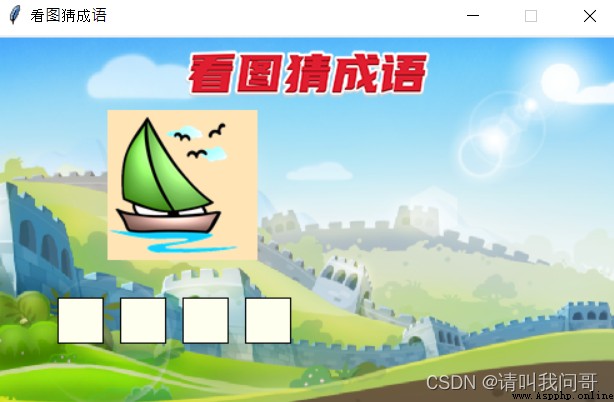
As for how the player can select Chinese characters to insert , In the next chapter, we will introduce .
For the Chinese character library placed on the right for players to choose , We can draw a rectangle by filling in the blanks , You can also use the button . Because we want to achieve the effect of players' clicking in the future , So here we use tkinter Button to achieve .
because Canvas I have no buttons , We're going to use tkinter Button assembly for , The declaration method is also the same as when we first declared a Canvas Canvas components are similar , It's instantiation tkinter Modular Button class . The following code is to create a Button Button .
btn = tk.Button(root, font =(' Square regular script, simplified Chinese ',11),width=2,relief='flat',background='lightyellow')
Now let's briefly introduce the definition Button Several commonly used parameters of :
background Parameters . Or we could just write it as bg, and Canvas Of bg The parameter functions are the same , Is to define the background color of the button . Brother Wen chose here lightyellow, Light yellow .
width Width . Define the width of the button , The numbers here are not in pixels , It must be an integer , And the minimum is 0( Negative numbers take absolute values ), Represents a unit width . If you omit this parameter , The button width will automatically change with the text size on the button .
relief Parameters . Button style .tkinter The built-in button provides 6 Styles , Namely flat, groove, raised, ridge, solid, and sunken. The default is raised, That is, the button style we usually use :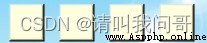
flat:
groove: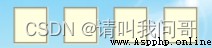
ridge: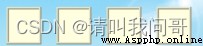
solid: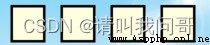
sunken: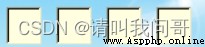
Use whichever you like here , Brother Wen used flat style , You can also choose what you like better .
font Font parameters .font Parameter is used to define some properties of the text display on the button , In this parameter we can assign a tuple , Inside is the name of the font 、 size 、 Bold italics, etc . Check which fonts can be used in the computer tkinter call , You can enter the following command , Be careful , Be sure to define a main window first , To view the font .
from tkinter import Tk, font
root = Tk()
font.families()
The button is created , We're going to paint them on the canvas . because Button The buttons are and Canvas Classes of the same class , So we use Canvas Of create_window Method , Where to put the button component on the canvas .
btn_window = cv.create_window(300, 75, window=btn)
It is the same as the rectangle you just placed to fill in the blank , When we find the rules , You can use a double-layer loop to arrange a 5 That's ok 4 Column isometric buttons , The code is as follows :
for i in range(4):
for j in range(5):
btn = tk.Button(root, font =(' Square regular script, simplified Chinese ',11),width=2,relief='flat',bg='lightyellow')
btn_window = cv.create_window(300+40*i, 75+35*j, window=btn)
The effect is as shown in the picture :
Let's leave the Chinese characters on the button blank , Wait until the next code implementation , And then the Chinese characters , Displayed on the button .
stay 20 There are four disordered Chinese characters , We also want to provide two small buttons , A Chinese character that allows players to erase their own mistakes , The other is that the computer can prompt a Chinese character , This cheating like option . Be careful : We don't need another one “ Submit ” The button lets the computer judge whether the player's choice is correct or not , Because as long as the player chooses 4 The Chinese characters , The computer can automatically judge . If you don't , Then it will be erased automatically , Let players choose again , If correct , Then a dialog box will pop up , Ask whether to enter the next level .
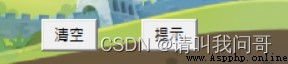
About button styles , We explained in detail in the previous section . But it seems that , I didn't choose the button style of the center meter . such as , If you use the following code , Select the default button style , The button will be displayed like this :
btn_clean=tk.Button(root, text=' Empty ', width=5)
btn_submit=tk.Button(root, text=' Tips ', width=5)
cv.create_window(320, 265, window=btn_clean)
cv.create_window(400, 265, window=btn_submit)
It's not bad , But brother Wen always feels uncomfortable , It's easy to feel like a rigid office software ( Maybe I asked my brother why ). So we can use it tkinter Another sub module of ttk To create another style of button .
Pay attention to the differences in the code , One more letter t :
from tkinter import ttk
btn_clean=ttk.Button(root, text=' Empty ', width=5)
btn_submit=ttk.Button(root, text=' Tips ', width=5)
cv.create_window(320, 265, window=btn_clean)
cv.create_window(400, 265, window=btn_submit)
ttk The sub module style buttons look like this :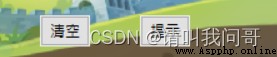
And the mouse over the button will change color , Make the buttons more flexible .
The last small detail is to add the level description text at the bottom , Tell the player how many levels have been advanced . We can go straight to Canvas Create text on the canvas . Create a variable at the same time level, Used to record the current level number .
Use the following code to put this text in the specified position :
level=1
level_indicator = cv.create_text(150,270,text=f' The first {
level} Turn off ', fill='black', font=(' Microsoft regular script ',9,'bold'))
And the above Canvas Of create_image,create_rectangle,create_window And so on , Create text , We can use create_text Methods . Several common parameters of this method are as follows :
Here we are , We have built the whole game interface completely :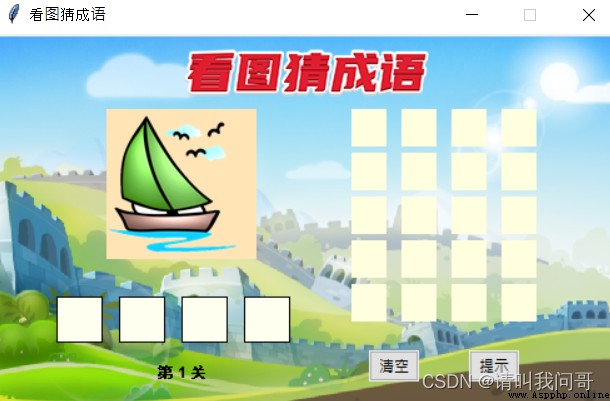
Although it can't move , Can't interact with players , But it seems a little interesting . The next part , Brother Wen will bring you a little Python Add the code , Implement the logic behind the game .
Although this article does not explain the code implementation part of the game logic , But about if you use tkinter Draw the game interface , Still introduced a lot of things , I hope everyone can try :
I hope everyone can try it by themselves , Although I have set the coordinates in the code , But in the process of creation , You still need to modify the coordinate values repeatedly , Constantly fine tune , In order to find a satisfactory position . This process is like painting , It still needs a little patience . Compared with , Programming languages have become less important .
And the game is dynamic , Need to interact with players , So we need code to make these components work . In the next article, I will show you how to use code to implement this small project .
Thank you for reading here , See you next time !