本文是關於spring和activeMq一種簡單的整合方式,只做參考學習只用,側重於對概念的理解。
1:JMS是Sun公司開發的一套訪問面向消息的中間件(MOM)的標准的API,本文采用的MOM組件是 activeMq.大家可以到http://activemq.apache.org/download.html網站下載activemq的程序包,
它使用非常簡單,解壓縮之後直接運行D:\activemq-4.1.1\bin目錄下的activemq.bat文件,啟動服務就 可以了。 而且我們只是簡單的測試,所以不需要我們配置jndi的相關內容。服務啟動
之後我們看到了相應的端口被啟動了,這樣我麼的MOM組件准備就緒...
2:接下來,我們新建一個WEB的項目(我用的是MyEclipse),導入相關的包,建議大家不要使用 MyEclipse中自帶的那個spring2.0的包,因為好幾個項目都是因為這個調試了很久,就是因為那個包有問 題。呵呵。
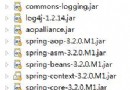
導入spring2.0.jar、apache-activemq-4.1.1.jar、commons-pool-1.2.jar、long4j.jar、commons- logging-1.1.jar文件到lib目錄下。接下來在WEB-INF下新建兩個XML文件
<?xml version="1.0" encoding="UTF-8"?>
<beans xmlns="http://www.springframework.org/schema/beans"
  xmlns:xsi="http://www.w3.org/2001/XMLSchema-instance"
  xmlns:tx="http://www.springframework.org/schema/tx"
   xsi:schemaLocation="


http://www.springframework.org/schema/beanshttp://www.springframework.org/schema/beans/sprin

g-beans-2.0.xsd


http://www.springframework.org/schema/txhttp://www.springframework.org/schema/tx/spring-tx-

2.0.xsd" >

  <bean id="connectionFactory"

class="org.apache.activemq.pool.PooledConnectionFactory">
    <property name="connectionFactory">
      <bean class="org.apache.activemq.ActiveMQConnectionFactory">
        <property name="brokerURL">
          <value>tcp://localhost:61616</value>
        </property>
      </bean>
    </property>
  </bean>

  <bean id="dest" class="org.apache.activemq.command.ActiveMQQueue">
    <constructor-arg value="myDest"/>
  </bean>

  <bean id="jmsTemplate" class="org.springframework.jms.core.JmsTemplate">
    <property name="connectionFactory" ref="connectionFactory"></property>
    <property name="defaultDestination" ref="dest"/>
  </bean>

  <bean id="messageSender" class="com.bo.impl.MessageSender">
    <property name="jmsTemplate" ref="jmsTemplate"></property>
  </bean>
</beans>
<?xml version="1.0" encoding="UTF-8"?>
<beans xmlns="http://www.springframework.org/schema/beans"
xmlns:xsi="http://www.w3.org/2001/XMLSchema-instance"
xmlns:tx="http://www.springframework.org/schema/tx"
xsi:schemaLocation="


http://www.springframework.org/schema/beanshttp://www.springframework.org/schema/beans/sprin

g-beans-2.0.xsd


http://www.springframework.org/schema/txhttp://www.springframework.org/schema/tx/spring-tx-

2.0.xsd" >

        <bean id="dest" class="org.apache.activemq.command.ActiveMQQueue">
    <constructor-arg value="myDest"></constructor-arg>
</bean>

<bean id="connectionFactory" class="org.apache.activemq.pool.PooledConnectionFactory">
    <property name="connectionFactory">
     <bean class="org.apache.activemq.ActiveMQConnectionFactory">
        <property name="brokerURL" value="tcp://localhost:61616"/>
     </bean>
    </property>
</bean>

<bean id="jmsTemplate" class="org.springframework.jms.core.JmsTemplate">
    <property name="connectionFactory" ref="connectionFactory"></property>
    <property name="defaultDestination" ref="dest"></property>
</bean>

<bean id="messageReceiver" class="com.bo.impl.MessageReceiver">
    <property name="jmsTemplate" ref="jmsTemplate"></property>
</bean>
</beans>
3: 發送消息的類:
public class MessageSender extends JmsGatewaySupport{
public void sendTextMsg(final String msg) {
    this.getJmsTemplate().send(new MessageCreator() {
     // 這裡創建了一個 message 對象,然後可以對該對象進行 各種屬性的定義
     private Message message;
     public Message createMessage(Session session) throws JMSException {
         message = session.createTextMessage(msg);

         message.setStringProperty("JMSXUserID", "123456789"); // 消息所屬的用戶編碼
         message.setStringProperty("JMSXApp1ID", "001002");    //     消息所

屬的應用程序編碼

        return message;
     }
     });
}
}
4:接收消息的類:
public class MessageReceiver extends JmsGatewaySupport{

public void receiverTextMsg(){
     TextMessage textMsg = (TextMessage)this.getJmsTemplate().receive();

    try{
     // 消息 header 中常有的 屬性定義
     System.out.println("消息編碼:" + textMsg.getJMSMessageID());
     System.out.println("目標對象:" + textMsg.getJMSDestination());
     System.out.println("消息模式:" + textMsg.getJMSDeliveryMode()); // 消息的模式 分為

持久模式和非持久模式, 默認是 非持久的模式(2)

     long sendTime = textMsg.getJMSTimestamp();
     Date date = new Date(sendTime);
     DateFormat f = new SimpleDateFormat("yyyy-MM-dd HH:mm:ss");
     String temp = f.format(date);

     System.out.println("消息發送時間:" + temp);
     System.out.println("消息失效時間:" + textMsg.getJMSExpiration()); // 這裡是一個 整

型值 0 表示 該消息永遠不會過期
     System.out.println("消息優先級:" + textMsg.getJMSPriority()); // 優先級 0~9, 0 表

示最低
     System.out.println("關聯編碼:" + textMsg.getJMSCorrelationID());

     System.out.println("回復消息的地址:" + textMsg.getJMSReplyTo());    // 回復消

息的地址(Destination類型),由發送者設定
     System.out.println("消息類型:" + textMsg.getJMSType()); // jms 不使用該字段, 一般

類型是由 用戶自己定義
     System.out.println("是否簽收過:" + textMsg.getJMSRedelivered()); // 如果是 真 ,表

示客戶端收到過該消息,但是並沒有簽收

     // 消息屬性 (properties)
     System.out.println("用戶編碼:" + textMsg.getStringProperty("JMSXUserID"));
     System.out.println("應用程序編碼:" + textMsg.getStringProperty("JMSXApp1ID"));
     System.out.println("已經嘗試發送消息的次數:" + textMsg.getStringProperty

("JMSXDeliveryCount"));


     //     消息體(body) 中傳遞的內容
     System.out.println("消息內容:" + textMsg.getText());


     }catch(JMSException e){
     e.printStackTrace();
     }catch(Exception e){
     e.printStackTrace();
     }
}
}
5:測試發送消息的類:
public class TestMessageSender {
private static ApplicationContext ctx = null;

static{
     ctx = new FileSystemXmlApplicationContext(new String[] { "WebRoot/jms_sender.xml"

});
}

public static void sentTextMsg(){
     MessageSender messageSender = (MessageSender)ctx.getBean("messageSender");
     messageSender.sendTextMsg("這個世界真的很無奈!");
}

public static void main(String[] args){
     sentTextMsg();
}
}
6:測試接收消息的類:
public class TestMessageReceiver {

private static ApplicationContext ctx = null;
static {
     ctx = new FileSystemXmlApplicationContext(new String[] { "WebRoot/jms_receiver.xml"

});
}
public static void getTextMsg(){
     MessageReceiver messageSender = (MessageReceiver) ctx.getBean("messageReceiver");
     messageSender.receiverTextMsg();
}

public static void main(String[] args) {
     getTextMsg();
}
}
7: 測試結果:
消息編碼:ID:hc-369a3f54b2b0-1440-1224731999968-1:0:1:1:1
目標對象:queue://myDest
消息模式:2
消息發送時間:2008-10-23 11:20:00
消息失效時間:0
消息優先級:4
關聯編碼:null
回復消息的地址:null
消息類型:null
是否簽收過:false
用戶編碼:123456789
應用程序編碼:001002
已經嘗試發送消息的次數:1
消息內容:這個世界真的很無奈!